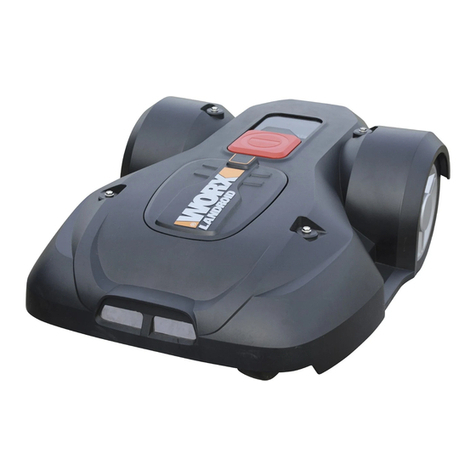
Worx Landroid WR165 User manual

Owner’s manual
(WR165 WR147 WR155)


Owner’s manual
Manuel utilisateur
Instrucciones de usuario
P04
P37
P70
EN
F
ES

4
EN
Welcome
Contact information
Safety Instruction
Information on Landroid
Get familiar with Landroid
Component List
What’s in the box
Getting to know Landroid
Technical data
Accessories
Getting started
Installation
Starting Landroid
Manual programming
Connecting Landroid to the Internet
Using the App
Maintenance
Blades
Cleaning
Charging
Storage
Firmware Updates
Quick reference
Operation messages
Error messages
Troubleshooting
Warrranty
Page 05
Page 06
Page 10
Page 11
Page 11
Page 12
Page 13
Page 14
Page 17
Page 24
Page 24
Page 27
Page 27
Page 28
Page 29
Page 29
Page 29
Page 30
Page 31
Page 31
Page 33
Page 36
TABLE OF CONTENTS

5
EN
Thank you for purchasing a Worx Landroid Robot Mower.
This manual will help you get set up and operate your Landroid safely and efficiently.
Support
www.worx.com/landroid-support
Customer Services Helpline
800-727-6260
We’re here to help:
Welcome
Live Chat
www.worx.com/landroid-support

6
EN
WARNING: Some dust created by power sanding, sawing, grinding, drilling and
other construction activities contains chemicals known to the State of California
to cause cancer, birth defects or other reproductive harm. Some examples of
these chemicals are:
•Lead from lead-based paints;
•Crystalline silica from bricks and cement and other masonry products;
•Arsenic and chromium from chemically-treated lumber.
Your risk from these exposures varies, depending on how often you do this type
of work. To reduce your exposure to these chemicals: work in a well ventilated
area, and work with approved safety equipment, such as those dust masks that
are specially designed to filter out microscopic particles.
WARNING: This product can expose you to chemicals including lead and Di(2-
ethylhexyl)phthalate (DEHP) which are known to the State of California to cause
cancer and birth defects or other reproductive harm. For more information go to
www.P65Warnings.ca.gov.
WARNING: Read all safety warnings and all instructions. Failure to follow the
warnings and instructions may result in electric shock, fire and/or serious injury.
Carefully read the instructions for the safe operation of the machine.
Save all warnings and instructions for future reference.
- This appliance is not intended for use by persons (including children) with reduced physical,
sensory or mental capabilities, or lack of experience and knowledge, unless they have been given
supervision or instruction concerning use of the appliance by a person responsible for their safety.
- Children should be supervised to ensure that they do not play with the appliance.
WARNING: For the purposes of recharging the battery, only use the detachable supply unit
provided with this appliance.
WARNING: To reduce the risk of injury to persons and damage to the machine, do not remove
battery pack before switching off the machine.
IMPORTANT
READ CAREFULLY BEFORE USE
KEEP FOR FUTURE REFERENCE
Safe operation practices
Training
a) Read the instructions carefully. Make sure you understand the instructions and be familiar with
the controls and the proper use of the appliance.
b) Never allow people unfamiliar with these instructions or children to use the appliance. Local
regulations can restrict the age of the operator.
c) The operator or user is responsible for accidents or hazards occurring to other people or their
property.
Preparation
a) Ensure the correct installation of boundary wire as instructed.
b) Periodically inspect the area where the appliance is to be used and remove all stones, sticks,
wires, bones, and other foreign objects.
c) Periodically visually inspect to see that the blades, blade bolts and cutter assembly are not worn
or damaged. Replace worn or damaged blades and bolts in sets to preserve balance.
d) On multi-spindle appliances, take care as rotating one blade can cause other blades to rotate.
e) WARNING! The lawnmower shall not be operated without the guard in place.
General & Additional Safety Instruction


7
EN
Operation
1. General
a) Never operate the appliance with defective guards, or without safety devices, for example
deflectors, in place.
b) Do not put hands or feet near or under rotating parts. Keep clear of the discharge opening at all
times.
c) Never pick up or carry an appliance while the motor is running.
d) Operate the disabling device from the appliance
– Before clearing a blockage;
– Before checking, cleaning or working on the appliance.
e) It is not permitted to modify the original design of robotic lawnmower. All modifications are made
at your own risk.
f) Start robotic lawnmower according to the instructions. When the power key is switched on,
make sure you keep your hands and feet away from the rotating blades. Never put your hands
and feet under the mower.
g) Never lift up robotic lawnmower or carry it when the power key is switched on.
h) Do not let persons who do not know how robotic lawnmower works and behaves use the
mower.
i) Do not put anything on top of robotic lawnmower or its charging station.
j) Do not allow robotic lawnmower to be used with a defective blade disc or body. Neither should it
be used with defective blades, screws, nuts or cables.
k) Always switch off robotic lawnmower when you do not intend to use the mower. Robotic
lawnmower can only start when the power key is switched on and the correct PIN code has been
entered.
L) Keep your hands and feet away from the rotating blades. Never place your hands or feet close to
or under the body when robotic lawnmower is in operation.
m) To avoid using the machine and its peripherals in bad weather conditions especially when there is
a risk of lightning.
n) Not to touch moving hazardous parts before these have come to a complete stop.
2. Additionally when the appliance is operating automatically
a) Do not leave the machine to operate unattended if you know that there are pets, children or
people in the vicinity.
Maintenance and storage
WARNING! When the mower is turned upside down the power key must always be
switched off.
The power key should be switched off during all work on the mower’s
underframe, such as cleaning or replacing the blades.
a) Keep all nuts, bolts and screws tight to be sure the appliance is in safe working condition.
b) Inspect the robotic lawnmower each week and replace worn or damaged parts for safety.
c) Check especially that the blades and blade disc are not damaged. Replace all blades and screws
at the same time if necessary so that the rotating parts are balanced.
d) Ensure that only replacement cutting means of the right type are used.
e) Ensure that batteries are charged using the correct charger recommended by the manufacturer.
Incorrect use may result in electric shock, overheating or leakage of corrosive liquid from the
battery.
f) In the event of leakage of electrolyte flush with water/neutralizing agent, seek medical help if it
comes into contact with the eyes etc.
g) Servicing of the appliance should be according to manufacturers’ instructions.
General & Additional Safety Instruction

8
EN
Recommendation
To connect the machine and/or its peripherals only to a supply circuit protected by a residual current
device (RCD ) with a tripping current of not more than 30 mA.
Residual risks
To avoid injuries, wear protective gloves when replacing the blades.
Transport
The original packaging should be used when transporting robotic lawnmower over long distances.
To safely move form or within the working area:
a) Press the STOP button to stop the mower.
You select the four digit PIN code when you start the mower for the first time.
b) Always switch off robotic lawnmower if you intend to carry the mower.
c) Carry the mower by the handle at the rear under the mower. Carry the mower with the blade disc
away from the body.
To satisfy FCC & IC RF exposure requirements, a separation distance of 20cm or more should be
maintained between the antenna of this device and persons during device operation. To ensure
compliance, operations at closer than this distance is not recommended.
This device complies with Part 15 of the FCC Rules.
Operation is subject to the following two conditions:
(1) This device may not cause harmful interference, and
(2) This device must accept any interference received, including interference that may cause
undesired operation.
WARNING: Changes or modifications to this unit not expressly approved by the party responsible
for compliance could void the user's authority to operate the equipment.
NOTE: This equipment has been tested and found to comply with the limits for a Class B digital
device, pursuant to Part 15 of the FCC Rules.
These limits are designed to provide reasonable protection against harmful interference in a
residential installation. This equipment generates, uses and can radiate radio frequency energy and,
if not installed and used in accordance with the instructions, may cause harmful interference to radio
communications.
However, there is no guarantee that interference will not occur in a particular installation. If
this equipment does cause harmful interference to radio or television reception, which can be
determined by turning the equipment off and on, the user is encouraged to try to correct the
interference by one or more of the following measures:
· Reorient or relocate the receiving antenna.
· Increase the separation between the equipment and receiver.
· Connect the equipment into an outlet on a circuit different from that to which the receiver is
connected.
· Consult the dealer or an experienced radio/TV technician for help.
This device contains licence-exempt transmitter(s)/receiver(s) that comply with Innovation, Science
and Economic Development Canada’s licence-exempt RSS(s). Operation is subject to the following
two conditions:
(1) This device may not cause interference.
(2) This device must accept any interference, including interference that may cause undesired
operation of the device.
Limited by local law regulations, version for North America does not have region selection option.
General & Additional Safety Instruction

9
EN
Safety Warnings for battery pack
a) Do not dismantle, open or shred battery pack.
b) Do not expose battery pack to heat or fire. Avoid storage in direct sunlight.
c) Do not short-circuit a battery pack. Do not store battery packs haphazardly in a box
or drawer where they may short-circuit each other or be short-circuited by other
metal objects.
When battery pack is not in use, keep it away from other metal objects, like
paper clips, coins, keys, nails, screws or other small metal objects, that can make a connection
from one terminal to another. Shorting the battery terminals together may cause burns or fire.
d) Do not subject battery pack to mechanical shock.
e) In the event of battery leaking, do not allow the liquid to come in contact with
the skin or eyes. If contact has been made, wash the affected area with copious
amounts of water and seek medical advice.
f) Do not use any battery pack which is not designed for use with the equipment.
g) Keep battery pack out of the reach of children.
h) Always purchase the battery pack recommended by the device manufacturer for the
equipment.
i) Keep battery pack clean and dry.
j) Wipe the battery pack terminals with a clean dry cloth if they become dirty.
k) Battery pack needs to be charged before use. Always use the correct charger and
refer to the manufacturer’s instructions or equipment manual for proper charging
instructions.
l) Do not leave battery pack on prolonged charge when not in use.
m)After extended periods of storage, it may be necessary to charge and discharge the
battery pack several times to obtain maximum performance.
n) Recharge only with the charger specified by Worx Do not use any charger other than
that specifically provided for use with the equipment.
o) Retain the original product literature for future reference.
p) Use only the battery pack in the application for which it was intended.
q) Remove the battery pack from the equipment when not in use.
r) Dispose of properly.
s) Do not mix cells of different manufacture, capacity, size or type within a device.
t) Keep the battery away from microwaves and high pressure.
General & Additional Safety Instruction

10
EN
INFORMATION ON LANDROID
WARNING – robotic lawn mowers can be dangerous if incorrectly used. Read through the Operator’s
manual carefully and understand the content before using your robotic mower.
WARNING - Keep a safe distance from the machine when operating.
WARNING – Activate the disabling device before working on or lifting the mower.
WARNING - Do not ride on the mower.
Li-Ion battery, battery must be recycled
Do not burn
Batteries may enter water cycle if disposed improperly, which can be hazardous for ecosystem. Do not
dispose of waste batteries as unsorted municipal waste.
Do not disassemble mower. Repairs should be made only by authorized repair personnel.
POSITEC Inc. has established a partnership with the RBRC Corporation to recycle any Positec batteries
with the RBRC-call2recycle seal. For environmental protection, please do not discard batteries in the trash.
After the batteries' life cycle is ended, then please call 1-800-822-8837 for a free service that will properly
dispose of the battery.
Class III mower
You can customize your Landroid’s performance with accessories. Visit www.worx.com/lawn-garden/
robotic-lawn-mowers.html to learn more about these available accessory options.
Information on Landroid

11
EN
COMPONENT LIST
Worx Landroid
Boundary wire connectors
Spare blade kit
Hex key
Charging Station
Charge base fixing screws
Wire pegs
Power supply
Boundary wire
20V battery
Boundary wire distance gauge
Bertelsen Ruler
Manual
A
B
C
D
E
F
G
H
I
J
K
L
M
The picture is only for reference
26 cm
10 cm
10,2 inch.
4 cm
A B C D
E
F
G
H
I
JK
L
M
Get familiar with Landroid

12
EN
A
B
Find My Landroid /
Radio Link slot*
Rain sensor
Charge contact
Off Limits slot*
Voice Control /
High Pitched Alarm Slot*
USB port
Cutting height adjustment
Microphone
LCD Display Interface
ACS slot*
GETTING TO KNOW
LANDROID
The picture is only for reference*Accessories available for purchase
Battery slot
Battery cover button
Safety stop button
Get familiar with Landroid

13
EN
TECHNICAL DATA
MODEL WR165 WR147 WR155
Rated voltage 20V Max.*
No load speed (/min) 2800 2400 2400
Cutting area (acre) 1/8 1/4 1/2
Cutting diameter (in.) 7” 8” 8”
Cutting height (in.) 2.0” - 3.5” 1.5”-3.5" 1.5”-3.5”
Cutting height positions 6
Battery type Lithium-ion
Battery model included WA3575.3 WA3578.3 WA3671
Charging time approx. (mins) 75 75 115
Landroid Charger model WA3795 WA3752
Charger rating
Input: 120 V~60 Hz, 38 W,
Output: 20 V , 1.5 A
Input: 120 V~60 Hz, 90 W,
Output: 20 V , 3.0 A
Machinery weight (lbs) 23.1 25.6 25.8
Protection degree III
App (WIFI/Bluetooth) Y
Frequency band of embedded WLAN
module 2.412GHz-2.484GHz
Max. radio-frequency power of embedded
WLAN module
802.11b:+16±2dBm(@11Mbps)
802.11g:+14±2dBm(@54Mbps)
802.11n:+13±2dBm(@HT20,MCS7)
Frequency band of inductive loop
systems 77 Hz
Max. radio-frequency power of inductive
loop systems 82 dBµA/m
* Voltage measured at no load. Initial battery voltage reaches maximum of 20 volts. Nominal voltage is 18 volts.
Get familiar with Landroid

14
EN
WHAT’S IN THE BOX
MODEL WR165 WR147 WR155
Boundary wire (feet) 426.5 590.5 820.2
Spare cutting blades 9
Hex key 1
Charging station 1
Charging station fixing screws 8
Wire pegs 180 250 340
Power supply WA3795 WA3752 WA3752
Boundary wire connectors 2
Battery pack WA3575.3 WA3578.3 WA3671
Boundary wire distance gauge 1
Bertelsen Ruler 1
Manual 1
We recommend that you purchase genuine replacement parts listed in the above list from the same store that sold you the mower.
Refer to the accessory packaging for further details.
INTENDED USE
This product is intended for domestic lawn mowing. It is designed to mow often, maintaining a healthier and better looking lawn than
ever before. Depending on the size of your lawn, your Landroid may be programmed to operate at any time or frequency.
ACCESSORIES AVAILABLE FOR PURCHASE
Accessory Model#
Find my Landroid WA0866
Anti-Collision Control WA0860
Off Limits Digital Fence WA0892
Landroid Radio Link WA0867
Landroid Garage WA0810
*More accessories available for purchase on Worx.com
Get familiar with Landroid

15
EN
HOW LANDROID WORKS
Landroid is an autonomous machine, capable of operating on its own. It knows when it needs to go to its charging station, can sense
when it is raining, can stop itself if it senses a problem and knows to stop, draw back, and turn around when it bumps into something
blocking its path. To prevent an accident, Landroid will also automatically stop its blade disc from rotating if it is lifted off the ground.
Self-Charging
When your Landroid needs to recharge, it will stop mowing and follow the boundary wire back to its charging station. Once charging
is complete, Landroid will automatically resume mowing or stay in the charging station according to its mowing schedule.
Edge/Perimeter Mowing
Landroid is programmed to mow the grass along the perimeter of your lawn twice a week on Monday and Friday. If you want to change
this pre-set,
you can modify it via the Landroid App or by using the control panel in “Work time-Customize Work time” menus. See
detailed instructions at the end of this manual. If you enable the Auto Schedule feature in the App. you cannot manually adjust the
Border Cut feature.
Rain sensor
Landroid is weather resistant and happy to be outside. But mowing wet grass does not give you the best finish or result. Landroid is
equipped with a rain sensor which detects rain and tells Landroid to stop mowing and go back to its charging station.
Rain delay time
After a rainfall, Landroid re-starts when the grass is no longer wet. The default Rain Delay time is 180 minutes. You can change the
Rain Delay time setting via the Landroid App. You can also adjust this from the control panel in "General Settings-Rain Start Delay"
menus.
In more extreme weather
In case of a lightning storm, protect Landroid by unplugging the charging station, disconnect the boundary wire, and make sure
Landroid is not able to charge. In the winter and especially in case of very cold weather and snow, we recommend you store
your Landroid inside.
Getting started

16
EN
No more grass clippings to collect
Landroid’s daily mowing produces very short clippings that don’t need to be de-thatched. These clippings are a perfect organic nu-
trient for your lawn. Frequent mowing boosts the density of grass blades and effectively prevents the propagation of weeds.
Cut to edge
The special offset blade gets as close as possible to the border of your lawn, leaving you little trimming to do.
Cutting Height
Before starting your Landroid for the first time, make sure your grass is no longer than 4 in. If longer, use a regular mower to cut it
before operating Landroid. If you want to drastically shorten the height of your grass, it is recommended that you do so progressively,
by adjusting the cutting height in steps.
Hose cleaning
You can hose Landroid off to get rid of dirt, grass and grime that it picks up while mowing. Keep Landroid looking and performing its
best.
Security & PIN Protection
To prevent unauthorized usage, Landroid is protected by a PIN code that you can easily set up. Set up your PIN before first use. Be
sure to record your PIN in a safe place. Default PIN is 0000 or AAAA (depending on the model).
GroundTracer
With the new auto-lifting design, its blades can raise automatically due to its floating disc, which gives it more clearance. This helps
Landroid avoid certain situations that would block other robotic mowers.
Getting started

17
EN
INSTALLATION
It is recommended you carefully follow these installation instructions to properly install your Landroid. In addition to the manual, you
can access comprehensive video tutorials on our YouTube Channel (Worx Tools)*.
* This information is provided for your convenience but the video information provided online does not replace the instruction manual
and the safety instructions that need to be read and understood.
EVERY MINUTE SPENT IN PLANNING SAVES YOU 10 MINUTES IN EXECUTION
Installing Landroid is even easier if you have made a clear plan of what you need to do. Proper planning will also help you avoid
mistakes or having to rework the installation once it’s done.
1. On the surface or buried?
Landroid’s boundary wire is designed to stay on the surface of your lawn. Nearly invisible from the first day, it will be engulfed
in the soil in a few weeks. If you will want to bury the wire, it is recommended to first peg it down and test the installation
is successful by running Landroid over the perimeter. This allows you to easily test that the installation is successful and, if
necessary, change the layout before burying the wire. Bury the wire no more than a few centimetres below ground level, so that
the wire maintains a good signal.
2. Plan for the charging station
The charging station is where your Landroid goes to have its battery recharged. It’s also the home where it rests in between
mowing sessions.
Locate a proper position for it, bearing in mind:
A. It needs to be powered, so it should be no more than 32 ft. away from an AC outlet. Using a GFCI outlet is recommended.
B. If possible, choose a shaded area to prevent the battery and charger from over-heating in direct sunlight. *Landroid Garage
accessory available for purchase.
C. It should be placed on flat, level ground to ensure effective docking.
D. Avoid places close to irrigation sprinklers.
Plan out your
installation
Lay the
boundary
wire
Power up
Landroid.
Test and get
ready to mow
Connect
charging
station to AC
Install the
charging
station
Getting started

18
EN
*How to calculate the slope of your lawn:
The slope would be:
35 in. (Elevation) = 35% (slope)
100 in. (Length)
Two stakes can be placed 100 inches apart. With one stake at the bottom of the slope and the other on the slope.
Tie a string to the bottom of the stake on the slope, ensure that it’s leveled and tie it to the other stake. Measure the
distance from the string to the ground. Use this value as the elevation in the formula.
You can place the charging station on your lawn or on a hard surface like a walkway, provided that the lawn and the hard surface are at
the same height (no steps).
For Landroid to successfully dock in the charging station, the following measures will need to be taken when laying the first segments of
boundary wire immediately entering and exiting the charging station.
1. For the boundary wire leaving the charging station:
- There should be a minimum of 12 in. of wire coming straight from the station before any turns are made (fig. 1, left side of station).
- If the yard layout is such that the boundary wire makes an immediate right turn (fig. 2), then the distance requirement is not necessary.
2. For the boundary wire entering charging station:
- There should be minimum of 31 in. of wire going straight to the station (fig. 1, fig. 2).
4. Placement of boundary wire on slopes
Landroid can handle slopes and inclines up to 35% or 20°. Ensure that when you place the boundary wire, you do not place it at the
bottom of the slope or incline of 17-35% to account for the extra gravitational force Landroid will have to overcome.
31 in.12 in.
Fig. 1Fig. 1
31 in.
Fig. 2
Upper boundary wire
Lower boundary
Wire
Lower boundary
Wire
10.2 in.
17%~35% <17%
15.7 in.
Fig. 3
0o
Getting started
39.4 in.
13.8 in.
Length
Elevation
Max. 35% slope
Install Landroid
on level ground
3. Charging station checklist:
A. Within reach of AC outlet (GFCI outlet recommended).
B. In the shade (if possible).
C. Straight path on entrance; straight path on exit if necessary
(fig. 1, fig. 2).
D. Flat land (fig. 3).
E. No irrigation sprinklers nearby.

19
EN
5. Plan for the boundary wire
The wire has to be placed at a certain distance from the edge of the lawn. This distance changes depending on what’s on the other
side of the edge. Different parts of your lawn may have different border scenarios: ie. stone pavers, fence, patio, etc.
A. If the edge of the lawn borders a step: keep the wire 10 in. from the edge. (figure 1).
B. If the edge of the lawn borders a path of the same height: keep the wire 4 in. from the edge. (figure 2).
C. If the edge of the lawn borders a pool: keep the wire at least 12 in. from the edge. (figure 3).
If a side of your lawn borders a neighbor’s lawn with a robotic mower in use, lay your wire at least 39 in. apart from your neighbor’s wire to
avoid possible interference.
0 in.
boundary wire
Fig. 2
Fig. 1
7. Identify obstacles
Landroid is equipped with a bump sensor which allows you to avoid surrounding all obstacles with boundary wire. Landroid can lightly bump
into solid obstacles like trees and furniture without harm. If your lawn has several obstacles like pavers and trees, we recommend purchasing
the Landroid ACS (Anti-Collision Control) accessory which helps Landroid steer around obstacles instead of bumping into them.
digital fence
PLAN YOUR INSTALLATION
Landroid is designed to manage the most complex of lawns. Carry out a visual inspection of your lawn so you are prepared for a
trouble-free installation of the boundary wire.
6. Identify Off-Limits Areas
You don’t want Landroid to mow flowers, dive into water, or become imobilized on tree roots that are above ground. Locate these
areas and surround them with boundary wire to prevent Landroid from accessing them.
The boundary wire is a single loop that starts at the charging station, encircles your yard, and then terminates back at the charging
station. To exclude the off-limits areas, the wire will need to be diverted at a right angle from the outer perimeter of the yard, directed
towards the area, and then laid in a counter clockwise path around the area, as show below in Fig. 1. Then the wire would go back
to the yard perimeter, making sure that there is no gap between the wires going to and coming from the off-limits area. This ensures
that the mower will not “see” this section of wire and will pass over it while mowing. This exercise does not involve cutting the wire in
any way, and still maintains one continuous loop.
A great alternative is to purchase the Landroid Off Limits Digital Fence accessory. With this option, you simply surround the off-limits
area with the provided magnetic strips. They do not have to be connected to the boundary wire. The Off-Limits Digital Fence is also
great for protecting seasonal items (ex. a trampoline or fire pit).
10 in. 4 in. 12 in.
1 2 3
Getting started

20
EN
NOW ROLL YOUR SLEEVES UP. YOU’RE READY FOR INSTALLATION!
Now that you have planned out your installation, you are ready to begin!. Before starting, you may want to use your old mower for the last
time to clean up your lawn and make the installation easier.
1. Secure the charging station in the selected location
A. Secure the charging station to the ground with the included screws, using the provided hex key (fig. 1)
B. See page 17 for tips on correctly installing your charging station.
2. Connect one end of the boundary wire to the charging station
A. Strip the end of the wire with a wire stripper (fig. 2).
B. Open the plastic door and insert the stripped end into the red left clamp (fig. 3).
C. Press the wire into the guide of the charging station as shown in fig. 3.
3. Lay the boundary wire around your lawn
A. Use the supplied wire distance gauge (item K) to ensure that the boundary wire is the appropriate distance from the edge of the yard.
B. If there is a step at the edge of your lawn, keep the wire at 10 in. from it (fig. 4).
C. If the edge is flush to the lawn, keep the wire at 4 in. from the edge (fig. 5).
D. When laying the boundary at corners, ensure that the corner angle of the wire is great than 90° (Fig. 6). This will ensure that the boundary
sensor can properly detect the wire.
Fig. 1
Fig. 3
Fig. 2
Fig. 3
Fig. 2
4 in.
10 in.
26 cm
10 cm
10,2 inch.
4 cm
26 cm
10 cm
10,2 inch.
4 cm
Fig. 4
Fig. 5
Fig. 4
Fig. 5
4 in.
10 in.
26 cm
10 cm
10,2 inch.
4 cm
26 cm
10 cm
10,2 inch.
4 cm
Fig. 4
Fig. 5
Fig. 4
Fig. 5
Getting started
<90o
>90o>90o
Fig. 6
This manual suits for next models
2
Table of contents
Languages:
Other Worx Lawn Mower manuals

Worx
Worx L1300 User manual

Worx
Worx WR165E User manual

Worx
Worx WG723E User manual

Worx
Worx LANDROID WG792E User manual

Worx
Worx wg706e User manual

Worx
Worx Landroid WR143E User manual

Worx
Worx Landroid M User manual

Worx
Worx WG708E User manual

Worx
Worx Landroid WG795E User manual

Worx
Worx WG772E User manual