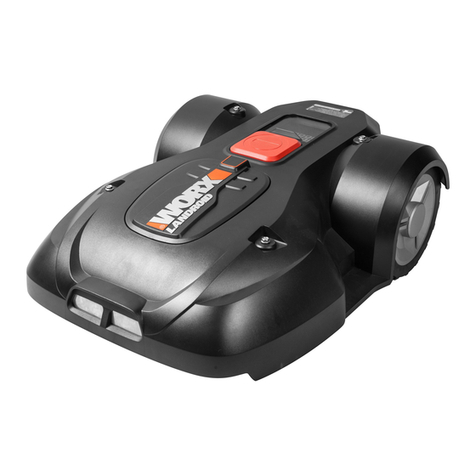
Worx Landroid Operation instructions

P02
P16
P30
P43
P56
Lawn Mowing Robot
Робот-газонокосилка
Robot-niiduk
Mauriņa pļaušanas robots
Automatinės vejapjovės
EN
RU
ET
LV
LT

Lawn Mowing Robot EN
2
TABLE OF CONTENTS
1. Product Safety
1.1 General &additional safety instruction
1.2 Information on the Landroid®L
2. Component list
3. Understanding Your Landroid®L
3.1 How does my Landroid®L know what to mow?
3.2 How does my Landroid®L know where to go?
A. Finding the Charging Base
B. Rain sensors
C. Sensing the boundary wire
D. Starting and stopping while mowing
3.3 How big an area can my Landroid®L mow?
3.4 How efficiently will my Landroid®L mow the grass?
4. Remote Mobile Control
5. Boundary Wire Basics
5.1 Pegging the Boundary Wire
5.2 Burying the Boundary Wire
5.3 Joining the Boundary Wire
6. Software update
7. Maintenance
7.1 Keep it sharp
A. Rotate and flip the blades
B. Replace the blades
7.2 Keep it clean
A. Cleaning the body
B. Cleaning the Underside
C. Clean the contact pins and the charging strips
7.3 Battery life
7.4 Winter hibernation
7.5 Replacing the battery
ORIGINAL INSTRUCTION
3
3
5
6
8
8
9
9
9
9
9
10
10
11
11
11
11
11
12
12
12
12
12
13
13
13
13
13
14
14

Lawn Mowing Robot EN
3
1. Product Safety
1.1 General & additional safety instruction
WARNING: Read all safety warnings and all instructions. Failure to follow the warnings and instructions may
result in electric shock, fire and/or serious injury.
Carefully read the instructions for the safe operation of the machine.
Save all warnings and instructions for future reference.
•This appliance is not intended for use by persons (including children) with reduced physical, sensory or mental capabilities, or
lack of experience and knowledge, unless they have been given supervision or instruction concerning use of the appliance by
a person responsible for their safety.
• Children should be supervised to ensure that they do not play with the appliance.
• The appliance is only to be used with the power supply unit provided with the appliance.
IMPORTANT
READ CAREFULLY BEFORE USE
KEEP FOR FUTURE REFERENCE
SAFE OPERATION PRACTICES
Training
a) Read the instructions carefully. Make sure you understand the instructions and be familiar with the controls and the proper
use of the appliance;
b) Never allow people unfamiliar with these instructions or children to use the appliance. Local regulations can restrict the age of
the operator;
c) The operator or user is responsible for accidents or hazards occurring to other people or their property.
Preparation
a) Ensure the correct installation of the boundary wire as instructed.
b) Periodically inspect the area where the appliance is to be used and remove all stones, sticks, wires, bones, and other foreign
objects.
c) Periodically visually inspect to see that the blades, blade bolts and cutter assembly are not worn or damaged. Replace worn
or damaged blades and bolts in sets to preserve balance.
d) On multi-spindle appliances, take care as rotating one blade can cause other blades to rotate.
e) WARNING!The lawnmower shall not be operated without the guard in place.
OPERATION
1. GENERAL
a) Never operate the appliance with defective guards, or without safety devices, for example deflectors, in place;
b) Do not put hands or feet near or under rotating parts. Keep clear of the discharge opening at all times;
c) Never pick up or carry an appliance while the motor is running;
d) Operate the disabling device from the appliance;
– Before clearing a blockage;
– Before checking, cleaning or working on the appliance;
e) It is not permitted to modify the original design of robotic lawnmower. All modifications are made at your own risk.
f) Start robotic lawnmower according to the instructions. When the power key is switched on, make sure you keep your hands
and feet away from the rotating blades. Never put your hands and feet under the mower.
g) Never lift up robotic lawnmower or carry it when the power key is switched on.
h) Do not let persons who do not know how robotic lawnmower works and behaves use the mower.
i) Do not put anything on top of robotic lawnmower or its charging station.
j) Do not allow robotic lawnmower to be used with a defective blade disc or body. Neither should it be used with defective
blades, screws, nuts or cables.
k) Always switch off robotic lawnmower when you do not intend to use the mower. Robotic lawnmower can only start when the
power key is switched on and the correct PIN code has been entered.
2. ADDITIONALLY WHEN THE APPLIANCE IS OPERATING AUTOMATICALLY
a) Do not leave the machine to operate unattended if you know that there are pets, children or people in the vicinity.
MAINTENANCE AND STORAGE
WARNING! When turning the mower upside down, the power key must always be switched off.
The power key should be switched off during all work on the mower’s underframe, such as cleaning
or replacing the blades.
a) Keep all nuts, bolts and screws tight to be sure the appliance is in safe working condition;
b) Inspect the robotic lawnmower each week and replace worn or damaged parts for safety;

Lawn Mowing Robot EN
4
c) Check especially that the blades and blade disc are not damaged. Replace all blades and screws at the same time if
necessary so that the rotating parts are balanced.
d) Ensure that only replacement cutting means of the right type are used;
e) Ensure that batteries are charged using the correct charger recommended by the manufacturer. Incorrect use may result in
electric shock, overheating or leakage of corrosive liquid from the battery;
f) In the event of leakage of electrolyte flush with water/neutralizing agent, seek medical help if it comes into contact with the
eyes etc;
g) Servicing of the appliance should be according to manufacturers instructions.
Transport
The original packaging should be used when transporting robotic lawnmower over long distances.
To safely move from or within the working area:
a) Press the STOP button to stop the mower.
b) You select the four digit PIN code when you start the mower for the first time.
c) Always switch off robotic lawnmower if you intend to carry the mower.
d) Carry the mower by the handle at the rear under the mower. Carry the mower with the blade disc away from the body.
Safety warnings for battery pack
a) Do not dismantle, open or shred cells or battery pack.
b) Do not short-circuit a battery pack. Do not store battery packs haphazardly in a box or drawer where
they may short-circuit each other or be short-circuited by conductive materials. When battery pack is not in
use, keep it away from other metal objects, like paper clips, coins, keys, nails, screws or other small metal objects, that can
make a connection from one terminal to another. Shorting the battery terminals together may cause burns or a fire.
c) Do not expose battery pack to heat or fire. Avoid storage in direct sunlight.
d) Do not subject battery pack to mechanical shock.
e) In the event of battery leaking, do not allow the liquid to come into contact with the skin or eyes.
If contact has been made, wash the affected area with copious amounts of water and seek medical
advice.
f) Seek medical advice immediately if a cell or battery pack has been swallowed.
g) Keep battery pack clean and dry.
h) Battery pack gives its best performance when it is operated at normal room temperature (20°C ± 5°C).
i) When disposing of battery packs, keep battery packs of different electrochemical systems separate
from each other.
j) Recharge only with the charger specified by WORX. Do not use any charger other than that specifically
provided for use with the equipment. A charger that is suitable for one type of battery pack may create a risk of fire
when used with another battery pack.
k) Do not use any battery pack which is not designed for use with the equipment.
l) Keep battery pack out of the reach of children.
m) Retain the original product literature for future reference.
n) Dispose of properly.

Lawn Mowing Robot EN
5
1.2 Information on the Landroid®L
WARNING - Robotic lawnmower can be dangerous if incorrectly used.
Read through the Operator’s manual carefully and understand the content before using your robotic lawnmower.
WARNING - Keep a safe distance from the machine when operating.
WARNING - Operate the disabling device before working on or lifting the machine.
WARNING - Do not ride on the machine.
Do not burn
Batteries may enter water cycle if disposed improperly, which can be hazardous for ecosystem. Do not dispose of
waste batteries as unsorted municipal waste.
Batteries should be recycled. Do not dispose of batteries, Return exhausted batteries to your local collection or
recycling point.
Do not wash the machine with a high pressure washer
Class III appliance
Waste electrical products must not be disposed of with household waste. Please recycle where facilities exist.
Check with your local authorities or retailer for recycling advice.

Lawn Mowing Robot EN
6
2. Component list
9
8
7
6
5
10 12
11
13
15
16
22
25 26 272423
18
14
20
21
19
2
3
4
1
17

Lawn Mowing Robot EN
7
1. HANDLE BAR
2. CONTACT PINS
3. CHARGING BASE
4. LOW VOLTAGE CABLE
5. CHARGING STRIP
6. GRASS CUTTING HEIGHT ADJUSTMENT COVER
7. ACCESS POINT – TO OPEN HEIGHT ADJUSTMENT COVER.
8. STOP BUTTON
9. KEYPAD WINDOW
10. Landroid®LDECK
11. REAR DRIVING WHEEL
12. RAIN SENSOR
13. HANDLE
14. MAIN HOUSING – CONTAINS MOTOR, ELECTRONICS AND BATTERY.
15. BATTERY PACK
16. BLADE TURNING DISC
17. CUTTING BLADES
18. FRONT WHEEL
19. KEYPAD
20. DISPLAY
21. ON/OFF KEY
22. POWER ADAPTOR
23. BOUNDARY WIRE
24. WIRE PEGS
25. CHARGING BASE FIXING NAILS
26. BOUNDARY WIRE DISTANCE GAUGE
27. HEX KEY

Lawn Mowing Robot EN
8
3. Understanding Your Landroid®L
We would like to congratulate you on your new purchase of the Landroid®L and entering into the care-free life of automatic
mowing. In the following, we would like to help you better understand how your Landroid®L thinks.
3.1 How does my Landroid®L know what to mow?
The Landroid®L chooses its direction at random. It will make sure your entire lawn is evenly mowed without leaving behind any
unattractive mowing paths (See Fig. A).
A

Lawn Mowing Robot EN
9
3.2 How does my Landroid®L know
where to go?
Your Landroid®L is capable of doing things on its own.The Landroid®L
knows when it needs to go to its Charging Base (3) to charge, can sense
when it is raining, can stop itself if it senses a problem, and knows to stop,
drawback, and then turn around when it bumps into something blocking its
path or other object. The Landroid®L will also automatically stop its Blade
Turning Disc (16) from rotating if it is lifted off the ground to prevent an
accident.
A. Finding the Charging Base
When your
Landroid®L
needs to recharge, it will stop mowing and follow the
Boundary Wire (23) in an anti-clockwise direction back to its Charging Base.
Landroid®L
is pre-programmed to mow the grass near the boundary wire
once a week.
If you want to mow the grass near the boundary wire at other times, open
the keypad window, press the home button and close the keypad window.
Landroid®L
will stop mowing, locate the boundary wire and mow the grass
near the boundary wire while it locates the charging station. We suggest you
use this function when the battery power is more than 75%. You can check
the battery power in the display.
B. Rain sensors
The Landroid®L is fitted with a Rain Sensor (12) that will detect rain drops
and tell the Landroid®L to stop mowing and follow the Boundary Wire back
to its Charging Base. (See Fig. B)
The Landroid®L is programmable to have a delay start function (0 – 180
mins) when it rains. When the rain sensors are wet, the Landroid®L
returns to its docking station. Only when the rain sensors become dry
will the Landroid®L begin the delay start countdown or return to mowing
immediately. See the Programming and Troubleshooting Guide for more details.
C. Sensing the boundary wire
The Landroid®L always obeys the border set by the Boundary Wire and uses two sensors at its front to sense when it is
getting close (See Fig. C). Before changing direction, the Landroid®L will overrun the Boundary Wire up to 25cm*.
*This is the recommended distance. Use the provided distance gauge to ensure proper installation.
D. Starting and stopping while mowing
If you would like to command the Landroid®L to stop mowing, then simply press the STOP button (8) on top of the mower.
It will not begin mowing again until you have press and closed its Keypad Window. (See Fig. D, E)
If the Landroid®L senses that something is wrong, it will display a fault message on the Display (20), and will turn itself off if
it does not receive any input from the user within 20 min (for information on fault messages refer to the Programming and
Troubleshooting Guide).
E
D
B
C

Lawn Mowing Robot EN
10
To resume:
Scene 1: STOP –Auto Shutdown after 20 mins
• Press the STOP Button
• Open the Keypad Window
• Press the ON/OFF Key (21) to ON
• Press key to correct the problem
• Press key again and Close the Keypad Window
• Now the Landroid®L will begin to mow!
Scene 2: STOP– Without Auto Shutdown
• Press the STOP Button
• Open the Keypad Window
• Press key to correct the problem
• Press key again and Close the Keypad Window
• Now the Landroid®L will begin to mow!
3.3 How big an area can my Landroid®L mow?
Your Landroid®L is capable of mowing areas of up to different size areas, although this depends on various factors, such as:
• Species of grass in your lawn and its growth rate
• Sharpness of the Blades (17)
• Humidity
• Surrounding temperature
• Amount of obstacles in your Lawn
If the surrounding temperature is very hot where you live then your Landroid®L may charge at a slightly slower rate. The
Landroid®L uses less energy in open areas that have fewer obstacles, such as flower beds, fountains, walkways, etc…
You can find the default work time of Landroid®Lfor different lawn size in programming guide
Mowing times are different for every lawn depending on the factors mentioned previously. Gradually adjust the time you allow
your Landroid®L to mow each day until you find the most suitable setting.
You can also program Landroid®Lworking time to suit your schedule – refer to Programming Guide.
3.4 How efficiently will my Landroid®L mow the grass?
The Landroid®L’s cutting height can be adjusted between 2cm - 6cm. Before starting your Landroid®L for the first time, you should
cut the grass to the height not more than 9 cm. Then make sure you open the GRASS CUTTING HEIGHT ADJUSTMENT COVER (6)
and set the cutting height to its maximum cutting height of 6cm (See Fig. F, G).
Your Landroid®L will cut its best in dry weather. It does not like wet grass, which can build up on the BladeTurning Disc (16) and
within the motor, and can also cause loose traction and slippage while working.
Your Landroid®L is afraid of Lightening Storms. In case of a Lightening Storm, protect the Landroid®L by unplugging the Charging
Base (3), disconnecting the Boundary Wire (23), and making sure the Landroid®L is not allowed to charge.
Your Landroid®L loves mowing grass and requires the Cutting Blades (17) to be kept in good condition to cut its best.The
Landroid®L can do most things by itself, but will need your help sometimes to prevent damage to itself.
• Never let the Landroid®L travel over gravel.
• Remove or prevent access to obstacles that the Landroid®L could accidentally climb and damage its Blade Disc on.
• Remove all debris and foreign objects from your lawn.
G
20
25
30
35
40
45
50
55
60
F

Lawn Mowing Robot EN
11
4. Remote Mobile Control (only for specific model, please check
Technical data & Declaration of Conformity)
Your Landroid®L could be connected to smart phone. All the general settings could be set on your phone. It will also show the
current working status, even errors. For the details settings, please refer to the Landroid®L Wifi Connection Guide.
5. Boundary Wire Basics
5.1 Pegging the Boundary Wire
Use the Boundary Wire Distance Gauge (26) to set the correct distance
from the border of your lawn (More than 45cm *).
* This is the recommended distance. Use the provided distance gauge to
ensure proper installation.
If your neighbor also uses a Landroid®L, then you must keep a spacing of at
least 0.5 metres between your Boundary Wire and your neighbors.
The boundary wire must outline the intended mowing area exactly. Your
Landroid®Lwill become confused by extra bends or coils of Boundary
Wire that are not part of its mowing area (See Fig. H). If there is excess
Boundary Wire after the mowing area has been outlined, then cut it off and
store this additional wire in a separate location. However, it is important to
leave the necessary length where it connects to the Charging Base so it can be connected and still remain buried.
5.2 Burying the Boundary Wire
If you are planning to bury the Boundary Wire then it should be noted that when entering its Charging Base for the first time,
your Landroid®L may find problems with the way you have laid the wire. It is recommended to first peg down the Boundary
Wire to the lawn so it is easy to make adjustments if necessary. This will allow the Landroid®L to become adjusted to its new
environment and ensures it will successfully work with the charging base before the Boundary Wire is buried.
When you have completed installing the boundary wire, it is recommended that you ask Landroid®L to follow the boundary wire
by pressing the home button.
Whilst observing Landroid®L locating the charging station you can then make alterations to the boundary wire route to ensure
trouble free tracking of the boundary wire by Landroid®L when locating the charging station.
5.3 Joining the Boundary Wire
The Boundary Wire (23) can be extended simply by splicing the ends and
connecting it to the ends of another piece of wire. You can use insulating
tape to secure the joined part of the wire. (See Fig. I)
H
I

Lawn Mowing Robot EN
12
6. Software update
Your Landroid®L software can be updated when new versions become available. The software version will be displayed in the
diagnosis page by pressing button 2 on homepage. The latest software can be downloaded from our website
www.worxlandroid.com. See the detailed guideline on download page.
The manual in box is based on the default software in the mass production .Some new features/functions in the new version may
not exist in the manual If you found some settings not in the manual, please visit www.worxlandroid.com to download the latest
manual.
7. Maintenance
Your Landroid®L needs to be checked from time to time. The Landroid®L works hard and after time needs a good cleaning as well as
to have its parts replaced, as they can become worn. In the following we want to let you know how to take care of your Landroid®L.
7.1 Keep it Sharp
WARNING: Before cleaning, adjusting, or replacing the
Blades, turn your Landroid®L OFF and put on protective
gloves.
WARNING! When fitting new blades, make sure you
replace ALL the blades. Always use new screws when
fitting blades . This is important to ensure blade retention.
Failure to use new screws could cause serious injury.
The Landroid®L does not cut grass like other mowers. Its Blades (17)
are razor sharp on all 4 edges and spin in both directions for maximum
cutting capacity (See Fig. J).Each blade of your Landroid®L has 4 cutting
edges. Depending on the frequency the Landroid®L mows your lawn,
the cutting blades will need to be flipped/rotated periodically for a new
cutting edge. If your Landroid®L is programmed to mow the lawn every
day then the cutting blades will need to be rotated monthly for the
best mowing results. Each cutting blade will last up to 4 months when it is programmed to mow every day. When the cutting
blades are dull and worn out, they should be replaced with the spare blades provided with your Landroid®L. Spare blades are
also available at your nearest WORX retailer.
A. Rotate and Flip the Blades
Your Landroid®L carries the Blades that are all screwed onto the Blade Disc (16). The Blades allow the Landroid®L to do its job and
need care and attention. Every once in awhile, you should simultaneously rotate and flip all blades for a perfect cut. When rotating
and flipping the Blades, make sure all the Blades are adjusted at the same time or else it could make the Blade Disc off balance.
If your Landroid®L mows on a normal schedule (daily) then the Blades should last one season if they are rotated and flipped every
month. Always check to see if the Blades are chipped or damaged and replace them if they are.
B. Replace the Blades (See Fig. K)
After some time, usually every season, your Landroid®L’s Blades will need
to be replaced. Your Landroid®L does not like mowing while using Blades
of different age and quality. So when replacing the Blades, make sure
to replace all of them at the same time. You can replace them with one
of the three spare Blade kits and extra Blade screws supplied with your
Landroid®L.
Before attempting to replace your Landroid®L’s Blades, turn the power off
and put on protective gloves. Then follow these steps:
1. Gently flip the Landroid®L over
2. Remove the battery cover and remove the battery.
3. Take the screws off the Blades with a screwdriver
4. Firmly screw on the new Blades
5. Refit the battery and battery cover.
IMPORTANT: After screwing the Blade to the Blade Disc,
make sure the Blade is able to spin freely.
43
1 2
J
K

Lawn Mowing Robot EN
13
7.2 Keep it Clean
WARNING! Before cleaning turn your Landroid®L OFF. Put
on protective gloves before cleaning the Blade Disc (16)
and do not use running water. (See Fig. L)
A. Cleaning the Body
Your Landroid®L will live a much happier and longer life if it is cleaned
regularly. Although, as your Landroid®L is an electric machine, you will need
to take care when cleaning, so DO NOT use a hose, high pressure washers
or otherwise pour running water on your Landroid®L, it is best to use a spray
bottle filled with water. When cleaning the machine body use a soft brush
or clean cloth and avoid using solvents or polishes (See Fig. L) .Lastly, make
sure that you remove all build up of grass clippings and debris.
B. Cleaning the Underside
Again, it is important that you power the Landroid®L OFF using the ON/Off
Button and wear protective gloves before touching the Blade Disc (16).
First, flip your Landroid®L upside down to expose its underside. Here you will see the Blade Disc, the Main Housing (14), and the
Front (18) and Drive (11) Wheels. Clean everything thoroughly with a soft brush or moist cloth.
Rotate the Blade Disc to ensure it rotates freely. Check the blades spin freely around the fixing screws. Remove any obstructions.
IMPORTANT: Remove any lodged debris so that it does not cause a crack in the Blade Disc. Even the
tiniest crack can decrease your Landroid®L's mowing output.
C. Clean the contact pins and the charging strips
Clean the Contact Pins (2) located on the Charging Base (3) and the Charging Strip (5) located on the Landroid®L using a cloth.
Remove any build up of grass clippings and debris around the contact pins and charge strips periodically to ensure the Landroid®L
successfully charges each time.
7.3 Battery Life
The heart of the Landroid®L is its 28-volt lithium-ion battery. No maintenance is required. For proper storage of the battery, make
sure it is fully charged in kept in a cool dry place between (20°C-60°C).
The life-span of the Landroid®L’s battery depends on various factors, such as:
• The time span of the mowing season in your region.
• Amount of hours the Landroid®L mows per day.
• Battery maintenance during storage.
Landroid®L can be charged manually without the boundary wire.
To manually charge the battery without connecting the boundary wire to the charging base;
1. Connect the Charging Base to a suitable power supply.
2.
Manually dock the Landroid
®
L into the Charging Base while the Landroid
®
L is powered off. (See Fig.M1)
3. The charging base red light will turn on.
4. While “charging” is shown on the screen. (See Fig. M2), Landroid®L will begin to charge.
L
M1
1
2
M2

Lawn Mowing Robot EN
14
7.4 Winter Hibernation
Your Landroid®L will live longer and healthier if it is allowed to hibernate. So even though it is tough, we would recommend that
you store your Landroid®L in your shed or garage during the winter.
Before you prepare your Landroid®L for winter hibernation, we recommend you:
• Thoroughly clean your Landroid®L.
• Fully charge the battery.
• Turn the mower off.
To maximize the battery life, it is recommended to fully charge the battery before storage during winter.
The Boundary Wire can be left in the ground although its ends should be protected, such as placed in a tin can with grease. If the
Charging Base is left outside for winter, leave the Boundary Wire connected.
NOTE: When bringing the Landroid®L back to life after winter hibernation, make sure the Charging Strips (5) and Contact Pins (2)
are clean, it is best to use a fine grade emery cloth. Then make sure the date and time are correct and send the Landroid®L back
to what it loves doing: mowing.
7.5 Replacing the Battery
WARNING! Press the ON/OFF Key to OFF before attempting any adjustment, replacement or repair.
If you need to replace the Battery, follow these steps:
1. Gently Turn your Landroid®L upside down.
2. Remove the six screws on the battery cover. (See Fig. N)
3. Take out the old battery. (See Fig. O)
4. Put in the new battery.
5. Firmly replace the screws.
Environmental Protection
Waste electrical products should not be disposed of with household waste. Please recycle where facilities exist. Check with
your Local Authority or retailer for recycling advice.
NO

Lawn Mowing Robot EN
15
Plug Replacement (UK & Ireland Only)
If you need to replace the fitted plug then follow the instructions below.
IMPORTANT
The wires in the mains lead are colored in accordance with the following code:
Blue – Neutral
Brown – Live
As the colors of the wires in the mains lead of this appliance may not correspond with the coloured markings identifying the terminals in your
plug, proceed as follows.The wire which is coloured blue must be connected to the terminal which is marked with N.The wire which is coloured
brown must be connected to the terminal which is marked with L.
WARNING: Never connect live or neutral wires to the earth terminal of the plug. Only fit an approved BS1363/A plug and the correct
rated fuse.
NOTE:If a moulded plug is fitted and has to be removed take great care in disposing of the plug and severed cable, it must be destroyed to
prevent engaging into a socket.
Connect
Blue to N
(neutral)
Outer sleeve
firmly clamped
Cable grip
Brown L (live)
13 Amp fuse approved
to BS1362

Робот-газонокосилка RU
16
СОДЕРЖАНИЕ
1. Указания по технике безопасности
1.1 Общиеидополнительныеуказания
1.2 СведенияогазонокосилкеLandroid®L
2. Комплектность поставки
3. Разъяснение принципов работы косилки Landroid®L
3.1 КакLandroid®Lузнает,чтоименнонужнокосить?
3.2 КакLandroid®Lузнает,куданужнодвигаться?
A.Нахождениезаряднойбазы
B.Датчикидождя
C.Опознаваниеграничногопровода
D.Пускиостановкавовремякошения
3.3.Площадьвыкашиваемогоучастка
3.4.Эффективностькошениятравы
4. Пульт дистанционного управления
5. Граничный провод
5.1 Прокладываниеграничногопровода
5.2 Присыпкаограничительногокабеляземлей
5.3 Подсоединениеограничительногокабеля
6. Обновление программного обеспечения
7. Техническое обслуживание
7.1 Поддержаниеостротыножей
A.Перестановкаипереворачиваниеножей
B.Заменаножей
7.2 Чистка
A.Чисткакорпуса
B.Очистканижнейчасти
С.Выполнитеочисткуконтактныхштырьковиполоскизарядки
7.3 Срокслужбыаккумуляторнойбатареи
7.4 Зимнеехранение
7.5 Заменааккумуляторнойбатареи
ИСХОДНЫХ ИНСТРУКЦИЙ
17
17
19
20
22
22
23
23
23
23
23
24
24
25
25
25
25
26
26
26
26
26
27
27
27
27
27
28
28
29

Робот-газонокосилка RU
17
1. Указания по технике безопасности
1.1 Общие и дополнительные указания
ВНИМАНИЕ! Изучите все предупреждения, относящиеся к безопасности и все указания.
Игнорированиепредупрежденийинесоблюдениеуказанияможетпривестикпоражениюэлектрическимтоком,к
пожаруи/иликтяжелойтравме.
Внимательно изучите инструкции по безопасной эксплуатации машины.
Сохраните все материалы с предупреждениями и указаниями для последующих справок..
• Данноеустройствонепредназначенодляиспользованиялицами(включаядетей),имеющимифизическиенедостатки,
дефектыоргановчувств,душевнобольными,либонеимеющимиопытаизнаний.Надтакимилицамидолженвестись
контрольлибоотдаватьсяуказанияпоприменениюустройствалицом,ответственнымзаихбезопасность...
• Задетьминеобходимприсмотрсцельюубедитьсявтом,чтоонинеиграютсустройством.
• Устройстводолжноиспользоватьсятолькосвходящимвкомплектпоставкиблокомпитания.
ВАЖНОЕ ЗАМЕЧАНИЕ
ВНИМАТЕЛЬНО ПРОЧТИТЕ ПЕРЕД ПРИМЕНЕНИЕМ
СОХРАНИТЕ ДЛЯ ПОСЛЕДУЮЩИХ СПРАВОК
ПРИЕМЫ БЕЗОПАСНОЙ РАБОТЫ
Обучение
а) ВнимательноизучитеинструкциюУдостоверьтесьвтом,чтовсеуказаниявамиуяснены,чтовыознакомленыс
органамиуправленияинадлежащимиспользованиемустройства.
b) Никогданепозволяйтепользоватьсяустройствомлицам,неознакомившимсясданнойинструкциейилидетям.
Возрастоператораможетограничиватьсяместнымиправилами.
с) Ответственностьзанесчастныеслучаиилитравмы,произошедшиеслюдьми,атакжезаповреждениесобственности
несетоператорилипользователь.
Подготовка к работе
a) Убедитесь,чтопрокладкаграничногопроводавыполненасогласноинструкций
b) Периодическипроверяйтезону,вкоторойиспользуетсяустройствоиудаляйтевсекамни,палки,провода,костии
другиепосторонниепредметы.
c) Периодическиосматривайтеустройстводляпроверкитого,чтоножи,болтыножейиузелкошениявсборене
изношеныинеповреждены.Длясохранениябалансировкиустройствазаменяйтеизношенныеилиповрежденные
ножи.
d) Будьтеосторожнысмногошпиндельнымиустройствами,посколькувнихвращениеодногоножаможетвызвать
вращениедругихножей.
e) ПРЕДУПРЕЖДЕНИЕ!Газонокосилкунельзяиспользоватьбезустановленногозащитногоустройства.
РАБОТА
1. ОБЩИЕ ПОЛОЖЕНИЯ
a) Никогданеработайтеустройствомсдефектныминаправляющими,либобеззащитныхустройств,такихкак
дефлекторы,неустановленныхнаместо.
b) Неприближайтерукииногиквращающимсядеталяминеподставляйтеподних.Всегдадержитепроемдляразгрузки
открытым.
c) Неподнимайтеинепереноситеустройствосработающимдвигателем.
d) Отключайтеприборнасамомустройстве:
– Передпрочисткойзасорения
– Передпроверкой,чисткойилипроведениемработсустройством.
e) Изменятьпервоначальнуюконструкциюроботизированнойгазонокосилкинеразрешается.Всеизмененияделаются
подвашуответственность.
f) Запускайтероботизированнуюгазонокосилкувсоответствиисинструкцией.НЕПРИКАСАЙТЕСЬкдвижущимся
ивращающимсячастямизделиявовремяработыидополнойостановки.Незасовывайтерукииногипод
газонокосилку.
g) Неподнимайтеинепереноситероботизированнуюгазонокосилкупривключенномпитании.
h) Непозволяйтелицам,незнакомымсработойихарактеромфункционированиягазонокосилки,использоватьее.
i) Ничегонекладитесверхугазонокосилкиизаряднойстанции.
j) Недопускайтеиспользованиегазонокосилкиснеисправныминожамиилисповрежденнымкорпусом.Такжене
следуетейпользоватьсяприповрежденныхножах,винтах,гайкахиликабелях.
k) Всегдавыключайтероботизированнуюгазонокосилку,еслиееиспользованиенепредполагается.Запуск
роботизированнойгазонокосилкивозможентолькопослеустановкивыключателяпитаниявположение«включено»и
вводаПИН-кода.
2. ДОПОЛНИТЕЛЬНЫЕ УКАЗАНИЯ К АВТОМАТИЧЕСКОЙ РАБОТЕ ГАЗОНОКОСИЛКИ

Робот-газонокосилка RU
18
a) Неоставляйтеработающуюмашинубезприсмотра,еслиизвестно,чтопоблизостинаходятсядомашниеживотные,
детииливзрослые.
ТЕХНИЧЕСКОЕ ОБСЛУЖИВАНИЕ И ХРАНЕНИЕ
ОСТОРОЖНО! Перед переворачиванием косилки выключатель питания должен быть
установлен в положение «выключено»!
Выключатель питания должен быть установлен в положение «выключено» при выполнении
любых операциях с изделием (очистка нижней части корпуса или замена режущего инструмента.
a) длягарантиибезопасногорабочегосостоянияустройствапроверяйтезатяжкугаекивинтов;
b) длябезопасностиработыпроверяйтероботизированнуюкосилкуеженедельноизаменяйтеизношенныеи
поврежденныеножи;
c) убедитесьвтом,чтоножиирежущийдискнеповреждены.Длясоблюдениябалансировкивращающихсядеталей
заменяйтевсеножиивинтыодновременно.
d) проверяйтеправильностьтипазаменяющихрежущихузлов;
e) удостоверяйтесь,чтобатареизаряжаютсяправильнымзаряднымустройством,рекомендованнымпроизводителем.
неправильноеприменениеможетпривестикпоражениюэлектрическимтоком,перегревуилиутечкекоррозионной
жидкостиизаккумуляторнойбатареи
f) вслучаеутечкиэлектролитасмойтееговодойилинейтрализующимраствором;еслиэлектролитпопалвглаза,ит.п.,
обратитесьзамедицинскойпомощью.
g) обслуживаниеустройствадолжновыполнятьсявсоответствиисинструкциямипроизводителя.
Транспортировка
Приперевозкероботизированнойгазонокосилкинадальниерасстояниенеобходимоиспользоватьоригинальную
упаковку.
Длятогочтобыбезопасноперемещатьустройствоврабочуюзонуилиизнее:
a) НажмитекнопкуSTOP,чтобывыключитьгазонокосилку.
b) КогдаВыначинаетеработусгазонокосилкойвпервыйраз,вывводитечетырехзначныйПИН-код.
c) Всегдавыключайтероботизированнуюгазонокосилку,еслиеенеобходимоперенестивдругоеместо.
d) Переноситекосилкузаручку,находящуюсявнижнейзаднейчасти.Переноситекосилкуножамиотсебя.
Правила техники безопасности для аккумуляторной батареи
a) Не допускается разбирать, вскрывать, измельчать элементы питания и аккумуляторную
батарею.
b) Не допускается накоротко замыкать элементы питания или аккумулятор. Не допускается
беспорядочно хранить элементы питания или аккумулятор в коробке или ящике, где они могут
замкнуть друг друга или могут быть замкнуты другими металлическими предметами. Если
аккумуляторнаябатареянеиспользуется,держитеееподальшеотметаллическихпредметов,такихкакзажимы,
монеты,гвозди,винтыипрочиеметаллическиепредметынебольшогоразмера,которыемогутсоединитьклеммыдруг
сдругом.Короткоезамыканиеклеммбатареиможетстатьпричинойожоговилипожара.
c) Не допускается подвергать аккумуляторную батарею воздействию высоких температур или
пламени. Избегайте хранения аккумуляторной батареи в местах, подверженных воздействию
прямого солнечного света.
d) Не допускается подвергать аккумуляторную батарею механическим ударам
e) В случае протечки аккумуляторной батареи, не допускайте контакта электролита с кожей
или глазами. В случае такого контакта необходимо промыть пораженный участок обильным
количеством воды и обратиться за медицинской помощью.
f) В случае проглатывания элемента питания или аккумулятора необходимо незамедлительно
обратиться за медицинской помощью.
g) Аккумуляторную батарею необходимо содержать в чистоте и сухости.
h) Аккумуляторная батарея работает наиболее эффективно при нормальной комнатной
температуре (20°C ±5°C).
i) При утилизации аккумуляторных батарей держите их отдельно от других электромеханических
систем.
j) Используйте только зарядные устройства, указанные WORX. Не допускается использовать
какие-либо зарядные устройства, за исключением специально предназначенных для данного
оборудования. Зарядноеустройство,котороеподходитдляоднойаккумуляторнойбатареи,можетстатьпричиной
пожараприиспользованиисдругойаккумуляторнойбатареей.
k) Не допускается использовать какие-либо аккумуляторные батареи, не предназначенные для
использования с данным оборудованием.
l) Храните аккумуляторную батарею в местах, недоступных для детей.
m) Следует сохранить оригинальную документацию на изделие для будущего использования.
n) Утилизируйте аккумуляторную батарею должным образом.

Робот-газонокосилка RU
19
1.2 Сведения о газонокосилке Landroid®L
ОСТОРОЖНО! –при неправильном использовании газонокосилка-робот может быть опасной.
Внимательно прочтите руководство по эксплуатации, чтобы понять его содержание до начала работы с газонокосилкой-роботом.
ОСТОРОЖНО! – При работе сохраняйте безопасное расстояние между собой и газонокосилкой.
ОСТОРОЖНО! –Включите кнопку защитного отключения перед тем как продолжить работу или поднять устройство вверх.
ОСТОРОЖНО – Не катайтесь на машине.
Не сжигайте
В случае нарушения правил утилизации батареи могут попасть в систему водоснабжения и нанести вред окружающей среде.
Запрещается утилизировать батареи вместе с обычными бытовыми отходами.
Аккумуляторы должны быть сданы на переработку. Не выбрасывайте аккумуляторы. Возвратите использованные аккумуляторы
на местный пункт сбора или утилизации.
Запрещается использовать моющий аппарат высокого давления для мытья газонокосилки
Прибор III класса
Отходы электрических изделий не должны выбрасываться вместе с бытовыми отходами. Утилизируйте их там, где существуют
центры по переработке. Проконсультируйтесь с вашими местными властями или продавцом по вопросу утилизации.

Робот-газонокосилка RU
20
2. Комплектность поставки
9
8
7
6
5
10 12
11
13
15
16
22
25 26 272423
18
14
20
21
19
2
3
4
1
17
Other manuals for Landroid
16
Table of contents
Languages:
Other Worx Lawn Mower manuals

Worx
Worx Landroid WR143 Specification sheet

Worx
Worx Landroid S 300 Specification sheet

Worx
Worx WG744E User manual

Worx
Worx WR147E.1 User manual

Worx
Worx WG784E Installation manual

Worx
Worx WG775E User manual

Worx
Worx WG778E User manual

Worx
Worx Landroid User manual

Worx
Worx WR165E User manual

Worx
Worx LANDROID WR210 User manual