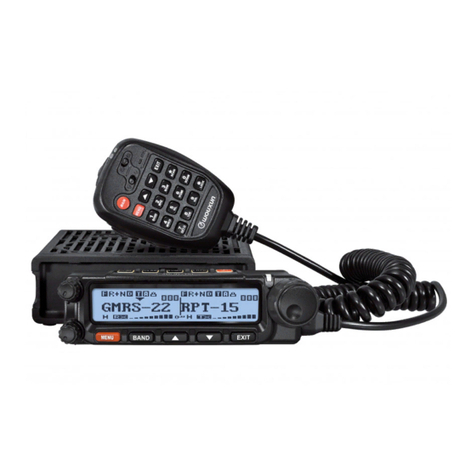
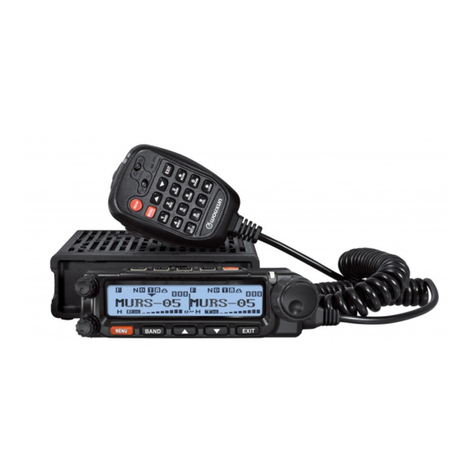
Wouxun KG-1000G Plus User manual

ank you for purchasing the Wouxun KG-1000G Plus mobile GMRS radio.
Your feedback makes our products better. Please share your thoughts.
feedback@buytwowayradios.com
www.buytwowayradios.com

2
Contents
Safety Information���������������������������������������������������������������������������������� 10
FCC Licensing Information.........................................................................14
Installation and Setup ����������������������������������������������������������������������������� 15
What’s Included ...........................................................................................15
Transceiver Installation.................................................................................16
Connecting a Power Source..........................................................................18
Replacing the Fuse........................................................................................19
Connecting an Antenna................................................................................20
Front Panel Installation ................................................................................21
External Speakers .........................................................................................26
Hand Microphone Installation.....................................................................27
Getting Started��������������������������������������������������������������������������������������� 28
Feature Summary..........................................................................................28
Front Panel Guide ........................................................................................30

3
LCD Guide ..................................................................................................31
Back Panel ....................................................................................................32
Side Panels....................................................................................................32
Hand Microphone ........................................................................................33
Basic Operation �������������������������������������������������������������������������������������� 34
Introducing GMRS and the KG-1000G Plus..............................................34
Power On/O and Adjusting Volume ..........................................................35
Your First Transmit.......................................................................................35
Dual Display: Using Areas “A” and “B”.........................................................37
Channel and Frequency Modes ....................................................................39
Channels and Privacy Codes.........................................................................41
Using the Repeater Channels .......................................................................42
Channel Scan................................................................................................45
Scanning CTCSS / DCS Codes ..................................................................48

4
NOAA Weather Mode.................................................................................49
Hand Microphone Hotkeys .........................................................................49
Menu Functions ������������������������������������������������������������������������������������� 57
[01: SQL] Squelch........................................................................................57
[02: W/N] Bandwidth ..................................................................................57
[03: BACK-LT] Backlight Timeout.............................................................57
[04: REPEATER] Repeater Oset ..............................................................58
[05: TX-POWER] Output Power................................................................58
[06: TDR] Dual Display...............................................................................59
[07: WORKMODE] Work Mode ...............................................................59
[08: FM-RADIO] FM Radio ......................................................................60
[09: RX-CTCSS] Receive CTCSS Tone .....................................................61
[10: TX-CTCSS] Transmit CTCSS Tone ...................................................61
[11: RX-DCS] Receive DCS Code..............................................................61

5
[12: TX-DCS] Transmit DCS Code............................................................62
[13: SCANMODE] Scan Mode ..................................................................62
[14: SCAN-GRP] Scan Group ....................................................................63
[15: SCAN-ADD] Scan Add / Delete.........................................................63
[16: SCAN-CTC] Scan CTCSS .................................................................63
[17: SCAN-DCS] Scan DCS ......................................................................64
[18: TONESAVE] CTCSS/DCS Tone Save Options.................................65
[19: TONESCAN] CTCSS/DCS Scan Filter.............................................65
[20: PRI-SCAN] Priority Scan ....................................................................66
[21: PRI-SAVE] Set Priority Channel.........................................................66
[22: PRI-SEL] Priority Channel Select .......................................................67
[23: STEP] Frequency Step..........................................................................67
[24: ROGER] Roger Beep ...........................................................................67
[25: TOT] Transmit Overtime Timer ..........................................................68

6
[26: TOA] Transmit Overtime Alarm ..........................................................68
[27: VOICE] Voice Guide............................................................................68
[28: BEEP] Button Beeps.............................................................................69
[29: BUSYLOCK] Busy Channel Lockout..................................................69
[30: CH-NAME] Channel Name................................................................69
[31: CH-ADD] Add Memory Channel.......................................................70
[32: CH-DEL] Delete Memory Channel....................................................70
[33: DESCRAMB] Descrambler .................................................................71
[34: COMPAND] Compander ....................................................................71
[35: SP-MUTE] Speaker Mute ...................................................................71
[36: ID-EDIT] Edit Radio ID.....................................................................72
[37: DTMF-ID] Radio ID Settings.............................................................72
[38: DTMF-DLY] DTMF Delay ...............................................................73
[39: DTMF-INT] DTMF Interval .............................................................73

7
[40: DTMF-DUR] DTMF Duration..........................................................74
[41: SIDETONE] Sidetone Setting ............................................................74
[42: RING] Ring Time ................................................................................75
[43: ALERT] Tone Alert..............................................................................75
[44: REM-CTRL] Remote Control ............................................................76
[45: AM-MODE] AM Mode......................................................................76
[46: AM-AUTO] Auto Detect AM ............................................................76
[47: AUTOLOCK] Auto Lock ...................................................................77
[48: AUTO-OFF] Auto Power O .............................................................77
[49: MED-PWR] Medium Power Setting ..................................................77
[50: VOLT-ALT] Low Voltage Alert...........................................................78
[51: FAN-SET] Fan Activation Setting.......................................................78
[52: SPEAKER] Speaker Setting.................................................................79
[53: RPT-TONE] Squelch Tone..................................................................79

8
[54: RPT-MODE] Repeater Mode .............................................................80
[55: RPT-SPK] Repeater Speaker Setting ...................................................80
[56: RPT-PTT] Repeater PTT Setting.......................................................81
[57: RPT-DLY] Repeater Hold Timer........................................................81
[58: WT-LED] Standby LED Color ..........................................................81
[59: RX-LED] Receive LED Color ............................................................82
[60: TX-LED] Transmit LED Color ..........................................................82
[61: KEY-PF1] PF1 Side Key Assignment ..................................................82
[62: KEY-A] Key A Assignment .................................................................83
[63: KEY-B] Key B Assignment...................................................................83
[64: KEY-C] Key C Assignment..................................................................83
[65: KEY-D] Key D Assignment .................................................................84
[66: RESET] Factory Reset..........................................................................84
Advanced Operation ������������������������������������������������������������������������������� 85

9
Setting Non-Standard CTCSS or DCS.......................................................85
Adding and Removing Channels..................................................................87
Repeater Mode Operation............................................................................90
DTMF Encoding .........................................................................................95
Remote Control............................................................................................98
Wire Clone.................................................................................................112
Troubleshooting ����������������������������������������������������������������������������������� 114
Technical Information �������������������������������������������������������������������������� 116
Specications ..............................................................................................116
Standard CTCSS and DCS Tones .............................................................117
Default GMRS Channels and Frequencies ................................................119
Optional Accessories����������������������������������������������������������������������������� 122
Limited Warranty ��������������������������������������������������������������������������������� 123

10
Safety InformationSafety Information
e KG-1000G Plus is an electrical apparatus and a generator of RF (Radio Frequen-
cy) energy, and you should exercise all safety precautions as are appropriate of this type
of device. ese safety tips apply to any device installed in a well-designed radio station.
⚠
Explosive atmospheres (gases, dust, fumes, etc.). Turn OFF your mobile radio while
taking on fuel or while parked in gasoline service stations. Do not carry spare fuel
containers in the trunk of your vehicle if your mobile radio is mounted in the trunk
area.
⚠
Injury from radio frequency transmissions. Do not operate your mobile radio when
somebody is either standing near to or touching the antenna, to avoid the possibili-
ty of radio frequency burns or related physical injury.
⚠
Dynamite blasting caps. Operating the mobile radio within 150m (500 feet) of
dynamite blasting caps may cause them to explode. Turn OFF your mobile radio
when in areas where blasting is in progress, or where “TURN OFF TWO-WAY
RADIO” signs have been posted. If you are transporting blasting caps in your vehi-
cle, make sure they are carried in a closed metal box with a padded interior. Do not
transmit while the caps are being placed into or removed from the container.
11
Safety InformationSafety Information
⚠
Never allow unsupervised children to play in the vicinity of your mobile radio or
antenna installation.
⚠
Be certain to wrap any wire or cable splices thoroughly with insulating electrical
tape, to prevent short circuits.
⚠
Do not route cables or wires through door jambs or other locations where, through
wear and tear, they may become frayed and shorted to ground or to each other.
⚠
Do not stand in front of a directional antenna while you are transmitting into that
antenna. Do not install a directional antenna in any location where humans or pets
may be walking in the main directional lobe of the antenna’s radiation pattern.
⚠
In mobile installations, it is preferable to mount your antenna on top of the roof of
the vehicle, if feasible, so as to utilize the car body as a counterpoise for the antenna
and raise the radiation pattern as far away from passengers as possible.
⚠
During vehicular operation when stopped (in a parking lot, for example), make it a
practice to switch to Low power if there are people walking nearby.

12
Safety Information
⚠
Never wear dual-earmu headphones while driving a vehicle.
⚠
Do not attempt to drive your vehicle while entering frequencies or accessing menu
items using the DTMF microphone, front panel or the base unit. Pull over to the
side of the road and put the vehicle in park before adjusting or programming the
transceiver.
Notice
▪
ese tips are important for safe operation of your
KG-1000G Plus mobile radio and its accessories. If they do not
function normally, please get in touch with your dealer immedi-
ately.
▪
If you use components or accessories not produced by the
Wouxun Company, Wouxun will not guarantee the safety and
usability of the transceiver.

13
Safety InformationSafety Information
Caution
Please read this manual before using, as it includes important instructions for the safe
handling, use and operation of your radio.
FCC Compliance
is device complies with Part 15 of the FCC Rules. Operation is subject to the follow-
ing two conditions:
(1) is device may not cause harmful interference, and
(2) is device must accept any interference received, including interference that may
cause undesired operation.
WARNING: MODIFICATION OF THIS DEVICE TO RECEIVE CELLULAR
RADIOTELEPHONE SERVICE SIGNALS IS PROHIBITED UNDER FCC
RULES AND US FEDERAL LAW.

14
Safety Information
Radio Operation and EME Exposure
Use only an antenna designed for use with this radio and its operating frequencies. Un-
authorized modications or attachments may damage the radio and violate FCC rules.
DO NOT hold the antenna while the radio is in use.
DO NOT attempt to use the radio with a damaged antenna or feed line.
FCC Licensing Information
e Wouxun KG-1000G Plus is FCC Part 95E type accepted for use on the GMRS.
e KG-1000G Plus operates on General Mobile Radio Service (GMRS) frequencies
according to the Federal Communications Commission (FCC) Rules in the United
States. As such, a GMRS license is required to transmit on these frequencies. To obtain
an FCC license for the GMRS, please go to the FCC’s web site and complete the on-
line application or request FCC Form 605.

15
Installation and SetupInstallation and SetupInstallation and SetupInstallation and Setup
What’s Included
Carefully unpack the contents of the box and be sure that you have the items in the list
below. If any items are missing, please contact your dealer.
FM N FM NRxCT RTX
DCS TX Rx CT R
DCS TT
BUSY 1 3 5 7 9 BUSY 1 3 5 7 9
B/SW
Mobile/Base
Transceiver
Hand
Microphone
Inclined Switchboard
Panel (Already Installed
on Mobile Transceiver)
Flat Switchboard
Panel
Screw Sets Hand
Microphone
Hangers
Mobile Mounting
Bracket
Remote Front
Panel Bracket
Mobile Power
Cord
Fuse Extension
Cable
User Manual

16
Installation and Setup
Transceiver Installation
Choose a safe place inside your vehicle to install the transceiver, considering a location
that would not cause harm to passengers while the vehicle is in motion or in case of an
accident or sudden braking. Install the transceiver in an area with good ventilation and
away from direct exposure to the sun.
1. Use the supplied self-tapping screws to
install the support bracket in the vehicle.
2. Set the transceiver in the bracket, then
insert the supplied combined screws and
tighten, ensuring that the screws are
fastened tightly. is will ensure the
support bracket and the transceiver do
not become loose when the vehicle hits
bumps or shakes.

17
Installation and SetupInstallation and Setup
3. Several screw slots are provided along the side of the support bracket to allow for
installing the transceiver at dierent angles.
PC
PC

18
Installation and Setup
Connecting a Power Source
e power requirement of the transceiver ranges from 13.8V±15%. If the power source
exceeds 16V, TX will be disabled but RX will operate as normal. If the power source
falls below 11.5V, the transceiver will automatically shut o to prevent it from draining
the battery and aecting the normal operation of the vehicle (See VOLT-ALT, page
78).
1
2
SP
ANT
DC13.8V
1
2
SP
ANT
DC13.8V
Important
e transceiver’s operating voltage is 13.8V±15% DC.

19
Installation and SetupInstallation and Setup
Replacing the Fuse
In the event that the transceiver blows a fuse, rst determine the cause, then replace the
fuse. If after installing the new fuse it blows again, disconnect the power source imme-
diately and contact your authorized Wouxun dealer for assistance.
e specied fuse current is 15A. e specied power source current is 20A and above.
Refer to the following diagram for fuse installation. Be sure the fuse is properly seated
and secured to the copper set.

20
Installation and Setup
Connecting an Antenna
Before using the transceiver, you must correctly connect a properly tuned and installed
antenna. To get the best results, be sure the antenna is tuned for the frequencies that
you intend to use, and the antenna’s impedance is 50 ohms. Using an incorrect or
improperly installed antenna could harm the transceiver. Never attempt to transmit
without an antenna connected!
e transceiver is equipped with an SO-239 (UHF female) antenna connector. It will
require an antenna cable with a PL-259 (UHF male) connector.
Table of contents
Other Wouxun Radio manuals

Wouxun
Wouxun KG-S72C User manual

Wouxun
Wouxun KG-XS20G User manual

Wouxun
Wouxun KG-1000M User manual

Wouxun
Wouxun PSB-1000 User manual

Wouxun
Wouxun KG-UV920R User manual

Wouxun
Wouxun KG-Q10G User manual

Wouxun
Wouxun KG-UV920P-E User manual

Wouxun
Wouxun KG-1000G User manual

Wouxun
Wouxun KG-Q10H User manual

Wouxun
Wouxun KG-S84B User manual