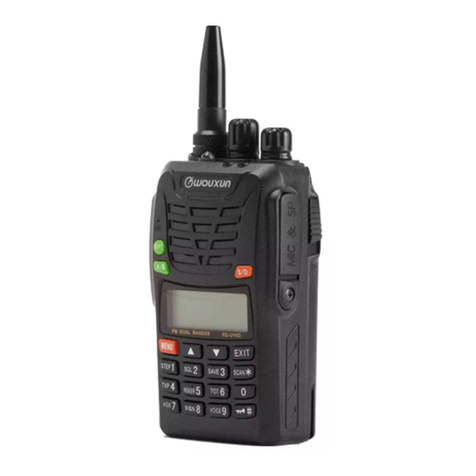
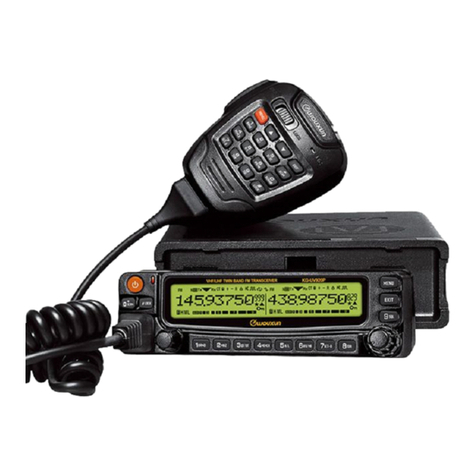
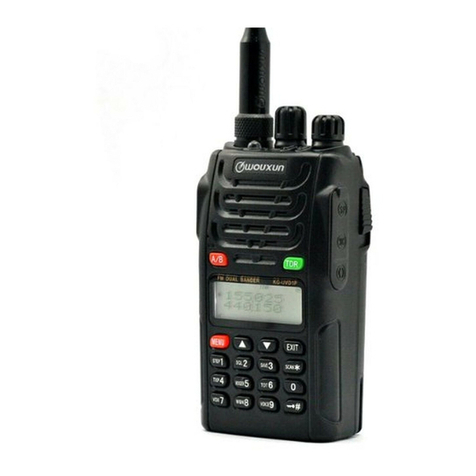
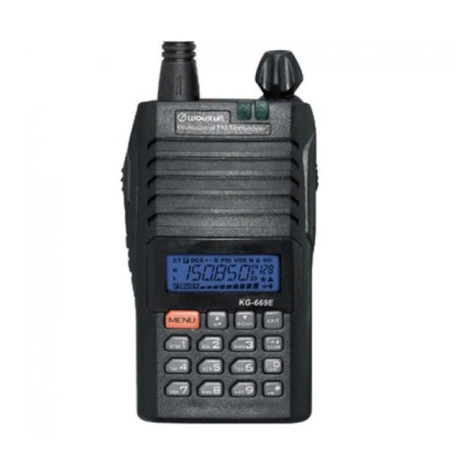
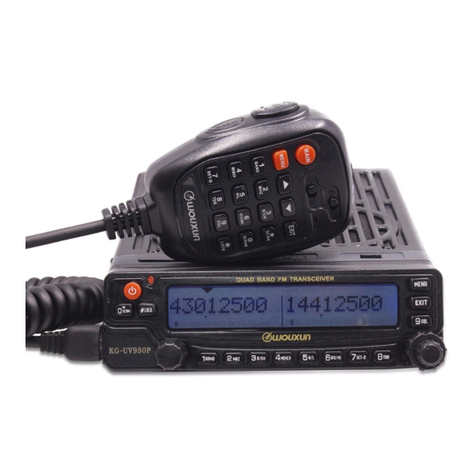
Wouxun KG-V98 User manual

16.2x11cm
Thanks
for
buying
the
@wouxun
transceiver.
This
transceiver
offers
latest
design,
multi-functionality,
stable
performance
and
easy
operation.
We
believe
you
will
be
pleased
with
the
high
quality
and
powerful
functions.
READ
THIS
IMPORTANT
INFORMATION
ON
SAFE
AND
EFFICIENT
OPERATION
BEFORE
USING
YOUR
@wouxun
PORTABLE
TWO-WAY
RADIO.
This
manual
is
suitable
ONLY:
KG-V98.

PRECAUTIONS
This
transceiver
is
with
excellent
design
and
advanced
technology.
Please follow
the
below
suggestions and
warning
to
assist
you
to
carry
out
the
responsibilities
on
warranty
terms,
and
learn
the
safety
before
using
the
transceiver.
1.
Please
keep
the
transceiver
and
accessories
out
of
the
reach
of
children.
2.
Do
not
disassemble
the
transceiver
to
avoid
the
possibility
of
damaging
by
a
non-professional.
B.
Please
ONLY
use
Gwouxun
supplied
batterypack
and
charger
to
avoid
the
possibility
of
damaging
the
transceiver.
4.
Please
ONLY
use
@wouxun
supplied
antenna
to
avoid
the
possibility
of
damaging
the
transceiver.
55.
Neither
expose
the
transceiver
directly
to
the
sunlight
nor
in
the
overheated
places
for
a
long
time.
6.
Keep
the
transceiver
away
from
the
dusty
or
humid
places.
7.
Clean
the
transceiver
with
a
mild
brush/cloth
or
detergents
instead
of
the
aggressive
chemical
material.
8.
Do
not
transmit
before
well
installing
the
antenna.
9.
If
any
abnormal
odor
or
smoke
is
detected
from
the
transceiver,
please
power
it
off
immediately,
then
remove
the
batterypack
from
the
transceiver.
And
contact
your
@wouxun
dealer.
Professional
FM
Trans
>
All
the
above
mentioned
suggestions
and
warnings
are
compatible
for
all
@wouxun
series
transceivers
and
accessories.
Please
contact
your
@wouxun
dealer
about
any
upset
operation.
2»
@wouxun
manufacturer
is
not
responsible
for
any
safety
or
operation
problems,
which
are
caused
by
using
the
incompatible
accessories
or
parts

Unpacking
and
Checking
the
Equipment
--
Installing
Before
Use
-
Getting
Started
Features
List
Technical
Specification
-
Description
of
Transceiver
Description
of
Functions
Multi
Operation
Modes
———————
Basic
Operation
—
=
Shortcut
Operation
Sheet.
How
to
Operate
-
m
Step
Frequency
(STEP)
---
MENU
1
Squelch
Level
(SQL-LE)
---
MENU
2
--
Power
Saver
Mode
(SAVE)
---
MENU
3
——
Transmitting
Power
Selection
(TXP)
---
MENU
4
Begin/End
Transmitting
Prompt
(ROGER)
—
MENU
5
Time-out
Timer
(TOT)
---
MENU
6
=-
VOX
(VOX)
---
MENU
7
—-
Bandwidth
Selection
(WIN)
---
MENU
8
Voice
Guide
(VOICE)
—
MENU
9
—-
Transmitting
Overtime
Alarm
(TOA)
---
MENU
10
Beep
Prompt
Function
(BEEP)
---
MENU
11
-
Display
Language
(Language)
---
MENU
12
Busy
Channel
Lockout
(BCL)
---
MENU
13
Scan
Mode
(SC-REV)
—
MENU
14
Receiving
CTCSS
(R-CTC)
—
MENU
15
Transmitting
CTCSS
(T-CTC)
---
MENU
16
Receiving
DCS
(R-DCS)
---
MENU
17
Transmitting
DCS
(T-DCS)
---
MENU
18
CALL/VFTX
on
Side
Key
1
(PF1)
---
MENU
19
——-
SCAN/LAMP/SOS-CHTELE-ALARM/RADIO/DISABLE
on
Side
Key
3
(PF3)
---
MENU
20
31
Working
Mode
Switch
(CH-MDF)
---
MENU
21
Auto
Backlight
(ABR)
---
MENU
22
Offset
Frequency
(OFF-SET)
---
MENU
23
Frequency
Shift
Direction
(SFT-D)
---
MENU
24
@wouxun
Professional
FM
Transceiver
Stopwatch
Timer
(SECOND)
—
MENU
25

|
Contents
eee
Channel
Name
Edit
(CHNAME)
—
MENU
26
eee
S)
Channel
Memory
(MEM-CH)
---
MENU
27
Channel
Delete
(DEL-CH)
---
MENU
28
-
Scan
CTCSS/DCS
(SCN-CTC)
---
MENU
29
Power-ON
Message(PONMSG)
---
MENU
30
Mute
Mode
(SP-MUTE)
---
MENU
31
-
Caller
ID
Code
Switch
(ANI-SW)
---
MENU
32
=-
=
Lem
i
uam
Caller
ID
Code
Edit
(ANI-EDIT)
—
MENU
33
~-
=
DTMF
Sidetone
(DTMF-ST)
---
MENU
34
—
Keypad
Autolock
(AUTOLOCK)
---
MENU
35
Priority
Channel
Switch
(PRI
CH-SW)
---
MENU
36
===
===
erate
==
43
Repeater
Setting
(RPT-SET)
---
MENU
37
a
een
Repeater
Speaker
(RPT-SPK)
---
MENU
38
~~~
cesser
=
vem
o
48
Repeater
PTT
(RPT-PTT)
---
MENU
39
»
dm
Scan
Add
(SCAN-ADD)
—
MENU
40
~~
48
Single-Tone
Pulse
Frequency
(ALERT)
---
MENU
41
«eme
49
PTT
ID
Delay
(PTT-DLY)
---
MENU
42
~~
x:
B
PTT
Caller
ID
Modes
(PTT-ID)
---
MENU
43
-
Ring
Time
(RING)
---
MENU44
--
Scan
Channel
Group
A
(SCG-A)
---
MENU
45
Scan
Channel
Group
B
(SCG-B)
---
MENU
46
-
Repeater
Receipt
Tone
(RPT-TONE)
—
MENU47
~-
Saving
Scanned
CTCSS/DCS(SC-QT)
---
MENU
48
Mute
Setting
on
Sub-freugency
(SMUTESET)
---
MENU
49
Selective
Call
Code
Group
Setting
(CALLCODE)
---
Reset
Setting(RESET)
—
MENU
51
=
i£!
Setting
Backlight(BK-LIGHT)---MENU52
Radio
Storage(RADIO-WR)---MENU53
-
Scramblet(SCRAM)---MENU54
Compander(COMPANDER)---MENU55
Repeater
Area
Setting
(RPT-AREA)---MENU
56
Public
Network
Mute(PNMUTE)---MENU
57
~
Battery
Voltage
(VOLTAGE)---MENU
58
~~
Network
OFF(PNOFF)---MENU
59
A
Area
Mute(ZA
MUTE)—MENU
60
~
B
Area
Mute(ZA
MUTE)---MENU
61
MENU
50
@wouxun
Professional
FM
Transceiver
50
-
50
5]
22]

All
Calls,
Group
Calls
and
Sele
Repeater
Usage
~
Optional
Accessories
-
Troubleshooting
~.-
Announcement
Basic
Operations
for
Pulic
Network
Mode(Zone
C)
Detailed
Instruction
for
Some
Important
Functions
^^
ctive
Calls
Unpacking
and
Checking
the
Equipment
arefully
unpack
the
transceiver.
We
recommend
that
you
identify
the
items
in
the
following
table
before
discarding
the
packing
material.
If
any
item
is
missed
or
has
been
damaged
during
shipment,
please
noti:
your
@wouxun
dealer.
Supplied
Accessories
Transceiver
Beltclip
High
gain
antenna
cf
Handstrap
Li-ion
batterypack
"
User's
manual
@uwouxun
Professional
FM
Transceiver
a
Intelligent
charger
Warranty
card

Installing
before
use
Professional
FM
Transceiver
W
Install
/
remove
batterypack
Wi
Install/take
down
USIM
card
The
batterypack
is
not
fully
charged
before
leaving
factory.
Please
charge
it
before
use.
»
Please
turn
off
the
radio
before
install
or
take
down
the
USIM
Card.
Ð
Do
not
shortcircuit
the
terminals
or
put
the
batterypack
into
fire.
»
Please
mind
the
direction
to
insert
the
USIM
Card.
>
Do
not
try
to
remove
the
case
from
the
batterypack.
1.
Please
insert
the
USIM
card
to
the
port
according
to
the
instruction
from
the
picture.
There
is
-
Make
the
catching
groove
at
the
bottom
of
the
batterypack
aligned
to
the
slot
at
the
bottom
of
the
crack
if
installation
is
ready.
radio,
press
up
the
latches
on
the
top
of
the
batterypack
and
here
is
crack
then
the
battery
is
fixed
2:
Please
press
down
thie
USIM
card
fromiradio:
There’
Ws
albo
rack
then
USINA
card
i
olt:
onto
the
radio.
.
Please
turn
off
the
radio
before
taking
the
batterypack
off
from
the
radio.
Press
down
the
two
latches
to
make
it
off
from
the
radio,
then
take
down
the
batterypack.
02 03

Getting
Started
Features
List
A.
fi.
Cross-Mode
Repeat(
Network
to
Analogue,
Analogue
to
Network,
Analogue
to
Analogue)
D.
Cross-Band
Repeat(
Duplex
work
at
A,
B,
C
area.
One
area
TX,
another
area
RX)
B.
Dual
Receive(
Simultaneous
Reception
among
A,
B,
C
areas.
Same
Band
or
Cross
Band
available)
Dr
Large
Colorful
Screen
.
Frequency
Range
(suitable
for
different
countries
or
areas):
136-1748&400-470MHz
(RX/TX)
144-146&430-440MHz(RX/TX)
136-174&400-480MHz
(RX/TX)
(RX)FM:76MHz-108MHz(Space:
100K)
136-1748420-520MHz
(RX/TX)
Network:
LTE
4G
(RX)
FM:
76MHz-108MHz(
frequency
step
100K)
6.
Tri
display
Tri
Bands
display
on
the
large
screen
independently
V.
Frequency
Offset
and
Direction
Programmable
in
Repeater
Mode
UHF/VHF
or
VHF/UHF
Cross-Band
Repeater
.
999
Memory
Channels
,
Strong
and
Stable
Output
Power
(VHF:
5W/UHF:
4W)
0.
QT/DQT
Encoding/Decoding,
QT/DQT
Scan
11.
VOX
04
Wn
SNAREOSSSoaeraae
Multi
Definition
for
Sidekeys
Incoming
Message
Display
Caller
ID
display
DTMF
Encoding&Decoding
All
Calls,
Group
Calls
And
Selective
Calls
SOS
Function
Priority
Scan
Function
Remote
Alarm
Wide/Narrow
Bandwidth
Selection
(25KHz/12.5KHz)
.
Voice
Guide:
Chinese/English
.
Chinese/English
Screen
Display
.
Bright
Flashlight
Illumination
Single-Tone
Pulse
Frequency:
2100Hz/1750Hz/1000Hz/1450Hz
(signalling
for
activating
repeater)
Reverse
Frequency
Stopwatch
GPS
Configured
Setting
for
Backlight
Compander
05

Getting
Started
@wouxun
5
"
"
'ssional
FM
Transceiver
B.Technical
Specification
Description
of
Transceiver
Analogue
Part
Whole
Part
Public
Network
Part
LCD
Display
Work
Bands
Customerized
according
to
different
|
Voltage
—
|37V
DC
Work
Band
—
|LTE4G
——
[There
are
various
indicators
display
on
the
screen
when
powering
on.
Please
refer
the
below
table
to
Step.
5K/6.25K/12.5K/25K/50K/100K
|
Weight
—
|300g
Max
TX
Power
|
23-25dbm
@AII
up
bits.
AURA
the
ial
cata
cand
SAM
A
Memory
Channels
1999
Ste
1355690840
(mm)
|
RX
Sensitivity
_|
-106dbm
EY
pattery
Mode
F2D/F3E
‘Audio
Power
|
<500mW
TEEN
VOX
save
Keypad
Lock
Voltage
Antenna
Impendance
500
Temperature
|
-20'C
to
40°C
FM
UM
VUX
=O
m
Analogue
RX
Part
|
Wide
Band
Narrow
Band
|
Analogue
TX
Part
|
Wide
Band
Narrow
Band
=
A "
Modulation
16K
F3E
TIKF3E
|
Adjacent
Charnel
Selecion
|
<70d8
<60d8
aa
=
q
t65101.—
—
—
E
fc
Noo
-
Main
Banc
—}—
Cross-Mode
Effective
Radiation
|.
7949
260dB
|
Inter-Modulation
|
«65dB
«oda
Mar
un
E
5
[-—
Higher
than
RX
Offset
value
lidN---1
C
Spurious
Radiation
|=60dB
60dB
Spurious
Radiation
|
<70dB «70dB
PUN
Tone
»
1
i
5
of 55
8
CH
Scrambler
—]—
Channel
No
[AudoResponse
|
+
|-3dB(0.3-3KHZ)
E3003
|
audio
Response
|
217309
03-
|
L1
34B(0.3-3KHZ)
j
-2.55KHZ)
3KHZ)
‘TX
Power
HH
om
L]
|—
RX
Sensitivity
itivity
|
>
m
Bandwidth
Offset
Frequency
Max
Offset.
+5KHZ
£25KHZ
|Squelch
Sensitivity
|
=45dB
240dB
WOT
egh-
f
c
pepe
Mek
Frequency
Stability
|+2.5ppm
Audio
Distortion
|
<5%
pane
»
1
45
n
255
n
cH
[Audio
Distortion
|
<5%
Sensitivity
UHF:
0.25uV(12dB
SINAD)
.
‘
s93
Output
Power
—
|VHF:5W,
UHF:
4W
VHF:
0.25uV(12d8
SINAD)
Hmmmmm
BEBE
Specifications
are
subject
to
change
without
notice.
MeHU
4
V
EXIT
06
07

Getting
Started
3
RX
Indicator(Green)
Screen
Lamp
~~~-
‘Analogue
Antenna
....
Band
Switch(A,8,C)
....
Menu
Key
1.
Numeric
Key
....
Up/Down
Key
....
Network
Antenna
ON/OFF
Button
~..
VFO/MR
SHortcut.
~.
MIC
Short
press
Display
switch
for
Analogue
A
or
B
are
Long
press:Turn
ON/OFF
repeat
Exit/Cancel
Key
Talkaround/Scan
Key
-
Lock
Key/Second
Key
08
PFI-Selective
Call
Sub
Band
TX,
~-
Network
TX
PTT
~-
PF2:Monitor(Long
Press)
...
Lamp(Short
Press)
PF3
Scan
Keypad
Backlight,
SOS,
Emergency
FM
Radio(Short
Press)
Exit
from
Personal
Call
at
main
band
in
Carea
TIBI
~-
Earphine
Jack
USIM
Port
09

Description
of
Functions
Multi
Work
Modes
a.
Normal
transceiver's
communication
mode
b.
Directional
cross-band
repeater
mode
or
two
way
cross-band
repeater
mode
Note:
Work
modes
can
be
switched
via
£f
key.
1.There
are
A,B
and
C
areas
on
the
LCD
screan
to
display
the
status
for
working
bands.
The
master
band
is
with
a
sign
[>]
on
the
top
right.This
is
an
important
sign,
since
all
the
below
operation
instruction
are
for
the
master
band.
The
band
without
this
sign
is
called
"Sub-band".
2.
Specifications
on
A&B
bands
can
be
programmed
separately.
Please
set
the
band
that
you
want
to
program
any
specifications
into
as
the
master
band
firstly.
3.
Some
functions
are
not
allowed
to
be
used
under
directional
cross-band
repeater
or
two
way
cross:
band
repeater
mode.
Basic
operation
W
Quick
Search
Short
press
V9
or
JI
key
to
search
the
desired
function
/
parameter
during
your
setting,
while
long
press
to
quick
search.
E
DTMF
encoding
10
@wouxun
Professional
FM
Transceiver
the
right
DTMF
tone
which
you
want
to
TX.
Number
key
and
corresponding
DTMF
encoding
are
as
Belews:
e[íe[eec
A
|e
[e|
£3
1
2
3
=
->
4 5 6 0
a
7|e|o|*
E
Setting
Reverse
Frequency
Function
When
the
reverse
frequency
function
is
activiated,
the
transmitting
and
receiving
frequencies
can
be
exchanged.
And
the
CTCSS/DCS
encoding
and
decoding
can
also
be
exchanged.
How
to
operate
reverse
frequency
function:
In
standby
mode,
long
press
@@
to
turn
on
the
reverse
frequency
function;
long
press
&&8
again
to
turn
off.
W
Working
Mode
Switch
Two
work
modes:
VFO(Frequency)
mode
and
MR(Channel)
mode.
Three
different
display
manners
for
MR
mode.
A.
Channel
NO.
B.
Frequency
Channel
NO.
C.
Channel
Name
It
is
available
to
switch
between
the
frequency
mode
and
the
channel
mode
manually
or
via
the
:
f
,
11

Description
of
Functions
VFO
——>
MR(Channel
NO.)
password.
Wire
Clone
Function
VFO/MR(Frequency/Channel
switch)
switch
is
indicated
as
following:
MR(Frequency+
Channel
NO.)
MR(Channel
Name)
When
you
set
password
for
switching
work
mode,
press
fff
LCD
screen
display(—-—-—-),
please
input
the
correct
password
and
press
(f
.
If
inputting
the
wrong
password,
the
work
mode
switch
can
not
be
workable.
Password
only
can
be
programmed
via
@wouxun
supplied
programming
software.
When
the
password
is
made
up
of
full
"ZERO",
the
work
mode
switch
does
not
require
Using
wireclone
‘Installing
the
battery
for
source
transceiver
and
target
transceiver.
2.Powering
on
target
transceiver.
3.Press
PF3
of
source
transceiver,
and
power
on
at
the
same
time.
4.Red
LED
of
the
source
radio
flashes,
the
cloning
activates
LED
is
flashing
red
during
cloning.
LED
goes
out
in
case
of
successful
cloning.
LED
glows
continuous
red
in
case
of
cloning
failure.
Target
Transceiver
Green
indicator
is
flashing
during
cloning.
Indicator
is
off
when
completing
cloning.
@wouxun
Professional
FM
Transceiver
low
to
use
the
intelligent
charger
hen
the
battery
power
is
low,
the
transceiver
will
activate
voice
guide,
and
prompt
"Di"
in
every
5
se-
onds.
Insert
the
AC
plug
into
outlet
(AC:90-240V),
the
charger
indicator
flashes
once.
That
means
the
cha:
rging
is
in
standby.
.
Insert
the
battery
into
the
charger,
the
RED
indicator
continuously
flashes.
That
means
the
charging
i
on
the
progress.
While
the
GREEN
indicator
continuously
flashes.
That
means
the
charging
is
complete.
»
When
inserting
the
exhausted
battery
into
the
charger,
it
will
pre-charge
the
battery
in
trickling
mode,
the
RED
light
of
charger
flashes
and
lasts
10-20
minutes,
then
start
normal
charger
with
RED
light
keeping
on,
it
will
turn
to
GREEN
when
it
is
fully
charged.
»
Trickling
charge
the
exhausted
battery
is
to
protect
the
lithium-ion
battery.
13

Shortcut
Operation
Sheet
Professional
FM
Transceiver
OFF:
Tam
off
BCL
nction
Function
Enter
Screen
display
Select
Selectable
Confirm
Return
Se
|o
Voice
Guide
vorce
|
es
ee
erga
wacom
-£8
>
-a>
ENGLISH:
Enghsh
voce
prompt
rder
name
function
parameter parameter
to
page
Ld
[elect
parameter]
[rr
tum
sec
poor
set
explanation
standby
=
O
Transmitting
a
oraa
key)
[OW
nervas
ii
=
seag
mercy
seps
wae
eee
=B
>|
>
aD
e
Dome
or
seme
-0+
Emo
enun
ernie
sessionis
|=
GE
>
GBPS
u—
100k
1
Beej
p
TES
30
£B
Key
|Í
on.
tn
on
beep
prompt
function
P2:
PO
Ch
EA
IR
EB
m
esse
or
inorena
>
>
GB
77)
2
squelch
MT
Pag
Prompt
H
lect
parameter]
P
24|
Cha
m
eL.
ster
||
Hee
evel
fom
0109
—
05-525
42
Display
=
faauoulae
—j
Level
J
let
parameter
^
Cm
a
oco
a
e
[meme
ones
-m+
ms
T
ITI
pe
-Mantsa
select
parameter
||
ENGLISH
B
Power
Saver
a>
AVE
D
bmi
peto
—
C5
-
0
(13
Busy
Channel
=
fewer)
ferus
+d
Ol
Lockout
@Q-aea-ear
jJ-e-
Lem.
noi
>
GD
GB
Pas
4
Transmitting
"
a”
"ess
B
Or
ER
ej
|
Í
H
High
power
(VHE
SW/UHE
4w)
P20
PUE
Ty
m,
Emo
p
Temm
-0-0
—
ra
e
[cc
a.
qr
a
Pr
rumem,
genkey
elect
parameter
|
Co:
Carer
mode
can
OFF
of
fis
incon
wha
——À
ssid
Lus
E
n
anaa
ay
voc
rompeng
'5
Begin/End
Rm
359
o
uio)
|
BOK
press
PT.
voce
prompt
wien
5
Receiving
e
X
fress
em
or
We)
(so
groups
cress
ease
5i
ki
ring
vans
@> B>
Be)
eer
-0+
>
25
Transmitting
Prompt
SD
>
^
Bc
parameter
t
-—[
Ch
Gp
krcss
-
e
ce
lect
parameter)
OFF:
tom
ott
cress
-0>
hen
enne
bum
BONN
pren
and
e
Toke
6
Tansmitting
Tos
7
EXIT
m
pmi
(cress
a-a-
ø-
-a>
OFF
um
ott
ICSS
-0-0
lect
parameter]
Pe
em
>
[rea]
[voc
ocn]
em
e.
ep
P2
5m
or
aep
key)
[TOT
jit
ees
step
7
Receiving
(6
Time-out
-+
of
5
seconds
[Timer
D
e
fec
parameter
eme
pcs
>a
lec
parameter
||
OFF
Tum
off
ocs
=)
D
-
Pres
wm
or
aie
7
Vox
FE
WNCLLILL
EB
We
8
Transmitting
emm
ue
105
groups
CS
(0023807540
-
P2
EB
>
(parameter
|
OFF
Tum
sif
VOX
aimo
cu
Des
o+
a+
a>»
re
>
CB
>
select
parameter
||
FF
Tum
ot
ocs
-0-0
8
Bandwidth
119
Side
Key
CALL
Selective
Call
Es
Em
or
D
key)
m
aKa
c
moe
mio
on
Sub
Selection
Ch
*8
|
cC
=
parameter
||
V
566
-0
>
57»
Betting
a-
8A
es
EB
bolec
parameter
|
177
su
>
>
GD
Pe
14
i

Shortcut
Operation
Sheet
Professional
FM
Transceiver
SEAN.
Activate
wan
8
Channel
Press
wm or
am
ke)
(y
res
em
or
a
key)
|
LAMP:
m
on
Lamp
P29
aai
>
EB
>
fect
parameter
||
299
tne
avaiable
Zu
Ge
rs
cer
Eure
once”
>
Ee
EBT
2
E
———"
RADO.
ten
cn
ado
|
9
Scan
-
feevee|aa
Diable
inactivate
ICSS/DCS
>
~~
->it
parameter
OCS
>
C5
-
8277
[Tic
ter
trios
emu.
Betect
parameter
et
_J
modes
salable
BO
Power-ON
Press
em
or
acm
key]
fart
ar
ree
P37)
21
Working
-
fess
em
oram
ie]
|
rro
mee
rm
P34
sae
m
I>
>
>
B
>
lect
parameter
IA
Vote
-M
6D
s
Mode
Switch
E
>
B
>
>
elect
parameter
||
Tver
enon
or
cuenta
ante]
>
“>
AD
-32
Liini
pane
BEEN
TTL
|
p
ehanen
en
ute
—
m)
Fes
okey)
ave
a
vee
sgh
ets)
P38
CI
anan
settings
>
D>
EB
m
(oe
m
Demo
wx"
eme
855
e
wn
32
Caller
ID.
hn
M
2
Auto
estara
le)
[s
on
[Transmission
(ff)
=>
mms
Vd
Fe
s
Cm»
Xa
a
sh
mmde|szmmumenee
>
ED
EB»
ettings
us
ec
parameter
9^
E
—
3
Editing
——)
res
em
or
ep
ej)
(raaua
Cater
IDs can
be
chosen
)
3
Offset
fesse
orc
ty
ale
rri-eorr?
jue
GE
coe
LR
ana
mte
me
range
10.9799,
ane
requency
-a-
>
B
ect
parameter
t
p
mot
begn
wano
(OTST
Keypad
udetan
wa
br
saiva)
ei
Vus
dredun
bea
wren
aroraa
=R]
TESS
ED
Or
D
key]
|
"Negative
vector
B4
DTMF
i—i
ANI
ST
Calle
ID
edetone
ve
be
act
7*
CB
rusas]
0
torrena
>
E
>
Emo
Mene
—
Gm
F
frenan
oran
ey)
baia
mron
serine
-0-0
14
Frequency
nn
Direction
2
>
E>
^c
ai
Cr
MINIM
:
EA
Settings
pper
set
parametr)
rnm
caeca
^
E
[TT
te
oer
s
pa
Stopwatch
am
>
Ea
secono
"See
B
=
reor
manue
-0-0
E
laid
RR
po
Keypad
oe
oy
ye
VES
|
curcc
=
NN
CU
fon:
Activate
(————À
‘Channel
name
shoud
be
composed
Auto
Lock
E
te
yeactivate
25
channel
CHNAME
aap
e
ae
remi
Dato
C
Enos
Le
—À
elect
parameter
[OFF
Name
Edit
ri
Select
parameter
|
|
numbers
(to),
eight
maximum
B6
Priority
—<$—
Faerli|(onae
|
———
hamd
>
O
>
£3
ecs
>
>
Omar
S
-—
FRICH-SW
ied
parameter
|
°F
Divae
27
Channel
ea
>
B>
men-o
Pee
em
re
N
oo
eranan
|
ED
D
witch
:
mt,
Memory
à
‘elect
parameter
J
-36|
ITT
m
LÓÓ—À
MM
LS
7
Repeater
T
Vl
ar
EB
^
oa
iln
—
na
bec
parameter
Eom
emos
e
Ce
ED
us
16
"ur

Shortcut
Operation
Sheet
8
Repeater
peaker
witch.
9
Repeater
TT
Switch
HO
Scan
Add
1
Single-
fone
Pulse
requency
i2
PTT
ID
elay
i3
Caller
ID
transmission
lode
44
Ring
Time
f A
Area
f
B
Area
RPT-PTT”|
SCAN-ADD*|
fres
em
oram
Im
[Select
parameter
fress
em
or
aem
tey]
elect
parameter
Fes
aera
a]
69
Wen
sanana
annei
ey)
[Select
parameter
||
OFF:
Channels
wil
not
be
added
to
Drm
elect
parameter
OFF
Speaker
is
deactivate
when.
|when
repeating
JOFF:
PTT
Vansmisson
Blocked
[when
repeating
vil
be
added
to
the
scanning
table
ere
are
4
wnge-tone
pule
freq-
wency
aptions:1750:
2100; 1000;
1450
PTT-DLV*.
Press
en
rame)
elect
parameter
PTT-ID
^
Pres
wem
or
am
tey)
Press
Wm
org
key
||
+20
Lese
nac
evel
3
second
[elect
parameter
||
OFF-Deaciivate
EOE
motoan
Pr
tower
cer
[elect
parameter
||
cm
nes
adem
PT
wat
at
e
emer
ctr
5
Scan
Channel
rou
NO.
em
ER»
Y
6
Scan
channel.
iroup
NO.
a-a-
ssn
ra
ke]
[Ae
Select
parameter)
croup
5
Croup
&.
Croup
7,
Group
8.
TTT
NE
Select
parameter
e
a
rom
&
rom
7.
Group
8
[Gres
1
Grp
2,
Group
3,
Group
4,
[rasp
9.
Croup
10
[Group
V
Group
2,
Group
3,
Group
4,
[Group
9
Group
10
18
-m
m
6
7
Repeater
leceipt
Tone
Saving
can
Mode
9
Setting
'ub-Frequency
ute
50
Selective
all
Code
iroup
Setting
1
Reset
etting
2
Setting
or
Backlight
53
Radio-WR
54
Scramber
5
Compander
@wouxun
Professional
FM
Transceiver
o-a-
gs:
TTD
2
Pag,
ict
parameter!
-0
ri
pag
ec
parameter!
Dm
elect
parameter
pm
>
B
>
kalet
parameter
NEC:
save
X
CIGSS/DCS
(OFF:
Desc
ts
Tuncton
TX;
Deactive
volume
on
sub-fequ
eny
when
transmitting
on
master
RX:
Deactve
volume
on
sub
requ
tn
nnen
ecewng
on
maser
GI
=>
AD
PSO
TIFA
Deactive
volume
on
sub-
|tequency
when
transiting
and
pecemeg
on
master
feauency
D>
ED
50
femra]
>
O
fect
parameter!
DICTI
elect
parameter
seno)
hc
parameter!
fess
em
or
ty
sect
parameter
(WOT
Reet
menu
funcional
par
t
Reset
a
imens&channed
[=
ED
=
GD
P51
functional
paramenters
Reas
Raso
Son.
0120
cours
|
mm
cay
(eg
P51
Wite Radi
Staton:
01.20
Groups
key]
>on

Repeat
Area
3
AREA)
CE
>
VEN
EJ
-e
Fr
T-AREA
-a>
EXIIT
(Select
parameter
Shortcut
Operation
Sheet
€
|
Pine?
-aQ>
Enr
a
ej)
{elect
parameter
Battery
Voltage
gm
=>
WEN
EB
>|
VOLTAGE
TAGE)
=
59.NetworkSwich
am
=>
CERES!
OFF
*
toffiOFF)
>-
-+
-0+
AW
senor
aa
kej
(Select
parameter
Zone
A
Mute
m-
g
-=|
ZA
MUTE
Tree
Gm
£343-|;
-
C |
ETT
ID
(Select
parameter
;1.
Mute(ZB
Zone
ri
zB
mure"
MUTE
Ch
£3€8A-—
|,
Cb
marak)
(Select
parameter
>>
m
>>
m
>
>
mrs
>
>
mrs
>
>
E250
>
C
-
G5!
20
@wouxun
Professional
FM
Transceiver
How
to
Operate
Step
Frequency
(STEP)
-----
MENU
1
In
standby,
press
Cf
+
@B,
the
screen
display:
Press
to
enter,
press
WE,
/
Æ
to
select
the
desired
step,
then
press
GB
to
confirm,
finally
press
GB
to
return
to
standby.
[The
frequency
steps
selectable
for
this
transceiver
are
as
follows:
5.00KHz,
6.25KHz,
10.00KHz, 12.50KHz,
25.00KHz,
50.00KHz
and
100KHz.
\Squelch
Level
(SQL-LE)
-----
MENU
2
Squelch
level
is
about
when
the
signal
is
strong
enough
to
turn
on
the
squelch
function,
and
when
it
is
weak
enough
to
turn
off.
You
may
hear
the
voice
from
the
loudspeaker
when
turning
ON
the
squelch
and,
receiving
the
same
signal
from
other
transceivers.
Higher
level
makes
it
harder
to
receive
the
weak
signals,
while
lower
level
will
be
interfered
by
noises
and/or
unwanted
signals.
n
standby,
press
*
the
screen
display:
Press
to
enter,
press
€B
/
€
to
select
the
desired
squelch
level,
then
press
to
confirm,
finally
press
Æ
to
return
to
standby.
21

How
to
Operate
1
X»
The
squelch
level
for
this
transceiver
has
0-9
levels
selectable,
and
level
O
means
turn off
the
squelch
function.
The
higher
level
of
the
squelch
is
set,
the
stronger
receiving
signal
is
needed.
Power
Saver
Mode
(SAVE)
---
MENU
3
hen
the
power
saver
function
is
ON,
the
receiver
circuit
will
be
cut
off for
a
moment,
and
then
t
re-activate
to
detect
the
signals
for
a
while,
in
ord
n
standby,
press
(Ef
+
Æ
,
the
screen
displays
Press
to
enter,
it
shows
'ON',
press
@@
/
Æ
to
select
turn
ON/OFF
the
power
saver
funtion.
Press
GB
to
confirm,
and
then
press
(899
to
return
to
standby.
duce
the
battery
capacity
consumption
Transmitting
Power
Selection
(TXP)
---
MENU
4
In
frequency
mode,
press
@B
+
the
screen
display:
Press
(ff
to
enter,
it
shows
'HIGH',
press
ŒB
/
€
to
select
HIGH/LOW
power,
then
press
confirm,
finally
press
&&
to
return
to
standby.
22
@wouxun
Professional
FM
Trans
2»
This
transceiver
has
HIGH
and
LOW
transmitting
power
selectable:
VHF:
HIGH:
5W
LOW:1W
UHF:
HIGH:
4W
LOW:1W.
Transmssion
Prompt
settings
(ROGER)
---
Menu
5
hen
the
transceiver
is
standby,
press
the
+
©
keys
and
the
screen
will
display:
Press
the
key
to
access
the
menu,
and
after
pressing
the
V9,
/
Æ
keys
to
choose
the
required
prompt
mode,
press
the
tff
key
to
to
confirm,
or
the
(E
key
to
retum
to
standby.
The
transceiver
features
4
kinds
of
prompt:
BOT
(beginning
of
transmission)
,
EOT
(end
of
transmission)
BOTH
(beginning
and end
of
transmission),
and
OFF
(prompts
deactivated).
Time-out
Timer
(TOT)
---
MENU
6
This
transceiver
can
be
set
in
60
levels
with
15
seconds
each,
between
15
and
900
seconds.
In
standby,
press
+
@,
the
screen
displays
Press
BQ
to
enter,
press
V
/
EP
to
select
the
d
press
@M
to
return
to
standby.
r
level,
then
press
@®
to
confirm,
finally
23

How
to
Operate
VOX
(VOX)
---
MENU
7
In
standby
,
press
f
+
@@,
the
screen
displays
Press
to
enter,
press
V3,
/
Æ
to
select
VOX
level(1-9),
then
press
GB
to
confirm,
finally
press
to
return
to
standby.
>»
The
higher
level
of
VOX
is
set,
the
higher
volume
is
needed.
2»
In
SCAN
and
FM
radio
modes,
the
VOX
function
is
not
available.
Bandwidth
Selection
(W/N)
---
MENU
8
In
standby,
press
@®
+
€
,
the
screen
displays
Press
to
enter,
it
shows
"WIDE',
press
V
/
€
to
select
WIDE/NARROW
bandwidth,
then
press
®
to confirm,
finally
press
Æ
to
return
to
standby.
There
are
two
bandwidths
for
option:
WIDE:25KHz
and
NARR:12.5KHz
Voice
Guide
(VOICE)
---
MENU
9
In
standby,
press
(fff
+
Æ
,
the
screen
displays
24
@wouxun
Professional
FM
Trans
ress
(Ef
to
enter,
press
WE
/
EP
to
select
ON
or
OFF
,
and
then
press
@®
key
to
confirm,
finally
press
Æ
to
return
to
standby.
»
Turn
off
MENU
9
and
MENU
11
at
the
same
time
to
turn
off
all
the
voice
prompt
if
required.
Transmitting
Overtime
Alarm
(TOA)
---
MENU
10
In
standby
,
press
+
@
Ø
the
screen
displays
Press
the
key
to
access
the
menu,
and
after
pressing
the
@®
/
€
keys
to
select
the
required
time,
press
the
key
to
confirm,
and
the
key
to
return
to
standby.
[TOA
has
a
maximum
length
of
10seconds,
each
level
corresponding
to
1second.
OFF:
Deactivate
TOA,
Special
Reminder
/\
>»
When
the
transmission
exceeds
the
"Time-out
timer"
set
time,
a
error
tone
will
prompt,
and
tra-
nsmission
is
stopped
automatically.
Beep
Prompt
Function
(BEEP)
---
MENU
11
n
standby,
press
Qf
+
@&
(KR,
the
screen
displays
25

How
to
operate
Press
GB
to
enter,
press
V
/
€
to
turn
ON/OFF
the
beep
prompt
function,
then
press
GB
to
confirm,
finally
press
@®
to
return
to
standby.
Display
Language
(LANGUAGE)
---
MENU
12
n
standby
,
press
Cà
+
n
,
the
screen
display
Press
(ff
to
access
the
function,
press
WIS,
/
EP
to
select
the
desired
language,
and
then
press
GB
to
confirm,
press
@@
to
return
to
standby
mode.
[Two
Options:CHINESE
and
ENGLISH
Busy
Channel
Lockout
(BCL)
---
MENU
13
n
frequency
mode,
press
G+
€i
the
screen
displays
Press
C
to
enter,
press
WB
/
EF
to
select
ON/OFF
this
function,
then
press
GM
to
confirm,
finally
dn
to
return
to
standby.
ote:This
function
is
invalid
in
cross
band
repeater
or
repeater/transmitter
modes.
can
Mode
Settings
(SC-REV)
---
Menu
14
hen
the
transceiver
is
standby,
press
the
CI
+
KR
Æ
,
keys
and
the
screen
will
display
26
@wouxun
Professional
FM
Transceiver
ting,
press
the
(MM
key
to
confirm,
and
the
key
to
retum
to
standby
The
transceiver
has
3
scan
modes:TO,CO,and
SE:
TO:
after
finding
a
carrier
wave
signal,
scanning
will
continue
if
no
operations
are
carrier
out
within
5
seconds.
CO:
scanning
will
stop
when
a
carrier
wave
signal
has
been
found,and
scanning
will
continue
if
the
carrier
wave
signal
is
lost
for
3
seconds
SE:
scanning
will
stop
when
a
carrier
wave
signal
is
found.
»
Hold
on
Æ
for
2
seconds
to
access
the
scan
mode.
leceiving
CTCSS
settings
(RX-CTC)
---
Menu
15
hen
the
transceiver
in
standby.
press
the
GB
+
@
©
keys
and
the
screen
will
display
Press
the
(fl
key
to
access
the
menu,and
after
pressing
the
€B
/
Æ
key
to
select
the
CTCSS
you
desire,
press
the
key
to
retum
to
standby.
[The
CTCSS
has
a
total
of
50
groups,
ranging
from
67.0
to
254.1HZ.
OFF:Deactivate.
27

How
to
Operate
Transmitting
CTCSS
settings
(TX-CTC)
---
Menu
16
hen
the
transceiver
is
standby,
press
the
-0a
keys
and
the
screen
will
display
Press
the
key
to
access
the
menu,
and
after
pressing
the
V3
/
Æ
key
to
select
the
CTCSS
you
desire,
press
the
@B
key
to
confirm,
and
press
the
@®
key
to
retum
to
standby.
CTCSS
has
a
total
of
5
groups,
ranging
from
67.0-254.1Hz.
OFF:
Deactivate
eceiving
DCS
settings
(RX-DCS)
---
Menu
17
hen
the
transceiver
is
standby,
press
the
Œ
+
@®
keys
and
the
screen
will
display
Press
the
(fb
key
to
access
the
menu,
and
after
pressing
the
V3
/
Æ
key
to
select
the
DCS
you
des:
re,
press
the
key
to
confirm,
and
press
the
G@
key
to
retum
to
standby.
DCS:
105
groups
of
positive
code,
105
groups
of
negative
code,
ranging
from
DO23N
to
D7541.
(OFF:
Deactivate.
Transmission
DCS
settings
(TX-DCS)
---
Menu
18
When
the
transceiver
is
standby,
press
the
C
+
(REB
keys
and
the
screen
will
display
Press
the
(ff
key
to
access
the
menu,and
after
pressing
the
V
/
€P
key
to
select
the
DCS
you
des:
re,
press
the
@®
key
to
confirm,
and
press
the
(IB
key
to
retum
to
standby.
28
@wouxun
Professional
FM
Transceiver
DCS:
105
groups
of
positive
code,
105
groups
of
negative
codes,
ranging
from
DO23N
to
D7541.
OFF:Deactive.
———
oe
CTCSS
l
67.0
1
94.8
21
131.8
31
171.3
A
203.5
2
69.3
12
97.4
22
136.5
32
173.8
42
2065
3
79
13
100.0
23
1413
33
1773
43
210.7
4
744
14
103.5
24
146.2
34
179.9
44
218.1
5
70
15
107.2
25
151.4
35
1835
45
2257
&
|
77
|
w
|
mos
|
26
|
167
|
36
|
12
|
46
|
291
7
82.5
17
114.8
27
159.8
37
189.9
47
2336
8
854
18
118.8
28
1622
38
192.8
48
241.8
9
88.5
19
123.0
29
165.5
39
196.6
49
250.3
10
915
20
127.3
30
167.9
40
199.5
50
2544
29

How
to
Operate
7-
DCS
(positive
code)
)
3
sew
w
|
coven
|
*
[oen
|
©
[osn]
s
sew
|
7€
[bw]
n
[oem
2
bos
|
x
[bone
|
32
[omn
|
s
|o
|
6
[ox
|
77
|
osan|
92
|
oenn
3
ome
|
18
|onsw|
3»
[bue
|
«
[os
|
6
|
pew
|
m
|
ossn|
93
|bexw
a
|
cow
|
19
|
oven
|
3 [mos
|
s
[os|
6a
|
osm
|
79
|
osen]
94
|
D6ASN
s
[oom]
39
[ow
|
35
[bonus
|
so
|
27m
|
os
[ber
|
so
|
oson
|
95
|
bes
s
onem
|
n
[oww|
a [onm
|
s
[bre
|
66
[omm
|
s
|
0506N
|
96
|
osem
z
[oum]
:
omw
|
x
bzw
|
s2
[owen]
6
|
eran
|
e
|
osen]
97
|
ossa
a
|
cos
|
3
|
ovaen
|
38
[onen
|
s3
orm
|
e [oum
|
e3
|
osan
|
98
|
0703N
s
[oom]
2
[om
|
3 [pum
|
s
|ossw
|
e
|
basin
|
s:
|
ose
|
39
[ora
30
|
Dos
|
25
|
own
|
so
[baa
|
ss
|
oa25n
|
70
|
osan
|
es
|
osaan
|
100
|
D723N
m
bos
|
26
|
own
|
a
|s
|
se
ow
|
71
|
ossu
|
se
|
osan
|
30:
|
px
xz
poem
|
z
|
osan
|
sz
|
basen
|
57
|
osn
|
72
|
davon
|
67
|
osen
|
102
|
orn
x3
foom
|
2
[oss|
a
|
basin
|
e
|
osan]
73
be
|
ss
|
Deven
|
103
|
prse
34
[oom
|
9
owe
|
a
[bos
|
59
|
oven
|
74
|
basen
|
e9
|
oezw
|
108
|
oraw
15
[ber
|
30
prem
|
«5
[oss
|
«o
ow
|
75
bes
|
90
|
oean
|
1
|
oven
J
ALL/VFTX
on
Side
Key
1
(PF1-KEY)
---
MENU
19
n
standby,
press
Ch
+
(KR
EP
kthe
screen
displays
Ev
Press
GBB
to
access
the
menu,
press
V,
/
I
to
select
the
mode
you
desire.
And
then
press
GB
to
Fonfirm,
and
press
G@
to
return
to
standby.
Iwo
options:
CALL(Selective
Calls)
and
VFTX
(Transmission
on
Sub-frequency).
Selective
call
codes
are
programmed
via
@wouxun
supplied
software.
30
@wouxun
sional
FM
Transceiver
SSCANILAMP/SOS/TeleAlarm/RADIO/DISABLE
on
Side
Key
3
(PF3-KEY)
---
MENU
20
In
standby,
press
GB
+
EMP
the
screen
display:
Press
Œ
to
access
the
menu,
press
WI,
/
Æ
to
select
the
function
you
desire.
And
then
press
(fh
ta
(confirm,
press
@
to
return
to
standby.
Six
options:
SCAN,LAMP,
SOS,
TeleAlarm,
RADIO
and
Disable.
Different
operations
according
to
different
functions:
SCAN:
Activate
the
scan
function:
In
standby,
press
PF3
to
access
scanning
mode.(scan
mode
can
be
set
via
MENU
14-Scan
Mode
Setting),
hile
press
any
key
to
stop
scanning.
LAMP:
Activate
lamp
function:
In
standby,
press
PF3
to
activate
lamp
function,
while
press
PF3
again
to
deactivate.
(SOS-CH
function
In
standby,
press
PF3,
the
speaker
will
prompt
alarm
after
2
seconds,
and
the
radio
will
transmit
alarm
tone.
31
Table of contents
Other Wouxun Transceiver manuals

Wouxun
Wouxun KG-UVD1P Upgrade Version User manual

Wouxun
Wouxun KG-UV3D User manual

Wouxun
Wouxun KG-619 User manual

Wouxun
Wouxun KG-UV950P User manual

Wouxun
Wouxun KG-UV9D User manual

Wouxun
Wouxun KG-V55 User manual

Wouxun
Wouxun KG-619 User manual

Wouxun
Wouxun KG-669E Series User manual

Wouxun
Wouxun KG-UV8D User manual

Wouxun
Wouxun KG-UVD1P Upgrade Version User manual

Wouxun
Wouxun KG-UVD1 User manual
Wouxun
Wouxun KG-UVD1P Upgrade Version User manual
Wouxun
Wouxun KG-UV6D User manual

Wouxun
Wouxun KG-UV920P User manual

Wouxun
Wouxun KG-UVA1 User manual

Wouxun
Wouxun KG-UVD1E User manual

Wouxun
Wouxun KG-689 User manual

Wouxun
Wouxun KG-UV6D User manual
Wouxun
Wouxun KG-998 User manual

Wouxun
Wouxun KG-UV920R User manual