Seite 7
Best.-Nr. / Item-No. / art. 018-1580/1585
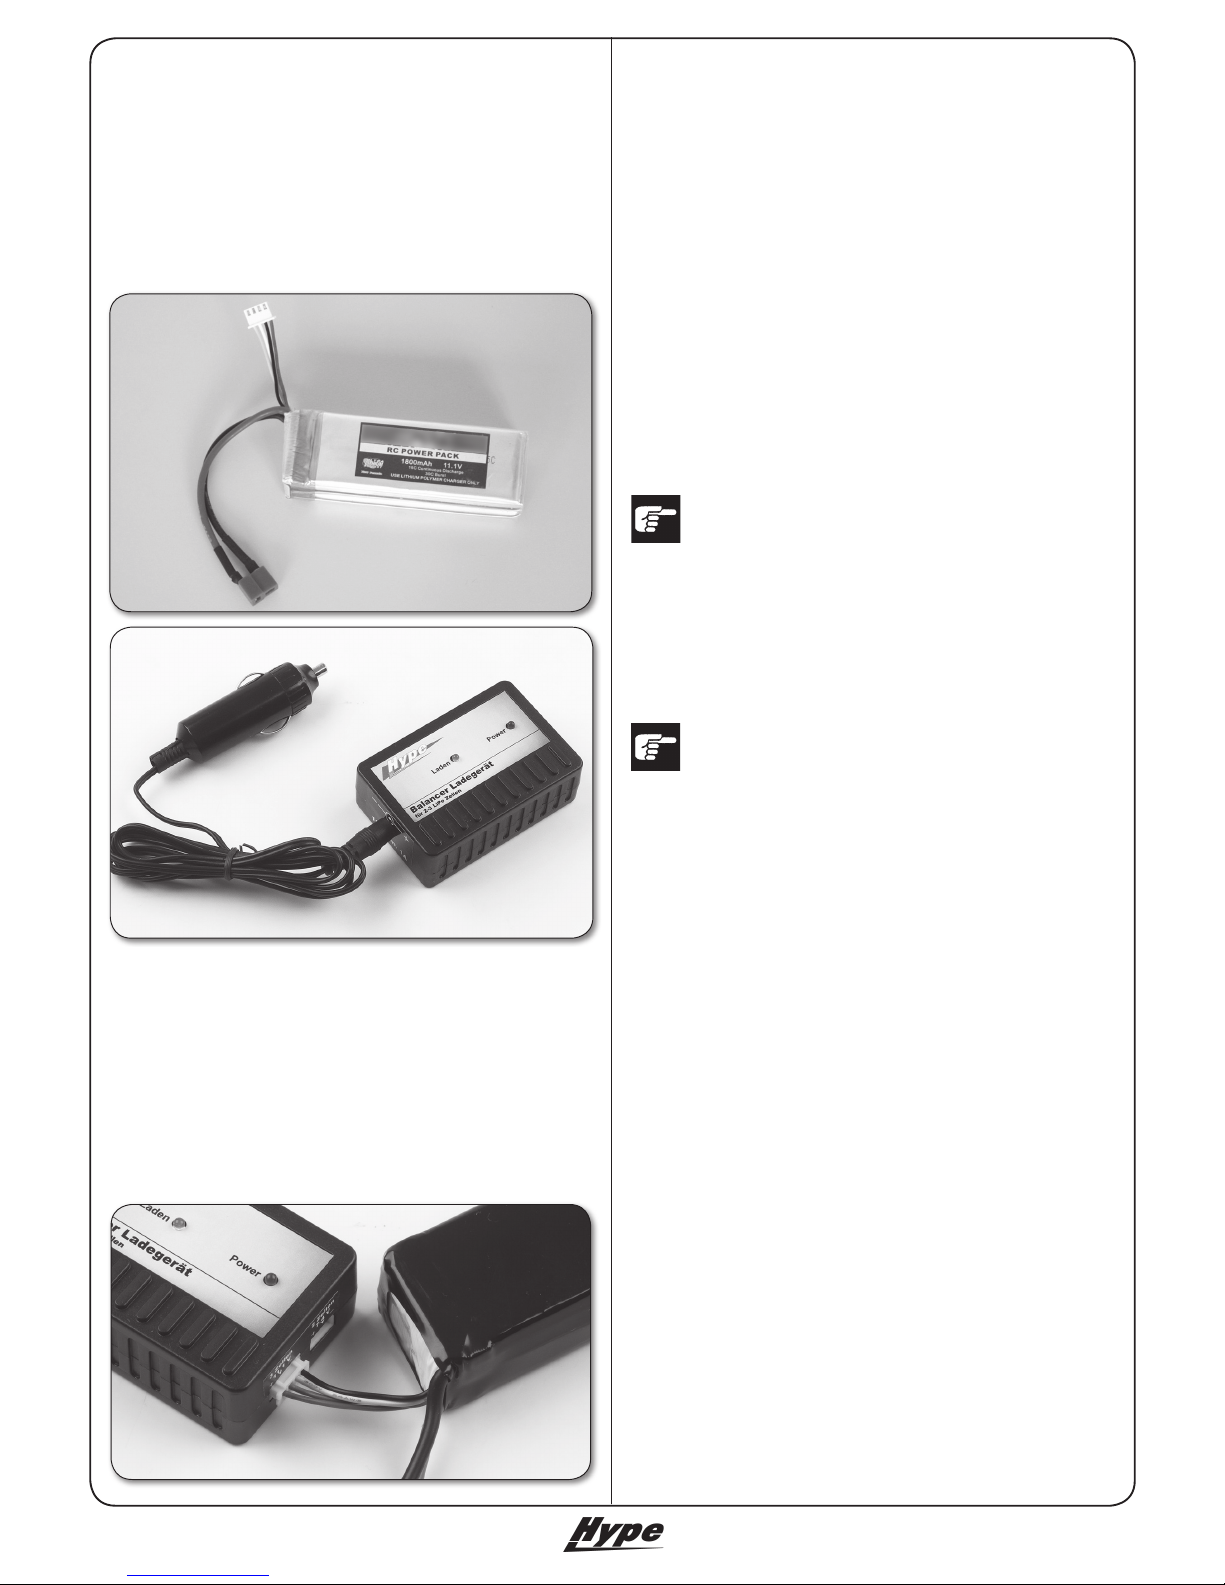
3. LiPo-Akku & Ladegerät / LiPo-Battery & Charger /
batteria LIPO e caricabatterie
Das Modell ist mit einem sogenannten LiPo-Akku ausge-
stattet. Dieser Akku darf ausschließlich mit dem mitgelie-
ferten Balancer-Ladegerät geladen werden! / The model
is equipped with a high performance LiPo-battery. For
charging this battery, only use the included charger! / Il
modello è dotato di una batteria ai polimeri di litio (LiPo)
che va caricata esclusivamente usando il caricabattere
con balancer in dotazione.
Das im Lieferumfang enthaltene Ladegerät ist für den An-
schluss an 12V Spannungsquellen (Autobatterie) ausge-
legt. Laden Sie mit diesem Ladegerät ausschließlich den
im Lieferumfang enthaltenen LiPo-Akku.
Ladegerät mit dem Stecker an den Zigarettenanzünder
anschließen. Nach dem korrekten Anschluss leuch-
tet die rote LED. / Connect the charger to the car plug
of the lighter. The red LED indicates 12V power input
connected. / Collegare il caricabatterie all'accendisagri
dell'automobile, si illumina il LED rosso.
Nehmen Sie den Balancer-Anschluss des LiPo-Akkus
und schließen Sie ihn wie dargestellt am Ladegerät an.
Während des Ladevorgangs, leuchtet die grüne LED per-
manent. Das Ladegerät verfügt über eine automatische
Voll-Erkennung des Akkus und schaltet bei Erreichen
der Ladeschluss-Spannung automatisch ab. Wenn die
grüne LED erlischt ist der Ladevorgang abgeschlossen.
/ Plug the balancer connector of the LiPo-Battery into
the charging port. The green LED indicates the charging
process. The charger's delta peak detection iterrupts the
charging process automatically when the battery is fully
charged. The green LED turns off, when the battery is
fully charged. / Collegare il balancer della batteria LiPo al
caricabatterie come mostrato in foto. Durante la ricarica il
LED si illumina verde. Il caricabatterie riconosce automa-
ticamente quando la batteria è piena, si spegne da se e il
LED verde si spegne.
Lassen Sie den Akku unbedingt völlig(!) ab-
kühlen, bevor Sie ihn erneut laden!!!
The battery must cool down completely before
you recharge the LiPo-Battery!!!
La batteria deve essere totalmente raffreddat
prima di metterla in carica!!!
Lassen Sie den Ladevorgang NIEMALS
unbeaufsichtigt! Legen Sie den Akku NIEMALS
auf einen brennbaren Untergrund!!!
Never leave the charging process unobserved!
Do not put the battery on an inammable
surface.
MAI lasciare la batteria sotto carica inosserva-
ta! MAI appoggiare la batteria su un fondo
facilmente inammabile.
Balancer-Anschluss / Balancer Connec-
tor / connettore per balancer
Regler-Anschluss / Controller Connec-
tor / connettore per regolatore di giri
12V= Anschluss / 12V DC Connector /
connettore 12 V