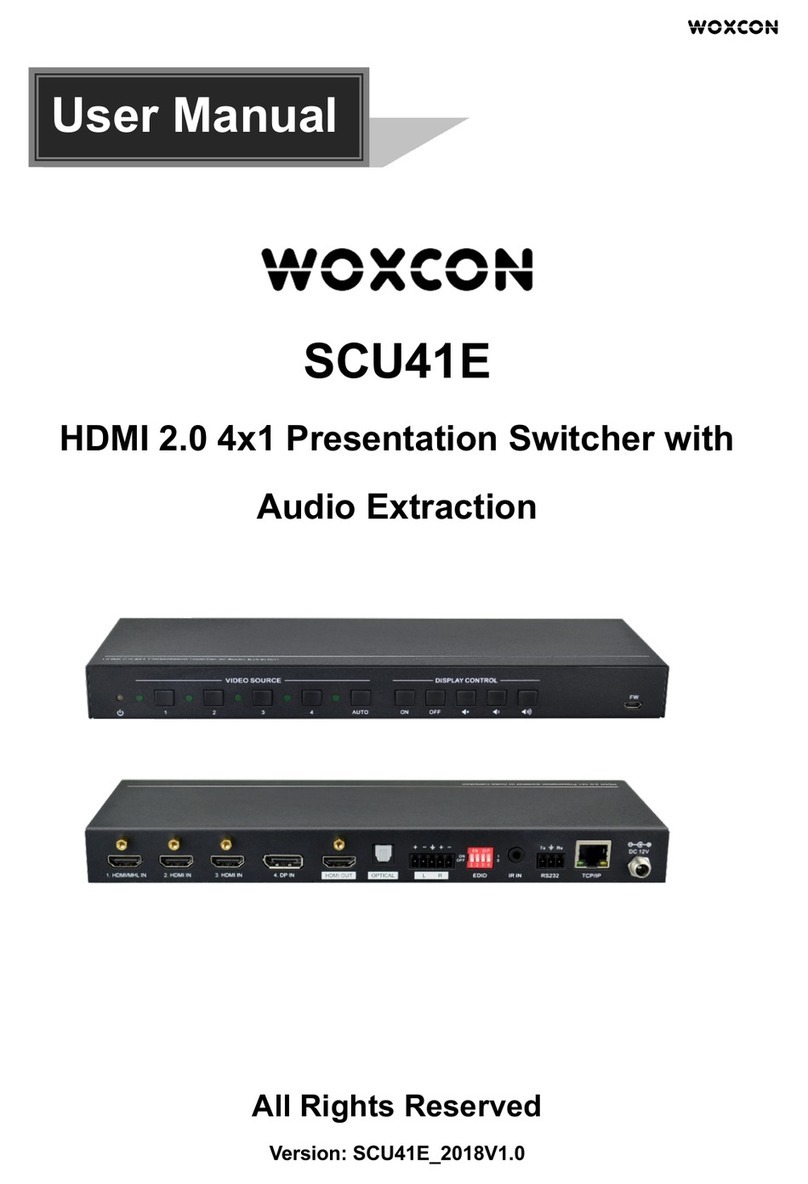
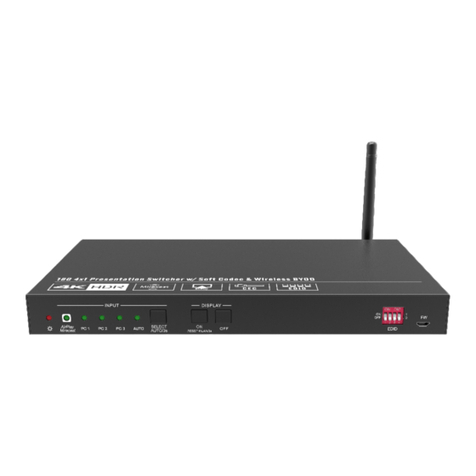
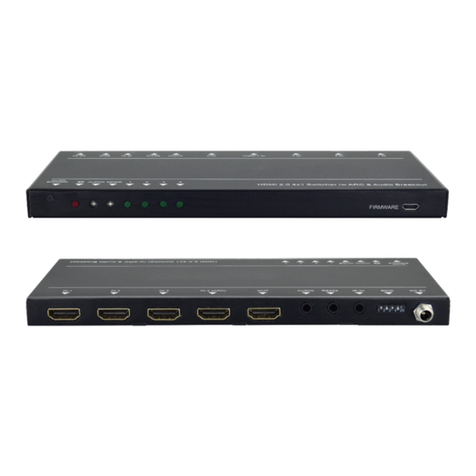
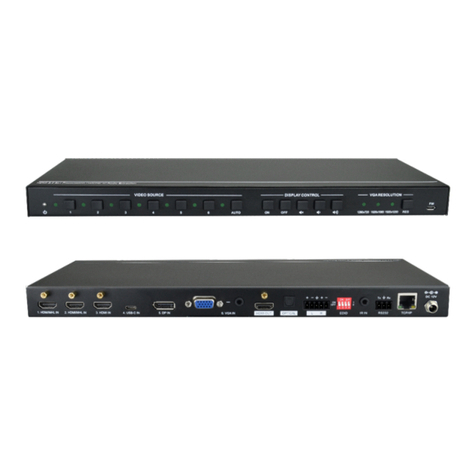
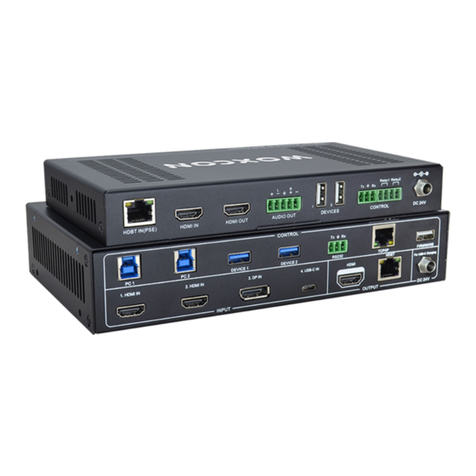
Woxcon SCU41E-VC User manual

SCU41E-VC
HDMI V2.0 4x1 Presentation Switcher with
Audio Extraction
All Rights Reserved
Version: SCU41E-VC_2021V1.0
User Manual

HDMI V2.0 4x1 Presentation Switcher with Audio Extraction
Table of Contents
1. Product Introduction .................................................................................................... 1
1.1 Features ............................................................................................................. 1
1.2 Package List ....................................................................................................... 1
2. Specification ................................................................................................................ 2
3. Panel Description ........................................................................................................ 4
3.1 Front Panel ......................................................................................................... 4
3.2 Rear Panel ......................................................................................................... 5
4. System Connection ..................................................................................................... 5
5. Button Control .............................................................................................................. 7
5.1 Manual Switching ............................................................................................... 7
5.2 Automatic Switching ........................................................................................... 7
5.3 Display Control ................................................................................................... 7
5.4 VGA Resolution Selection .................................................................................. 8
5.5 EDID Setting ....................................................................................................... 8
6. IR Remote Control ....................................................................................................... 9
7. RS232 Control ........................................................................................................... 10
7.1.1 Device Control ........................................................................................ 10
7.1.2 Source Switching ................................................................................... 11
7.1.3 VGA Resolution Selection ...................................................................... 12
7.1.4 EDID Management ................................................................................. 12
7.1.5 Audio Control .......................................................................................... 14
7.1.6 Display Control ....................................................................................... 14
7.1.7 CEC Control ........................................................................................... 15
7.1.8 Third-party Device Control ..................................................................... 15
8. Firmware Upgrade ..................................................................................................... 21
HDMI V2.0 4x1 Presentation Switcher with Audio Extraction
1
1. Product Introduction
Thanks for choosing the HDMI V2.0 4x1 Presentation Switcher. The switcher allows
selection of four different sources (one HDMI input, one USB-C input, one DisplayPort
input and one VGA input), and will switch the selected video to HDMI output. It supports
video resolution up to 4K@60Hz 4:4:4 8bit, 1080p, and 3D. In addition, there is the
smart built-in EDID setting can be selected by the 4-pin DIP switch on the rear panel.
The switcher supports stereo and multichannel audio on the HDMI inputs. In addition to
the audio embedded in the HDMI output stream, the audio is simultaneously de-
embedded to an optical digital audio output and a balanced analog audio output.
The switcher features multiple methods of control. When in the AUTO mode, the
switcher will automatically switch to the first detected source device. When the active
source is removed, the switcher will switch from input 1 to 4. The switcher can be
manually controlled by the front panel buttons, IR remote and RS232 commands. CEC
allows the display device can be controlled by the front panel buttons and RS232 CEC
commands.
1.1 Features
l Supports HDMI V2.0 and video resolution up to 4K@60Hz 4:4:4 8bit, 1080p 3D.
l 18Gbps high bandwidth and supports HDR 10.
l HDCP 2.3 compliant.
l Supports automatic switching.
l CEC control for display volume and ON/OFF.
l Controllable via RS232 and IR.
l VGA resolution is selectable on the front panel.
l Optical and balanced analog audio for audio de-embedding.
l Smart EDID management for various application and customized setting.
1.2 Package List
l 1x SCU41E-VC Switcher
l 1x Power Adapter (12V DC, 2A)
l 2x Mounting Ears with 4 Screws
l 4x Plastic Cushions
l 1x IR Receiver
l 1x IR Remote
l 1x 3-pin Terminal Block
l 1x 5-pin Terminal Block
l 1x RS232 Cable (3-pin to DB9)
l 1x User Manual
Note: Please contact your distributor immediately if any damage or defect in the
components is found.

HDMI V2.0 4x1 Presentation Switcher with Audio Extraction
2
2. Specification
Video Input
Input
(1) HDMI IN, (1) USB-C IN, (1) DP IN, (1) VGA IN
Input Connector
(4) Type-A female HDMI, (1) Type-C USB, (1) DisplayPort,
(1) Female VGA (15-pin)
HDMI Input Resolution
Up to 4K@60Hz 4:4:4 8bit, HDR10
USB-C Input Resolution
Up to 4K@60Hz 4:4:4
DP Input Resolution
Up to 4K@60Hz 4:4:4
VGA Input Resolution
Up to 1920x1200@50/60Hz
Video Output
Output
(1) HDMI
Output Connector
(1) Type-A female HDMI
HDMI Output Resolution
Up to 4K@60Hz 4:4:4 8bit, HDR10
VGA Scale Resolution
1024x768@60Hz, 1280x720@50Hz, 1280x720@60Hz,
1360x768@60Hz, 1600x1200@60Hz, 1920x1080@50Hz,
1920x1080@60Hz (Default), 1920x1200@60Hz
Audio
Audio Output
(1) OPTICAL, (1) Stereo balanced L/R
Audio Output Connector
(1) Toslink connector, (1) 5-pin terminal block
HDMI Audio Format
LPCM 7.1 audio, Dolby Atmos®, Dolby® TrueHD, Dolby Digital®
Plus, DTS:X™, and DTS-HD® Master Audio™ pass-through.
DP Audio Format
8 channels LPCM, up to 24bit 192Khz, AC3, DTS
Balanced analog audio Format
PCM
Optical Digital Audio Format
PCM, Dolby Digital, DTS, DTS-HD
Frequency Response
20Hz to 20kHz, ±1dB
Max Output Level
2.0Vrms ± 0.5dB. 2V = 16dB headroom above -10dBV (316mV)
nominal consumer line level signal
THD+N
<0.05% (-80dB), 20Hz ~ 20KHz bandwidth, 1kHz sine at 0dBFS
level (or max level)
SNR
>80dB, 20Hz ~ 20kHz bandwidth
Crosstalk Isolation
>70dB, 10kHz sine at 0dBFS level (or max level before clipping)
L-R Level Deviation
< 0.3dB, 1kHz sine at 0dBFS level (or max level before clipping)
Frequency Response
Deviation
<± 0.1dB 20Hz ~ 20KHz
Output Load Capability
1KΩ and higher (supports 10x paralleled 10KΩ loads)
Stereo Channel Separation
>70dB@1kHz
Control Part

HDMI V2.0 4x1 Presentation Switcher with Audio Extraction
3
Control
(1) FW, (1) EDID, (1) IR IN, (1) RS232
Control Connector
(1) Micro USB, (1) 4-pin DIP switch, (1) 3.5mm jack,
(1) 3-pin terminal block
General
HDMI Version
2.0
HDCP Version
2.3
DP Version
1.2
CEC
Supported
HPD
Supported
Bandwidth
18Gbps
HDMI V2.0 Cable Length
4K@60Hz 4:4:4 ≤ 5m,
4K@60Hz 4:2:0 ≤ 10m,
1080p ≤ 15m
Operation Temperature
-5 to +55℃ (+23° to +131°F)
Storage Temperature
-25 to +70℃ (-13° to +158°F)
Relative Humidity
10% to 90%, Non-condensing
External Power Supply
Input: AC 100~240V, 50/60Hz, Output: 12V DC 2A
Power Consumption
8W (Max)
Dimension (W*H*D)
300mm x 26mm x 115mm
Net Weight
855g

HDMI V2.0 4x1 Presentation Switcher with Audio Extraction
3. Panel Description
3.1 Front Panel
① Power LED: Illuminates red when the device is in standby, or illuminates green
when the device is power on.
② VIDEO SOURCE:
l Press 1~4 button to select input source respectively, and its corresponding LED
illuminates green.
l Press and hold the AUTO button at least three seconds to enable automatic
switching mode, and its LED illuminates green.
③ DISPLAY CONTROL:
l Press ON to turn on the display device.
l Press OFF to turn off the display device.
l Press to mute/unmute audio of display device.
l Press to decrease the audio volume gradually, or press and hold it to
decrease the audio volume constantly.
l Press to increase the audio volume gradually, or press and hold it to
increase the audio volume constantly.
④ VGA RESOLUTION:
l When the VGA input is selected, press RES button repeatedly can set the
output resolution to 1280x720, 1920x1080 or 1920x1200.
l One of three LEDs illuminates green to indicate which output resolution is
selected.
⑤ FW: Micro-USB port for firmware upgrade.
FW
VI DE O SOU RC E DISPLAY CONTROL
ON OFF1 2 34AUTO RES
1920x10801280x720 1920x1200
VG A RES OL UTI ON
12345

HDMI V2.0 4x1 Presentation Switcher with Audio Extraction
5
3.2 Rear Panel
① 1. HDMI IN: Connects to HDMI video source.
② 2. USB-C IN: Connects to the video source with SlimPort output, e.g. Macbook.
③ 3. DP IN: Connects to DisplayPort video source.
④ 4. VGA IN: Connects to VGA video source.
⑤ VGA Audio IN: Connects to audio source to be embedded in VGA video.
⑥ HDMI OUT: Connects to HDMI display device.
⑦ OPTICAL: Connects to audio playback device.
⑧ L/R (5-pin balanced audio): Connects to audio playback device.
⑨ EDID: 4-pin DIP switch for EDID setting.
⑩ IR IN: Connects to IR receiver to control the switcher by IR remote.
⑪ RS232: Connects to RS232 control device (e.g. PC) to control the switcher by
RS232 commands.
⑫ DC 12V: DC barrel port for power adapter connection.
4. System Connection
The following diagram illustrates typical input and output connections that can be
utilized with this switcher:
1. HDMI IN 4. VGA IN2. USB-C IN HDMI OUT OPTICAL
Tx Rx
RS 23 2 IR IN EDID
ON
OFF
1
0
L R
1 2 3 4
3. DP IN
123456789

HDMI V2.0 4x1 Presentation Switcher with Audio Extraction
6

HDMI V2.0 4x1 Presentation Switcher with Audio Extraction
7
5. Button Control
5.1 Manual Switching
When the switcher is in the manual switching mode, the Auto Mode LED goes out. If
need to change the input source, please directly press the 1, 2, 3 or 4 button, and the
corresponding LED illuminates green immediately.
5.2 Automatic Switching
Press and hold the AUTO button at least three seconds to enable automatic switching,
and the Auto mode LED will light.
When in the Auto mode, the switcher will switch according to the following rules:
l The switcher will switch to the first available active input starting at input 1 to 4.
l New input: The switcher will automatically select the new input once detecting a
new input.
l Reboot: If power is restored to the switcher, it will automatically reconnect the input
before powered off.
l Source removed: When an active source is removed, the switcher will switch to the
first available active input starting at HDMI input 1.
l Press the Video Source button (1, 2, 3 or 4) can directly change the input source. If
the corresponding source device is active, it will be switched as input source;
otherwise, the switcher will switch to the first available active input starting at HDMI
input 1.
l Press and hold the AUTO button at least three seconds again can exit AUTO mode,
but the input source will remain the current setting.
5.3 Display Control
The switcher supports CEC, and the DISPLAY CONTROL buttons on the front panel
are designed for Display On/Off and volume adjustment.
l ON: Display On.
l OFF: Display Off.
l : Mute/unmute display device.
l : Volume down display device.
l : Volume up display device.

HDMI V2.0 4x1 Presentation Switcher with Audio Extraction
8
5.4 VGA Resolution Selection
The RES button on the front panel is designed for VGA resolution selection.
When switch to VGA input, press RES button repeatedly to set the output resolution to
1280x720, 1920x1080 or 1920x1200, and its corresponding LED will illuminate green.
5.5 EDID Setting
The Extended Display Identification Data (EDID) is used for the source device to match
its video resolution with the connected display. The 4-pin DIP switch on the rear panel
can be used to set the EDID to a built-in fixed value. Use the following table to
determine the setting for the 4-pin DIP switch for specific video resolution and audio
capabilities.
The switch represents “0” when in the lower (OFF) position, and it represents “1” while
putting the switch in the upper (ON) position.
Switch Status
EDID
0000
EDID pass-through (Default)
0001
1920x1080@60Hz RGB 4:4:4 8bit Stereo Audio
0010
1920x1080@60Hz RGB 4:4:4 8bit High Definition Audio
0011
1920x1080@60Hz RGB 4:4:4 12bit Stereo Audio
0100
1920x1080@60Hz RGB 4:4:4 12bit High Definition Audio
0101
3840x2160@60Hz RGB 4:2:0 12bit Stereo Audio
0110
3840x2160@60Hz RGB 4:2:0 12bit High Definition Audio
0111
3840x2160p@60Hz 4:4:4 HDR 12bit Stereo Audio
1000
3840x2160p@60Hz 4:4:4 HDR 12bit High Definition Audio
1001
1280x800@60Hz RGB 4:4:4 8bit Stereo Audio
1010
1920x1200@60Hz RGB 4:4:4 8bit Stereo Audio
1011
User-defined EDID 1.
1100
User-defined EDID 2.
1101
User-defined EDID 3.
1110
User-defined EDID 4.
1111
Enable RS232 EDID management.
Note:
l Stereo Audio: LPCM 2Ch.
l High Definition Audio: LPCM 8Ch, AC-3 6Ch, DTS 5.1, Dolby Digital 5.1.
l The four user-defined EDID can be customized by RS232 command, please refer to
7.2.4 EDID management for more details.

HDMI V2.0 4x1 Presentation Switcher with Audio Extraction
9
6. IR Remote Control
Connect the IR IN port to an IR receiver, the switcher can be controlled by the below IR
remote.
① Enter or exit standby mode.
② Video input selection buttons (1~4) and
AUTO mode button.
③ Source device control buttons.
Page Up
Page Down
Rewind
Fast
Forward
Pause/Play
Stop
Exit
Enter
Up
Down
Left
Right
Power On/Off
④ VGA resolution selection buttons.
⑤ Display device control buttons.
Power
On/Off
Mute/Unmute
Volume
Down
Volume Up
OK
56
HDMI 2.0 Presentation Swither
DISPLAY
SOURCE
Manual/Auto
VGA RESOLUTION
1280x720 1360x768 1920x1080 1920x1200
INPUTS
Manual/Auto
1
2
3
4
5

HDMI V2.0 4x1 Presentation Switcher with Audio Extraction
10
7. RS232 Control
Connect the RS232 port to control device (e.g. PC) with RS232 cable. The switcher can
be controlled by sending the RS232 commands.
The below command lists are used to control the switcher. The RS232 control software
(e.g. docklight) needs to be installed on the control PC to send RS232 commands.
Communication protocol:
RS232 Communication Protocol
Baud rate: 9600
Data bit: 8
Stop bit: 1
Parity bit: none
Note:
l Please remember to end the commands with the ending symbols “.” or “;”.
l Please type the command carefully due to case-sensitive.
7.1.1 Device Control
Command
Function
Command Example and
Feedback
POWON.
Power on system.
POWER ON!
POWOFF.
System standby.
POWER OFF!
RST.
Restore to factory default.
FACTORY DEFAULT!
SCU41E-VC
VERSION V1.0.0
POWER ON!
FRONT PANEL UNLOCK!
HDMI OUT SWITCH TO AUTO
MODE!
HDMI OUT SWITCH TO 1!
DIP0000!
DIP EDID0000!
SPDIF OUT ON!
IIS OUT ON!
AUDIO MUTE OFF!
AUDIO VOL:50!
AUDIO OUT ON!
UNLOCK.
Unlock front panel buttons.
FRONT PANEL UNLOCK!

HDMI V2.0 4x1 Presentation Switcher with Audio Extraction
11
Command
Function
Command Example and
Feedback
LOCK.
Lock front panel buttons.
FRONT PANEL LOCKED!
STA.
Report system status.
RS232 QUERY STATUS!
SCU41E-VC
VERSION V1.0.0
POWER ON!
FRONT PANEL UNLOCK!
HDMI OUT SWITCH TO AUTO
MODE!
HDMI OUT SWITCH TO 2!
DIP0000!
DIP EDID0000!
SPDIF OUT ON!
IIS OUT ON!
AUDIO MUTE ON!
AUDIO VOL:00!
HELP.
Get the command list.
RS232 COMMANDS LIST:
1 - POWON
2 - POWOFF
3 - RST
4 – UNLOCK
…
7.1.2 Source Switching
Command
Function
Command Example and
Feedback
HDMI1.
Switch to HDMI input.
HDMI OUT SWITCH TO 1!
HDMI2.
Switch to USB-C input.
HDMI OUT SWITCH TO 2!
HDMI3.
Switch to DP input.
HDMI OUT SWITCH TO 3!
HDMI4.
Switch to VGA input.
HDMI OUT SWITCH TO 4!
HDMIA.
Enable auto switching mode.
HDMI OUT SWITCH TO AUTO
MODE!
HDMIM.
Enable manual switching mode.
HDMI OUT SWITCH TO MANUAL
MODE!

HDMI V2.0 4x1 Presentation Switcher with Audio Extraction
12
7.1.3 VGA Resolution Selection
When VGA source is selected, the below commands can be used to set the VGA
output resolution.
Command
Function
Command Example and
Feedback
VGARES1.
Set the VGA output resolution to
1024x768@60Hz.
SET RESOLUTION OF VGA
OUTPUT TO 1024x768@60Hz!
VGARES2.
Set the VGA output resolution to
1280x720@50Hz.
SET RESOLUTION OF VGA
OUTPUT TO 1280x720@50Hz!
VGARES3.
Set the VGA output resolution to
1280x720@60Hz.
SET RESOLUTION OF VGA
OUTPUT TO 1280x720@60Hz!
VGARES4.
Set the VGA output resolution to
1360x768@60Hz.
SET RESOLUTION OF VGA
OUTPUT TO 1360x768@60Hz!
VGARES5.
Set the VGA output resolution to
1600x1200@60Hz.
SET RESOLUTION OF VGA
OUTPUT TO 1600x1200@60Hz!
VGARES6.
Set the VGA output resolution to
1920x1080@50Hz.
SET RESOLUTION OF VGA
OUTPUT TO 1920x1080@50Hz!
VGARES7.
Set the VGA output resolution to
1920x1080@60Hz.
SET RESOLUTION OF VGA
OUTPUT TO 1920x1080@60Hz!
VGARES8.
Set the VGA output resolution to
1920x1200@60Hz.
SET RESOLUTION OF VGA
OUTPUT TO 1920x1200@60Hz!
VGAUPGR.
Upgrade the firmware Of VGA input port
chip
UPGRADING FIRMWARE OF VGA
CHIP!
VGAAUTO.
Automatically adjust VGA input’s picture.
VGAAUTO.
Set VGA AUTO ADJUST!
7.1.4 EDID Management
Command
Function
Command Example and
Feedback
EDIDRxxxx.
Read the preset EDID. The “xxxx”
represents the 4-pin DIP switch status. It
maybe from “0000” to “1110”.
EDIDR0000.
EDID HEX STRING OF '0000':
EDIDUSExxxx.
Invoke the preset EDID. The “xxxx”
represents the 4-pin DIP switch status. It
maybe from “0000” to “1110”.
EDIDUSE0000.
DIP0000!
PLEASE SET DIP TO 1111 FIRST!
[ EDID_RS232_MODE! ]

HDMI V2.0 4x1 Presentation Switcher with Audio Extraction
13
l User-defined EDID
There are four EDID values can be customized by sending the below command.
Note: When send the below commands to configure EDID, the 4-pin EDID DIP switch
on the rear panel must be in the “1111” status.
Command
Function & Operation
EDIDW[xxxx].
User-defined EDID. [xxxx] = 1011, 1100, 1101 or 1110.
Operation:
Step 1: Prepare the EDID file (.bin).
Step 2: Set the 4-pin DIP switch to “1111” status.
Step 3: Send the command “EDIDW1101.”, and the feedback is “PLEASE SEND
THE EDID FILE!”.
Step 4: Send the EDID file (.bin). If successfully upload, the feedback is:
“RECEIVED THE FILE, LENGTH=134!
EDID1101 UPDATE SUCCESSFULLY!”

HDMI V2.0 4x1 Presentation Switcher with Audio Extraction
14
7.1.5 Audio Control
Command
Function
Command Example and
Feedback
SPDIFON.
Turn on the OPTICAL audio output.
SPDIF OUT ON!
SPDIFOFF.
Turn off the OPTICAL audio output.
SPDIF OUT OFF!
IISON.
Turn on the analog balanced L/R audio
output.
IIS OUT ON!
IISOFF.
Turn off the analog balanced L/R audio
output.
IIS OUT OFF!
SETAUDIOVOL
<xx>.
Set the volume level of analog
balanced L/R audio to xx. xx=0~60.
SETAUDIOVOL <0>.
SETAUDIOVOL <60>.
AUDIO VOL:0!
AUDIO VOL:60!
AUDIOON
Enable HDMI output’s audio
AUDIOON
AUDIO HDMI OUT ON!
AUDIOOFF
Disable HDMI output’s audio
AUDIOOFF
AUDIO HDMI OUT OFF!
7.1.6 Display Control
Command
Function
Command Example and
Feedback
TVON.
Send CEC “DISPLAY ON” command to
power on the display device (e.g. TV).
CEC TV POWER ON!
TVOFF.
Send CEC “DISPLAY OFF” command to
power off the display device (e.g. TV).
CEC TV POWER OFF!
TVVOL+.
Send CEC “VOLUME UP” command to
volume up the display device (e.g. TV).
CEC TV VOLUME INCREASE!
TVVOL-.
Send CEC “VOLUME DOWN” command
to volume down the display device (e.g.
TV).
CEC TV VOLUME DECREASE!
TVMUTE.
Send CEC “VOLUME MUTE” command
to mute/unmute the display device (e.g.
TV).
CEC TV VOLUME
MUTE/UNMUTE!

HDMI V2.0 4x1 Presentation Switcher with Audio Extraction
15
7.1.7 CEC Control
If the input sources and display support CEC, they can be controlled by sending the
below command to replace IR remote.
Command
Function
Command Example and
Feedback
CECxx
<yy:yy:yy>.
Send CEC command “yy yy yy” to control
the source device or the display device.
l The “xx” represents the port number.
00 – HDMI IN
01 – USB-C
02 – DP IN
03 – HDMI OUT
l The “<yy:yy:yy>” represents the
specific control command of source
device or display device.
CEC00 <40:44:41>.
Send CEC command “40:44:41” to
control the source device which is
connected to the 1-HDMI IN port.
7.1.8 Third-party Device Control
The switcher supports RS232 pass-through control, the third-party device can be
controlled by RS232 command, and the command format as shown below:
Command
Function
Command Example and
Feedback
/+[B]:xxx.
Send ASCII string to third-party device via
RS232 port.
xxx: ASCII string.
The “B” represents the baud rate of third-
party device.
B
Baudrate
B
Baudrate
1
2400
2
4800
3
9600
4
19200
5
38400
6
57600
7
115200
/+3:abc123
Send the ASCII command “abc123”
to the third-party whose baud rate
is 9600.
/-[B]:xx xx xx.
/-3:1A 2A 3A 4A

HDMI V2.0 4x1 Presentation Switcher with Audio Extraction
16
Command
Function
Command Example and
Feedback
Send HEX string to third-party device via
RS232 port.
xx xx xx: HEX string.
The “B” represents the baud rate of third-
party device.
B
Baudrate
B
Baudrate
1
2400
2
4800
3
9600
4
19200
5
38400
6
57600
7
115200
Send the HEX command “1A 2A 3A
4A” to the third-party whose baud
rate is 9600.
CMDON/+[B]:xx
x.
Set the ASCII string of “DISPLAY ON” to
be saved. It will be automatically sent to
display device when the “DISPLAY ON”
button have been pressed.
xxx: ASCII string.
The “B” represents the baud rate of third-
party device.
B
Baudrate
B
Baudrate
1
2400
2
4800
3
9600
4
19200
5
38400
6
57600
7
115200
CMDON/+3:abc123
CMDON/-[B]:xx
xx xx.
Set the HEX string of “DISPLAY ON” to
be saved. It will be automatically sent to
display device when the “DISPLAY ON”
button have been pressed.
xx xx xx: HEX string.
The “B” represents the baud rate of third-
party device.
B
Baudrate
B
Baudrate
1
2400
2
4800
3
9600
4
19200
5
38400
6
57600
7
115200
CMDON/-3:1A 2A 3A 4A

HDMI V2.0 4x1 Presentation Switcher with Audio Extraction
17
Command
Function
Command Example and
Feedback
CMDOFF/+[B]:x
xx.
Set the ASCII string of “DISPLAY OFF” to
be saved. It will be automatically sent to
display device when the “DISPLAY OFF”
button have been pressed.
xxx: ASCII string.
The “B” represents the baud rate of third-
party device.
B
Baudrate
B
Baudrate
1
2400
2
4800
3
9600
4
19200
5
38400
6
57600
7
115200
CMDOFF/+3:abc123
CMDOFF/-
[B]:xx xx xx.
Set the HEX string of “DISPLAY OFF” to
be saved. It will be automatically sent to
display device when the “DISPLAY OFF”
button have been pressed.
xx xx xx: HEX string.
The “B” represents the baud rate of third-
party device.
B
Baudrate
B
Baudrate
1
2400
2
4800
3
9600
4
19200
5
38400
6
57600
7
115200
CMDOFF/-3:1A 2A 3A 4A

HDMI V2.0 4x1 Presentation Switcher with Audio Extraction
18
Command
Function
Command Example and
Feedback
CMDVOLUP/+[
B]:xxx.
Set the ASCII string of “VOLUME UP” to
be saved. It will be automatically sent to
display device when the “VOLUME UP”
button have been pressed.
xxx: ASCII string.
The “B” represents the baud rate of third-
party device.
B
Baudrate
B
Baudrate
1
2400
2
4800
3
9600
4
19200
5
38400
6
57600
7
115200
CMDVOLUP/+3:abc123
CMDVOLUP/-
[B]:xx xx xx.
Set the HEX string of “VOLUME UP” to be
saved. It will be automatically sent to
display device when the “VOLUME UP”
button have been pressed.
xx xx xx: HEX string.
The “B” represents the baud rate of third-
party device.
B
Baudrate
B
Baudrate
1
2400
2
4800
3
9600
4
19200
5
38400
6
57600
7
115200
CMDVOLUP/-3:1A 2A 3A 4A
Table of contents
Other Woxcon Switch manuals

Woxcon
Woxcon SCU41-BYOD User manual

Woxcon
Woxcon SCU61E User manual

Woxcon
Woxcon SE-891MV User manual

Woxcon
Woxcon SCU42T-CODEC User manual

Woxcon
Woxcon SM62T User manual

Woxcon
Woxcon WUH4ARC-H2 User manual

Woxcon
Woxcon SCU41T-TB User manual

Woxcon
Woxcon SCU41-MV User manual

Woxcon
Woxcon SCU21E-CODEC User manual

Woxcon
Woxcon SCU42 User manual