Xantrex 808-1888 User manual

Xantrex Gateway Quickstart Guide
Product Number: 808-1888
Owner's Guide
DANGER
RISK OF FIRE, ELECTRIC SHOCK, EXPLOSION, AND ARC FLASH
This Quickstart Guide is in addition to, and incorporates by reference, the relevant product manuals for
the Xantrex Gateway. Review this Quickstart Guide and then you must read the relevant product manuals
available online. Unless specified, information on safety, specifications, installation, and operation is as
shown in the primary documentation available for the product online. Ensure you are familiar with that
information before proceeding.
Failure to follow these instructions will result in death or serious injury.
Contact Information
Telephone: +1-800-670-0707 / +1-408-987-6030
Email: customerservice@xantrex.com
Web: https://xantrex.com/support/get-customer-support/
Product Safety Information
NOTICE
RISK OF ELECTRIC SHOCK AND EQUIPMENT DAMAGE
nConnect communication circuits only to Safety Power Source Class 1 (PS1) circuits. This
device connects to a 9-65VZbattery source through the two-pin battery terminal (see
Connection Terminals on page 1).
nDo not expose the Xantrex Gateway to rain, snow, spray, or bilge water. For indoor use only.
nDo not disassemble. No user serviceable parts inside.
nDo not install and/or operate in compartments containing flammable materials or in locations
that require ignition-protected equipment.
Failure to follow these instructions may result in injury or equipment damage.

EMIInformation
This device complies with part 15 of the FCC Rules and contains a licence-exempt transceiver that
complies with ISED Canada’s licence-exempt RSS Rules. Operation is subject to the following two
conditions:
(1) This device may not cause harmful interference, and
(2) this device must accept any interference received, including interference that may cause undesired
operation.
These limits are designed to provide reasonable protection against harmful interference in a residential
environment. This equipment generates, uses, and can radiate radio frequency energy and, if not installed
and used in accordance with the instructions, may cause harmful interference to radio communications.
However, there is no guarantee that interference will not occur in a particular installation. If this equipment
does cause harmful interference to radio or television reception, which can be determined by turning the
equipment off and on, the user is encouraged to try to correct the interference by one or more of the following
measures:
-Reorient or relocate the receiving antenna.
-Increase the separation between the equipment and receiver.
-Connect the equipment into an outlet on a circuit different from that to which the receiver is connected.
-Consult the dealer or an experienced radio/TV technician for help.
Contains:
FCC ID: 2ABCB-RPI4B
IC: 20953-RPI4B
cCAUTION
Unauthorized changes or modifications to the equipment could void the user’s authority to operate the
equipment.
cThis prototype device is currently undergoing testing in compliance with the CE Marking Radio
Equipment Directive for RF spectrum and RF safety as well as the EMC Directive for emissions and
immunity requirements. Regulatory approval pending.
Material List
BE
DF*
C
A
NOTE: If any of the items are missing, contact Xantrex or any
authorized Xantrex dealer for replacement.
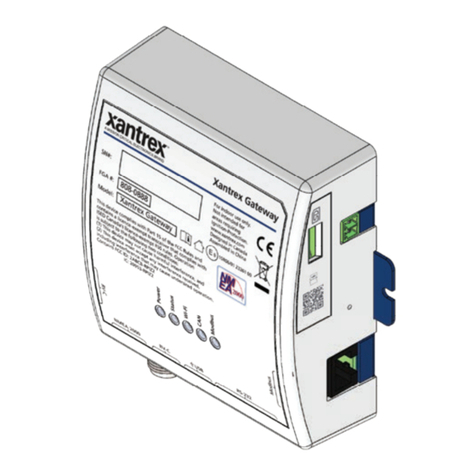
AXantrex Gateway
BmicroSD card reader
Cpower supply 2-pin connector with pigtail, 14–28AWG (0.2–1.5mm2)
DQuickstart guide
E2x mounting screws 6-20½" (or equivalent)
F* PN: 808-1889 Harness RV-C CAN 4-pin to RJ45 XGW (RV-C)
PN: 808-1890 Harness RJ45 to MPPT XGW (Modbus)
PN: 808-1891 Harness Micro-C to RJ45 XGW (NMEA2000)
PN: 808-1892 Harness 20-pin to RJ45 XGW (RV-C)

Getting started
Power up Xantrex Gateway.
9-65 VDC
1
Make sure the
provided micro SD
card is inserted in
the slot.
Power
-1-

2Choose the best way to connect to
the Xantrex Gateway device. You
have three options.
Connect using the optional
Gateway Touchscreen device
(page 3).
Connect through an
existing Wi-fi network (go to
page 4 first).
Connect through a Gateway
hotspot (go to page 4 first).
A.
B.
C.
-2-
A
B
C

Back of
Touchscreen
HDMI Micro-B
Connect through the Gateway Touchscreen
A
!
Connect the cables.
1
Follow the instructions on the
Touchscreen.
2
USB HDMI
-3-

1Download the XantrexApp and
install it on your smart phone.
Download the Xantrex App
-4-
2Proceed to one of the following:
Connect through an existing
Wi-fi network (page 5).
Connect through a Gateway
hotspot (page 10).
B.
C.
B
C

Connect to an existing Wi-fi network
1
Tap the Xantrex App then tap
your Xantrex Gateway device
from the list to initiate the pairing
with the device.
Xantrex-XGWxxxxxx
Gateway
SN: XGWxxxxxx
six-digit pairing code
from your unit’s serial label
B
-5-

2Tap
Xantrex Gateway Tap
Xantrex Gateway
Wi-Fi Network
WI-FI NETWORK
Wi-Fi Network Password
Tap
Tap
ShawOpen
VerizonHotspot
MyOwnWiFi
PublicAccess
ATTHotspot
D O N E
Select
Tap
six-digit pairing code
from your unit’s serial label
-6-

MyOwnWifi
3Tap
WI-FI NETWORK
Wi-Fi Network Password
MyOwnWiFi
*******
Apply Cancel
Tap
Tap
-7-
MyOwnWifiTo connect to:

Change the Country or Region,
if applicable.
Change the default SSID and
password (recommended).
4
Go back to the previous screen.
5
XGWxxxxxx_newname
new_password
Tap
-8-

-9-
6Tap
MyOwnWifi Tap
MyOwnWifiTo connect to:

IfyouhavechangedyourSSIDand
password from a previous step,
such as in [B], then go to your
smart phone’s Wi-Fi settings and
connect to that network using the
new SSID and password.
B
Connect to a Gateway hotspot
1Go to your smart phone’s Wi-Fi
settings and connect to:
SSID XGWxxxxxx and
password 12345678.
2Tap the XantrexApp.
C
-10-

Tap
3
-11-
Tap
Gateway hotspotTo connect to:
If you have changed your SSID
and password from a previous
step, such as in [B], then you
may skip the next and final step.
B

XGWxxxxxx_newname
new_password
Tap
Change the Country or Region,
if applicable.
Change the default SSID and
password (recommended).
4
-12-

-13-
IMPORTANT
In order to connect the
Gatewaytoeachofthe
various devices, you
MUST consult the
Owner’s Guide for
proper instructions.
Owner’s Guide

-14-
Typical Vehicle Comm unication Network
For more information on
Connection Terminals, Port
Pin Assignments, and RV-C
Freedom XC PRO
Gateway
For information purposes only. Network configurations may vary
according to your specific application.
Harness 20-Pin to RJ45 XGW (RV-C)
(PN: 808-1892)

-15-
Typical Vehicle Comm unication Network
Xantrex Battery
network hub
MPPT SOLAR Charge Controller
9-65VDC power source
network terminator
custom harness
terminator settings, see the
Owner’s Guide.
Harness RV-C CAN 4-Pin to RJ45 XGW (RV-C)
(PN: 808-1889)
Harness RJ45 to MPPT XGW (Modbus)
(PN: 808-1890)
Harness Micro-C to RJ45 XGW (NMEA2000)
(PN: 808-1891)

End of Life Disposal
The Xantrex Gateway is designed with environmental awareness and sustainability in mind. At the end of
its useful life, the Xantrex Gateway can be decommissioned and disassembled. Components which can
be recycled must be recycled and those that cannot be recycled must be disposed of according to local,
regional, or national environmental regulations.
Many of the electrical components used in the Xantrex Gateway are made of recyclable material like
steel, copper, aluminum, and other alloys. These materials can be auctioned off to traditional scrap metal
recycling companies who resell reusable scraps.
Electronic equipment such as the circuit boards, connectors, and fuses can be broken down and recycled
by specialized recycling companies whose goal is to avoid having these components end up in the landfill.
For more information on disposal, contact Xantrex.
Copyright © 2023. Xantrex All rights reserved. 975-1178-01-01 Rev B (DRAFT)
Table of contents
Other Xantrex Gateway manuals