XFactory X - 6 SQUARED User manual

K021 Instructions v1.0
Bag I
Page
62
BAG I
FINISH IT UP
INSTALL THE SERVO
I1) Consult the Set-Up sheet and Tuning Section to determine if your servo will be in
the forward or rear position. Remove the servo mount bag ASC 7336) from Bag
I. It includes two servo mounts and the necessary bolts. There are also some
spacers allowing fine adjustment of your servo position, though most Team
drivers only use them to space the servo forward if it hits the chassis when trying
to use the rear mounting holes.
I2) Install the servo mounts to your servo (servo not included) using the button head
screws and washers included in the servo mount bag. We’ve found this easiest
to do by threading the button head screws into the mounts slightly, sliding the
mounts on to the servo tabs, and then finger tighten the screws. The mounts go
under the mounting tabs; looking at the top of the servo, the mounts should face
down while the output shaft is on the left.

K021 Instructions v1.0
Bag I
Page
63
TEAM TIP: This is the easiest point at which to center your servo. The quickest way
to do this is to plug the servo into another car, and power it on briefly.
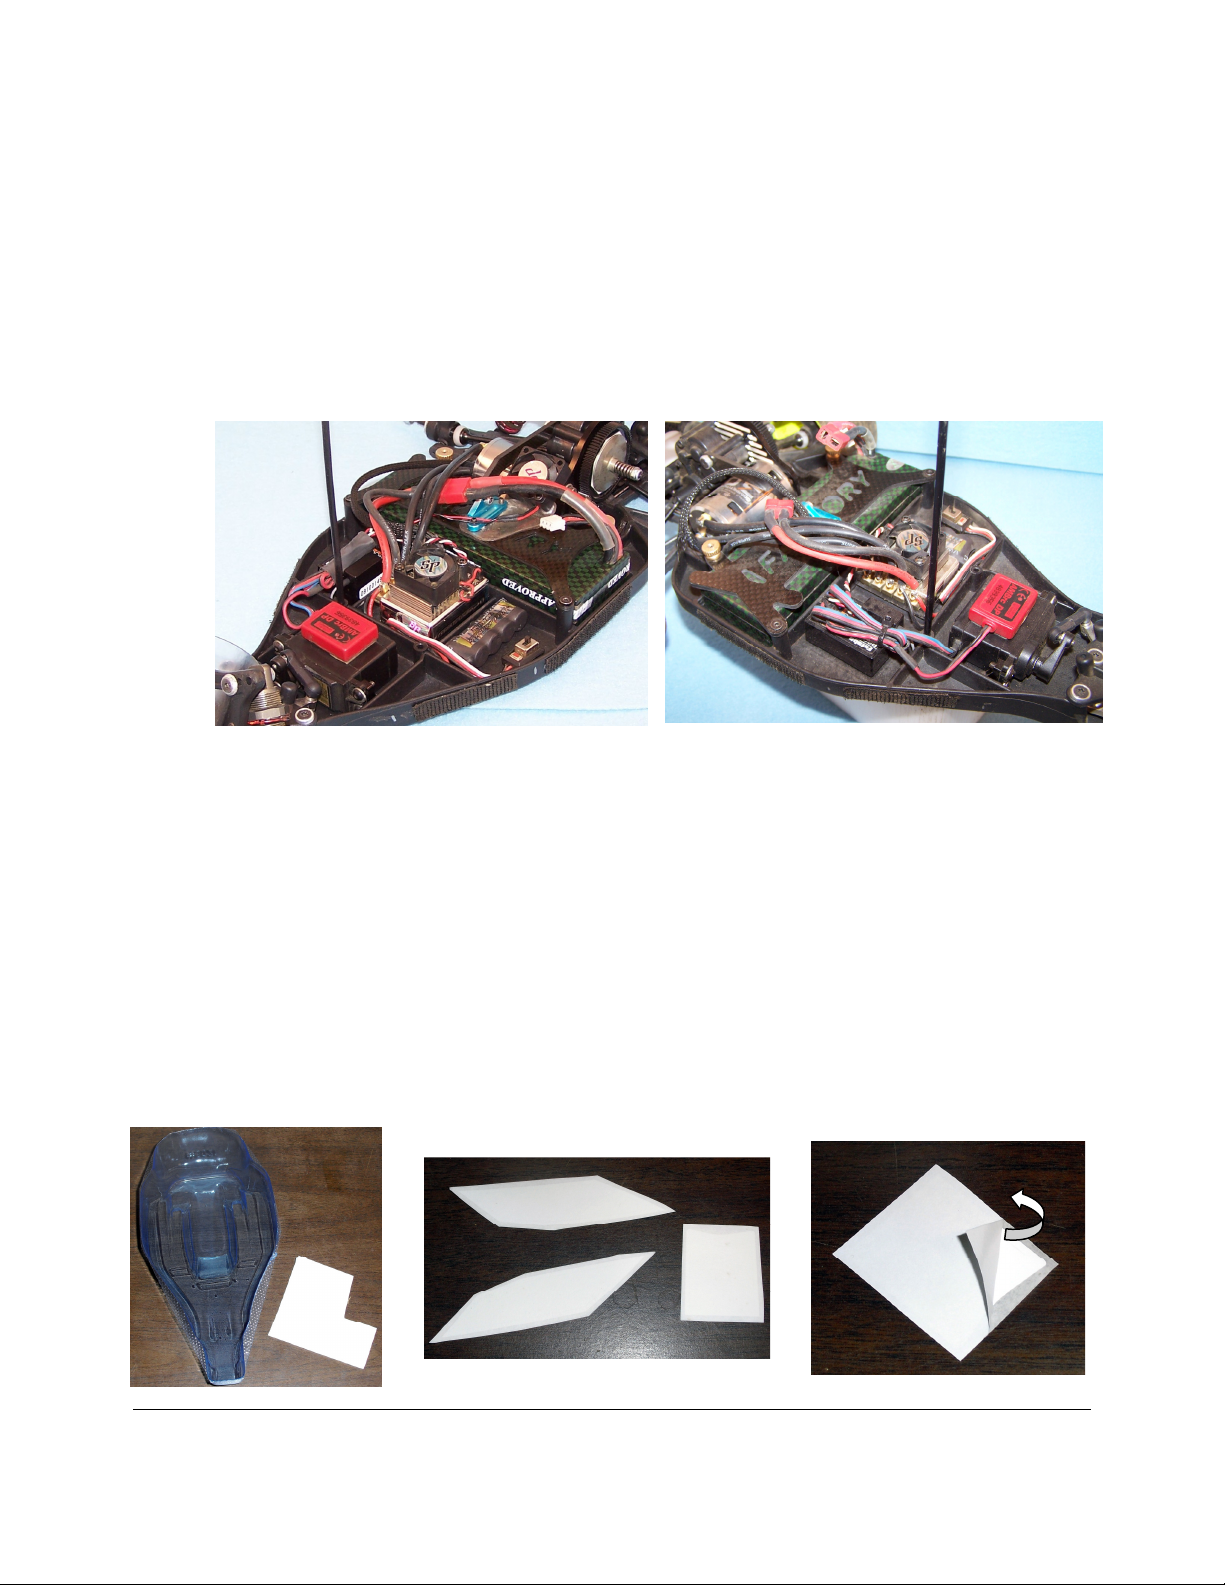
Alternatively, if you have the electronics you’ll be installing in your X – 6 Squared
handy, simply hook the battery, speed controller, receiver, and servo. Turn it on
long enough for the servo to power up and center itself (and who can resist
moving the transmitter just a little?). You’ll do the fine adjustments once
everything is installed in the car; this quick centering process gets the servo in
the ballpark.
I3) Remove the servo horn tree (ASC
9180); notice each horn has a letter on
it. Choose the horn appropriate for
your servo:
A – Airtronics/Sanwa
H – Hitec
J – JR and KO
F – Futaba
The only difference in the horns is the number of splines; if the horn seems
unusually hard to install on your servo try a different horn. With the servo
centered, put the horn on pointing straight up. (left) Carefully remove the horn
and move it one spline to the right, or clockwise. (center) Secure the horn with
the bolt included with your servo. (right)
I4) Find the 3/16” ball stud (6170) in the hardware bag for
installation in the servo horn. If you’re installing the
servo in the forward position, you’ll want to put the ball
stud in from the back, so it faces the servo (shown in
these pictures). If the servo will be in the rear position,
install the ball stud from the front of the servo horn.

K021 Instructions v1.0
Bag I
Page
64
I5) Setting the servo aside for a moment, it’s time to make the small drag link (ASC
9170) which connects the servo to the bellcrank system. Find the two small ball
cups and the threaded rod. We recommend pre-tapping the two ball cups with a
normal 4-40 screw to make installing the threaded rod easier, but don’t let the
gorilla over-do things.
I6) Using some pliers to hold on to the threaded rod, screw one of the ball cups
around half-way on. Screw the other small ball cup onto the other half of the
threaded rod, and tighten it down toward the other. You’ll want to orient the ball
cups so they are 1/6
th
of a rotation from parallel; that is, the flats of each ball cup
line up together, but the cups are one flat from being lined up. The overall length
of the drag link (outside to outside) should be just over one inch (25.4 mm).
17) This step is easier with the servo out: pop one
of the steering link ball cups on the left
bellcrank/servo saver inside the car. We show
the servo in the forward mount, so the drag link
is oriented with the other cup facing the front of
the car. If you’ll be using the rear servo mount
holes, the cup faces back.

K021 Instructions v1.0
Bag I
Page
65
I8) Using the two 5/16” flathead screws (ASC 7336), install the servo on its mounts
into the chassis. Once again, these photos show the forward servo mount. The
screws come up through the chassis and thread into the holes in the servo
mounts installed in step I2.
I9) Now carefully remove the servo, making sure not to move the servo mounts on
the servo. Tighten the mounts, then re-install in the car. Now pop the ball cup
on the servo horn ball cup.
ELECTRONICS
I10) Install your motor (not included) using the two 3 x 6mm screws (6602) and
washers (6080) included in Bag I. We’ve found it easiest to install the bottom
screw first. Leave the motor screws finger tight. Install the pinion gear (not
included) on the motor’s output shaft. Slide the motor toward the rear of the car
to mesh the pinion with the spur gear and tighten the motor screws. Take care
when setting the pinion/spur mesh; too loose and you risk damaging the spur
gear, and too tight will cause binding and excess heat in the motor. The gears
should be well engaged, but make sure you can rock the spur gear back and
forth slightly in the teeth of the pinion gear. (photos next page)

K021 Instructions v1.0
Bag I
Page
66
.
I11) Install the battery (not included) and X Factory CF battery strap (1223) using the
4-40 1” flat head screws (6028). With most LiPo batteries 4200 MAh and lower
the battery strap will ‘pop’ onto the posts in the chassis and the screws will
secure it. With extremely high-capacity packs, the battery strap may sit above
the posts – this is OK, the flat head screws will help locate the strap over the
battery and hold it securely. A few extra axle spacers (or the inner ball races
from some old wheel bearings) would work well to space up to the strap.
If you will use NiMh cells, you need part # XF 1224, a CF strap that fits on the
same posts as the LiPo battery strap, but extends forward to hold the two cells in
the forward bay. Make up your pack in a 4+2 configuration, with the four cells in
front of the motor and two up front.

K021 Instructions v1.0
Bag I
Page
67
I12) If you are using Lipo, install the ESC (not included) using double-sided tape in
the center of the chassis just ahead of the battery, and the receiver in one of the
side bays. With NiMh, the ESC and receiver will each go in one side bay. There
are two antenna mounts, so you can use the receiver on either side. A personal
transponder fits nicely on top of the servo, or in one of the side bays. The layout
pictured here is Paul Sinclair’s car, showing an SMC 4100 battery, Speed
Passion GT 2.0 Speedo, Competition 3.0 motor, a # DDP 023 Transmission
Brace, and a fan mount made out of some extra lexan.
THE BEAUTIFUL BODY
I13) We’ve included some pretty awesome 2-piece window masks to make it easier to
have a classy-looking paint job. They do take a little extra care to install. The
first time we tried it – just trying to peel off the mask and stick it to the body – we
messed it up. After several tries, we found this process best: First, clean the
inside of the body (8021) with warm water and a gentle detergent. Cut each of
the window mask pieces out by trimming close to the mask. No need be super-
close, like a decal, just remove the excess. Then, carefully peel the opaque,
white, stiffer backing off, leaving the window masks stuck on the more
translucent, low-tack backing tape.

K021 Instructions v1.0
Bag I
Page
68
I14) Apply the window masks to the inside of the body, still attached to their low-tack
backing tape. Line up the white masks with the window lines molded in the body.
Once lined up, firmly press the masks to the lexan: they’ll seem to turn from white
to blue once fully pressed on. In the left photo below the lower part of the mask
is fully pressed on (large arrow) and the top part of the mask has not been
pressed firmly (small arrow). Finally peel off the backing tape, leaving the
window masks on the inside of the body.
I15) After painting your dialed scheme, carefully peel off the outside surrounding edge
of the window masks. This will give a nice even border around the windows to
spray a quick color. Spray a backing color if you want, and once everything’s
finally dry peel off the main portion of each window. Remove the blue over-spray
film from the outside of the body, and carefully trim the body along its cut lines.
There are two lines along the bottom edges of the body; if you are running a
larger LiPo battery you’ll probably want to use the lower line, which raises the
body up some and helps clear the battery posts. Use the supplied Velcro from
Bag I on each side of the body and chassis to hold the body on the car.

K021 Instructions v1.0
Bag I
Page
69
I16) Cut out the wing; check the Tuning
Section to determine what the
various cut lines will do on the
track. Cut two holes a bit less than
1/4” (5 mm) diameter on either set
of dimple marks. The Tuning
Section and Set-Up sheet will tell
you which set of holes to use. Use
the two black nylon wing washers
(6311) and body clips (6310) to
attach the wing to the wing mounts.
I15) Install the wheels and tires (not included). The rear wheel nuts are on the axles;
the front wheel bearings (3/16” X 3/8” rubber sealed 6200) and 1/4” button head
screws (6041) should be the last parts from Bag I.
Here is the beautiful X – 6 Squared of Team driver Yuichi Ajishi-san. Dialed!
Now, go through Paul’s Final Set-Up & Prep section, then
completely confuse yourself in the Tuning Section, and
LET’S GO RACING!!!
Other manuals for X - 6 SQUARED
1
Table of contents
Other XFactory Motorized Toy Car manuals