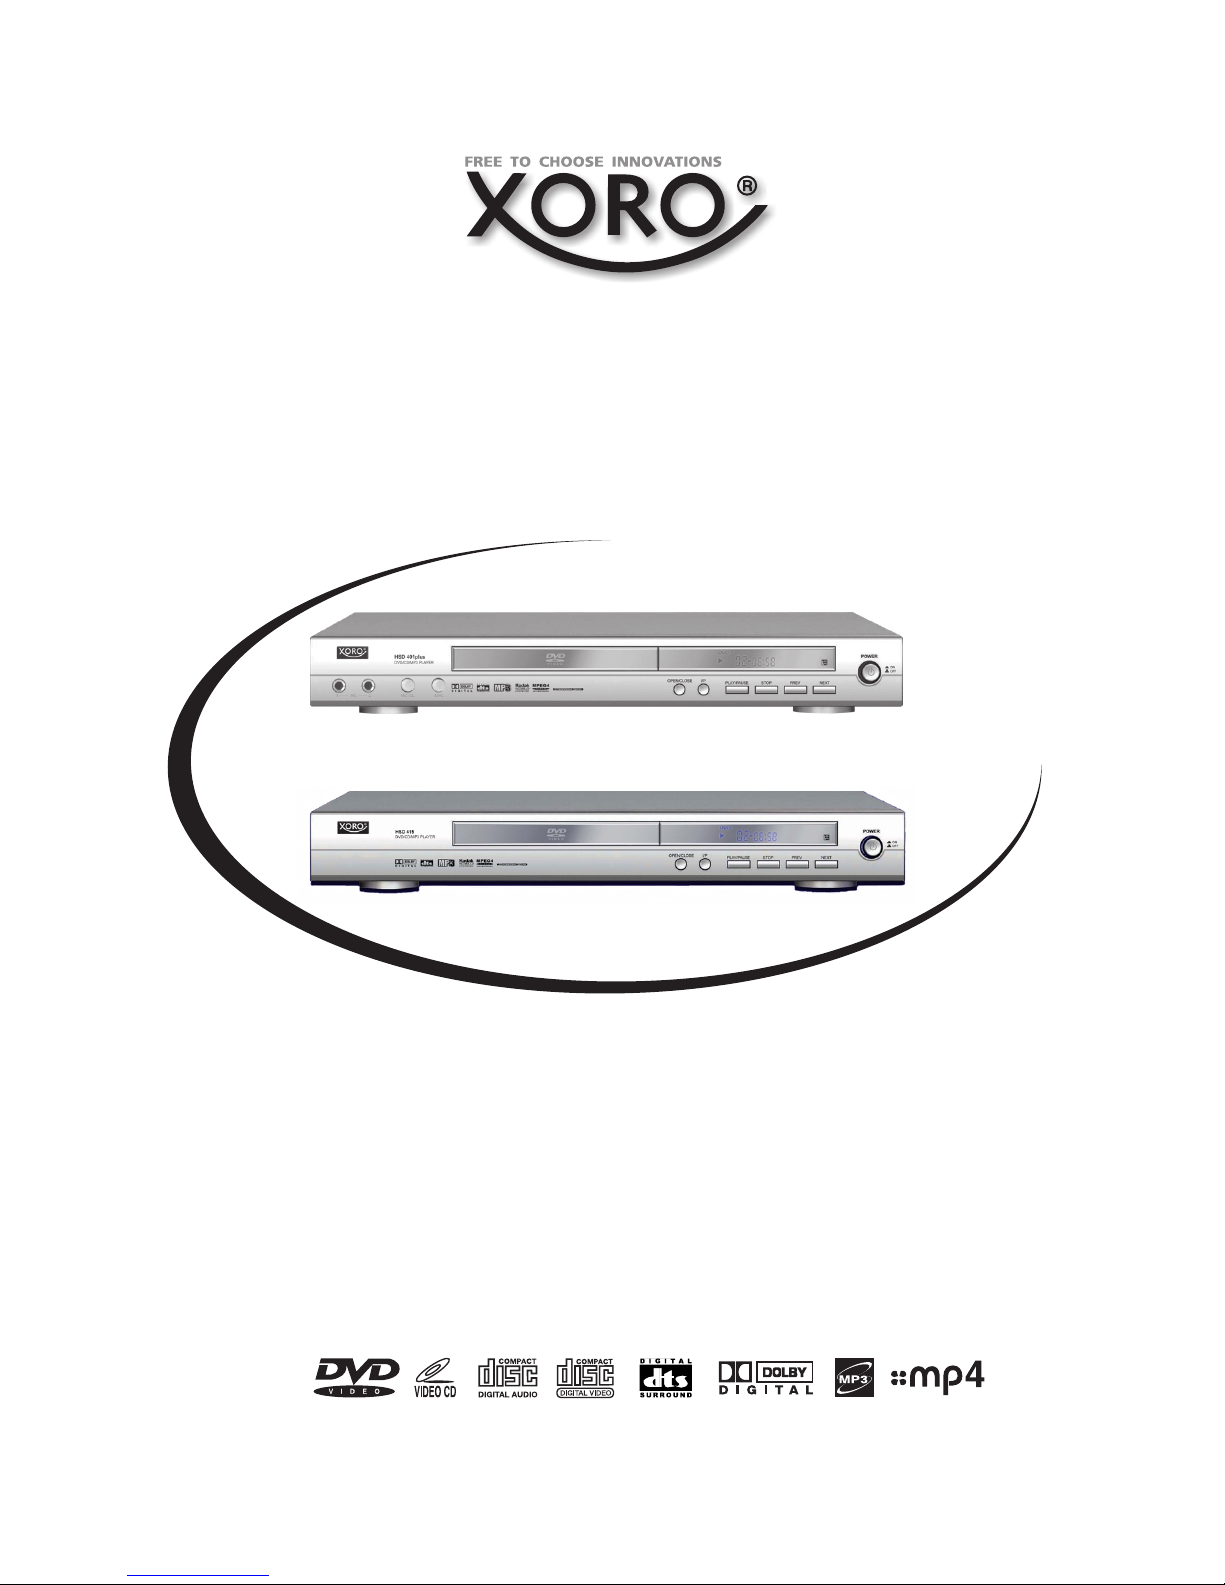
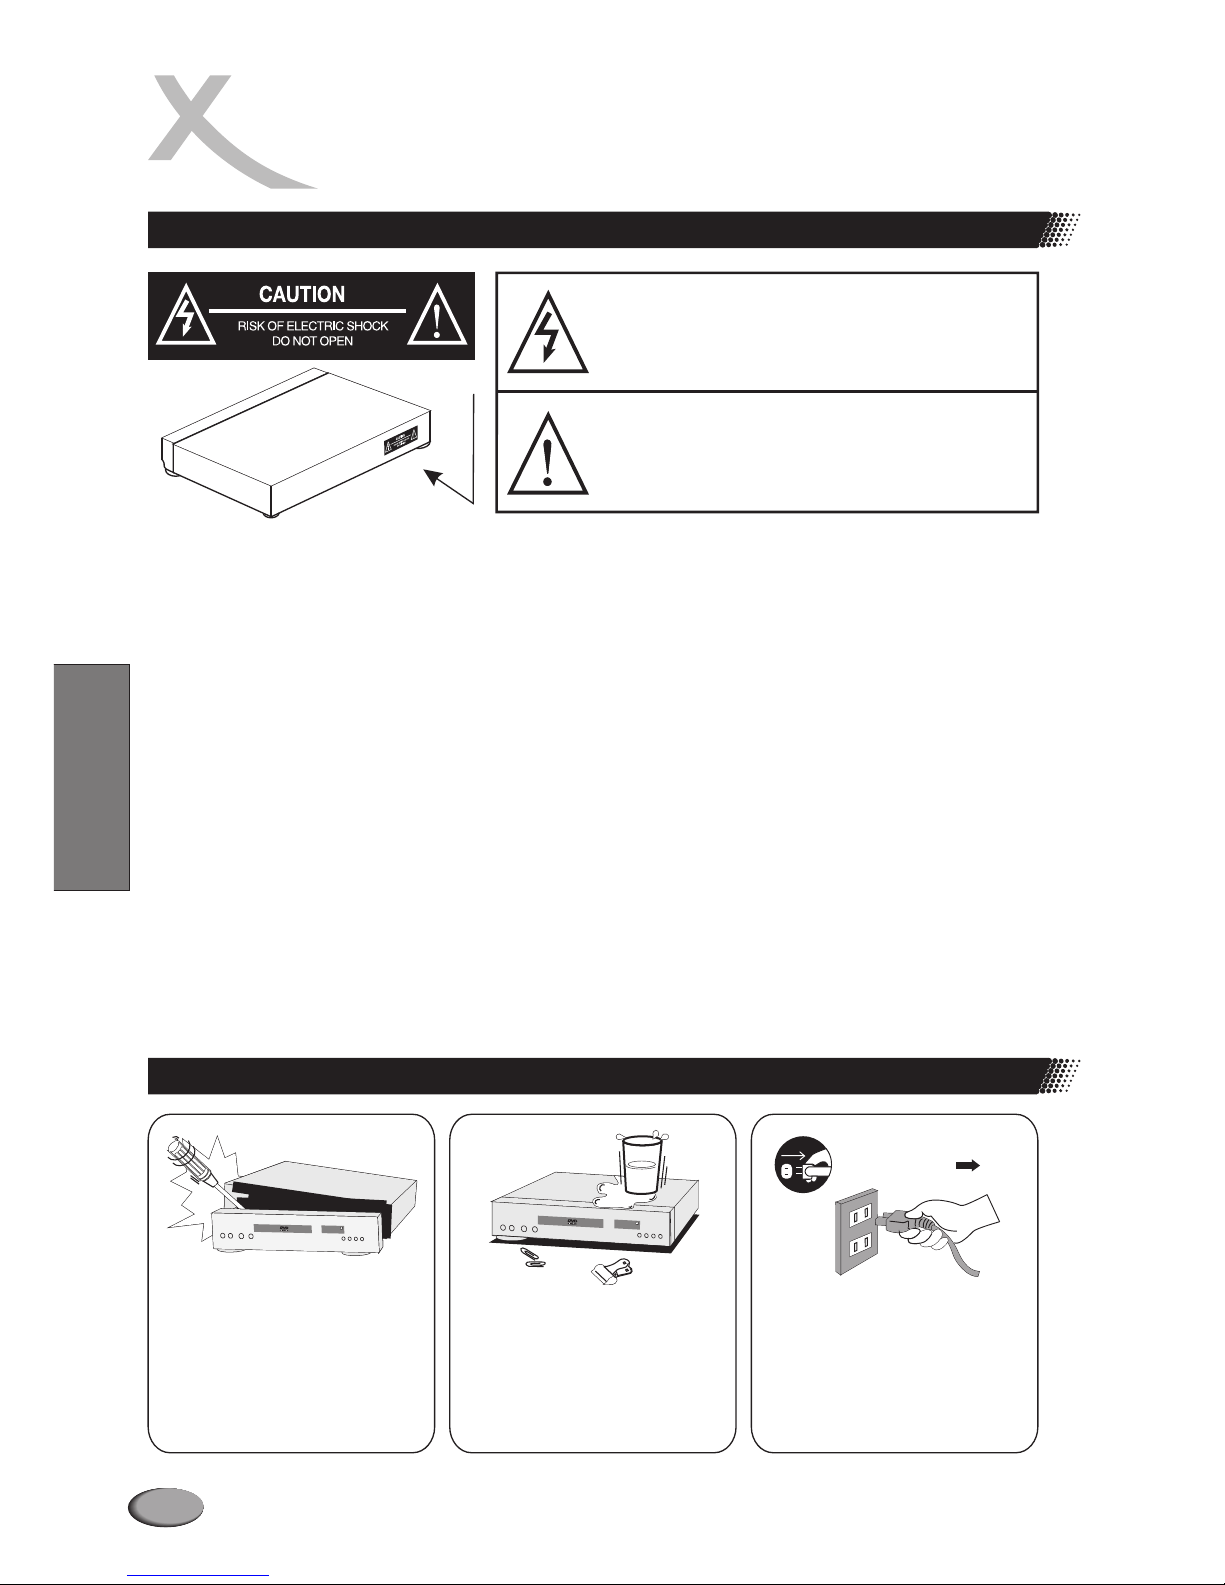
Xoro HSD 310 User manual

Manual
MPEG4 DVD - Player
HSD 401plus
HSD 310 / HSD 415

56
CONTENTS
FEATURES 57
SAFETY PRECAUTIONS 58
ACCESSORIES 60
QUICK START 64
lRemote control 64
lBattery advise 64
CONNECTIONS 65
lConnecting to a TV 65
lConnecting to an Audio-System 66
lConnecting to the 5.1 Audio-System (not available on HSD 310) 67
PLAYBACK 68
lRemote control functions 68
lButtons description 69
lBasic playback 70
FUNCTIONS 71
lSpecial functions 71
lKaraoke (only model HSD 401 plus) 71
lSpecial DVD functions 71
l
lJPEG Picture Display 72
lFunction setup 73
lRecommendations 75
NOTES ON SERVICE 76
lTroubleshooting 76
lSpecification 77
OUTPUTS AND CONTROL ELEMENTS HSD 400 plus 61
lDVD-Player 61
Front panel 61
Back panel 61
OUTPUTS AND CONTROL ELEMENTS HSD 310 / HSD 415 62
lDVD-Player 62
Front panel 62
Back panel 62
Remote Control 63
Multimedia playback 72
DISC INFORMATION 75
ls
Eng ih

57
lFile formats compatibility list:
Video: MPEG1(SVCD, VCD)/MPEG2(DVD)/MPEG4
Audio: WMA/CD/MP3
JPEG Picture CD
Kodak Picture CD
lMedia formats compatibility list:
CD-RW, DVD-R(W), DVD+R(W)
lIntegrated surround-decoder (Dolby Digital/MPEG 5.1)
with 5.1 analog outputs (not on model HSD 310)
lHigh quality picture provided YUV connection with Progressive Scan ability
lPAL/NTSC/Multi
lWide screen and Pan&Scan options
4:3 Pan & Scan / 4:3 Letterbox for standart TV set
16:9-widescreen
lFull DVD functionality
lKaraoke (only on model HSD 401plus)
lWide range of connections:
Coaxial and optical digital outputs (optical output not on model HSD 310)
SCART
S-Video
VGA (not on model HSD 310)
Composite video
YUV
Dolby Digital/MPEG 5.1 decoded analog output (not on model HSD 310)
Analog stereo
FEATURES
NOTES:
„Dolby“ and Doppel-D-Symbol are the trademarks of Dolby Laboratories.
Made with licence of Dolby Laboratories.
© Dolby Laboratories Inc. All rights reserved
ngl sh
Ei

58
SAFETY PRECAUTIONS
Basic safety requirements
WARNING: DO NOT EXPOSE THIS APPLIANCE TO RAIN OR MOISTURE,
DUE TO THE HIGH RISK OF FIRE OR ELECTRIC SHOCK, DO NOT OPEN
THE CABINET DANGEROUS HIGH VOLTAGES ARE PRESENT INSIDE
THE ENCLOSURE. ONLY QUALIFIED SERVICE PERSONNEL SHOULD
ATTEMPT THIS.
CAUTION: This Digital Video Disc Player employs a Laser System. To
prevent direct exposure to the laser beam, do not try to open the enclosure.
Visible laser radiation when open and interlocks defeated. Use of controls or
adjustments or performance of procedures other than those specified herein
may result in hazardous radiation exposure.
DO NOT STARE INTO BEAM.
To ensure proper use of this product, please read this owner’s manual
carefully and retain for future reference. Should the unit require
maintenance, contact an authorized service location, or contact us. Only
qualified service personnel should remove the cover.
Do not open the cabinet Do not use the apparatus
near the water Unplug the apparatus
during the lightning
storms or when unused
for a long period
The lightning flash with an arrowhead symbol within an
equilateral triangle is intended to alert the user to the
presence of uninsulated "dangerous voltage" within the
product's enclosure that may be of sufficient magnitude
to constitute a risk of electric shock to persons.
The exclamation point within an equilateral triangle is
intended to alert the user to the presence of important
operating and maintenance (servicing) instructions in
the literature accompanying the appliance.
Marking of safety
ls
Eng ih

59
ngl sh
Ei

60
Open the package of this DVD player, make sure the following accessories attached:
ACCESSORIES
Remote control
Audio and video cable
(combined Cinch cable)
1,5 V batteries
Users’s manual
Unit of equipment
ls
Eng ih

HSD 401 PLUS
AV
VGA OUTPUT
61
Front panel
Rear panel
POWERDISC TRAY
OPEN / CLOSE
INTERLACED / PROGRESSIVE
PLAY / PAUSE
STOP
SEARCH
DISPLAY
VOLUME AND HALL ADJUSTING KNOBS
MICROPHONE INPUTS
VIDEO OUT
STEREO AUDIO OUTPUT RIGHT
STEREO AUDIO OUTPUT LEFT
DIGITAL OUT, COAXIAL
(5.1 MODE)
SURROUND (5.1 MODE)
(5.1 MODE)
AUDIO OUT FRONT RIGHT
AUDIO RIGHT
AUDIO OUT SUBWOOFER
AUDIO OUT CENTER
SURROUND AUDIO OUT LEFT
AUDIO OUT LEFT
YUV OUT (PROGRESSIVE SCAN ENABLED)
(5.1 MODE)
(5.1 MODE)
(5.1 MODE)
OPTICAL DIGITAL OUT
S-VIDEO OUT
VGA OUT
SCART
OUTPUTS AND CONTROL ELEMENTS
HSD 401PLUS
ngl sh
Ei
HSD 401 PLUS
DVD/CD/MP3 PLAYER
OPEN/CLOSE I/P PLAY/PAUSE STOP PREV NEXT
MIC 21 MIC VOL ECHO

OPEN / CLOSE
INTERLACED / PROGRESSIVE
PLAY / PAUSE
STOP
SEARCH
HSD 415
DVD/CD/MP3 PLAYER
OPEN/CLOSE I/P PLAY/PAUSE STOP PREV NEXT
Front panel
Rear panel
POWER
DISC TRAY
Note: 5.1 connectors not available in model HSD 310.
62
OUTPUTS AND CONTROL ELEMENTS
HDS 310 / HSD 415
ls
Eng ih
HSD 415
AV
VGA OUTPUT
VIDEO OUT
STEREO AUDIO OUTPUT RIGHT
STEREO AUDIO OUTPUT LEFT
DIGITAL OUT, COAXIAL
(5.1 MODE)
SURROUND (5.1 MODE)
(5.1 MODE)
AUDIO OUT FRONT RIGHT
AUDIO RIGHT
AUDIO OUT SUBWOOFER
AUDIO OUT CENTER
SURROUND AUDIO OUT LEFT
AUDIO OUT LEFT
YUV OUT (PROGRESSIVE SCAN ENABLED)
(5.1 MODE)
(5.1 MODE)
(5.1 MODE)
OPTICAL DIGITAL OUT
S-VIDEO OUT
VGA OUT
SCART
DISPLAY

Remote control
5
1 15
3
4
28
9
10
20
25
6
2
7
11
12
8
13
14
16
17
18
19
21
22
23
26
24
27
29
31
30
1. POWER Stand by on/off
2. MUTE Sound off
3. NUMBER PAD Number buttons
4. TITLE Title menu
5. AUDIO Audiotrack select
6. MENU Access to the menu of DVD
7. STOP Stop the playback of disc
8. PLAY Start the playback of disc
9. PAUSE/STEP Pause the playback of disc
10. A-B Select and repeat segment
fromApoin to B
11. PROG Programm
12. REPEAT Repeat of the chapter /
title / folder
13. ANGLE Camera angle selection
14. SHUFFLE Random play
15. OPEN/CLOSE Open/close the tray
16. SETUP DVD-player set up menu
17. PBC Playback control (VCD)
18. NTSC/PAL TV standart selection
19. SEARCH Search on time
or number of a track
20. CLEAR Clear number pad input
21. PHOTO MODE Picture show mode
for JPEG, Kodak picture CD
22. SUBTITLE Subtitle select
23. RETURN Back in the menu or to PBC
24. LEFT, RIGHT Moves the cursor to the
UP, DOWN selected item
25. ENTER Choose of selected item
26. DISPLAY On-screnn display
27. SLOW Slow play
28. FAST FF/FR Fast play
29. SKIP Skip the chapter
30. VOL +/-: Volume control
31. ZOOM To zoom video and pictures
OUTPUTS AND CONTROL ELEMENTS
OF THE DVD-PLAYER
63
ngl sh
Ei

64
1
2
3
QUICK START
REMOTE CONTROL
Insert the batteries in the remote control
Open the cover
Put the batteries
Close the cover
Make sure to match - and +
NOTES:
lDirect the remote control at the infrared
reciever (IR) of the player
lDo not drop the remote control
lDo not spill water or put anything wet on it
lDo not disassemble the remote control
Point the remote control at the IR
NOTES ON BATTERIES:
Improper use may cause battery leakage and
corrosion. Please follow the instructions below:
lDo not insert the batteries in the wrong
direction
lDo not use different types of batteries together
lIf you do not use the remote control for a long
time, remove the batteries
lIf the remote control operates not correctly,
replace the batteries
lIf battery leakage occurs, wipe the battery
liquid from the battery compartment, then
insert new batteries
lMake sure that the used batteries are disposed
properly according to you local regulations.
Within about 7 m with angle
about 30 grade in the both
direction
Remote control
NOTES:
Do not expose the IR of the dvd player to
a strong light source or direct sunlight.
Remote control Operating instructions
ls
Eng ih

HSD 401 PLUS
AV
VGA OUTPUT
65
Connecting to a TV
NOTES:
lTurn off all devices before connecting.
lSelect CVBS, S-Video, SCART, YUV or VGAoutput according to different TVs.
lFollow the sketch above to connect the devices with selected output.
lRefer to setup instructions on the page 18,19.
CONNECTIONS
SCART
STEREO OUT LEFT
S-VIDEO OUT
VIDEO OUT
STEREO OUT RIGHT
VGA OUT (NOT ON MODEL HSD 310)
YUV out
Use this signal source to get best picture
quality.
ngl sh
Ei

66
Connecting to an audio system
NOTES:
lPlease refer to the manual of the reciver or amplyfier
lTurn off the power of all devices before connecting
lThe player output has a wide dynamic range. Be sure to adjust the volume of reciever to a
moderate level. Otherwise, a sudden high volume may damage the speakers
lTurn off the audio system before you connect or disconnect power cord of the player
lRefer to the setup instructions of the player on the pages 19
STEREO
OUTPUT
LEFT
STEREO
OUTPUT
RIGHT
CONNECTIONS
ls
Eng ih
HSD 401 PLUS
AV
VGA OUTPUT

HSD 401 PLUS
AV
VGA OUTPUT
VIDEO
FRONT (L)
FRONT R)(
SURROUND (L)
CENTER
SUBWOOFER
SURROUND (R)
AV-RECIEVER
FRONT LEFT FRONT RIGHT
SURROUND
LEFT
SURROUND
RIGHT
SUBWOOFER
CENTER
67
See notes on the page 12, see setup instructions on the page 19
* 5.1 connection not availabel on model HSD 310
CONNECTIONS
Connecting to the amplifier with 5.1 channel sound output*
ngl sh
Ei

68
Remote control functions
Direction buttons (áâßà) and
ENTER
Press the Direction buttons to move the
cursor to the selected item, then press
the ENTER
lCLEAR button
Press this button to clear the input digits
(displays on the screen) when
programming
lPLAY button
This button starts the playback of the
CD/DVD
lNumber pad
When playing a VCD/SVCD disc, press
the number buttons directly to play your
favorite track in PBC off status. If the
track number is from 1 to 9, you can
directly press the number. If the track
number is more than 9, you should use
button 10+ and the other number buttons
together to select the track, for example:
for track 25, first, press the 10+ button
twice, then press button 5.
lSTOP button
When playing a DVD disc, press this
button the first time during playback, the
DVD player memorizes the location
where you stopped (press PLAY to
resume playback from the
memorizedpoint). Press this button
again to stop the disc (then press PLAY
to start playing from the beginning of the
disc).
lRETURN button
For SVCD or VCD2.0 discs, in PBC
status, press this button to return to the
playback
lPAUSE/STEP button
Press this button for the first time to
pause, then each time you press the
PAUSE/STEP button, the picture
advances one frame. For CD, MPEG4 or
MP3, this button is only used for PAUSE
function.
lFAST (<< / >> ) buttons
Press the FAST button during playback,
the playback speed changes. Press
PLAY to resume the normal speed.
lSLOW button
For slow motion. Press this button
repeatedly to change the speed. Press
PLAY to resume the normal speed.
PLAYBACK
ls
Eng ih

69
l SKIP buttons
Press SKIP to select the next (previous)
chapter (for DVD)or track (for SVCD /
VCD / CD / MP3 / MPEG4).
( ) or ( ).
lZOOM button
Press the ZOOM button during normal
playback to zoom a picture,press the
Direction buttons to shift the zoom point.
Press this button repeatedly to change
the magnification levels.
For JPG files, this button should be used
with the FAST buttons to fulfill the zoom
Function.
lA-B button
Press the A-B button at the beginning of
the segment (point A) you want to play
repeatedly, then press it again at the end
of the segment (point B), the selected
segment can be played Repeatedly.
Press it the third time to resume normal
playback. For MP3 and JPG files, the
button is invalid.
lREPEAT button
For DVD discs,press this button to repeat
the title or chapter. For VCD or SVCD
discs, press this button to repeat the
track.
lSEARCH button
Use to go to the needed position of the
disc.
.lDISPLAY button
Press this button to display the current
playback information on the screen.
uu||tt
Buttons description
lPROG button
For VCD or SVCD discs, press this
button, the program menu appears on
the screen, press the number buttons to
enter the chapter / track number you
want to program, the programmed tracks
can be up to 99 tracks. Press the PLAY to
start the programmed playback.Press
the CLEAR button to cancel the wrong
input digits. If you want to cancel
program, then press the PROG button
again.
lI/P button
I/P button is used for switching between
Progressive Scan and Interlaced display.
If the player is switched to Progressive
Scan by pressing I/P button, the DVD
player switches to YUV or VGA output
and to Progressive Scan mode. By
pressing I/P key in Progressive Scan
mode, the player deactivates
Progressive Scan playback and switches
to the output previously used.
You should use the I/P button only if the
DVD player is connected via YUV or VGA
to a device.
If the I/P button is pressed by accident
and you do not get a picture, press the I/P
key until you get a picture on your screen.
PLAYBACK
ngl sh
Ei

70
1. Press the POWER button on the front panel of the player
2. Press the OPEN/CLOSE button on the player or on the remote control
3. Put a compatible disc in the opened tray
4. Press OPEN/CLOSE button again.
ATTENTION: Do not push the tray with the hand. You may damage it!
5. Use playback control buttons on the player to SKIP or PAUSE. Or use the buttons of the remote
control to operate:
lSKIP
lSEARCH
lSLOW MOTION
lZOOM
See more about on the pages 17, 18, 19, 20.
Basic playback
NOTES:
lDo not move the DVD player during playback
lIf you do not use the player for a long time unplug it
lFor the PBC for VCD please refer to the following pages
PLAYBACK
ls
Eng ih

71
l
lVOLUME Control
lMUTE
PBC-Playback
For VCD 2.0 or SVCD discs, press this
button to set the PBC functions.
In the PBC display of the SVCD /
VCD2.0, if the PLAY button is pressed,
the Player will enter PBC playback
status.If the PBC is turned off, the disc
will be played as VCD1.0/1.1.
When PBC is set to ON, the menu
appears on the screen, press the
number buttons to select and play the
track you want.
You can change the volume level.
To turn off the sound, press this button.
One more time press the button to turn
on the sound.
1. Connect the microphone to MIC jack.
Turn on the microphone.
2.Adjust volume with the know VOLUME
3. Select the track
When playing a Karaoke disc, press the
number buttons to select the track you
want to play, then you can start the
Karaoke
* Karaoke only available on model
HSD 401plus
lMENU button
Press this button to enter the DVD menu.
(If it is supported by the discs.)
lTITLE button
For DVD discs, press this button to enter
the title menu, then press the Direction
buttons and PLAY button to select and
play. (If it is supported by the discs.)
lAUDIO button
This button allows the user to select a
preferred audio language from those
included on the disc. This button also
support language selection for the SVCD
discs.
lANGLE button
Press this button to change the camera
angle of the scene you are watching if the
scene was recorded from multiple
angles.
lSUBTITLE button
This button allows the user to select a
preferred language for the subtitle and
messages from those included on the
disc.
Special functions Special DVD-functions
FUNCTIONS
Karaoke*
ngl sh
Ei

72
FUNCTIONS
Multimedia playback (MP3 / MPEG4 / JPEG etc.)
lSmart Navi: Playback menu
When a MP3 or MPEG4 disc is being played,
the playback menu will appear on the screen,
as shown in the following figure:
lUse the button to select the
previous / next track. Press the SKIP
buttons to turn the page up / down. Move
the cursor to the track you want to play,
then press the PLAY button to play the
track.
lYou can use the Number buttons to select
and play the track directly.
lUse the / button to switch between
the selection of the playback mode and
playback menu. Move the cursor to the
playback mode, then press the
button to select the playback mode.
lIf you choose to cancel the menu in the
SMART NAVI (navigation)item in the
setup menu,the playback menu will not be
displayed on the screen, and the Player
will playback the tracks sequentially.
á/ â
ßà
á/ â
WHAT IS MPEG4?
MPEG-4 is an ISO/IEC standard developed by
MPEG (Moving Picture Experts Group), the
committee that also developed the Emmy
Award winning standards known as MPEG-1
and MPEG-2 (DVD adopts this standard for
video application).
MPEG-4 is a very efficient digital video
compression standard, which can compress
MPEG-2 video into about one eighth of its
original size. Most video stream medias base
on this technology, such as DivX, WMV, and so
on. So MPEG-4 is the most popular digital
video technology in the video distribution and
communication.
HOW TO PLAYBACK YOUR MPEG4 CD?
1. Press OPEN/CLOSE. Place the CD on the
disc tray, and press it again to close the tray.
2. Select a folder or an AV file contained on the
CD. Use the direction keys to navigate
among the items.
3. Press PLAY. The player will start the
playback.
HOW TO CREATE YOUR MPEG-4 DISC?
1. Download the files from Internet or rip from
the other video source using the PC/MAC
application, and save the MPEG-4 files as
many formats, like *.avi, *.asf etc.
2. Place the blank CD-R/-RW disc into PC CD-
R/-RW driver or other record devices.
3. Burn your favorite MPEG-4 files into your
CD-R/-RW using the CD burn application,
like the Nero Burning , Clone CD, etc.
4. Finalize your disc and eject the CD.
DIVX SUBTITLES
Your Xoro DVD player can display DivX
subtitles. It supports .sub, .srt and .smi.
Before you start playback, the subtitle file must
be activated. As soon as the player ha read the
CD index, a menu shows the movie and the
subtitle files. The subtitle file is displayed with a
question mark, this is normal. Navigate with the
arrow keys to the desired subtitle file and press
SUBTITLE key on the remote control. The
player propmts “DivX subtitle selected”. Now,
you can start the movie and the subtitles will be
displayed. You can deactivate the subtitle
display simply by pressing SUBTITLE key on
the remote control.
Note:
Subtitles are not supported in all languages. At
the time this manual has been printed, English,
german and polish subtitles are supported. It
may be possible that other languages are
supported, too due to an improved firmware.
Also, other subtitle formats may be supported
by newer firmware.
Please note that some programs create
subtitles which are not compatible with this
player. This is normal and is no defect of the
player.
JPEG Picture Display
The playback menu of the JPEG picture
is similar to MP3 / MPEG4 playback
menu. Please refer to MP3 / MPEG4
Playback.
lWhen playing the JPG pictures,
press the direction buttons to rotate the
picture.
ls
Eng ih
SMART NAVI
ROOT
CD 01
CD 02
CD 03
CD 04
CD 05
ROOT 0
TRACK 104 1
TRACK 105 2
TRACK 106 3
TRACK 107 4
TRACK 108 5
PLAY MODE FOLDER R
MP3
MP3
MP3
MP3
MP3

SETUP MENU -- MAIN PAGE
GENERAL SETUP
SPEAKER SETUP
AUDIO SETUP
PREFERENCES
EXIT SETUP
--SPEAKER SETUP PAGE--
DOWNMIX
CENTER
REAR
SUBWOOFER
CNTR DELAY
REAR DELAY
MAIN PAGE
LT/RT
STEREO
OFF
--AUDIO PAGE--
SPDIF OUTPUT
DUAL MONO
COMPRESSION
PRO LOGIC
MAIN PAGE
OFF
SPDIF/PCM
AUDIO RELATED
-- GENERAL PAGE --
ANGLE MARK
OSD LANG
CAPTIONS
SCREEN SAVER
MAIN PAGE
ON
OFF
TEST TONE
SPDIF/RAW
LPCM OUTPUT
SPEAKER SETUP PAGE
Note:
Model HSD 310
only offers
“DOWNMIX”
DOWNMIX
LT/RT, STEREO, OFF
CENTER
ON, OFF
REAR
ON, OFF
SUBWOOFER
ON, OFF
CNTR DELAY
The delaying time can be setup as:
0, 1, 2, 3, 4 and 5 MS (miliseconds).
REAR DELAY
The delaying time can be setup as:
0, 3, 6, 9, 12 and 15 MS (miliseconds).
AUDIO SETUP PAGE
lSPDIF OUT
OFF, SPDIF/RAW/SPDIF/PCM
!DUAL MONO
STEREO,L-MONO, R-MONO, MIX-MONO
!COMPRESSION
OFF, 1/8, 2/8, 3/8, 4/8, 5/8, 6/8, 7/8, FULL
lPRO LOGIC
OFF, ON,AUTO
lLPCM OUTPUT
LPCM 48K, LPCM 96K
l
l
l
l
l
l
Press the SETUP button, the following figure
will appear on the screen:
Note: Model HSD 401plus
has additional entry “KARAOKE”
1. Press the SETUP menu to enter the setup
menu.
2. Use the button to choose the menu item
you want to change, then press ENTER to
confirm it.
3. Use the button to move the high light icon
to the right side item.
4. Use the button to change the current
setup, then press the ENTER button to
confirm it.
5. Use the button to return to the left side
item.
6. Press the SETUP button to quit the setup
menu.
GENERAL PAGE
lANGLE MARK:
ON, OFF
lOSD LANG (language)
Select your preferred language for OSD
display and messages
!CAPTIONS
ON, OFF
lSCREEN SAVER
ON, OFF
áâ
à
áâ
ß
73
Lagerung von Cds
FUNCTIONS
Function Setup
ngl sh
Ei

PREFERENCES PAGE
The preferences setup should be done in
completely stop status.
!TV DISPLAY
NORMAL/PS
lTV TYPE
MULTI.SYTEM, NTSC, PAL
lVIDEO OUTPUT
S-VIDEO, RGB, VGA (not HSD 310),
YCBCR,YPBPR
lAUDIO (audio language)
Here you can select the language of the
audio stream (if supported by the disc)
lSUBTITLE Language
Here you can select the language of the
subtitles (if supported by the disc)
lDISC MENU
Here you can select the language of the disc
menu (If it is supported by the disc)
lPARENTAL
1 G, 2, 3 PG, 4 PG 13, 5, 6 PG-R, 7 NC-17, 8
ADULT, NO-PARENTAL
If you want to change the setup of the item,
you should enter the password. About the
password, please refer to PASSWORD.
The default password is 3308
!DEFAULTS:
Here you can restore the factory default
settings
!SMART NAVI
Here you can select if the smartnavi is
displayed with or without menu in
filemode.
PASSWORD
When you select to change the password,
PASSWORD CHANGE PAGE appears on the
screen.
The first line is OLD PASSWORD.
The second line is NEW PASSWORD.
The third line is CONFIRM PWD (password).
When the new password is entered for two
times, it means you have successively
changed the password.
The factory code (password) is 3308.
--PASSWORD CHANGE PAGE--
OLD PASSWORD
NEW PASSWORD
CONFIRM PWD
--PREFERENCES PAGE--
TV Display
TV Type
VIDEO OUTPUT
AUDIO
SUBTITLE
DISC MENU
PARENTAL
PASSWORD
DEFAULTS
MULTI SYSTEM
NTSC
PAL
MAIN PAGE
SMART NAVI
74
FUNCTIONS
Function Setup
ls
Eng ih
This manual suits for next models
2
Table of contents
Other Xoro DVD Player manuals