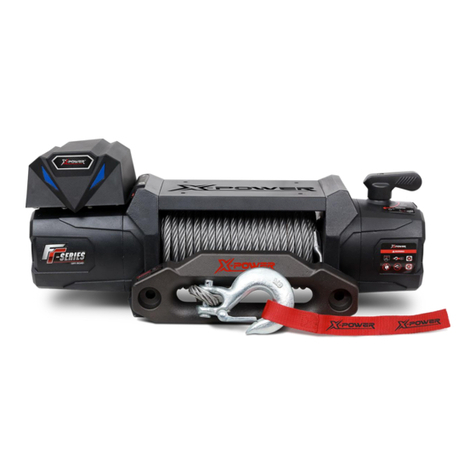
XPower 20805002 User manual

ELECTRIC WINCH
20000LB
Owner’s Manual
WARNING: Read carefully and understand all ASSEMBLY AND OPERATION
INSTRUCTIONS before operating. Failure to follow the safety rules and other basic safety
SAVE THESE INSTRUCTIONS

Thank you very much for choosing an X-power™ product!
For future reference, please complete the owner’s record below:
Serial Number/Lot Date Code: ________________________________
Purchase Date: ____________________________________________
Save the receipt, warranty, and this manual. It is important that you read
the entire manual to become familiar with this product before you begin
using it.
This electric winch is designed for certain applications only. Forcome Co.,
Ltd. is not responsible for issues arising from modification or improper
use of this product such as an application for which it was not designed.
We strongly recommend that this product not be modified and/or used for
any application other than that for which it was designed.
For technical questions, please contact your local distributor

Safety Precautions
Warning!
MOVING PARTS ENTANGLEMENT HAZARD
Failure to observe these instructions could lead to severe injury or death.
To avoid injury to hands or fingers
Always keep hands clear of wire rope.hook loop,hook and fairlead opening during installation,operation, and when
spooling in or out.
Always use extreme caution when handling hook and wire rope during spooling operations.
Always use supplied hook strap whenever spooling wire rope in or out,during installation or operation to avoid injury
to hands or fingers.
Warning
CHEMICLAND FIRE HAZARD
Failure to observe these instructions could lead to severe injury or death.
Always remove jewelry and wear eye protection.
Never lean over battery while making connections.
Always verify area when drilling is clean of fuel line,fuel tank,brake lines,electrical wires,etc.
Never route electrical cables:
-Across any sharp edeges.
-Through or near moving parts.
-Near parts that become hot.
Always insulate and protect all exposed wiring and electrical terminals.
Always install termnial boots as directed in installation instructions.
Warning
FALLING OR CRUSHING HAZARD
Failure to observe these instructions could lead to severe injury or death.
Never use as an overhead hoist ,or to suspend a load.
Never use to lift or move persons.
CAUTION
MOVING PARTS ENTANGLEMENT HAZARD
Failure to observe these instructions could lead to minor or moderate injury.
General Safety:
Always know your winch: Take time to fully read and understand the included Installation and Operation guide,and
Basic Guide to Winching Techniques, in order to understand your winch and winching operation.
Never operate this winch if you are under 16 years of age.
Never operate this winch when under the infulence of drugs, alcohol or medication.
Never exceed winch or wire rope rated capacity. Double line using a snatch block to reduce winch load.
Installation Safety:
Always choose a mounting location that is sufficiently strong to withstand the maximum pulling capacity of your
winch.
Always use factory approved switches,remote controls,accessories and installation components.

Always use Grade 5 or better hardware,never weld bolts and never use longerbolts than those supplied from factory.
Always complete winch mounting and attachment of hook to hook loop before wiring winch before installation.
Always position fairlead with WARNIING label on top.
Always spool the wire rope onto the drum as indicated by the drum rotation label on the winch.Required for automatic
brake to work (if winch is so equipped) and for correct installation orientation.
Always prestretch wire rope and respool under load before use.Tightly wound wire rope reduces chances of
“binding”,which is wire rope working its way down into a loosely wound wire roep layer and catching or damaging
itself.
CAUTION
MOVING PARTS ENTANGLEMENT HAZARD
Failure to observe these instructions could lead to minor or moderate injury.
Winch Safety:
Always inspect winch installation and wire rope condietion before operating winch.Frayecd, kinked or damaged wire
rope must be replaced immediately.Loose or damaged winch installation must be corrected immediately.
Never leave remote control plugged into winch while free spooling,rigging or sitting idle.
Never hook wire rope back onto itself.This damages the wire rope.Always use a choker chain,wire choker rope,or
tree trunk protector on the anchor.
Always prior to winching, remove any element that may interfere with safe winch operation.
Always take your time when rigging for a winch pull.
Always be certain the anchor you select will withstand the load, and the strap or chain will not slip.
Never engage or disengage clutch if winc is under load,wire rope is in tension or wire rope drum is moving.
Always unspool as much wire rope as possible when rigging.Double line or pick distant anchor point.
Never winch with less than 5 wraps of wire rope around the drum, the wire rope could come loose from the drum.
Always stand clear of wire rope and load during operation.
Never touch wire rope or hook while in tension or under load.
Never touch the wire rope or hook while someone is at the remote swtich or during winch ing operation.
Never touch wire rope or hook while remote control is plugged into the winch.
Always stand clear of wire rope and load and keep others away while winching.
CAUTION
MOVING PARTS ENTANGLEMENT HAZARD
Failure to observe these instructions could lead to minor or moderate injury.
Winch Safety:
Always require operator and bystanders to be aware of stability during winching of vehicle and/or laod.
Always keep the remote control lead clear of the drum,wire rope and rigging.Insepct for cracks,pinches,frayed wires
or loose connections.Replace if damaged.
Always pass remote control through a window to avoid pinching lead in door,when using remote inside a vehicle.
CAUTION
CUTAND BURN HAZARD
Failure to observe these instructions could lead to minor or moderate injury.
TO avoid injury to hands or fingers:
Always wear heavy leather gloves when handling a wire rope.
Never let wire rope slip through your hands.
TO avoid injury to hands or fingers:
Always be awar of possible hot surface at winch motor,drum or wire rope during or after winch use.

Notice
AVOID WINCHAND EQUIPMENT DAMAGE
Always avoid continuous side pulls which can pile up wire rope at one end of the drum.This can damage your wire
rope or winch.
Always ensure the clutch is fully engaged or disengaged.
Never use winch to tow other vehicles.Shock loads could momentarily exceed capacity of wire rope and winch.
Always use care to not damage your frame when anchoring your vehicle during a winching operation.
Never “jog” wire rope under load. Shock loads could momentarily exceed capacity of wire rope and winch.
Never use winch to secure a load during transportation.
Never submerge winch in water.
Always store the remote control in a protected, clean, dry area.
1. Keep work area clean and dry.
Cluttered,damp,or wet wok areas invite injuries.Observe work area conditions.Never use winch in disordered
area.And never expose accessories to rain or water.Keep work area clean and tidy.Do not use electrically powered
equipment in the presence of flammable gases or liquids.
2.Keep children away from work area.
Children must never be allowed in the work area.Do not let them handle machines,tools,or equipment.
3.Store idle equipment.
When not in use,tools and equipment should be stored in a dry location to inhibit rust.Always lock up tools and
equipment, and keep out of reach of children.
4. Dress Properly:
-Don't wear loose clothing or jewellery. They can be caught in moving parts.
-Wear leather gloves when handling winch cable. Do not handle cable with bare hands, broken wires can cause
injuries.
-Non-skid footwear is recommended,
-Protective hair covering to contain long hair.
5. Keep a Safe Distance:
-Ensure that all persons stand well clear of winch cable and load during winch operation, 1.5 times the cable length
recommended. If a cable pulls loose or breaks under load it can lash back and cause serious personal injury or
death.
-Don't step over the cable.
- All visitors and onlookers should be kept away from the work area.
-Keep proper footing and balance at all times to avoid hazard resulted from slipping.
6. Don'tAbuse the Cord and wireless remote:
-Never carry your winch by the cord or yank it to disconnect it from the receptacle.Never plug other switches into the
receptacle.
-Keep cord and wireless remote from heat, oil and sharp edges.
7. Don't Overwork the winch:
-If the motor becomes uncomfortably hot to touch(about 60℃), stop the winch immediately and let it cool for a few
minutes.And then use snatch block or other rig to rework it.
-Don't maintain power to the winch if the motor stalls.(the winch is equipped with a patented cut-off switch which is
easy and convenient to operate)
-Don't exceed maximum line pull ratings shown in tables. Shock loads must not exceed these ratings.

8.Avoid Unintentional Starting:
-Winch clutch should be disengaged when not in use and fully engaged when in use.
-The cut-off switch on the red battery cable should be in the state of “OFF” when not in use.Switch it “ON” when in
use.
9. Check Damaged Parts:
-Before using, you should check your winch carefully. Any part that is damaged should be properly repaired or
replaced by an authorized service centre.
10. Repair Your Winch:
-When repairing. use only identical replacement parts or it may cause considerable danger for the user.
11. Respool the Cable:
-Leather gloves must be worn while respelling. To respool correctly, it is necessary to keep a slight load on the cable.
Hold the cable with one hand and the remote control switch or the wireless remote with the other. Start as far back
and in the centre as you can. Walk up keeping load on the cable as the winch is powered in .
-Do not allow the cable to slop through your hand and do not approach the winch too closely.
-Turn off the winch and repeat the procedure until all the cable except 1m is in.
-Disconnect the remote control switch and finish spooling in cable by rotating the drum by hand with clutch
disengaged.
-On hidden winches, spool in cable under power but keep hands clear.
Warning: The use of any other accessory or attachment other than those recommended in the instruction
manual may present a risk of personal injury.
Technical Specifications
Part Number: 20805002
Single line rated pull 20000LB(9072kg)
Motor 7.3hp/5.5kw(12V);8.16 hp/6.0kw(24v);Series Wound
Control Remote switch,12ft(3.7m)lead;
Gear reduction ratio 375:1
Clutch Sliding Ring Gear
Braking Action Two-way, Automatic In-The-Drum
Drum size Φ99mmX201.5mm
Cable Φ13.5mmX30m
Remote Control Wired remote control
Battery
Recommended:650CCA minimum for winching
Battery Leads 2 gauge,72"(1830mm)
MAX Current (No Load)
≧75A(12V)≧65A(24V)
MAX Current (Loaded)
≧465A(12v) ≧410A(24V)
Finish
Dark gray powder coat

Overall dimensions 565X310X280MM
Mounting hole
254x114.3mm,254x194.3mm M10X30 Outside Hexagon
8.8 grade 8 pieces
20000LBS LINE SPEED AND AMP DRAW (FIRST LAYER) 12v
Line Pull
Lbs NO
LOAD 8000 10000 13000 16000 20000
kgs 3629 4536 5897 7258 9072
Line Speed
ft/min 19.8 11.6 9.7 8.58 6.6 3.96
m/min 6 3.5 2.95 2.6 2 1.2
Motor Current
amps
75
190
260
310
380
465
20000LBS LINE SPEED AND AMP DRAW (FIRST LAYER) 24v
Line Pull
Lbs NO
LOAD 8000 10000 13000 16000 20000
kgs 3629 4536 5897 7258 9072
Line Speed
ft/min
19.8
11.6
9.7
8.58
6.6
3.96
m/min
6
3.5
2.95
2.6
2
1.2
Motor Current
amps
65
170
230
290
360
410
20000LBS LINE PULL AND CABLE CAPACITY
Layer of cable
1
2
3
4
5
Rated line
pull per layer
Lbs
20000
16000
13000
10000
8000
Kgs
9072
7258
5897
4536
3629
Cumulative
Cable capacity
Ft
16.5
37.3
61
89
99
M 5 11.3 18.5 27 30
Specific Operation Warnings
Read the following carefully before attempting to operate your winch and keep the instructions for future
reference.
1. The uneven spooling of cable, while pulling a load, is not a problem, unless there is a cable pile up on one end of
the drum. If this happens reverse the winch to relieve the load and move your anchor point further to the centre of the
vehicle.
After the job is done you can unspool and rewind for a neat lay of the cable.
2. Store the remote control switch and wireless remote inside your vehicle where it will not become damaged, inspect
it before you plug it in.
3. When ready to begin spooling in, plug in remote control switch with clutch disengaged, do not engage clutch with
motor running.
4. Never connect the hook back to the cable. This causes cable damage. Always use a sling or chain of suitable
strength.
5.Observe your winch while winching, if possible while standing at a safe distance. Stop the winching process every
metre or so to assure the cable is not pulling up in one corner. Jamming the cable can break your winch.
6. Do not attach tow hooks to winch mounting apparatus. They must be attached to vehicle frame.

7. The use of a snatch block will aid recovery operations by providing a doubling of the winch capacity and a halving
of the winching speed, and the means to maintain a direct line pull to the centre of the rollers. When double loading
during stationary winching, please do use the snatch block and the winch hook should be attached to the chassis of
the vehicle.
8. Ensure rated "D" or bow shackles are used in conjunction with an approved tree trunk protector to provide a safe
anchor point.
9. When extending winch cable, ensure that at least five wraps of cable remain on drum at all times. Failure to do this
could result in the cable parting from the drum under load .Serious personal injury or property damage may result.
10.All winches are provided with a Red Cable marking to identify that 5 cable wraps remain on the Winch drum when
this mark appears at the rollers. No recovery should be attempted beyond this marking.
11.Since the greatest pulling power is achieved on the innermost layer of your winch, it is desirable to pull off as
much line as you can for heavy pulls (you must leave at least 5 wraps minimum on the drum-red cable).If this is not
practical use a snatch block and double line arrangement.
12..Draping a heavy blanket or similar object over the extended winch cable is recommended as it will dampen any
back lash should a failure occur.
13.Neat, tight spooling avoids cable binding, which is caused when a load is applied and the table is pinched
between the others. If this happens, alternatively power the winch in and out. Do not attempt to work a bound cable
under load, free by hand.
14.Apply blocks to wheels when vehicles are on an incline.
15.Battery:
-Be sure that the battery is in good condition.Avoid contact with battery acid or other contaminants.
-Always wear eye protection when working around a battery.
-Have the engine running when using the winch, to avoid flattening the battery.
16. Winch Cable:
- Be sure that the cable is in good condition and is attached properly.
- Do not use the winch if cable is frayed.
- Do not move the vehicle to pull a load.
- The life of the cable is directly related to the use and care it receives. Following its first and subsequent uses, a
cable must be would on to the drum under a load of at least 500lbs (230kg) or the outer wraps will draw into the inner
wraps and severely damage the cable during winching. The first winch use should be a familiarization run while in a
relaxed, non-recovery situation. Spool out the cable until the red cable mark appears (about five wraps on the drum),
then rewind the cable on to the drum under a load of 500lbs (230kg) or more. This will slightly tension and stretch the
new cable and create a tight cable wrap around the drum. Failure to do so may result in cable damage and reduced
cable life.
- When the cable is replaced,remove the fastener at the end of the cable from the pin on the drum, get the new cable
and positon the new fastener back onto the pin.
17. Never attempt to exceed the pulling limits of this winch.
18. DO NOT drive your vehicle to assist the winch in any way . Vehicle movement in combination with winch

operation may overload the cable, the winch itself or cause damaging shock loads.
19. Shock loads when winching are dangerous! A shock load occurs when an increased force is suddenly applied to
the cable.A vehicle rolling back on a slack cable may induce a damaging shock load.
20. The winches shown in this manual are solely for vehicle and boat mounted, non-industrial applications.
21. Do not use winch in hoisting applications due to required hoist safety factors and features.
22. Do not use the winch to lift, support or otherwise transport persons.
Assembly Instructions
MOUNTING YOUR WINCH
1a) The winch is to be mounted into a suitable steel mounting frame using the 4 point foot mounting system in either
a horizontal or vertical plane.
b) It's very important that the winch be mounted on a flat surface so that the three sections (motor, cable drum and
gear housing) are properly aligned.
c) Before commencing installation ensure the mounting facility being used is capable of withstanding the winches
rated capacity.
d) The fitment of winches and/or a frontal protection system may affect the triggering of SRS air bags. Check that the
mounting system has been tested and approved for winch fitment in the airbag equipped vehicle.
2. Winch mounting frames and /or Frontal Protection Systems are suggested to suit most popular vehicles. Winch
frames are packaged with detailed fitting instructions.
3. The winch should be secured to the mounting with carbon steel bolts M10 x 30 and nuts M10 and spring washers
provided.
4. The roller fairlead is to be mounted so as to guide the rope onto the drum evenly.
LUBRICATION INSTALLATION
All moving parts in the winch are permanently lubricated with high and low temperature resistant mineral grease at
the time of assembly.
Under normal conditions factory lubrication will surfice.Lubricate cable periodically using light penetrating oil. Inspect
for broken strands and replace if necessary. If the cable becomes worn or damaged it must be replaced otherwise
great danger will be invited!.
CABLE INSTALLATION
Unwind the new cable by rolling it along the ground, to prevent kinking. Removed old cable and observe the manner
in which it is attached to the cable drum flange.

ELECTRICAL CONNECTION
For normal self -recovery work, your existing electrical system is adequate. A fully charged battery and proper
connections are essential. Run the vehicle engine during winching operations to keep battery charged.
Pay close attention to proper electrical cable connection as follows(refer to Diagram1)
1. Short red cable (B') connecting to the red terminal (B) of the motor.
2. Short black cable with yellow jacket (C') connecting to the yellow terminal (C) of the motor.
3. Short black cable with black jacket (D') connecting to the black terminal (D) of the motor.
4. Thin black cable(a') connecting to bottom terminal (A) of the motor.
5. Long black cable (1.8m), one terminal (A') connecting to the bottom terminal (A) of the motor, and the other
terminal
negative (-) connecting to negative (-) terminal of battery.
6. Long red cable positive (+) connecting to positive (+) terminal of battery.
NOTE:
1. Your battery must be kept in good condition.
2. Be sure battery cables are not drawn taught across any surfaces, which could possibly damage them.
3. Corrosion on electrical connections will reduce performance or may cause a short.
4. Clean all connections especially in remote control switch and receptacle.
5. In salty environments use a silicone sealer to protect from corrosion.
6. Index the heads of the plate studs into the keyhole slots on the back of the winch.
7.Attach the winch/Adaptor Plate assembly to your trailer hitch, by inserting the trailer hitch ball through the shaped
hole in theAdaptor Plate.

Operating Instructions
The best way to get acquainted with how your winch operates is to make a few test runs before you actually need to
use it .Plan your test in advance. Remember you can hear your winch as well as you can see it operate. Get to
recognize the
sound of a light steady pull, a heavy pull, and sounds caused by load jerking or shifting. Soon you will gain
confidence in operating your winch and its use will become second nature to you.
OPERATING:
1. Ensure the vehicle is secure by applying the parking brake or chocking the wheels
2. Pull out the winch cable the desired length and connect to an anchor point.
The winch clutch allows rapid uncoiling of the cable for hooking onto the load or anchor point. The shifter tab located
on the gear housing of the winch operates the clutch as follows:
a) To disengage the clutch, move the clutch shifter tab to the "FREESPOOL" position. Cable could be free spooled
off the drum.
b) To engage the clutch, move the clutch shifter tab into the "ENGAGED" position. The winch is now ready for pulling.
IMPORTANT NOTICE: The shifter tab could only be moved counter-clockwise.
3.Recheck all cable rigging before proceeding .
4.Plug in the winch hand control. It is recommended that the winching operation takes place from the driver's position
to ensure safe operation.
ENGAGED
FREE SPOOL

5. To commence winching operation, start vehicle engine, select neutral in transmission, maintain engine speed at
idle.
6. Operate the remote control switch to IN or OUT until the vehicle has been retrieved. Regularly check the winch to
ensure cable is winding onto the drum evenly.
Note:
1. Never winch with your vehicle in gear or in park, which would damage your vehicle's transmission.
2. Never wrap the cable around the object and hook onto the cable itself. This can cause damage to the object being
pulled, and kink or fray the cable.
3. Keep hands,clothing,hair and jewellery clear of the drum area and cable when winching.
4. Never use the winch if the cable is frayed, kinked or damaged.
5. Never allow anyone to stand near the cable, or in line with the cable behind the winch while it is under power. If the
cable should slip or brake, it can suddenly whip back towards the winch, causing a hazard for anyone in the area.
Always stand well to the side while winding.
6.Don't leave the switch plugged in and disconnect the power cables when winch is not in use.
CHECK THE WINCH CAREFULLY AND THOROUGHLY BEFORE OPERATING!
SPECIAL INSTRUCTIONS ON AIR COMPRESSOR WINCH SQ10000
Please follow the instructions on winch part when using the winch,but remember this:the winch and the air
compressor cannot work at the same time!Working both of them will cause big electrical current which will probably
destroy the battery.So it would be the best to use only one at a time,either the winch or the air compressor,but never
use them both simultaneously.The designed max working pressure for this air compressor is 115PSI.And the
compressor could inflate balls,bikes,motorcycles,cars,offroad vehicles, and light trucks and could work air tools
too.To achieve better performance,a 5-gallon air tank would help effectively.
Notes:
1. Connect the quick connector,air gun and air tank.
2. Power on the switch for air compressor
3. Work the air compressor,until it shuts off by itself and then use the air gun.
4. When you finish the inflating,power off the air compressor.And the air left in the air tube or air tank must be
deflated thoroughly otherwise great danger will be invited.
5. Do not point the air gun at people or animals!
6. When air tank is equipped,booster valve could be used to enable the air compressor to be applied more widely.
Maintenance
It is highly recommended that the winch be used regularly (once a month).Simply power the cable out 15m,free spool
5m and then power back in .This will keep all components in good working condition so that the winch can be relied
on when needed. Contact your authorized outlet for technical assistance and repairs.
SPARE PARTS:
A comprehensive range of spare parts is available.
Please kindly contact the distributor on the end cover or the local retailer.
NOTE:
The safety precautions and instructions discussed in this manual can't cover all possible

conditions and situations that may occur. It must be understood by the operator that common
sense and caution are factors, which cannot be built into this product, but must be applied by
the operator.
Integrated Parts Diagram

Item No. Description Qty
1 Clutch handle cap 1
2 Wavy spring washer 1
3
Gasket
1
4 Clutch handle 1
5
O-ring
2
6 Fixed hexagon screw 1
7
Spring washer
1
8 Gear box housing 1
9
Bearing
1
10 sun gear 1
11
3rd Planetary gear assy
1
12 2nd Planetary gear assy 1
13
Dual inner gear
1
14 1st Planetary gear assy 1
15
Gear box seal gasket
1
16 Hexagon screw M16x40 4
17
Spring washer zinc coated
4
18 Fairlead rolling wheel (short) 2
19 Bearing 8
20 Fairlead cross shaft 2
21
Gasket
2
22 Gasket 4
23
Fairlead shaft
2
24 Fairlead rolling wheel(long) 2
25
Fixed gear
1
26 Gear box bracket 1
27
Cylindrical pin
3
28 Spring washer 6
29
Hexagon screw M6x16
6
30 Spring washer 10
31
Hexagon screw M5x25
10
32 Bearing 2
33
Drum assy
1
34 Transmission shaft 1
35
New brake assy
1
36 Motor assy 1
37 Tie bar 1
38 Hexagon screw M6x12 4

Replacement Parts
•For replacement parts and technical questions, please contact your local distributor
•Not all product components are available for replacement. The illustrations provided are a convenient reference to the
location and position of parts in the assembly sequence.
•When ordering parts, the following information will be required: item description, item model number, item serial
number/item lot date code, and the replacement part number.
•The distributor reserves the rights to make design changes and improvements to product lines and manuals without
notice.

Limited Warranty
Forcome (Shanghai)Co., Ltd ("We'' or '"Us'') warrants to the original purchaser only ("You'' or “Your”) that the X-power
product purchased will be free from material defects in both materials and workmanship, normal wear and tear excepted,
for a period of two year from date of purchase. The foregoing warranty is valid only if the installation and use of the product
is strictly in accordance with product instructions. There are no other warranties, express or implied, including the warranty
of merchantability or fitness for a particular purpose. If the product does not comply with this limited warranty, Your sole and
exclusive remedy is that We will, at our sole option and within a commercially reasonable time, either replace the product
or product component without charge to You or refund the purchase price (less shipping). This limited warranty is not
transferable.
Limitations on the Warranty
This limited warranty does not cover: (a) normal wear and tear; (b) damage through abuse, neglect, misuse, or as a result
of any accident or in any other manner; (c) damage from misapplication, overloading, or improper installation; (d) improper
maintenance and repair; and (e) product alteration in any manner by anyone other than Us, with the sole exception of
alterations made pursuant to product instructions and in a workmanlike manner.
Obligations of Purchaser
You must retain Your product purchase receipt to verify date of purchase and that You are the original purchaser. To make
a warranty claim, contact your local distributor, identify the product by make and model number, and follow the claim
instructions that will be provided. The product and the purchase receipt must be provided to Us in order to process Your
warranty claim. Any returned product that is replaced or refunded by Us becomes our property. You will be responsible for
return shipping costs or costs related to Your return visit to a retail store.
Remedy Limits
Product replacement or a refund of the purchase price is Your sole remedy under this limited warranty or any other
warranty related to the product. We shall not be liable for: service or labor charges or damage to Your property incurred in
removing or replacing the product; any damages, including, without limitation, damages to tangible personal property or
personal injury, related to Your improper use, installation, or maintenance of the product or product component; or any
indirect, incidental or consequential damages of any kind for any reason.
Assumption of Risk
You acknowledge and agree that any use of the product for any purpose other than the specified use(s) stated in the
product instructions is at Your own risk..
Table of contents
Other XPower Winch manuals
Popular Winch manuals by other brands

Warrior Winches
Warrior Winches S4000EN Assembly & operating instructions

Tulsa
Tulsa RUFNEK 15 Service manual

American Landmaster
American Landmaster 18931-R installation instructions

Hammerhead
Hammerhead HG2200AT Operator's manual

FLINT HILL
FLINT HILL FHG47ZR Instruction manual parts catalog

SuperATV
SuperATV WN-3500 Guide