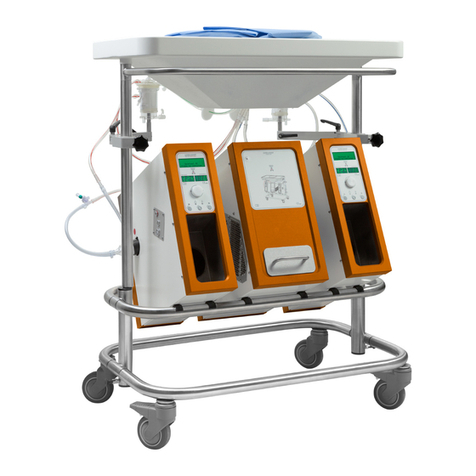
XVIVO XPS User manual

XVIVO Perfusion System (XPSTM) Instrucons for Use -1- P/N: 9182-0189 Revision Q
XVIVO PERFUSION SYSTEM (XPS™)
SOFTWARE ver. 5.2
INSTRUCTIONS FOR USE
Ref: 19030 (US) and 19040 (CE)
Serial Numbers: XPS0101+

XVIVO Perfusion System (XPSTM) Instrucons for Use -2- P/N: 9182-0189 Revision Q
Copyright © 2010, 2011, 2012, 2013, 2014, 2015,
2016, 2017, 2018, 2019
XVIVO Perfusion AB, all rights reserved
Subject to technical changes
Because of connuous product improvements, the illus-
traons and technical informaon found in the XPS User’s
Guide may dier (slightly) from the current version of the
device.
User Guide References
This document was created using informaon from:
1) CardioHelp User’s Manual/English/0.9.0
2) CardioHelp XVIVO/Technical Data/Maintenance/
English/100813
3) Flow/bubble sensor/ Technical Data/English/100812
4) Hamilton-C3 Operator’s Manual 624446/03 Soware
version 2.0.x (2017-05-12)
5) Hico-Variotherm 550 Instrucons for Use/ REF 542801
Rev.2-08/05
Manufacturer:
XVIVO Perfusion AB
Box 53015
SE-400 14 Göteborg
Sweden
Visitors/deliveries:
Mässans gata 10
SE-412 51 Göteborg
Sweden
Telephone: +46 31 788 21 50
Distributed in the US by:
XVIVO, Inc.
3666 S Inca St
Englewood, CO 80110
Telephone: (303) 395-9171
www.xvivoperfusion.com
This User’s Guide and the equipment it describes are for use only by qualied medical professionals trained
in the parcular technique and surgical procedure to be performed.
Australia Sponsor:
Emergo Australia
Level 20
Darling Park, Tower II
201 Sussex Street
Sydney, NSW, 2000
Australia 2460

XVIVO Perfusion System (XPSTM) Instrucons for Use -3- P/N: 9182-0189 Revision Q
Symbol Denion
Recyclable materials
Important! Observe warnings and safety
precauons in the accompanying doc-
uments
Electrical: General Danger
Electrical Shock/ Electrocuon (located
on top of power supply covers)
Moving parts can crush and cut
Alternang current
Direct current
Equipotenal Ground (located at the ex-
ternal ground point next to the input
power connector)
Protecve Earth ground (located at every
ground stud within the cart frame)
Symbols used on device labels and packaging:
Symbol Denion
Power on/o switch
Manufacturer
Date of manufacture
Consult operator’s manual. Refer to the
operator’s manual for complete infor-
maon.
Indicates the degree of protecon against
electric shock according to IEC 60601-1.
Class II devices have double or reinforced
insulaon, as they have no provision for
protecve grounding. (C3 Venlator only)
Canadian Standards Associaon and Na-
onal Recognized Test Laboratory ap-
proval
Dispose according to Council Direcve
2002/96/EC or WEEE (Waste Electrical
and Electronic Equipment)
Serial Number
This way up
Fragile, handle with care
Keep dry
Temperature limitaons
Humidity limitaons
Atmospheric pressure limitaons at
transport and storage
Stacking limitaons

XVIVO Perfusion System (XPSTM) Instrucons for Use -4- P/N: 9182-0189 Revision Q
CONTENTS
CHAPTER 1 XPSTM System 8
1.1 STEEN SoluonTM Overview 8
1.2 XPSTM Cart Overview 9
1.3 XPS Operator Warnings and Cauons 10-11
CHAPTER 2 Technical Operaon 12
2.1 Technical Operaon 12
2.2 XVIVO Disposables 12
2.2.1 XVIVO Organ ChamberTM 13
2.2.2 XVIVO Disposable Lung CircuitTM 14
2.2.3 Connect XVIVO Disposable Lung CircuitTM 15
2.2.4 Assemble STEEN SoluonTM Spike Manifold 16
2.2.5 Connect Tubing Lines to XPS Cart 17
2.2.6 XVIVO PGM Disposable SensorTM 18
2.2.7 Set Temperature 19
2.3 Power Up 20
2.4 STEEN SoluonTM Perfusate Setup 21
2.4.1 CardioHelp XVIVO Pump Controls 21
2.4.2 Prime Circuit with STEEN SoluonTM 22
2.4.3 Flow/Bubble and Level Sensors 23
2.4.4 Calibrate Flow Sensor 24
2.4.5 Calibrate C3 Venlator 25
2.5 Enter Setup Data 26
2.5.1 XVIVO PGM Disposable Sensor Calibraon 27
2.6 Weight Sensor 28
2.7 UPS 29
CHAPTER 3 Lung Preparaon 30
3.1 Lung Preservaon 30
3.2 Protecve Maintenance 30
3.3 Lung Cannulaon 31
3.3.1 Ideal Lung Cannulaon 31
3.3.2 Le Atrial (LA) Cannulaon 32
3.3.3 Pulmonary Artery (PA) Cannulaon 33
3.3.4 Intubaon 34
3.3.5 Single Lung Cannulaon 35
3.3.6 Back Table Flush 36
3.3.7 Pressure Sensors 37
3.3.8 Zero Pressure Sensors 38
3.3.9 Prime Lung/ Retrograde Flow 39
3.3.10 Antegrade Flow 40
3.3.11 Venlator Sengs 41-43
CHAPTER 4 Ex Vivo Lung Perfusion (EVLP) Procedure 44
4.1 Ex Vivo Lung Perfusion (EVLP) 44
4.2 EVLP Strategy 44
4.3 EVLP Procedure 45
4.3.1 Lung-Protecve Flow Rates 45
4.3.2 Deoxygenaon Gas 46
4.3.3 XVIVO PGM Disposable SensorsTM Single 47
Point Calibraon
4.3.4 Smart Sequencing 48
4.3.5 Lung Recruitment 1: Manual Breath 49
4.3.6 Lung Recruitment 2: O2 Challenge Mode 50
4.3.7 Chest Radiograph 51
4.3.8 STEEN SoluonTM Exchange 52
IFU CHAPTERS
1) XPSTM Overview
2) Technical Operation
3) Lung Preparation
4) Ex Vivo Lung Perfusion
5) Notifications
6) Equipment Alerts
7) Equipment Alarms
8) Appendix 1 Features
9) Appendix 2 Cleaning &
Maintenance
10) Appendix 3 Tech Data

XVIVO Perfusion System (XPSTM) Instrucons for Use -5- P/N: 9182-0189 Revision Q
CONTENTS
CHAPTER 4 (Connued)
4.4 Troubleshoong 53
4.4.1 High PA Pressures 53
4.4.2 Impaired LA Drainage 54
4.4.3 Low pH 55
4.4.4 Low PCO255
4.4.5 Decreasing STEEN SoluonTM Levels in 56
Reservoir
4.4.6 Changing Out Oxygenator Pump Disposable 57
4.4.7 Restart XPSTM Soware 58
4.5 Finishing EVLP 59
4.5.1 Rapid Cool-Down 59
4.5.2 EVLP Failure Assessment 60
4.5.3 Automated End Case Feature 61
4.5.4 Shutdown and Cleaning 62
CHAPTER 5 Nocaons 63
5.1 Connecons & Date/Time 64
5.2 XPSTM Soware 65-72
CHAPTER 6 Equipment Alerts 73
6.1 Heater/ Cooler 74
6.2 CardioHelp XVIVO Alert Panels 75
6.2.1 CardioHelp XVIVO (Medium-priority) 76-77
6.2.2 CardioHelp XVIVO (Low-priority) 78-80
6.3 C3 Venlator Alert Panels 81
6.3.1 C3 Venlator 82-83
CHAPTER 7 Equipment Alarms 84
7.1 Heater/ Cooler 85
7.2 CardioHelp XVIVO 86
7.4 C3 Venlator 87
IFU CHAPTERS
1) XPSTM Overview
2) Technical Operation
3) Lung Preparation
4) Ex Vivo Lung Perfusion
5) Notifications
6) Equipment Alerts
7) Equipment Alarms
8) Appendix 1 Features
9) Appendix 2 Cleaning &
Maintenance
10) Appendix 3 Tech Data

XVIVO Perfusion System (XPSTM) Instrucons for Use -6- P/N: 9182-0189 Revision Q
CONTENTS
CHAPTER 8 Appendix 1 Addional Features 88
CardioHelp XVIVO
8.1 Display Features 89
8.2 Tab Controls 90
8.3 Menu Features 91
8.3.1 General Menu Sengs 91-92
8.3.2 System Data & Informaon Sengs 92
8.3.3 Pump Mode Sengs 93
8.3.4 Calibrate Touchscreen 93
8.4 Intervenon Sengs 94
8.4.1 RPM Mode: Flow Monitoring Control 94
8.4.2 Temperature Monitoring 94
8.4.3 Pressure Monitoring and Control 95
8.4.4 Bubble & Level Monitoring and Control 95
Heater/ Cooler
8.5 Control Layout 96
C3 Venlator
8.6 Setup Controls 97
8.6.1 Set Date & Time 97
8.6.2 Main Screen Orientaon 97
8.7 Graphics Monitoring 98
8.7.1 Graphics Window 98
8.7.2 Dynamic Lung 98
8.7.3 Dynamic Lung Compliance Graphics 99
8.7.4 Dynamic Loop Display 99
8.8 Monitored Parameters 100-101
Smart Sequencing
8.9 Smart Sequencing Table 102-103
EVENTS Page
8.10 History and Trend Logs
Viewing and Downloading Files 104
8.11 Trend Log Data 105-106
CHAPTER 9 APPENDIX 2 Cleaning & Maintenance 107
9.1 CardioHelp XVIVO 108
9.1.1 Cleaning 108
9.1.2 Maintenance & Service 108
9.2 Heater/Cooler 109
9.3 C3 Venlator 110
9.3.1 Cleaning 110
9.3.2 Maintenance & Service 110
9.4 Perfusate Gas Monitor (PGM) 111
9.4.1 Cleaning 111
9.4.2 Maintenance & Service 111
9.5 XVIVO Perfusion Cart 112
9.5.1 Cleaning 112
9.5.2 Maintenance & Service 112
IFU CHAPTERS
1) XPSTM Overview
2) Technical Operation
3) Lung Preparation
4) Ex Vivo Lung Perfusion
5) Notifications
6) Equipment Alerts
7) Equipment Alarms
8) Appendix 1 Features
9) Appendix 2 Cleaning &
Maintenance
10) Appendix 3 Tech Data

XVIVO Perfusion System (XPSTM) Instrucons for Use -7- P/N: 9182-0189 Revision Q
CONTENTS
CHAPTER 10 Appendix 3 Technical Data 113
10.1 CardioHelp XVIVO Technical Specicaons 114-117
10.1.1 Technical Data:Quadrox-iR Disposable 118
oxygenator, heat exchanger and
centrifugal pump
10.2 Heater/ Cooler Technical Specicaons 119
10.2.1 Technical Data 119
10.3 C3 Venlator Technical Specicaons 120
10.3.1 Environmental Requirements 120
10.3.2 Pneumac Specicaons 120
10.3.3 Electrical Specicaons 120
10.3.4 Control Seng Ranges and Resoluons 121
10.3.5 Parameter Ranges, Resoluons & 122-123
Accuracies
10.3.6 Real-me curves and loops 123
10.3.7 Adjustable alarm ranges and resoluons 124
10.3.8 Other Technical Data 125
10.4 PGM (Monitor) Technical Specicaons 126
10.4.1 Technical Data 126
10.5 PGM (Sensors) Technical Specicaons 127
10.5.1 Technical Data pH Sensor 127
10.5.2 Technical Data PO2 Sensor 127
10.6 XVIVO Perfusion Cart System Technical Specs 128
10.6.1 Product Classicaon 128
10.6.2 Physical Characteriscs 128
10.6.3 Environmental Requirements 128
10.6.4 Pneumac Specicaons 128
10.6.5 Electrical Specicaons 129
10.6.6 Control Sengs 129
10.6.7 Monitored Parameters 129
10.6.8 Noces 130
10.6.9 Conguraon Specicaons 130
10.6.10 Standards and Approvals 130
10.7 Electromagnec Compability (EMC) Declaraons
(IEC 60601-1-2) 131
10.8 Guidance and Manufacturer’s Declaraon
Electromagnec Immunity 132-134
10.9 XPS Accessories 135
10.10 XPS I/O Connecons 136
10.11 Installaon & Environmental Requirements 137
10.12 Revision History 138-140
IFU CHAPTERS
1) XPSTM Overview
2) Technical Operation
3) Lung Preparation
4) Ex Vivo Lung Perfusion
5) Notifications
6) Equipment Alerts
7) Equipment Alarms
8) Appendix 1 Features
9) Appendix 2 Cleaning &
Maintenance
10) Appendix 3 Tech Data

XVIVO Perfusion System (XPSTM) Instrucons for Use -8- P/N: 9182-0189 Revision Q
The primary mode of action for
STEEN Solution™ is its ability to
provide optimal colloid-osmotic
pressure (COP), permitting stable
fluid compartment homeostasis for
sufficient time to allow meaningful
functional evaluation of the lung at
37°C. STEEN SolutionTM therefore
mimics the in vivo situation with-
out the risk of edema formation in
the absence of harmful pro-
inflammatory cytokines and
activated leucocytes associated
with trauma, stress and brain
death. This mode of action is
primarily related to the water
binding properties of albumin and
its distributions across semi-
permeable membranes between
the intra- and extra-vascular spac-
es within the lung, and is not
based on any metabolic or
pharmacological action of either
colloid.
1.1 GENERAL OVERVIEW
STEEN Soluon™ is a clear, sterile, non-pyrogenic, non-toxic physiological
salt soluon containing human serum albumin (HSA) and dextran 40. This
soluon is an extracellular (low potassium) electrolyte soluon with physio-
logical colloid-osmoc pressure (COP) designed for use as a temporary con-
nuous normothermic machine perfusion soluon for assessment of inially
unacceptable isolated lungs aer removal from the donor in preparaon for
eventual transplantaon into a recipient.
The composion of STEEN Soluon™ was
designed to simulate the colloid-osmoc
pressure (COP) and crystalloid-osmoc
properes of human plasma to permit safe,
connuous ex vivo lung perfusion at
normothermia for up to 6 hours without the
development of either ssue edema or de-
hydraon - i.e. the COP and osmoc pres-
sure of the soluon were chosen to maintain
opmal water balance between the cellular
and the intra- and extra-vascular spaces.
The opmal (iso-oncoc) COP is provided by
a proprietary combinaon of human
albumin and dextran 40. The electrolyte
composion is essenally extra-cellular
(low K+) with a phosphate buer.
STEEN Soluon™ is intended to be used with the XVIVO Perfusion System
(XPSTM) for ushing and temporary connuous normothermic machine
perfusion of inially unacceptable excised donor lungs during which me
the funcon of the lungs can be reassessed for transplantaon. The me
required by the lungs to reverse the negave eects of neurogenic
pulmonary edema and to achieve a normal uid balance can vary based on
the inial donor environment.
Typically, the duraon of normothermic machine perfusion lasts 3-5 hours
(per FDA PMA approval) 3-6 hours (per FDA Novel Extension Study and CE
approval) to allow the lungs to slowly warm up, normalize uid balance and
be eecvely assessed. In exceponal cases, an addional 1-2 hours may
be needed for the lung to be adequately reassessed to allow assessment for
transplantaon suitability:
1
STEEN SolutionTM
5 hr (FDA)
6 hr (Novel Extension / CE)
3 - 5hr (FDA)
3 - 5 hr (Novel Extension) / CE
2 hr
1 hr30 min
2 hr1 hr30 min

XVIVO Perfusion System (XPSTM) Instrucons for Use -9- P/N: 9182-0189 Revision Q
XPSTM Cart Hardware
CardioHelp XVIVO pump
(includes pressure, temperature,
level, bubble and flow sensors)
Heater/ cooler
C3 Ventilator
Perfusate Gas Monitor (PGM)
STEEN SolutionTM Pumps
Touchscreen monitor
Display-only monitor
XVIVO Organ ChamberTM platform
100% medical O2 gas cylinder or
high pressure wall line for ventilator
Gas cylinder containing medical
quality O2 6%, CO2 8% and Nitrogen
86% for deoxygenation membrane.
X-Ray shelf
Barcode Scanner
Weight Sensor
1.2 XPSTM Cart Overview
Intended Use
The XVIVO Perfusion System (XPS™) is indicated for use in flushing and temporary continuous normothermic machine
perfusion of initially unacceptable excised donor lungs during which time the ex-vivo function of the lungs can be reas-
sessed for transplantation. (US)
The XVIVO Perfusion System (XPS™) is intended for flushing and temporary continuous normothermic machine perfusion
of isolated lungs, during which time the function of the lungs can be assessed for transplantation. (All markets except for
US)
Intended use patient population is adults: age ≥ 18 years old

XVIVO Perfusion System (XPSTM) Instrucons for Use -10- P/N: 9182-0189 Revision Q
1.3 XPSTM
Operator Warnings and Cautions
OPERATOR WARNINGS
Warning: The volume of STEEN SoluonTM perfusate loss in the system may adversely aect ex vivo lung stability. The user’s
aenon to providing adequate, mely replacement is essenal for lung safety.
Warning:The XVIVO Perfusion Cart as well as the rest of the XVIVO Perfusion System (XPSTM) are intended for use by healthcare
professionals only.
Warning:Use of accessories and cables other than those specied as replacement parts may result in increased risk of injury to
the XVIVO Perfusion Cart and/or user. Addionally, this may also result in increased RF Emissions and/or decreased
immunity to RF energy of the XVIVO Perfusion Cart.
Warning:Do not block or cover the venlaon opening on the XVIVO Perfusion Cart. Overheang could occur, causing decreased
funconality of the system.
Warning:Only use the CardioHelp XVIVO with acvated ow monitoring which triggers an alarm or intervenon as necessary.
Warning:Excessive electromagnec interference can occur and interfere with the ow measurement of the ow/bubble sensor.
This can result in incorrect measurements which cause incorrect value displays, alarms, ow regulaon and
intervenons.
Warning: Peristalc pump heads can cause injury if touched while in operaon with pump hose clamp not engaged.
Warning:The XPS™ should not be used adjacent to or stacked with other equipment and that if adjacent or stacked use is
necessary, the XPS™ should be observed to verify normal operaon in the conguraon in which it will be used.
Warning: Posion XPS™ close to power outlet to prevent accidental removal of power plug from power socket.
Warning: No modicaons to this equipment are allowed.
Warning: To avoid the risk of electric shock, this equipment must only be connected to a supply mains with protecve earth.
Warning: The UPS in the XPS must be periodically checked for proper operaon. The baeries in the UPS must be replaced periodi-
cally to maintain proper operaon. Baeries in the UPS are to be replaced by qualied service personnel only.

XVIVO Perfusion System (XPSTM) Instrucons for Use -11- P/N: 9182-0189 Revision Q
OPERATOR CAUTIONS
Cauon: This User’s Guide and the equipment it describes are for use only by qualied medical professionals trained in the
parcular technique and surgical procedure to be performed.
Cauon: The safe and eecve use of this medical device depends to a large degree on factors solely under the control of the
operator. It is important that all operators of this surgical system read, understand and follow the operang instrucons
(User’s Guide) supplied with this equipment. The responsibility to adhere to the approved labeling and Instrucons for Use
rests with the user. The Instrucons for Use are only provided as suggesons for procedure. The user must, on the basis
of his or her medical training and experience, evaluate the suitability of this procedure.
Cauon: Federal (USA) law restricts this device to the order of a physician.
Cauon: This device complies with the electromagnec compability standard IEC EN60601-1-2. It is possible that this device may
interfere with or be disturbed by other electrical devices.
Cauon: All disposable components of this device are designed as single use only and may not be reused in an ex vivo lung
procedure.
NOTE: When administered systemically, human serum albumin and Dextran have been associated with rare allergic reacons.
However, no such reacons have been reported with either of these substances when used for ex vivo lung preservaon.
NOTE: The XPSTM has been tested and found to comply with the limits for a Class A device, pursuant to CISPR 11 and Part 18 of
the FCC Rules. These limits are designed to provide reasonable protecon against harmful interference in a commercial
installaon. However, portable and mobile RF communicaons equipment generates, uses and can radiate radio
frequency energy and, if not installed and used in accordance with the manufacturer’s instrucons, may cause harmful
interference to the XPSTM. There is no guarantee that interference will not occur in a parcular installaon. If this
equipment receives harmful interference from RF communicaons, which can be determined by turning the RF
communicaons equipment o and on, the user is encouraged to try to correct the interference by one or more of the
following measures:
• Reorient or relocate the XVIVO Perfusion Cart
• Increase the separaon between the XVIVO Perfusion Cart and the RF communicaons equip-
ment
• Connect the XVIVO Perfusion Cart into an outlet on a circuit dierent from that to which the
RF communicaons equipment is connected
• Deacvate the ow intervenon. Incorrect ow values can trigger improper intervenons.
• Please note that ow values may be displayed and monitored with reduced accuracy and
alarms triggered with reduced accuracy
1.3 XPSTM
Operator Warnings and Cautions

XVIVO Perfusion System (XPSTM) Instrucons for Use -12- P/N: 9182-0189 Revision Q
2.1 TECHNICAL OPERATION
The XVIVO Perfusion System (XPSTM) provides a comprehensive plaorm
for ex vivo lung perfusion and assessment. The XPSTM Perfusion Cart is
designed with the following elements:
• CardioHelp XVIVO centrifugal pump drive with integrated
temperature (2) and pressure (2) sensors
• Thermoelectric heater/cooler device that uses water to maintain
perfusate temperatures at any set point between 15-39oC
• ICU-grade C3 Venlator with modes designed to provide protec-
ve venlaon to the ex vivo lung
• Perfusate management system with integrated pumps to enable
the addion, subtracon and recycling of STEEN SoluonTM in
the perfusion circuit
• In-line perfusate gas monitor (PGM) to enable real-me trending
of pH and PO2 during the procedure
• Touchscreen computer monitor for the perfusionist and separate
display-only monitor for the surgeon that displays data from the
hardware components as well as trends important lung funcon
parameters graphically
2.2 XVIVO DISPOSABLES
In addion to the hardware cart, the XPSTM includes the following single-
use disposable products designed for ex vivo lung perfusion:
• XVIVO Organ ChamberTM to asepcally hold the lungs during
the procedure
• XVIVO Disposable Lung Kit
- Fluid Level Sensor
- Pressure Sensor Line (Disposable Pressure Transducer)
- XVIVO Lung Cannula Kit
- Limb-o Breathing Circuit
- Venlator Flow Sensor
- Bacterial/Viral Filter
- Sterile Drape
• XVIVO Disposable Lung Circuit™ which includes an integrated
centrifugal pump head/ oxygenaon and heat exchange
membrane, hard-shell reservoir, leukocyte lter, so drain
reservoir and tubing
• XVIVO PGM Disposable SensorsTM to provide in-line, easily-
calibrated trending of the perfusate
• STEEN SoluonTM for ex vivo normothermic organ perfusion and
assessment
The following chapter details the hardware and disposable set-up and
operaonal procedures for the successful XPSTM operaon.
2
XPSTM Power Up
Disposable Circuit
XVIVO Organ ChamberTM
XVIVO Disposable Lung
Circuit™
Connect Disposables
STEEN Solution Manifold
XVIVO PGM Disposable
Sensors™
Set Temperature
XPSTM Setup
CardioHelp XVIVO
Prime Circuit with STEEN
SolutionTM
Flow/Bubble/Level Sensors
Calibrate C3 Ventilator
Enter Setup Data
PGM Sensor Calibration
Weight Sensor
UPS

XVIVO Perfusion System (XPSTM) Instrucons for Use -13- P/N: 9182-0189 Revision Q
Lift the blue chamber table
until it clicks into the locked
position. Place the weight sensor
on the table, within the groves
(see section 2.6 for more detail).
Connect the weight sensor
cable, at the vent panel. To dis-
connect cable, depress clips (not
shown) on each right and left side
of connector.
Open the separately wrapped
sterile clear “U” drape (product #
1019) and wrap the non-cut end
across the weight sensor and blue
chamber table. Wrap the end
with the pre-cut slot up and over
the top cross bar. Leave a small
opening from the pre-cut slot
near the area where the perfusion
tubing will pass into the sterile
area.
Secure in place with stainless
steel bar clips.
NOTE: Clips can be autoclaved or
drape can be clipped by perfu-
sionist from non-sterile side.
Open the XVIVO Organ Cham-
ber™ outer box. Remove the
Chamber and open the plastic
wrap by tearing along the blue
dotted line that reads “TEAR TO
OPEN” beginning at notch on
either end.
Remove the Chamber from the
poly bag and prepare to pass it
off aseptically to the gowned
scrub tech/nurse. Carefully and
aseptically, unwrap the first blue
drape layer away from the Cham-
ber and pass off to a scrub tech
or nurse.
Securely place the Chamber
on the weight scale to open the
second layer, using it to create a
sterile field around the Organ
Chamber.
2.2.1 XVIVO Organ
ChamberTM
Disposable Set-up
MANUAL TIP: Throughout the
XPS IFU, you routinely see three
color-coded number circles:
Black represents an instruction
only (no associated picture).
Red and/or blue indicates an
instruction and a representative
picture reference.

XVIVO Perfusion System (XPSTM) Instrucons for Use -14- P/N: 9182-0189 Revision Q
2.2.2 XVIVO Disposable
Lung CircuitTM
The XVIVO Disposable Lung
CircuitTM provides the aseptic
interface between the XPSTM cart
hardware and the ex vivo lung.
The following components are
part of the pack:
Quadrox-iR centrifugal pump
head/ oxygenation membrane/
heat exchanger
Temperature probe (2)
In-line perfusate gas sensor (2)
Leukocyte filter
Flow probe
Perfusion Loop
Pulmonary artery cannula and
pressure line
Left atrial cannula and pressure
line
XVIVO Organ Chamber
Hardshell reservoir
Level sensor
NOTE: #s 3, 7, 8, 9 & 11 are pack-
aged separately
Items 2 & 5 are reusable

XVIVO Perfusion System (XPSTM) Instrucons for Use -15- P/N: 9182-0189 Revision Q
Connect the disposables in the
order that they come out of the
pack:
Connect the oxygenator/
pump head to the pump drive.
Slightly tilt the device to the right
and then click to the left to se-
cure. Remove yellow luer cap.
Connect the leukocyte filter
into its housing and remove blue
luer cap/ air vent.
Connect the reservoir into the
reservoir housing with volume
marks pointed out (away from
mounting pole).
Aseptically pass off the blue-
wrapped perfusion loop section
and blue-wrapped drain bag
section to the sterile side of the
cart.
Sterilely connect the drain bag
connector to the XVIVO Organ
Chamber’s drain port.
Pass drain bag back over to
the non-sterile ‘wet area’ to
attach to wall hooks.
Pass the perfusion loop section
(from #4 above) quick connect
ends through the sterile drape
opening to the non-sterile wet
area. Snap perfusion loop hoses
into open tube clamps on bar
through the cart window (PA/
yellow marked tube on right side,
LA/green on left) as shown.
Surround the tubing with the
clear drape cut-out and re-secure
the drape clips if necessary.
NOTE: Any kinking in tubing lines
may occlude flow rates. Ensure
lines are free of kinks or obstruc-
tions.
2.2.3 Connect XVIVO
Disposable Lung
CircuitTM
Disposable Set-up

XVIVO Perfusion System (XPSTM) Instrucons for Use -16- P/N: 9182-0189 Revision Q
Locate the STEEN SolutionTM
spike manifold tubing (3 spikes
connected in series). Snap the
STEEN spike end piece (with the
connected air vent) into position
’3’ of the spike holder.
Snap the middle spike into
position ‘2’
Snap the third spike (closest to
the long single tube) into position
‘1’ of the spike holder.
Snap the spike holder into po-
sition below the STEEN SolutionTM
bottle holder as shown.
Feed the long STEEN Solu-
tionTM tubing piece through the
closest peristaltic pump track and
center tubing across middle of
pump head. Check to make sure
tubing is centered between small
black channels on both ends.
NOTE: Safety guards (not shown)
are installed over each peristaltic
pump motor.
Carefully close pump head by
moving lever all the way to the
right. Check for kinking.
NOTE: Tubing must be centered
across peristaltic pump heads or
damage/ kinking to the tubing
may occur.
Connect STEEN SolutionTM tub-
ing to reservoir inlet port (Section
2.2.5).
2.2.4 Assemble STEEN
SolutionTM Spike
Manifold

XVIVO Perfusion System (XPSTM) Instrucons for Use -17- P/N: 9182-0189 Revision Q
Connect STEEN SolutionTM
spike tubing to reservoir inlet
port
Locate the STEEN SolutionTM
drain tubing which comes off of
the Quadrox-iR oxygenator and is
not connected to anything else at
its terminal end and has an or-
ange-colored tape.
Feed the STEEN SolutionTM
drain tubing through second
(lower) pump head in the flow
direction shown by the arrow
(Right to Left)
Connect STEEN SolutionTM
drain tubing to drain bag at the
number-matched orange tape
stripe near luer port.
Locate the STEEN SolutionTM
recycle tubing which is a 24 inch
piece of tubing connected to the
drain bag with a red tape stripe.
Connect the open end of the
recycle tubing to a reservoir inlet
port and feed the STEEN Solu-
tionTM recycle tubing through the
third pump head in the direction
shown.
NOTE: Tubing must be inserted
from the RIGHT side (entry) to the
LEFT side (exit), centered across
peristaltic pump heads, carefully
fitting between the two black
tubing channel rails on both the
entry and exit ends of the pump
head or damage/ kinking to the
tubing may occur.
CAUTION: The adjustable black
settings on both sides of all 3
pump heads must be fixed in the
3rd click position down from the
top on each pump to properly
seat the tubing.
2.2.5 Connect Tubing
Lines to the XPSTM Cart
Disposable Set-up

XVIVO Perfusion System (XPSTM) Instrucons for Use -18- P/N: 9182-0189 Revision Q
2.2.6 XVIVO PGM
Disposable SensorTM
Open sensor package.
NOTE: Keep packaging label to
enter calibration data into XPS
Software in a later step.
Aseptically connect sensor to
disposable tubing set using quick
connects. Sensor will only con-
nect in the correct orientation.
Insert sensor into housing as
shown.
Repeat for second sensor.

XVIVO Perfusion System (XPSTM) Instrucons for Use -19- P/N: 9182-0189 Revision Q
2.2.7 Set Temperature
TEMP SENSORS
Connect straight LA
temperature sensor to reservoir.
Connect PA temperature sen-
sor to oxygenator.
Ensure temperature sensors
are connected to the correct
(color-coded) ports on interface
panel as shown.
HEATER/COOLER
Ensure blue hoses are
connected to hose panel and
Hansen connectors are snapped
tightly onto oxygenator (does not
matter which blue hose connects
to which port on oxygenator).
NOTE: Water will leak out of
Hansen connectors if they are not
seated correctly. Make sure they
snap tightly onto heat exchange
ports of oxygenator.
Set initial temperature of
heater/cooler unit to 23oC by
using touch keypad.
If temperature is >35oC,
simultaneously press the
temperature release key and the
down arrow to achieve desired
temperature setting.
Ensure there is enough
distilled water in Heater/Cooler
reservoir. See Section 9.2 for
filling directions.
Circulate water through the
oxygenator’s heat exchanger
membrane to eliminate bubbles
and to check for leaks/cracks in
the oxygenator housing.
XPSTM Perfusion Cart Hardware

XVIVO Perfusion System (XPSTM) Instrucons for Use -20- P/N: 9182-0189 Revision Q
Remove 6 to 8 bottles of
STEEN SolutionTM to allow to
warm up to room temperature.
Note: As a precursor to the rec-
ommended STEEN SolutionTM
Exchange step (Section 4.3.7)
consider warming half the bot-
tles (3 to 4 bottles) to a normo-
thermic temperature.
Ensure XPS is plugged into
the wall outlet. Note: wall outlet
should be equipped with back-
up power.
Turn toggle switch to the up
position to initiate XPS system
battery backup and press the
UPS button.
Start CardioHelp and HCU by
pressing power buttons for
each. Set HCU to 23 degrees.
Start Touchscreen monitor
(power button is located on the
back of the monitor), and Ven-
tilator by pressing power but-
tons for each.
2.3 Power Up
CAUTION: Before starng proce-
dure, ensure that all four wheel
casters are in locked posion by
pressing each caster lock to the
DOWN posion.
Table of contents
Other XVIVO Medical Equipment manuals