6
fr - traduction de la notice originale
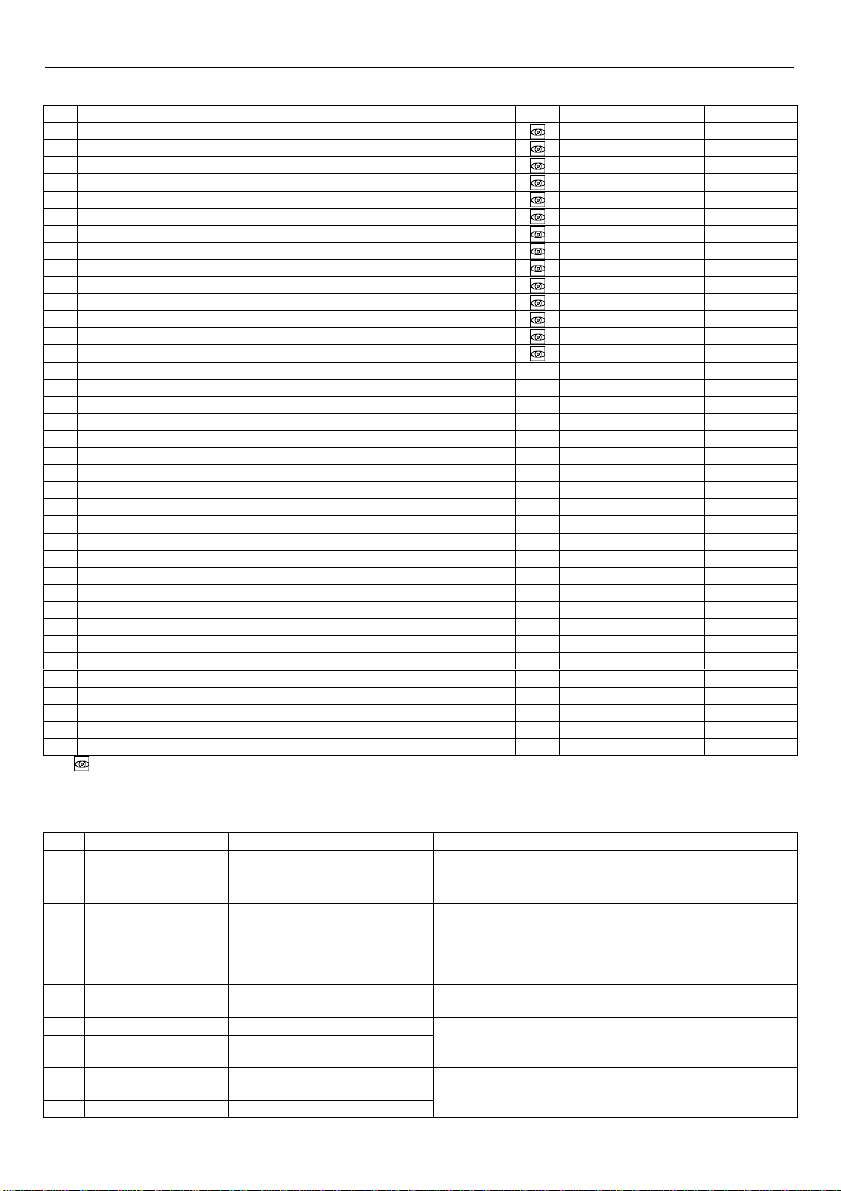
Check:
the system configuration
the position and integrity of the check valve or the
clapet valve
Stop the pump for 5 minutes and then restart it again; if
the problem continues, contact Xylem or the Authorised
Distributor
EEPROM Data memory
corrupted
Voltage supply out of operating
range
Check:
the voltage
the connection of the electric system
Motor winding
temperature error
Motor thermal protection trip
Check for impurities near the impeller and rotor.
Remove them if necessary
Check the conditions of installation, and the water and
air temperature
Wait for the motor to cool down
If the error persists, stop the pump for 5 minutes and
then start it again
If the problem continues, contact Xylem or the Authorised
Distributor
Power module
temperature error
Frequency converter thermal
protection trip
Check the conditions of installation, and the air
temperature
Stop the pump for 5 minutes and then restart it again; if
the problem continues, contact Xylem or the Authorised
Distributor
Check if there are any leaks in the system and refill the
system
Lack of water detection (if P48=
ERR)
Check the water level in the system
Missing pressure sensor (not
present in ACT)
Check the condition of the connection cables
Pressure below minimum
threshold (not present in ACT)
Check the settings of parameters P45 and P46
One of the three power supply
phases is missing.
Check the connection to the power supply network
No pressure sensor 1 detected
Check the condition of the sensor connection cables
No pressure sensor 2 detected
Check the condition of the sensor connection cables
AVERTISSEMENT
Ce guide ne remplace pas le manuel d’installation, d’exploitation et de maintenance.
Le personnel qualifié doit s'assurer d'avoir lu et compris le manuel d’installation, d’exploitation et de
maintenance avant d'installer le produit et de l'utiliser.
Connexion
1. Connecter la pompe au circuit hydraulique.
2. Amorcer la pompe, en s'assurant d'éliminer tout l'air de l'intérieur à l'aide des vannes de purge.
3. Pressuriser le système en s'assurant que la pression d'aspiration de la pompe correspond aux indications du
manuel relatif.
4. Connecter le câble d’alimentation à l'unité à l'aide du presse-étoupe M20. Voir Figure 1.
5. Ouvrir le couvercle de la boîte à bornes. Voir Figure 1.
6. Connecter (voir Figure 2) :
a) Le fil de terre à la borne 1 (versions monophasées et triphasées)
b) Le conducteur de phase à la borne 2 (versions monophasées) ou aux bornes 2, 3 ou 4 (versions triphasées)
c) Le conducteur neutre à la borne 3 (versions monophasées uniquement).
7. Si le système de contrôle de bas niveau d'eau doit être connecté, retirer le cavalier des bornes 13 et 14 (versions
monophasées) ou des bornes 11 et 12 (versions triphasées). Voir Figure 2.
8. Pour les connexions externes, voir les Figures 3, 4, 5, 6, 7, 8 et 9.
9. Fermer le couvercle de la boîte à bornes et serrer toutes les vis et presse-étoupes.