TABLE OF CONTENTS
General Description ..................................................... 1
Accessories & Options ................................................. 4
................................................ 4
.....................................................
Before You Begin .......................................................... 6
.......................................... 6
.................. 6
................................... 7
................................ 7
................................................... 7
............................................................ 7
Installation and Interconnections ............................... 8
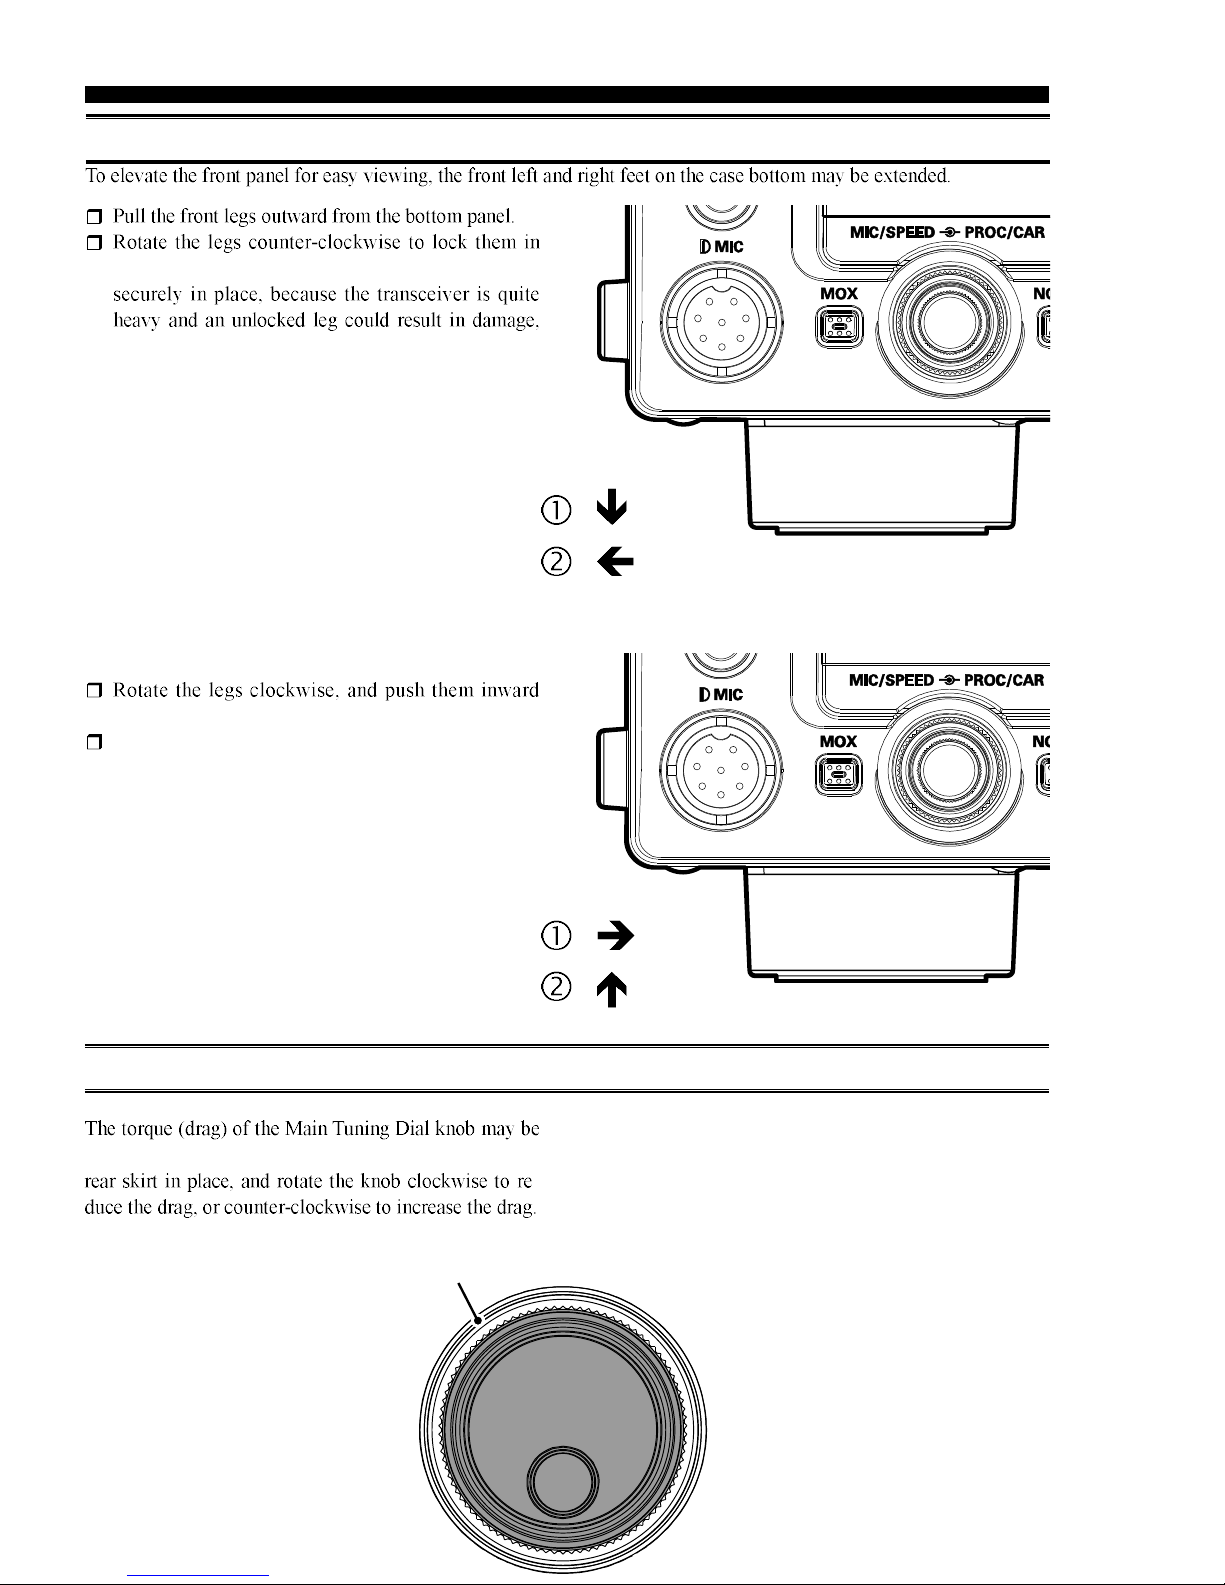
........................................... 8
................................................ 8
Grounding .................................................................
............. 10
........... 11
Interconnections .....................................................
.......... 13
................... 14
Plug/Connector Pinout Diagrams ............................. 15
Front Panel Controls & Switches ............................. 16
Display Indications..................................................... 26
Rear Panel ................................................................... 29
FH-2 Switches ............................................................. 31
Basic Operation: Receiving on Amateur Bands ...... 32
...................................
................................... 36
..................................................................... 37
............................................................... 37
Convenience Features ................................................ 38
.................................................... 38
.............................................
..............................................
Scope ...................................................................... 40
......................................
............... 43
................................ 43
...................... 43
B8 ....... 43
Interference Rejection ............................................... 44
.......... 44
...
......................................................................... 46
.......................................................... 47
........................
..........................................
..........................
..............................
...............................................
....................
Using IF Shift and Width Together ...................
peration .......................................
....................
............
............................
Tools for Comfortable and Effective Reception ...... 59
...............................................
..........................................................
............................. 60
SSB/AM Mode Transmission .................................... 62
Using the Automatic Antenna Tuner ........................ 64
....................................................... 64
............................................
Enhancing Transmit Signal Quality ......................... 66
.......................... 66
................................... 68
idth ...........
Transmitter Convenience Features .......................... 70
........................................................ 70
......... 70
...........
............................................................. 73
.................. 74
.....................................
.......................................