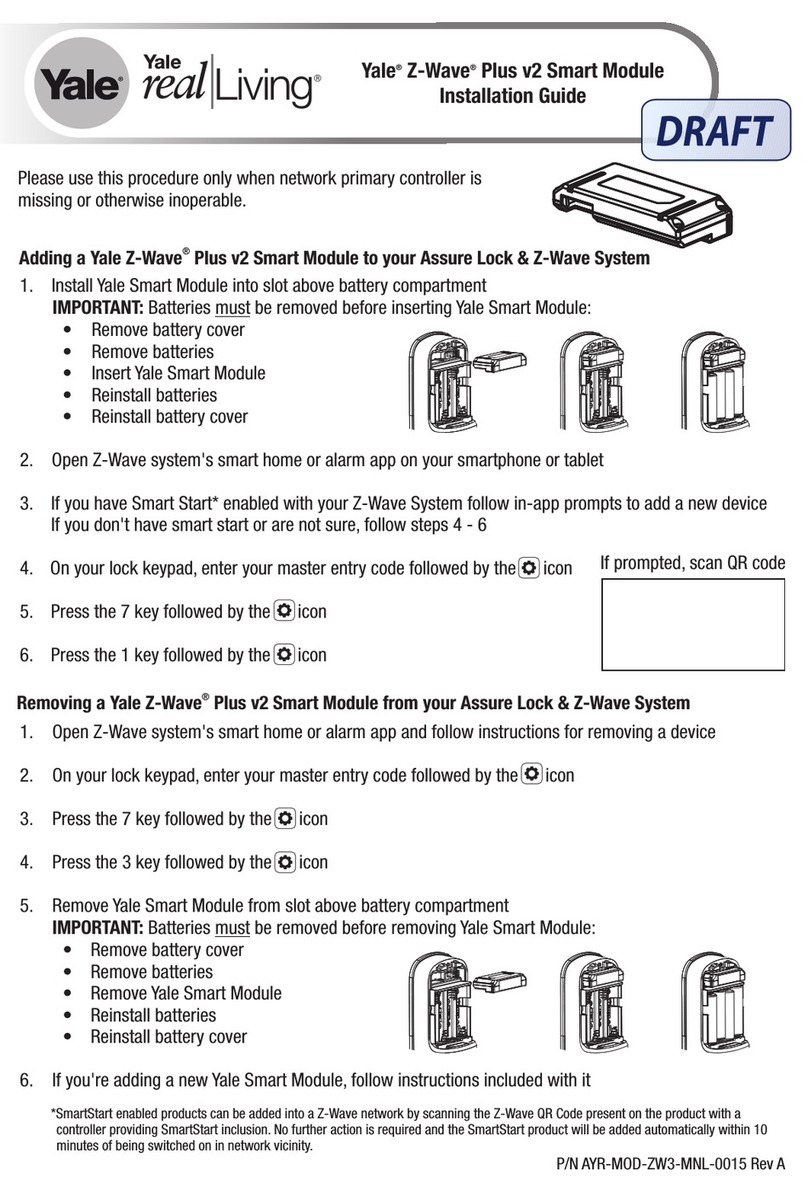
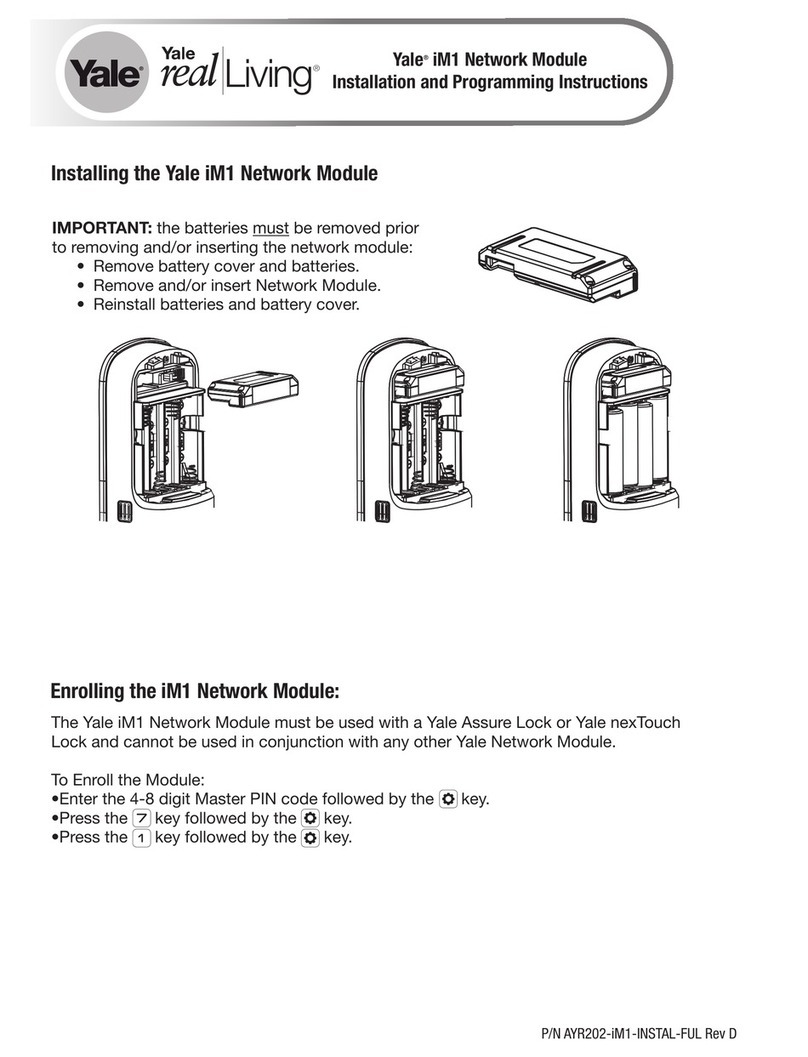
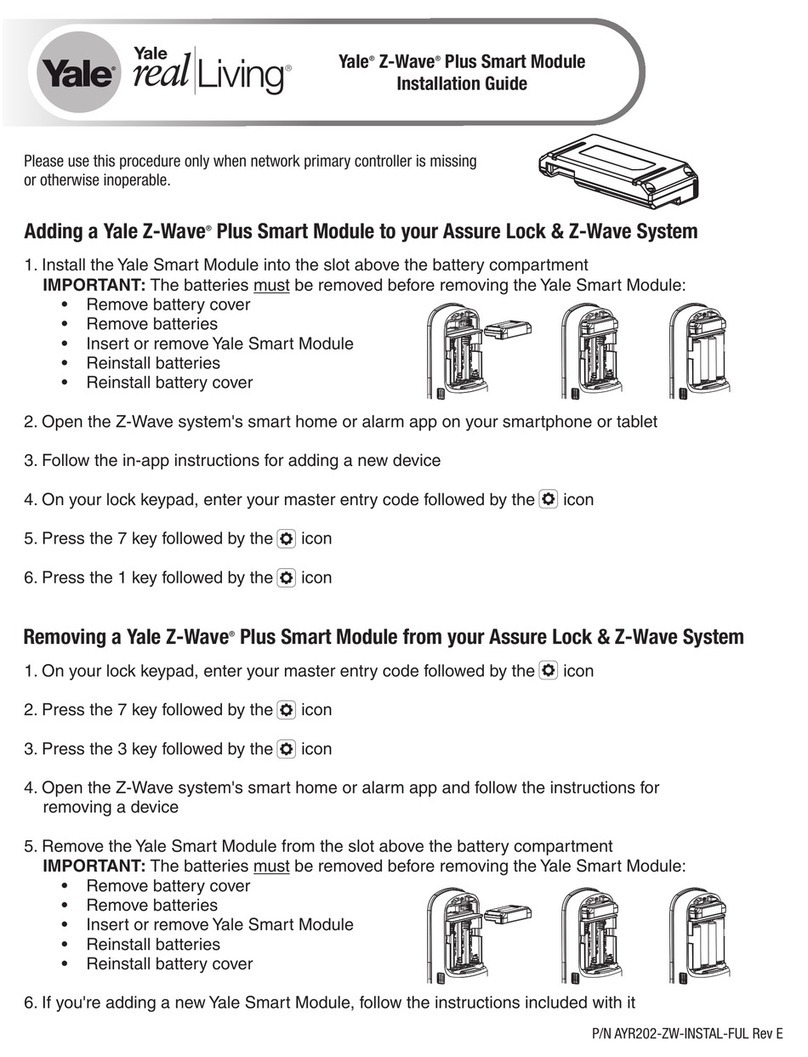
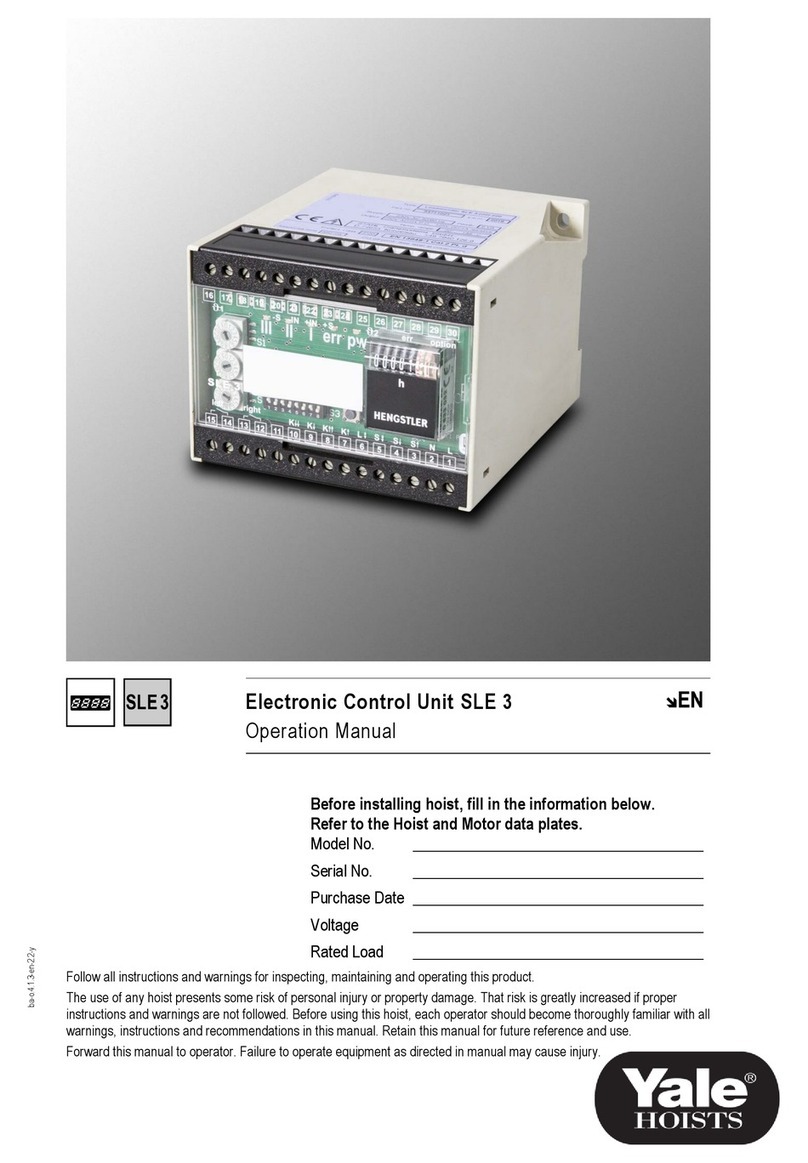
Yale Z-Wave Plus User manual

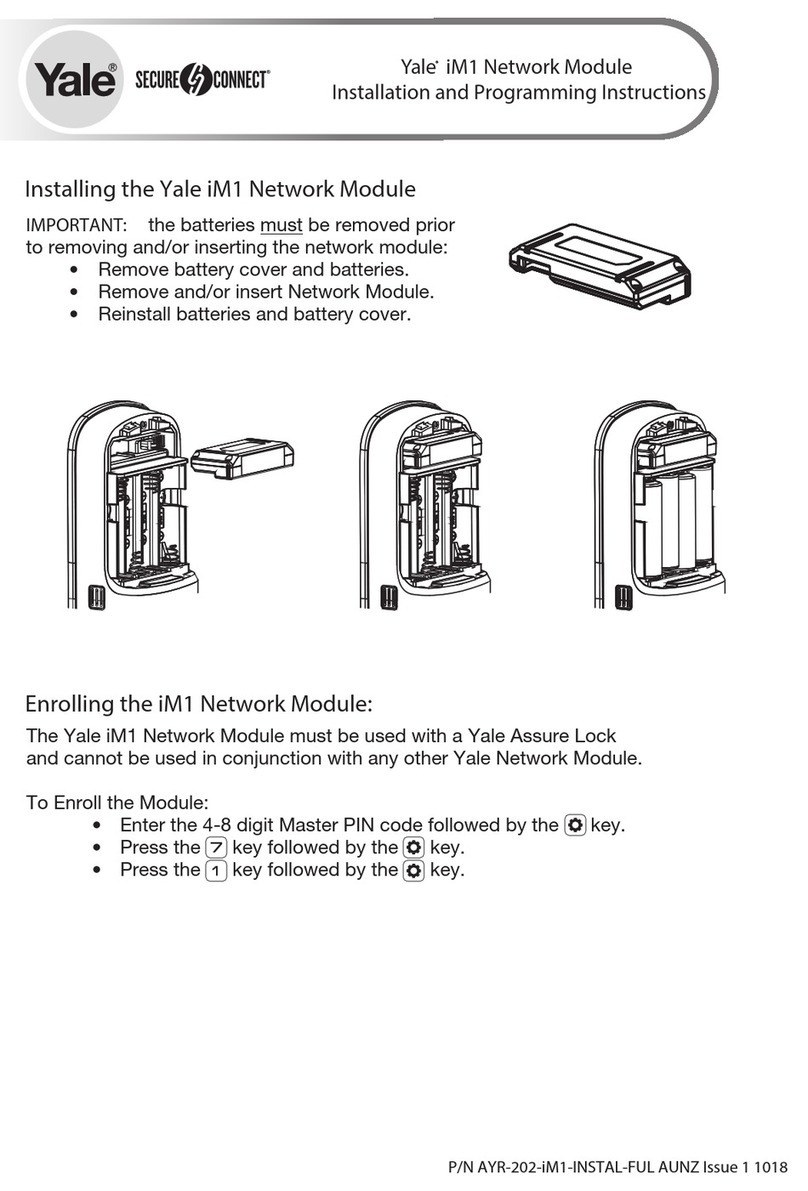
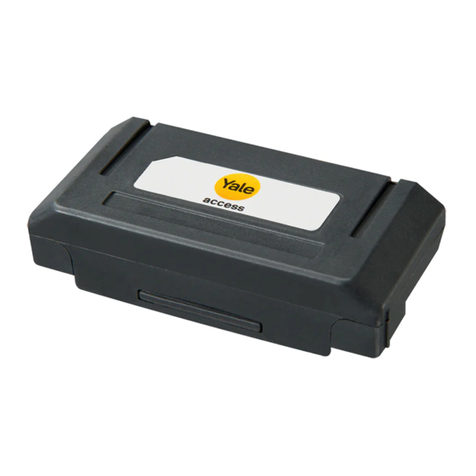
Yale® Z-Wave Plus™ Smart Module Installation Guide1. On your lock keypad, enter your master entry code followed by the icon2. Press the 7 key followed by the icon3. Press the 3 key followed by the icon4. Open the Z-Wave system's smart home or alarm app and follow the instructions forremoving a device5. Remove the Yale Smart Module from the slot above the battery compartmentIMPORTANT: The batteries must be removed before removing the Yale Smart Module:•Remove battery cover•Remove batteries•Insert or remove Yale Smart Module•Reinstall batteries•Reinstall battery cover6. If you're adding a new Yale Smart Module, follow the instructions included with itRemoving a Yale Z-Wave Plus Smart Module from your Assure Lock & Z-Wave System1. Install the Yale Smart Module into the slot above the battery compartmentIMPORTANT: The batteries must be removed before removing the Yale Smart Module:•Remove battery cover•Remove batteries•Insert or remove Yale Smart Module•Reinstall batteries•Reinstall battery cover2. Open the Z-Wave system's smart home or alarm app on your smartphone or tablet3. Follow the in-app instructions for adding a new device4. On your lock keypad, enter your master entry code followed by the icon5. Press the 7 key followed by the icon6. Press the 1 key followed by the iconAdding a Yale Z-Wave Plus™ Smart Module to your Assure Lock & Z-Wave™ SystemPlease use this procedure only when the network primary controller ismissing or otherwise inoperableP/N AYR202-ZW-INSTAL-FUL Rev FTrusted every dayPart of ASSA ABLOY

P/N AYR202-ZW-INSTAL-FUL Rev FTrusted every dayPart of ASSA ABLOYWARNING: Changes or modifications to this device, not expressly approved by Yale Home could void the user's authority to operate the equipment.FCC:Contain FCC ID: U4A-YRHCPZW0FM Model: YRMZW2-USThis equipment has been tested and found to comply with the limits for a Class B digital device, pursuant to Part 15 of the FCC Rules. These limits are designed to provide reasonable protection against harmful interference in a residential installation. This equipment generates, uses, and can radiate radio frequency energy and, if not installed and used in accordance with the instructions, may cause harmful interference to radio communications. However, there is no guarantee that interference will not occur in a particular installation. If this equipment does cause harmful Interference to radio or television reception, which can be determined by turning the equipment off and on, the user is encouraged to try to correct the interference by one or more of the following measures:Ÿ Reorient or relocate the receiving antenna.Ÿ Increase the separation between the equipment and receiver.Ÿ Connect the equipment into an outlet on a circuit different from that to which the receiver is connected.Ÿ Consult the dealer or an experienced radio/TV technician for help.THIS DEVICE COMPLIES WITH PART 15 OF THE FCC RULES. OPERATION IS SUBJECT TO THE FOLLOWING TWO CONDITIONS.(1) THIS DEVICE MAY NOT CAUSE HARMFUL INTERFERENCE, AND (2) THIS DEVICE MUST ACCEPT ANY INTERFERENCE RECEIVED, INCLUDING INTERFERENCE THAT MAY CAUSE UNDESIRED OPERATION.Industry Canada:Contain IC: 6982A-YRHCPZW0FMModel: YRMZW2-USSection 7.1.2 of RSS-GEN Under Industry Canada regulations, this radio transmitter may only operate using an antenna of a type and maximum (or lesser) gain approved for the transmitter by Industry Canada. To reduce potential radio interference to other users, the antenna type and its gain should be so chosen that the equivalent isotropically radiated power (e.i.r.p.) is not more than that necessary for successful communication.En vertu des règlements d'Industrie Canada, cet émetteur radio ne peut fonctionner avec une antenne d'un type et un maximum (ou moins) approuvés pour gagner de l'émetteur par Industrie Canada. Pour réduire le risque d'interférence aux autres utilisateurs, le type d'antenne et son gain doivent être choisies de façon que la puissance isotrope rayonnée équivalente (PIRE) ne dépasse pas ce qui est nécessaire pour une communication réussie.Section 7.1.3 of RSS-GEN This Device complies with Industry Canada License-exempt RSS standard(s). Operation is subject to the following two conditions: 1) this device may not cause interference, and 2) this device must accept any interference, including interference that may cause undesired operation of the device.Cet appareil est conforme avec Industrie Canada RSS standard exemptes de licence(s). Son fonctionnement est soumis aux deux conditions suivantes: 1) ce dispositif ne peut causer des interférences, et 2) cet appareil doit accepter toute interférence, y compris les interférences qui peuvent causer un mauvais fonctionnement du dispositif.This radio transmitter 6982A-YRHCPZW0FM has been approved by Industry Canada to operate with the antenna types listed below with the maximum permissible gain indicated. Antenna types not included in this list, having a gain greater than the maximum gain indicated for that type, are strictly prohibited for use with this device. Le présent émetteur radio 6982A-YRHCPZW0FM a été approuvé par Industrie Canada pour fonctionner avec les types d'antenne énumérés ci-dessous et ayant un gain admissible maximal. Les types d'antenne non inclus dans cette liste, et dont le gain est supérieur au gain maximal indiqué, sont strictement interdits pour l'exploitation de l'émetteur.CAN ICES-3B/NMB-3B24/7 Tech Support : 1-855-492-0505 • www.US.YaleHome.comYale® is a registered trademark of Yale Home. Other products' brand names may be trademarks or registered trademarks of their respective owners and are mentioned for reference purposes only. © Copyright 2020. All rights reserved. Reproduction in whole or in part without the express written permission of Yale Home is prohibited.This device is a security enabled Z-Wave Plus product that is able to use encrypted Z-Wave Plus messages to communicate to other security enabled Z-Wave Plus products. This device must be used in conjunction with a Security Enabled Z-Wave Controller in order to fully utilize all implemented functions. This product can be operated in any Z-Wave network with other Z-Wave certified devices from other manufacturers. All non-battery operated nodes within the network will act as repeaters regardless of vendor to increase reliability of the network.Yale Home

!Do not take apart the outside assembly.Installation OptionsInstalling Outside Assembly6Outside GasketInside Gasket2-3/8" LatchboltAdjusting for 1-3/8" Door (if necessary) Privacy DPS Switch Network or Yale Accentra Key Module
10-32 x 2-1/2" PFHMS Order 1-3/8" Thin Door Kit: 14-4761-0106!?Determining Handing Left Hand “LH”, Hinges Left. Open Inward.Left Hand Reverse "LHR", Hinges Left. Open Outward.Right Hand "RH", Hinges Right.Open Inward.Right Hand Reverse "RHR", Hinges Right. Open Outward. The hand of a door is determined from the secure side of the door. The term "secure" means the side from which you initially unlock and enter.2Preparing Frame!1Preparing DoorDrill holes 1/2 way thru door then complete from other side to prevent splitting.3Preparing Inside Escutcheon
3
2
1
Do NotOvertighten Screws!DPS Option Wood Door:3/8" Dia. Thru toHole in Door Face*Metal Door:3/4" Dia. Thru toHole in Door FaceDoorFrame1" Dia. x 1/2" DeepFrameInside of DoorFrame3-1/2"*Metal Door Installations Supplied plastic collar MUST be installed for DPS to function properly.3/32"!DPS Option Wood Frame:3/8" Dia. x 1"*Metal Frame:3/4" Dia. x 1"See InstructionA7983BMetal Frame/Door Installations Supplied plastic collars MUST be installed for DPS to function properly.
Retrofitting or modifying this product may impact fire rating, safety features and warranty. Consult with code specifications to ensure compliance with all codes and ratings. Avoid pinchingcables!9Installing Inside Escutcheon10Installing Batteries & CoverInstalling Inside Support Assembly77-16 / 8-32 x 1" UNCWSx2Attaching Cables 8P/N 80-9150-0080-010 (06-16)®nexTouch Touchscreen and Push Button Access Cylindrical LockInstallation and Programming Instructions x2Curved edge of latchbolt faces direction door closes.!Installing Latchbolt4Inside of Door7-16 / 8-32 x 1" UNCWS
Inside of DoorInside of Door Inside of DoorRemoving Battery Cover5Testing Outside Lever OperationTesting Inside Lever OperationInside of Door
1
2
View from Outside of Door"T" TabsRetractor PocketMounting FlangeTwo moving "T" tabsmust be fully capturedin retractor pocket.Mounting Flangesmust be in MountingFlange Pockets.!Mounting Flange PocketMountingFlangeMounting Flange Pocket
AAAAAAAA
Optionalx2OptionalDPSConnectionMotorConnectionTouchpadConnection80-8150-0032-010Rev A®nexTouch Cylindrical LockBEVELED EDGEDOOR ONLYHIGH EDGELOW EDGE3/4" Dia.(19mm)Thru DoorHIGH EDGE Fold Line2-3/4" Beveled Backset
2-3/8" Square Backset Fold Line2-3/8" Square Backset Fold Line
5/32" Dia x 1/8" Deep(4mm x 3mm)2 LocationsBoth sides of door2-3/4" (70mm)Between Centers2-1/8" Dia(54mm)Thru Door3-1/2" (89mm)Between Centers3"3"CAUTION: If printed from websitePrint 1:1 ScaleMeasure both 3" lines to check scale
SQUARE EDGEDOOR ONLY
5/32" Dia x 1/8" Deep(4mm x 3mm)2 LocationsBoth sides of doorHIGH EDGE Fold Line2-3/8" Beveled BacksetLOW EDGE Fold Line2-3/8" Beveled BacksetLOW EDGE Fold Line2-3/4" Beveled BacksetWHEN IN TOPPOSITION ONLY5/16" Dia(8mm)Thru Door5/16" Dia(8mm)Thru Door
3/4" Dia.(19mm)Thru DoorWHEN IN TOPPOSITION ONLY3-1/2" (89mm)Between Centers
HorizontalCenter LineVerticalCenter LineCUTCUTCUTCUTCUTCUTProduct Support Tel 800-810-WIRE (9473) • www.yalelocks.comCopyright © 2015, Yale Security Inc., an ASSA ABLOY Group company. All rights reserved. Reproduction in whole or in part without the express written permission of Yale Security Inc., an ASSA ABLOY Group company is prohibited.Yale Locks & Hardware is a division of Yale Security Inc., an ASSA ABLOY Group company.An ASSA ABLOY Group brand
3/4" (19mm) Dia. Metal Frame3/8" (9.5mm) Dia. Wood Frame
®nexTouch Cylindrical LocksNTB610NTB620NTB630NTB640Cylinder Override - Push ButtonCylinder Override - Cap TouchNo Cylinder Override - Push ButtonNo Cylinder Override - Cap Touch3/4" (19mm) Dia. Metal Frame3/8" (9.5mm) Dia. Wood Frame
Optional Door Position Switch Option enables Privacy feature*Metal Frame Installations Supplied plastic collar MUST be installed for DPS to function properly.!2-3/8" Latchbolt for thin doors sold separately. See Installation Options.
Thin door gaskets sold separately. See Installation Options.Thin door gaskets sold separately. See Installation Options.Optional DPSOptional DPS Optional Network or Yale Accentra Key module must be installed BEFORE batteries. See Installation Options.!"Welcome to Yale."®Congratulations, you've installed the Yale nexTouch Lock!Turn sheet over to customize your product.

Enter MasterPIN codePress Factory Settings1. Remove inside lever with thesupplied lever removal tool.2. Remove the battery cover withsupplied hex wrench and thenremove batteries.3. Remove the 10-32 x 3/4" panhead screw from the center ofthe battery housing.4. Remove the interior escutcheonfrom the door to access the reset button on back of escutcheon. Cables may stay connected. (See illustration at above for location of the reset button.) 5. Reinstall four (4) AA batteries.6. Press the reset button for 3seconds.7. While continuing to press thereset button, temporarilyremove one (1) AA battery.8. Reinstall the battery.9. Release reset button and waitapproximately 15 seconds.Speaker will announce"Welcome to Yale."10. Reassemble escutcheon byreversing steps 1-4.
All Code Lockout Mode: This feature is enabled by the Master code. When enabled, it restricts all user (except Master) PIN code access. When attempting to enter a code while the unit is in Lockout, the RED locked padlock will appear on the screen. (Main Menu selection #6.)Automatic Re-lock Time: After a successful unlock, the unit will re-lock automatically after 5 seconds or for a duration selected in the Advanced Lock Settings (Main Menu selection #3 then #1). Language Setting Mode: Choose English (1), Spanish (2) or French (3) for the lock's voice prompts. (Main Menu selection #5.)Low Battery: When battery power is low, the Low Battery Warning indicator flashes RED. If battery power is completely lost, use the 9Volt battery override. To use the 9V battery override apply 9V battery, in either direction, to terminals on the touchscreen for backup power option. Activate the touchscreen and enter your pin code to unlock the door.Master PIN Code: The Master PIN code is used for programming and for feature settings. It must be created prior to programming the lock. The Master code will also operate (unlock/lock) the lock.Network Module Setting: With the optional Network Module installed, this setting becomes available (Main Menu selection #7) and allows the lock to connect with a network controller.One Touch Locking: When the unit is unlocked, activating the touchscreen will lock the unit (during Automatic Re-lock duration or when Automatic Re-lock is disabled). When One-Touch Re-lock is not in use (disabled), any valid PIN code will re-lock the lock. (Main Menu selection #3 then #3.)Privacy Button to Lock Door: If Automatic Re-lock is disabled, a short 1 second press of this button will lock the door. Privacy Mode: With optional Door Position Switch installed, Privacy Mode enabled thru Menu Mode and door closed, all keypad functions can be disabled with a 3 second press of the Privacy Button. Privacy Mode is disabled by default. Enable Privacy Mode thru Main Menu selection #3 then #4. With door closed, press and hold the privacy button until voice prompt indicates Privacy Mode is enabled. Privacy Mode duration ends when door is opened and voice prompt indicates Privacy Mode is disabled.Shut Down Time: The unit will shut down for sixty (60) seconds and not allow operation after the wrong code entry limit (5 attempts) has been met. When the unit is in Shut down, the keypad will be flashing.Tamper Alert: Audible alarm sounds if attempting to forcibly remove outside lock from door.User PIN Code: The User code operates the lock. Maximum number of user codes is 500. Volume Setting Mode: The volume setting for PIN code verification is set to HIGH (1) by default; otherwise it can be set to Low (2) or Silent (3) for quiet areas. (Main Menu selection #4.)Wrong Code Entry Limit: After five (5) unsuccessful attempts at entering a valid PIN code, the unit will shut down and not allow operation. When the unit is in Shut Down, the keypad will be flashing.DefinitionsFeature Programming Through Menu ModeUsing Master PIN code* Programming Troubleshooting NOTE: When batteries are replaced, Network Module locks have a real time clock that will be set through the User Interface (UI); it is recommended to verify correct date and time particularly those locks operating under Daylight Saving Time (DST).• • Contact the Master user.Only the Master can enable/disable Lockout Mode.Check to see if All Code Lockout Mode is enabled.Check to see if Auto Re-lock Mode is enabled.• If low battery indicator is lit (see below), change batteries.• • • Contact the Master user.Only the Master can enable/disable Lockout Mode.Check to see if All Code Lockout Mode is enabled. SymptomSuggested ActionLock does not respond – door is open and accessible. • • • • Unit chimes to indicate code acceptance, but thedoor will not open.• • Unit operates to allow access, but will notautomatically re-lock. PIN codes will not register.• • • • • • Upon entering a PIN code and pressing key, theunit displays "invalid code" error or lock times out with-out responding.
Upon entering a PIN code and pressing the key, the red padlock icon appearsand there are different tones.
The unit operates, but it makes no sound. • The unit responds "Low Battery"• Upon entering a PIN code and pressing the key, the unit responds "Wrong number of digits". • Lock does not respond – door is locked and inaccessible. • Unit is on for a while thenshows no reaction. Lightsdim.• PIN codes must consist of 4 to 8 digits to register.Checkor gearcannot be used as part of the PIN code.Contact the Master user.Check that the motor cable is firmly connected into the PC board marked "MOTOR".Check the door gaps for any foreign objects between doorand frame.• Batteries may be completely discharged.Check batteries are installed and oriented correctly (polarity)in the battery case.User codes must be entered within 20 seconds (whiletouchscreen is active) or process will have to be restarted.Registration/management of PIN codes is set by theauthority of the Master Code, which is set first.The same PIN code cannot be used for multiple users.Batteries do not have enough power. Replace batteries.Check to see if touchscreen cable is fully connected and not pinched.Check batteries are in good condition; replace batteriesif discharged.If touchscreen numbers are visible, check to see if theyrespond when pressed.Touchscreen becomes active when pressed w/whole hand.Use a larger area of the hand or fingers and verify contactwith at least 3 areas.The digits entered were incorrect or incomplete. Re-enter4-8 digits followed by the check key.This is the alert to replace the batteries. Replace all four(4) batteries with new AA Alkaline batteries.Check to see if Volume is set to Silent.Apply 9V battery to terminals on the touchscreen foremergency power jump option.• • Check for another locking device on the door (i.e. deadbolt).Continue CompleteContinue Complete3UUPrivacyEnable DisableVolume SettingLanguage Setting All Code Lockout**Network Module SettingEnableDisableEnglishSpanishFrenchSilentLowHighMaster PIN Code SettingM User Codes
Enter
DeleteAdvanced Lock Settings**This function appears only with Network or Yale Accentra Key module installed.Automatic Re-lock DisableOne Touch Locking Enable DisableDefault settingsin bold.M12Continue Complete1-180 Sec **Set-up Digital KeysJoin the networkExit the networkSettingsFactory SettingMaster PIN CodeRegistration required*Automatic Relock5 SecondsOne Touch LockingEnabledPrivacy SettingDisabledLanguageEnglishWrong Code Entry Limit5 TimesShutdown Time60 Seconds*The Master PIN code must be registered prior to any otherprogramming of the lock.Volume SettingHighAll Code Lockout ModeDisabled
1. Touch screen with back of hand or palm to activate.2. Enter 4-8 digit master PIN code* followed by key.Lock Response: "Menu mode, enter number (Enter digit corresponding to thefunction to be performed), press the key to continue."3. Follow the voice commands.4. Press key to complete the process and conclude the programming session.Programming InstructionsReorient or relocate the receiving antenna.Increase the separation between the equipment and receiver.Connect the equipment into an outlet on a circuit different from that to which thereceiver is connected.Consult the dealer or an experienced radio/ TV technician for help.Industry Canada:This device complies with Industry Canada licence-exempt RSS standard(s). Operation is subject to the following two conditions: (1) this device may not cause interference, and (2) this device must accept any interference, including interference that may cause undesired operation of the device.Le présent appareil est conforme aux CNR d'Industrie Canada applicables aux appareils radio exempts de licence. L'exploitation est autorisée aux deux conditions suivantes: (1) l'appareil ne doit pas produire de brouillage, et (2) l'utilisateur de l'appareil doit accepter tout brouillage radioélectrique subi, meme si le brouillage est susceptible d'en compromettre le fonctionnement. IMPORTANT! Tous les changements ou modifications pas expressément approuvés par la partie responsable de la conformité ont pu vider l'autorité de l'utilisateur pour actioner cet équipment.
ORMaster PIN Code must be created before any further programming.Max User Codes = 500 Warning: Changes or modifications to this device, not expressly approved by Yale Security Inc. could void the user's authority to operate the equipment.
Creating Master PIN Code1Enter 4-8 digit Master PIN Code. Creating a Master PIN Code must be performed upon installation or after resetting the lock to factory default. Programming and use of lock is not possible until this step has been successfully completed.Press Press Press Press Creating User PIN Codes2Master PIN code must be created first.*Max User Codes = 500Press Adding more User Codes:Enter 4-8 digit PIN codePress Locking & Unlocking Door with Registered Master or User PIN Code 3Enter PIN Code Press To end programming:Press Interior Escutcheon Resetting Lock to Factory DefaultWhen lock is reset to factory defaults all user codes (including the Master PIN code*) are deleted and all programming features are reset to original default settings (see Factory Settings).
*The Master PIN code must be registered prior to any other programming of the lock. Hardware TroubleshootingCycle lock in both the locked and unlocked positions. If problems are found:Latchbolt will not deadlock.a. Either strike is out of alignment or the gap between door and jamb is too great.Realign strike or shim strike out towards flat area of latchbolt.Latchbolt does not retract or extend properly.Latchbolt tail and retractor are not properly positioned:a. Remove lockset. Look through 2-1/8" hole and verify latchbolt tail is centeredbetween top and bottom of hole.b. Remove latchbolt and insert lockset. Look through latchbolt hole and verify retractormouth is centered in hole. If not, adjust outside rose plate.c. If necessary, rebore holes to line up retractor and tail.Product Support Tel 800.810.WIRE (9473) • www.yalelocks.comCopyright © 2016, Yale Security Inc., an ASSA ABLOY Group company. All rights reserved. Reproduction in whole or in part without the express written permission of Yale Security Inc. is prohibited.Yale Locks & Hardware is a division of Yale Security Inc., an ASSA ABLOY Group company.YALE, with its unique global reach and range of products, is the world's favorite lock–the preferred solution for securing your home, family and personal belongings.ASSA ABLOY is the global leader in door opening solutions, dedicated to satisfying end-user needs for security, safety and convenience.
Lock ActivationInterior EscutcheonPrivacy ButtonSpeakerLow BatteryIndicatorExterior EscutcheonUpon reset, Master PIN Code creation is the only option available and must be performed prior to any other programming of the lock. Please use this procedure only when the network primary controller is missing or otherwise inoperable.FCC:NOTE: This equipment has been tested and found to comply with the limits for a Class B digital device, pursuant to part 15 of the FCC Rules. These limits are designed to provide reasonable protection against harmful interference in a residential installation. This equipment generates, uses and can radiate radio frequency energy and, if not installed and used in accordance with the instructions, may cause harmful interference to radio communications. However, there is no guarantee that interference will not occur in a particular installation. If this equipment does cause harmful interference to radio or television reception, which can be determined by turning the equipment off and on, the user is encouraged to try to correct the interference by one or more of the following measures:
9Volt BatteryOverride Terminal IMPORTANT: The outside assembly remains assembled.
"Register MasterCode. Press the gearkey to continue.""Press 1 to register a code.""Registered.Press the check key to complete. Press the gear key to continue."Creating User PIN Codes con't2"Register User code.Press the gear keyto continue."Press Press "Register User code.Press the gear keyto continue.""PIN code registration.Enter a 4-8 digit PIN code.Press the gear keyto continue.""Enter a 4-8 digitPIN code. Press the gear key to continue.""Registered.""Completed."Enter 4-8 digit PIN codefollowed by "Menu Mode, enter number.""Completed.""Registered.Press the check key to complete. Press the gear key to continue."Lever Removal ToolHex WrenchButtonReset Locking Door with Privacy Button4Lockout ModeIndicatorDoor is binding.UnlockIndicator
1
Yale Locks
Z-Wave Plus™ System Integrators Guide
Yale NexTouch Exit Trim Commercial Grade Lock
Document Revision: 2

2
Contents
Yale Z-Wave Plus Product Info ........................................................................................................................... 3
Supported Command Classes ....................................................................................................................... 3
Association Table .......................................................................................................................................... 4
Notifications Table ........................................................................................................................................ 4
Configurable Parameters .............................................................................................................................. 6
* Command Class Requires Security

3
Yale Z-Wave Plus Product Info
Manufacturer ID: Assa Abloy (0x0129)
Z-Wave Device Type: Door Lock Keypad
Z-Wave Role Type: Listening Sleeping Slave (LSS)
Product ID:
0x1200 for NTT610/620/630/640-ZW2 (Exit Device)
0x0C0C for NTT612-ZW2 (2nd Generation Touch Screen Exit Device)
0x0C16 for NTT622-ZW2 (2nd Generation Touch Screen Exit Device)
Product Type ID:
0x8009 for NTT610/630-ZW2 (Pushbutton Exit Device)
0x800A for NTT620/640-ZW2 (Touch Screen Exit Device)
0x8102 for NTT612/622-ZW2 (2nd Generation Exit Device)
Supported Command Classes
Command Class Z-Wave Plus Info
Command Class Manufacturer Specific
Command Class Security
Command Class Device Reset Locally
Command Class Power Level
Command Class Version
Command Class Battery*
Command Class Door Lock*
Command Class Door Lock Logging*
Command Class Schedule Entry Lock*
Command Class User Code*
Command Class Time Parameters*
Command Class Time*
Command Class Association*
Command Class Association Group Info*
Command Class Notification*
Command Class Configuration*
Command Class Firmware Update Md*
* Command Class Requires Security

4
Association Table
Group ID
Maximum Nodes
Description
Commands
1
1
Lifeline
Command_Class_Battery, Battery_Report ;
Command_Class_Notification, Notification_Report;
Command_Class_Configuration, Configuration_Report;
Command_Class_Device_reset_locally,
Device_Reset_locally_notification
Notifications Table
Alarm Reports
Alarm
type
Alarm Level
Description
Master Code
changed.
0x70
0x00
Master code was changed at keypad
0xFB
Master code was changed over RF
User added
0x(01-max
users)
User added. Alarm level = user slot number
User deleted
0x21
0x(01-max
users)
User was deleted. Alarm level = user slot number
Tamper Alarm
0xA1
0x01
keypad attempts exceed code entry limit
0x02
front escutcheon removed from main
RF Operate Unlock
0x19
0x01
by RF module
Manual Unlock
0x16
0x01
By key cylinder or
inside thumb turn
Keypad Unlock
0x13
0x(01-max
users)
Where Alarm level represents user slot number (0xFB =
Master Code)
Manual Lock
0x15
0x01
by key cylinder or inside thumb-turn
0x02
by touch function (lock and leave)
0x03
By inside button
RF Operate Lock
0x18
0x01
by RF module
Keypad Lock
0x12
0x (01 –max
users)
Where Alarm level represents user slot number
Non Access
0x26
0x(01-max
users)
A Non Access Code was entered at the lock.
Where alarm level represents user slot number
Jammed
0x09
0x01
Jammed
while locking
0x02
Jammed
while unlocking
Low Battery
Alarms**
0xA9
0x (Current %)
Too Low to operate (Starting at 4.6V for 0x8009 &
0x800A; 4.2V for 0x8102)

5
0xA8
0x (Current %)
Critical Battery Level (Starting at 4.8V for 0x8009 &
0x800A; 4.4V for 0x8102)
0xA7
0x (Current %)
Low Battery
(Starting at 5V for 0x8009 & 0x800A; 4.6V for 0x8102)
Auto Lock Operate
Locked
0x1B
0x01
Auto re-lock cycle complete, locked.
Duplicate Pin-code
error
0x71
0x (01-max
users)
Where Alarm level represents user slot number
Alarm generated in response to add user RF cmd.
This alarm is not generated when attempting to add
duplicate pin at the keypad. The lock simply denies it
and plays the “Denied”. Trying to duplicate the
master code will result in a 0x71 0x00 alarm report.
RF Module Power
Cycled
0x82
0x00
Power to RFM was restored, sent by RF module. The
lock doesn’t send any alarm to the RF module when
power is cycled.
Disabled user
entered at keypad
0x83
0x(01-max
users)
A disabled user pin code was entered at the keypad
Valid user but
outside of schedule
0x84
0x(01-max
users)
A valid user can be both a normal user and a Non-
Access user. If a non-access user is out of schedule this
alarm will be sent instead of the non-access alarm.
Door Position
Sensor (Optional
Hardware
Required)
0x2B
0x00
Door Opened
0x01
Door Closed
0x02
Door Propped (Door Open for longer than configurable
door propped time)
Daily Repeating
Schedule
Set/Erased
0x60
0x(01-max
users)
Schedule(s) has been set/erased for specified user ID
Daily Repeating
Schedule
Enabled/Disabled
0x61
0x(01-max
users)
Schedule(s) has been enabled/disabled for specified
user ID
Year Day Schedule
Set/Erased
0x62
0x(01-max
users)
Schedule(s) has been set/erased for specified user ID
Year Day Schedule
Enabled/Disabled
0x63
0x(01-max
users)
Schedule(s) has been enabled/disabled for specified
user ID
All Schedule Types
Erased
0x64
0x(01-max
users)
Schedule(s) has been set/erased for specified user ID
All Schedule Types
Enabled/Disabled
0x65
0x(01-max
users)
Schedule(s) has been enable/disabled for specified user
ID
** - The Yale NexTouch Exit Rim Trim locks also supports a 3rd low battery alarm, too low to operate.
This alarm is sent out as a Battery Report (with value = 0xFF) through the Battery Command Class. This
is the last low battery alarm level before the product stops functioning.

6
Configurable Parameters
Configuration Parameters
Parameter
Number
Size
Description
Silent mode on/off
1
1 byte
Level control, 1 = High Volume, 2 = Low Volume, 3 = Silent.
Default is 2 or Low Volume
Auto Relock on/off
2
1 byte
0x00 = OFF, 0xFF = ON default is 0x00 or OFF
Auto Relock time
3
1 byte
10 to 180 seconds default is 30 seconds
Wrong Code Entry Limit
4
1 byte
3 to 10 default is 5 times
Language
5
1 byte
1=English, 2=Spanish, 3=French default is 1= English
Shut down time (after
wrong code entries)
7
1 byte
10 to 180 seconds default is 60 seconds
Operating mode
8
1 byte
00 = normal mode (this is the default mode)
01 = vacation mode, keypad lockout
02= privacy mode, no keypad. RF Unlock will work
One Touch Locking
11
1 byte
0x00 = OFF, 0xFF = ON default is 0xFF or ON.
Privacy Button
12
1 byte
0x00 = OFF, 0xFF = ON default is 0x00 or OFF
Lock Status LED
13
1 byte
0x00 = OFF, 0xFF = ON default is 0x00 or OFF.
Reset To Factory Defaults
15
1 byte
01 = Lock will execute Reset To Factory.
No default value
Door Propped Timer***
18
1 byte
10 to 2540 second. This value is represented as seconds X 10.
(ie a value of 4 would mean a door propped timer of 40
seconds) Set to 0x00 to disable Door Propped Alarm. Default
= 0x00 (off)
DPS Alarms***
19
1 byte
0x00 = OFF, 0xFF = ON Default is 0x00 or off.
Used to enable/disable door condition alarms for locks that
support a door position sensor. Any lock that does not
support DPS will always report 0x00.
Eco Mode On/Off
21
1 byte
0x00 = OFF, 0xFF = ON default is 0x00 or OFF
If supported switches lock to lower power mode of operation
with reduced sound and led brightness.
*** - Additional hardware required. These parameters are only active if the optional Door Position
Switch has been installed with the lock.
Table of contents
Other Yale Control Unit manuals

Yale
Yale SECURE CONNECT iM1 Technical specifications

Yale
Yale Conexis Instruction Manual

Yale
Yale Real Living ZigBee Module Technical specifications

Yale
Yale Real Living YRMZB2 Technical specifications

Yale
Yale Z-Wave Plus v2 User manual

Yale
Yale iM1 User manual

Yale
Yale MD-05 User manual

Yale
Yale SLE 3 User manual

Yale
Yale Real Living iM1 Technical specifications

Yale
Yale Z-Wave Plus YRMZW2-US User manual