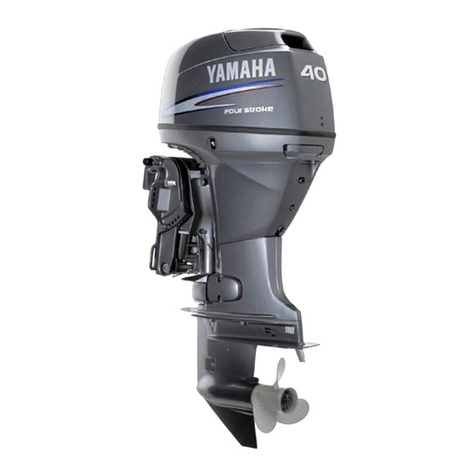
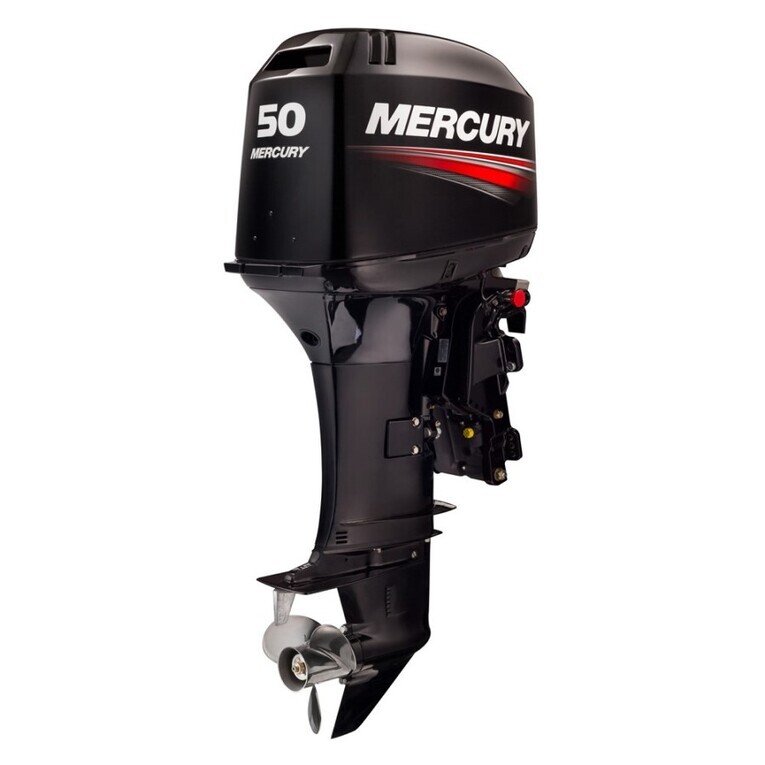
Yamaha Z200N User manual

68F-28197-Z9-A1
WORLDWIDE
Z200N
LZ200N
Z200Y
LZ200Y
USA, CANADA
SERVICE MANUAL
290369

E
PREFACE
This manual has been prepared by the Yamaha Motor Company, Ltd. primarily for use by
Yamaha dealers and their trained mechanics when performing maintenance procedures and
repairs to Yamaha equipment. It has been written to suit the needs of persons who have a
basic understanding of the mechanical and electrical concepts and procedures inherent in the
work, for without such knowledge attempted repairs or service to the equipment could render
it unsafe or unfit for use.
Because the Yamaha Motor Company, Ltd. has a policy of continuously improving its prod-
ucts, models may differ in detail from the descriptions and illustrations given in this publica-
tion. Use only the latest edition of this manual. Authorized Yamaha dealers are notified
periodically of modifications and significant changes in specifications and procedures, and
these are incorporated in successive editions of this manual.
CAUTION
USE UNLEADED STRAIGHT GASOLINE ONLY
• Gasoline containing lead can cause performance
lose and engine damage.
• Do not use gasoline mixed with oil (premix).
• Use YAMALUBE 2 stroke outboard oil or another
2-stroke engine oil with a BIA-certified TC-W3 rate.
Z200N, LZ200N
SERVICE MANUAL
©1999 Yamaha Motor Co., Ltd.
1st Edition, October 1999
All rights reserved.
No part of this publication may be
reproduced or transmitted in any form or by
any means including photocopying and
recording without the written permission of
the copyright holder.
Such written permission must also be
obtained before any part of this publication
is stored in a retrieval system of any nature.
Printed in Japan
P/N 68F-28197-Z9-A1


E
HOW TO USE THIS MANUAL
MANUAL FORMAT
All of the procedures in this manual are organized in a sequential, step-by-step format. The
information has been compiled to provide the mechanic with an easy to read, handy refer-
ence that contains comprehensive explanations of all disassembly, repair, assembly, and
check operations.
In this revised format, the condition of a faulty component will precede an arrow symbol and
the course of action required will follow the symbol, e.g.,
• Bearings
Pitting/scratches
→
Replace.
To assist you in finding your way through this manual, the section title and major heading is
given at the top of every page.
MODEL INDICATION
Multiple models are mentioned in this manual and their model indications are noted as fol-
lows.
ILLUSTRATIONS
The illustrations within this service manual represent all of the designated models.
CROSS REFERENCES
The cross references have been kept to a minimum. Cross references will direct you to the
appropriate section or chapter.
Model name Z200NETO LZ200NETO
USA and
Canada name Z200TR LZ200TR
Indication Z200NETO LZ200NETO

E
IMPORTANT INFORMATION
In this Service Manual particularly important information is distinguished in the following
ways.
The Safety Alert Symbol means ATTENTION! BECOME ALERT! YOUR SAFETY IS
INVOLVED!
WARNING
Failure to follow WARNING instructions could result in severe injury or death to the machine
operator, a bystander, or a person inspecting or repairing the outboard motor.
CAUTION:
A CAUTION indicates special precautions that must be taken to avoid damage to the out-
board motor.
NOTE:
A NOTE provides key information to make procedures easier or clearer.

E
HOW TO USE THIS MANUAL
1
The main points regarding removing/installing and disassembling/assembling procedures
are shown in the exploded views.
2
The numbers in the exploded views indicate the required sequence of the procedure and
should be observed accordingly.
3
Symbols are used in the exploded views to indicate important aspects of the procedure.
A list of meanings for these symbols is provided on the following page.
4
It is important to refer to the job instruction charts at the same time as the exploded views.
These charts list the sequence that the procedures should be carried out in, as well as pro-
viding explanations on part names, quantities, dimensions and important points relating
to each relevant task.
Example:
O-ring size 39.5
×
2.5 mm: inside diameter (D)
×
ring diameter (d)
5
In addition to tightening torques, the dimensions of the bolts or screws are also men-
tioned.
Example:
Bolt or screw size : diameter (D)
×
length (L)
6
In addition to the exploded views and job instruction charts, this manual provides individ-
ual illustrations when further explanations are required to explain the relevant procedure.
d
D
10 ×25 mm
D
L

E
SYMBOLS
Symbols
1
to
9
are designed as thumb-
tabs to indicate the content of a chapter.
1
General information
2
Specifications
3
Periodic inspections and adjustments
4
Fuel system
5
Power unit
6
Lower unit
7
Bracket unit
8
Electrical systems
9
Trouble analysis
Symbols
0
to
E
indicate specific data.
0
Special tool
A
Specified liquid
B
Specified engine speed
C
Specified torque
D
Specified measurement
E
Specified electrical value
[Resistance (
Ω
), Voltage (V), Electric current
(A)]
Symbol
F
to
H
in an exploded diagram
indicate the grade of lubricant and the loca-
tion of the lubrication point.
F
Apply Yamaha 2-stroke outboard motor oil
(TC-W3)
G
Apply water resistant grease
(Yamaha grease A, Yamaha marine grease)
H
Apply molybdenum disulfide oil
Symbols
I
to
Nin an exploded diagram
indicate the grade of the sealing or locking
agent and the location of the application
point.
IApply Gasket Maker®
JApply Yamabond #4
(Yamaha bond number 4)
KApply LOCTITE®No. 271 (Red LOCTITE)
LApply LOCTITE®No. 242 (Blue LOCTITE)
MApply LOCTITE®No. 572
NApply silicon sealant
12
34
56
78
90
AB
CD
EF
GH
IJ
KL
MN
GEN
INFO SPEC
INSP
ADJ FUEL
POWR
LOWR
BRKT –+
ELEC
TRBL
ANLS
T
R
.
.
E
AM
GM 4
271
LT
242
LT
572
LT LT
SS

E
CONTENTS
GENERAL INFORMATION 1
SPECIFICATIONS 2
SPEC
PERIODIC INSPECTIONS AND
ADJUSTMENTS 3
FUEL SYSTEM 4
FUEL
POWER UNIT 5
POWR
LOWER UNIT 6
LOWR
BRACKET UNIT 7
BRKT
ELECTRICAL SYSTEMS 8
ELEC
TROUBLE ANALYSIS 9
GEN
INFO
INSP
ADJ
–+
TRBL
ANLS


E
1
2
3
4
5
6
7
8
9
GEN
INFO
CHAPTER 1
GENERAL INFORMATION
IDENTIFICATION
............................................................................................ 1-1
SERIAL NUMBER ..................................................................................... 1-1
STARTING SERIAL NUMBERS ............................................................... 1-1
SAFETY WHILE WORKING
............................................................................ 1-2
FIRE PREVENTION ................................................................................... 1-2
VENTILATION........................................................................................... 1-2
SELF-PROTECTION.................................................................................. 1-2
OILS, GREASES AND SEALING FLUIDS................................................ 1-2
GOOD WORKING PRACTICES ................................................................ 1-3
DISASSEMBLY AND ASSEMBLY ........................................................... 1-4
SPECIAL TOOLS
............................................................................................. 1-5
MEASURING ............................................................................................ 1-5
REMOVING AND INSTALLING ............................................................... 1-8

1-1
GEN
INFO
E
IDENTIFICATION
IDENTIFICATION
1
SERIAL NUMBER
The outboard motor’s serial number is
stamped on a label which is attached to the
port side of the clamp bracket.
NOTE:
If the serial number label is removed,
“VOID” marks will be appear on the label.
1
Model name
2
Approved model code
3
Transom height
4
Serial number
STARTING SERIAL NUMBERS
The starting serial number blocks are as fol-
lows:
Model name Approved
model
code
Starting
serial
number
Worldwide USA Canada
Z200NETO Z200TR Z200TR 6G6 X:100101 -
LZ200NETOLZ200TR —6K1 X:100101 -

1-2
GEN
INFO
E
SAFETY WHILE WORKING
1
The procedures given in this manual are
those recommended by Yamaha to be fol-
lowed by Yamaha dealers and their
mechanics.
FIRE PREVENTION
Gasoline (petrol) is highly flammable.
Petroleum vapor is explosive if ignited.
Do not smoke while handling gasoline and
keep it away from heat, sparks and open
flames.
VENTILATION
Petroleum vapor is heavier than air and is
deadly if inhaled in large quantities. Engine
exhaust gases are harmful to breathe.
When test-running an engine indoors,
maintain good ventilation.
SELF-PROTECTION
Protect your eyes with suitable safety
glasses or safety goggles, when grinding or
when doing any operation which may
cause particles to fly off. Protect hands and
feet by wearing safety gloves or protective
shoes if appropriate to the work you are
doing.
OILS, GREASES AND SEALING
FLUIDS
Use only genuine Yamaha oils, greases and
sealing fluids or those recommended by
Yamaha.

1-3
GEN
INFO
E
SAFETY WHILE WORKING
Under normal conditions of use, there
should be no hazards from the use of the
lubricants mentioned in this manual, but
safety is all-important, and by adopting
good safety practices, any risk is minimized.
A summary of the most important precau-
tions is as follows:
1.While working, maintain good stan-
dards of personal and industrial
hygiene.
2.Clothing which has become contami-
nated with lubricants should be
changed as soon as practicable, and
laundered before further use.
3.Avoid skin contact with lubricants; do
not, for example, place a soiled wiping-
rag in your pocket.
4.Hands and any other part of the body
which have been in contact with lubri-
cants or lubricant-contaminated cloth-
ing, should be thoroughly washed with
hot water and soap as soon as practica-
ble.
5.To protect the skin, the application of a
suitable barrier cream to the hands
before working, is recommended.
6.A supply of clean lint-free cloths should
be available for wiping purposes.
GOOD WORKING PRACTICES
1.The right tools
Use the recommended special tools to
protect parts from damage. Use the
right tool in the right manner – do not
improvise.
2.Tightening torque
Follow the tightening torque instruc-
tions. When tightening bolts, nuts and
screws, tighten the large sizes first, and
tighten inner-positioned fixings before
outer-positioned ones.

1-4
GEN
INFO
E
SAFETY WHILE WORKING
3.Non-reusable items
Always use new gaskets, packings, O-
rings, split-pins, circlips, etc., on reas-
sembly.
DISASSEMBLY AND ASSEMBLY
1.Clean parts with compressed air when
disassembling.
2.Oil the contact surfaces of moving parts
before assembly.
3.After assembly, check that moving parts
operate normally.
4.Install bearings with the manufacturer’s
markings on the side exposed to view,
and liberally oil the bearings.
5.When installing oil seals, apply a light
coating of water-resistant grease to the
outside diameter.

1-5
GEN
INFO
E
SPECIAL TOOLS
SPECIAL TOOLS
1
Using the correct special tools recom-
mended by Yamaha, will aid the work and
enable accurate assembly and tune-up.
Improvising and using improper tools can
damage the equipment.
NOTE:
• For USA and Canada, use part numbers
that start with “J-”, “YB-”, “YM-”, “YS-”,
“YU-” or “YW-”.
• For worldwide, use part numbers that
start with “90890-”.
MEASURING
1
Tachometer
P/N. YU-08036-A ............................
a
90890-06760 ...........................
b
2
Fuel pressure gauge
P/N. YB-06766
90890-06786
3
Mity vac
P/N. YB-35956
90890-06756
4
Pressure tester
P/N. YB-35956
90890-06762
5
Digital caliper
P/N. 90890-06704
6
Pinion height gauge
P/N. YB-34432-7, YB-34432-11 ......
a
90890-06702 ...........................
b
7
Shimming gauge
P/N. YB-34446-1, YB-34446-3,
YB-34446-4, YB-34446-7,
YB-34446-8
8
Shimming gauge
P/N. YB-34468-1, YB-34468-2
9
Shimming plate
P/N. 90890-06701
0
Shift rod wrench
P/N. YB-06052 ................................
a
90890-06052 ...........................
b
1b
4
3
5
a
2
78
9
0ba
6ba

1-6
GEN
INFO
E
SPECIAL TOOLS
A
Magnetic base
P/N. YU-34481
90890-06705
B
Magnetic base attaching plate
P/N. YB-07003
90890-07003
C
Backlash indicator
P/N. YB-06265
90890-06706
D
Dial gauge set
P/N. YU-03097
90890-01252
E
Hydraulic pressure gauge
P/N. 90890-06776
F
Up-relief valve attachment
P/N. 90890-06773
Down-relief valve attachment
P/N. 90890-06774
GDigital tester
P/N. J-39299 ................................... a
90890-06752 ........................... b
HPeak voltage adapter
P/N. YU-39991 ................................ a
90890-03169 ........................... b
ISpark gap tester
P/N. YM-34487 ............................... a
90890-06754 ........................... b
JTest harness
P/N. YB-06443, YB-06767,
YB-06768, YB-06769,
YB-06779, YB-06787,
YB-06788
90890-06757, 90890-06767,
90890-06768, 90890-06769,
90890-06779, 90890-06787,
90890-06788
KDiagnostic indicator
P/N. YB-06765
90890-06765
Hb
F
a
Iba
K
J
E
C D
AB
Gba

1-7
GEN
INFO E
SPECIAL TOOLS
LDiagnostic unit
Check the engine condition by using a
personal computer when it is connected
to the Electronic Control Unit (ECU).
Diagnosis:
Indicates the name of a failed part.
Diagnosis record:
Displays the name of the part whose diag-
nosis is detected, along with the engine
running total hours.
Static test:
Checks operation sound and ignition sparks
by activating the electric fuel pump, electric
oil pump, injector and spark plug while the
engine is stopped.
Dynamic test:
Checks the engine for operation through
any change in its speed by stopping the
operation of the spark plug on each cylinder
while the engine is in the neutral position.
Engine monitor:
Indicates information on the sensors and
switches by converting it to each value
while the engine is running.
Data logger:
Indicates in numeric values the engine
speed, throttle opening voltage, oxygen
density sensor voltage, water temperature
sensor voltage and fuel pressure sensor
voltage that occurred within 13 minutes.
ECU information:
Displays the ECU identification number.
NOTE:
To use any of these functions a personal
computer, connection cables, adapter and
communication software are required.
The personal computer should be compati-
ble with Windows®95/98, equipped with a
CD-ROM and the RS232C terminal.

1-8
GEN
INFO E
SPECIAL TOOLS
REMOVING AND INSTALLING
1Flywheel magnet assembly holder
P/N. YB-06139 ................................ a
90890-06522 ........................... b
2Universal puller
P/N. YB-06117 ................................ a
90890-06521 ........................... b
3Bearing/oil seal attachment
P/N. YB-06205 ................................ a
90890-06663 ........................... b
4Piston ring compressor
P/N. YU-33294 ................................ a
90890-06530 ........................... b
5Bearing separator
P/N. YB-06219 ................................ a
90890-06534 ........................... b
6Guide plate stand
P/N. 90890-06538
7Guide plate
P/N. 90890-06501
8Bearing puller
P/N. 90890-06535
9Small universal claws
P/N. 90890-06536
0Ring nut wrench
P/N. YB-34447 ................................ a
90890-06512 ........................... b
ARing nut wrench extension
P/N. 90890-06513
1ba
3
ba
67
4ba
5ba
2ba
8 9
A
0ba

1-9
GEN
INFO E
SPECIAL TOOLS
BPropeller shaft housing puller
P/N. YB-06207 ................................ a
90890-06502 ........................... b
CCenter bolt
P/N. 90890-06504
DSlide hammer
P/N. YB-06096
90890-06531
EDrive shaft holder
P/N. YB-06201
90890-06520
FPinion nut holder
P/N. 90890-06505
GPinion nut holder attachment
P/N. 90890-06508
HBearing puller
P/N. YB-06029, YB-06247
90890-06523
ILarge universal claws
P/N. 90890-06532
JDriver rod
P/N. YB-06071
90890-06604, 90890-06605,
90890-06606, 90890-06652
KBearing/oil seal depth plate
P/N. 90890-06603
LBearing/oil seal attachment
P/N. YB-06194, YB-06196, YB-06246
MBearing/oil seal attachment
P/N. YB-06195, YB-06258
NBearing/oil seal attachment
P/N. YB-06200
OBearing/oil seal attachment
P/N. YB-06336
PBearing/oil seal attachment
P/N. 90890-06610, 90890-06612,
90890-06631, 90890-06633,
90890-06636, 90890-06653,
90890-06654
QBearing/oil seal attachment
P/N. 90890-06619, 90890-06622
RBearing/oil seal attachment
P/N. 90890-06629
CD
EF
G
P
H
I
L
K
J
M
R
N
Q
O
Bab

1-10
GEN
INFO E
SPECIAL TOOLS
SBearing/oil seal attachment
P/N. 90890-06637
TBearing/oil seal attachment
P/N. 90890-06659, 90890-06660,
90890-06661, 90890-06662
USlide hammer attachment
P/N. YB-06335
90890-06514
VEnd screw wrench
P/N. YB-06548
90890-06548
WEnd screw wrench
P/N. YB-06175-1A
XUniversal holder
P/N. YU-01235
90890-01235
YSheave holder
P/N. YS-1880-A
90890-01701
ZUniversal puller
P/N. YB-06540
90890-06540
ST
UV
W
YZ
X

Other manuals for Z200N
1
This manual suits for next models
3
Table of contents
Other Yamaha Outboard Motor manuals

Yamaha
Yamaha F150 User manual

Yamaha
Yamaha F30B User manual

Yamaha
Yamaha F30A User manual

Yamaha
Yamaha F225 User manual

Yamaha
Yamaha T8C User manual

Yamaha
Yamaha F225A User manual

Yamaha
Yamaha LF225 User manual

Yamaha
Yamaha 30DMH User manual

Yamaha
Yamaha V MAX SHO FourStrake User manual

Yamaha
Yamaha F115A User manual