Yamaha ATS-C200 User manual

Sound Bar
User Guide
EN

CONTENTS
INTRODUCTION 5
About this User Guide................................................................................5
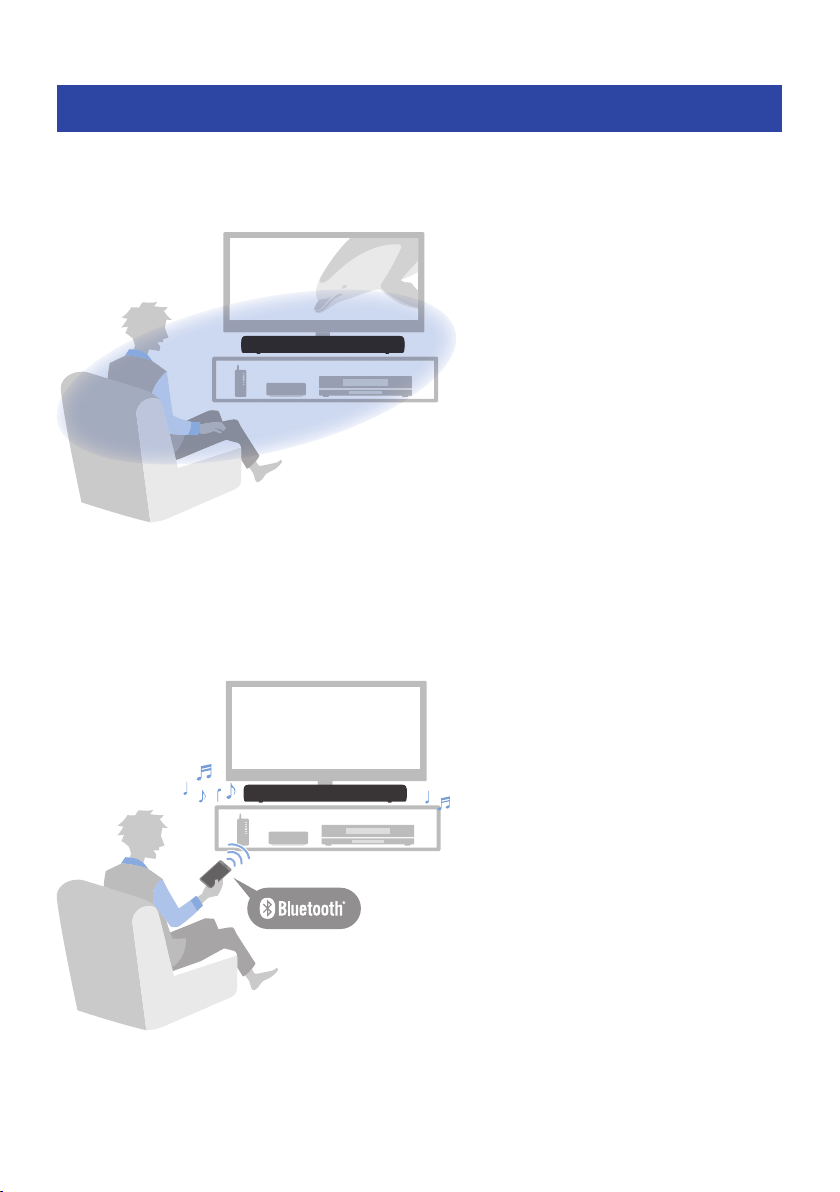
Features..................................................................................................6
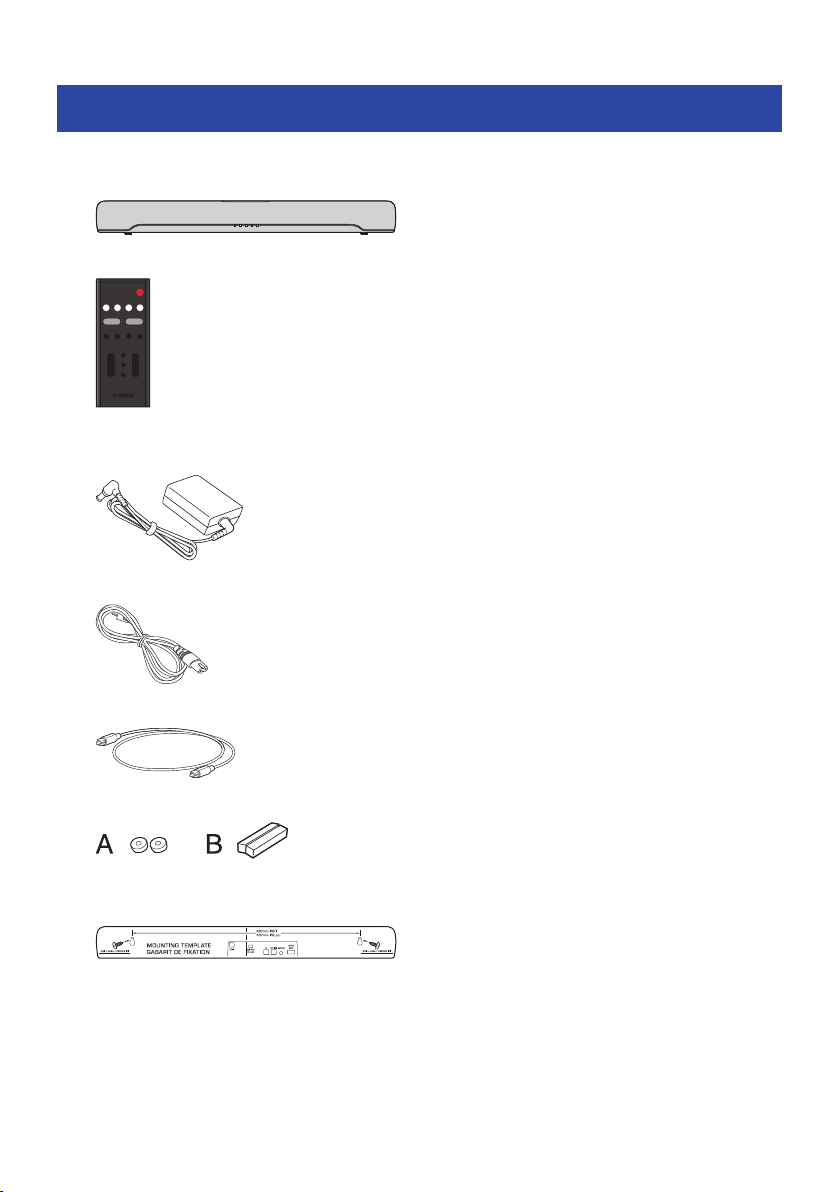
Supplied accessories.................................................................................8
PART NAMES AND FUNCTIONS 10
Part names of the sound bar (front/top).. ................................................... 10
Part names of the sound bar (rear).............................................................12
Part names of the remote control..............................................................13
PREPARATION 15
Preparation............................................................................................15
Precautions for preparation......................................................................18
Installing the sound bar.. ......................................................................... 20
Connecting a TV.. .................................................................................... 21
Connecting a TV using only the supplied digital optical audio cable....................................................................................21
Connecting a TV using an HDMI cable (sold separately).. ......................................................................................................23
Connecting an audio device.. .................................................................... 27
Preparing the remote control....................................................................30
Turning on and off the sound bar...............................................................31
PLAYBACK 32
Basic control during playback...................................................................32
Adjusting the sound to your preference......................................................34
Sound functions of this product..............................................................................................................................................34
Surround playback...................................................................................................................................................................35
Stereo playback........................................................................................................................................................................36
Adjusting the volume of the subwoofer..................................................................................................................................37
Playing back human voices clearly (CLEAR VOICE).. ..............................................................................................................38
Enjoying enhanced bass sound (BASS EXT)............................................................................................................................39
Listening to audio from a Bluetooth® device................................................40
2
CONTENTS

ADDITIONAL FEATURES 43
Changing the brightness of the indicators (Dimmer).....................................43
Using a TV’s remote control to control the sound bar (HDMI Control)..............44
Showing the type of audio signal and settings for functions.. ........................ 45
Controlling the sound bar with the app.......................................................46
CONFIGURATION 47
Enabling/disabling the HDMI Control function.............................................47
Enabling/disabling the Auto Power Standby function...................................48
Enabling/disabling the Child Lock function.. ............................................... 49
Enabling/disabling the Bluetooth Standby function.. ................................... 50
Enabling/disabling the Bluetooth function..................................................51
Setting the dynamic range compression level..............................................52
Changing frequency characteristics according to how the sound bar is
installed.. .............................................................................................. 54
Initializing the sound bar..........................................................................56
TROUBLESHOOTING 57
Check the following first when any problem occurs......................................57
When a problem occurs: Power or overall functionality.. .............................. 58
When a problem occurs: Audio...................................................................66
When a problem occurs: Bluetooth®...........................................................71
When a problem occurs: App.....................................................................73
Other actions..........................................................................................74
How to minimize standby power consumption.. ...................................................................................................................74
Precautions for remote control batteries.. .............................................................................................................................75
How to replace the remote control battery............................................................................................................................76
How to reset the sound bar.. ...................................................................................................................................................77
APPENDIX 78
Specifications of the Sound Bar.................................................................78
Supported digital audio signal formats.......................................................81
3
CONTENTS

List of indicator displays.. ........................................................................ 82
About third party software programs.........................................................85
Mounting the sound bar on a wall.. ............................................................ 93
Precautions for mounting the sound bar on a wall................................................................................................................93
Mounting the sound bar on a wall (for qualified service personnel).....................................................................................94
4
CONTENTS

INTRODUCTION
About this User Guide
• This User Guide is for the following readers:
– the users of the product
– the constructor, builder and dealer that mount the product on the wall
• This User Guide uses the following signal words for the important information:
–WARNING
This content indicates “risk of serious injury or death.”
–CAUTION
This content indicates “risk of injury.”
–NOTICE
Indicates points that you must observe in order to prevent product failure, damage or malfunction and
data loss, as well as to protect the environment.
–NOTE
Indicates notes on instructions, restrictions on functions, and additional information that may be
helpful.
• The illustrations and screens in this User Guide are for instructional purposes only.
• The company names and product names in this User Guide are the trademarks or registered trademarks of
their respective companies.
• Various smartphones and tablet devices are collectively referred to as “mobile devices”. When necessary,
the type of mobile device is specified in the explanations.
• The [Search tag] is a keyword used in searches. This serves as a link from the Quick Start Guide to the User
Guide.
NOTE
The Safety Brochure and the Quick Start Guide are supplied with this product. See the Safety Brochure first.
5
INTRODUCTION > About this User Guide

Features
This sound bar is a speaker for your TV that allows you to easily enjoy surround sound on the TV.
nPlay surround sound
Related links
“Surround playback”(p.35)
nEasily play audio content from a Bluetooth device
Related links
“Listening to audio from a Bluetooth® device”(p.40)
6
INTRODUCTION > Features

nAdditional features
Clear Voice
This function automatically distinguishes human voices from background sound and increases the volume of
the voices only. Human voices in TV programs that use a lot of background music and sound effects can be
heard more clearly.
• “Playing back human voices clearly (CLEAR VOICE)”(p.38)
Bass Extension
This function boosts bass levels that are often not strong enough when using a compact speaker, for more
impactful sound.
• “Enjoying enhanced bass sound (BASS EXT)”(p.39)
Audio Return Channel (ARC) and HDMI Control function compatible
An Audio Return Channel (ARC) compatible TV can be connected to the sound bar using a single HDMI cable.
An HDMI control function compatible TV allows for controlling the sound bar's basic functions using the TV’s
remote control.
• “Connecting a TV using an HDMI cable (sold separately)”(p.23)
• “Using a TV’s remote control to control the sound bar (HDMI Control)”(p.44)
Dedicated app: “Sound Bar Remote”
The sound bar can be easily controlled from your mobile device.
nCertified as a Yamaha Eco-Product
Yamaha Eco-Label is a mark that certifies products of high environmental performance.
With an advanced energy saving design, this product achieves a low power consumption of not more than
1.8 watts when in standby mode.
7
INTRODUCTION > Features

Supplied accessories
Make sure you have received all of the following accessories:
• Sound bar (ATS-C200)
• Remote control
* A Lithium battery (CR2025) has already been inserted into the remote control.
• AC adaptor (model number: ANAD-420FIOT-B or ANAD-420FIOT-W)
• Power cord
• Digital optical audio cable
• Spacers (A: ×2, B: ×2 on 1 sheet)
* Use when mounting the sound bar on a wall.
• Mounting template
* Use when mounting the sound bar on a wall.
8
INTRODUCTION > Supplied accessories

• Quick Start Guide
• Safety Brochure
9
INTRODUCTION > Supplied accessories

PART NAMES AND FUNCTIONS
Part names of the sound bar (front/top)
This section describes the part names and functions of the front/top of the sound bar.
a
e
b
cd
dc
aIndicators
The indicators on the top panel flash or glow to show the operation and setting status. During normal playback, the
setting status is indicated as follows:
TV/OPTICAL / BLUETOOTH / ANALOG: Selected input source
SURROUND: Surround playback (glowing) / Stereo playback (off)
NOTE
This document uses the following illustrations to show that indicators are off, glowing, or flashing.
Off
Glowing
Flashing
bControls
Touch the symbols with your fingertip to control the sound bar.
y (Input): Select an input source (p.32).
} / { (Volume +/-): Adjust the volume (p.32).
z (Power): Turn the sound bar on and off.
cSpeakers
dBuilt-in subwoofers
10
PART NAMES AND FUNCTIONS > Part names of the sound bar (front/top)

eRemote control sensors
NOTE
• To prevent unintended operation, do not place anything on the controls of the sound bar.
Enabling the Child Lock function prevents accidental operation.
• The brightness of the indicators can be adjusted by pressing DIM.
Related links
• “Enabling/disabling the Child Lock function”(p.49)
• “Changing the brightness of the indicators (Dimmer)”(p.43)
11
PART NAMES AND FUNCTIONS > Part names of the sound bar (front/top)

Part names of the sound bar (rear)
This section describes the part names and functions of the rear of the sound bar.
a b c d e f
aUPDATE ONLY jack
Use to update the sound bar’s firmware.
Refer to the instructions supplied with the firmware for details.
bANALOG input jack (p.27)
cOPTICAL input jack (p.27)
dTV input jack (p.21)
eHDMI OUT/TV (ARC) jack (p.23)
fDC IN (20V) jack
Related links
• “Part names of the sound bar (front/top)”(p.10)
• “Part names of the remote control”(p.13)
12
PART NAMES AND FUNCTIONS > Part names of the sound bar (rear)

Part names of the remote control
This section describes the part names and functions of the remote control.
b
c
f
h
a
d
e
i
g
j
az (Power) button
Turn the sound bar on and off (p.31).
bInput source buttons
Select an audio input source (p.32).
• TV button: Audio from a TV
• OPTICAL button: Audio from a device connected to the OPTICAL input jack
• BLUETOOTH button: Audio from a Bluetooth device
• ANALOG button: Audio from a device connected to the ANALOG input jack
cCLEAR VOICE button
Enable or disable the Clear Voice function (p.38).
dBASS EXT button
Enable or disable the Bass Extension function (p.39).
13
PART NAMES AND FUNCTIONS > Part names of the remote control

eSound mode buttons
Switch to your preferred sound mode (p.34).
• STANDARD
• MOVIE
• GAME
• STEREO
fINFO button
Shows information such as the type of audio signal being played and the settings for the sound bar’s functions
(p.45).
gDIM button
Switch the brightness of the indicators of the sound bar (p.43).
hSUBWOOFER (+/-) button
Adjust the volume of the subwoofer (p.37).
iVOLUME (+/-) button
Adjust the volume of the sound bar (p.32).
j| (Mute) button
Mute the audio output (p.32). Press this button again, or press VOLUME (+/-) to unmute.
NOTE
Use the remote control within the range shown in the following illustration:
Within 6 m
Remote control sensor
Related links
“Part names of the sound bar (front/top)”(p.10)
14
PART NAMES AND FUNCTIONS > Part names of the remote control

2Connect a TV to the sound bar.
Depending on the type of TV, connect the TV to the sound bar as follows:
•Connecting the TV using only the supplied digital optical audio cable
OPTICAL
Connection procedure
– “Connecting a TV using only the supplied digital optical audio cable”(p.21)
•TV equipped with an HDMI jack labeled as “ARC”
HDMI IN
ARC
OPTICAL
Connection procedure
– “Connecting a TV using an HDMI cable (sold separately)”(p.23)
•TV not equipped with an HDMI jack labeled as “ARC”
HDMI INOPTICAL
Connection procedure
– “Connecting a TV using only the supplied digital optical audio cable”(p.21)
– “Connecting a TV using an HDMI cable (sold separately)”(p.23)
3Connect an audio device (if required).
Connection procedure
“Connecting an audio device”(p.27)
16
PREPARATION > Preparation

4Prepare the remote control.
“Preparing the remote control”(p.30)
5Turn on the sound bar.
“Turning on and off the sound bar”(p.31)
NOTE
• Connect AV devices (such as BD/DVD players and set top boxes) to the TV’s HDMI input jacks.
HDMI IN
This sound bar AV devices
• When playing audio from a TV or AV device via the sound bar, set the input sources as follows:
– Sound bar’s input source: TV
– TV’s input source: AV device playing the content
• ARC (Audio Return Channel) is a function that sends audio signals from the TV’s HDMI output jack.
17
PREPARATION > Preparation

Precautions for preparation
Before installing the sound bar and connecting other devices, be sure to read the following precautions. Be
sure to always obey the precautions.
nPrecautions for installation
WARNING
• Install in the manner instructed in the manual. Falling or toppling may result in injury or damage.
• Confirm that the finished installation is safe and secure. Also, carry out safety inspections periodically. Failure to observe this
may cause devices to fall and result in injury.
• Do not expose the product to rain, use it near water or in damp or wet conditions, or place on the product any containers (such
as vases, bottles or glasses) containing liquids which might spill into any openings or places where water may drop. A liquid
such as water getting into the product may cause a fire, electric shocks, or malfunctions.
• Do not place any burning items or open flames near the product, since they may cause a fire.
• Do not use this product near medical devices or inside medical facilities. Radio waves from this product may affect electro-
medical devices.
CAUTION
• Do not place the product in an unstable position where it might accidentally drop or fall over and cause injuries.
• When installing this product, do not obstruct heat dissipation. Failure to observe this may trap heat inside the product, causing
a fire or malfunctions.
• Do not install the product in places where it may come into contact with corrosive gases or salt air, or places that have
excessive smoke or steam. Doing so may result in malfunction.
• Avoid being near the product during a disaster, such as an earthquake. Since the product may turn over or fall and cause injury,
quickly move away from the product and go to a safe place.
NOTICE
• Do not press hard on the speaker units or fabric-covered portion of this product.
• Do not place any objects susceptible to magnetism (such as a hard disk drive or magnetic card) near the product. The magnetic
effect of the sound bar may cause damage to the object or its recorded data.
• Do not use this product in a location that becomes extremely hot, such as in direct sunlight or near a heater, or that becomes
extremely cold, or that is subject to excessive dust or vibration. Failure to observe this may cause this product’s panel to
become deformed, the internal components to malfunction, or for operation to become unstable.
• If using a wireless function, avoid installing this product near metal walls or desks, microwave ovens, or other wireless network
devices. Obstructions could shorten the transmission distance.
18
PREPARATION > Precautions for preparation

nPrecautions for connections
WARNING
• Use this product with the power supply voltage printed on it. Failure to connect to an appropriate AC outlet may cause a fire,
electric shocks, or malfunctions.
• Be sure to use the supplied power cord and AC adaptor. Do not use the supplied power cord and AC adaptor for other devices.
Failure to observe this may cause a fire, electric shocks, or malfunctions.
• Never insert or remove an electric plug with wet hands. Do not handle this product with wet hands. Failure to observe this may
cause electric shocks or malfunctions.
• Do not touch the power plug or cord if there is a chance of lightning. Failure to observe this may cause electric shocks.
• When setting up the product, make sure that the AC outlet you are using is easily accessible. If some trouble or malfunction
occurs, immediately turn off the power switch and disconnect the plug from the AC outlet. Even when the power switch is
turned off, as long as the power cord is not unplugged from the wall AC outlet, the product will not be disconnected from the
power source.
• If not using the product for long periods of time, be sure to pull the power plug from the AC outlet. Failure to observe this may
cause a fire or malfunctions.
• Check the electric plug periodically and remove any dirt or dust which may have accumulated on it. Failure to observe this may
cause a fire or electric shocks.
CAUTION
• Do not use an AC outlet where the power plug fits loosely when inserted. Failure to observe this may cause a fire, electric
shocks, or burns.
• When disconnecting the power plug, always hold the plug itself and not the cord. Pulling by the cord can damage it and cause
electric shocks or a fire.
• Insert the power plug firmly all the way into the AC outlet. Using the product when it is not plugged in sufficiently can cause
dust to accumulate on the plug, causing a fire or burns.
NOTICE
• If connecting external devices, be sure to thoroughly read the User Guide for each device and connect them in accordance with
the instructions. Failure to properly handle a device in accordance with the instructions could cause malfunctions.
• Do not connect this product to industrial devices. This product has been designed to connect to consumer-use devices.
Connection to an industrial-use device could cause this product to malfunction.
19
PREPARATION > Precautions for preparation

Installing the sound bar
• Before installing the sound bar, be sure to read the following precautions.
– “Precautions for preparation”(p.18)
Install the sound bar as shown in the following illustration.
Controls
NOTE
• The sound bar can also be mounted on a wall.
• The frequency characteristics of the sound can be changed according to whether the sound bar is placed on a TV stand or mounted
on a wall.
Related links
• “Mounting the sound bar on a wall (for qualified service personnel)”(p.94)
• “Changing frequency characteristics according to how the sound bar is installed”(p.54)
20
PREPARATION > Installing the sound bar
Other manuals for ATS-C200
1
Table of contents
Other Yamaha Speakers System manuals

Yamaha
Yamaha YHT-24 Assembly instructions

Yamaha
Yamaha NS-P41 User manual

Yamaha
Yamaha YSP-1 User manual

Yamaha
Yamaha NS-P240 User manual

Yamaha
Yamaha NS-AW190W User manual

Yamaha
Yamaha NS-BP182 User manual

Yamaha
Yamaha CBR15 User manual

Yamaha
Yamaha NS-C444 - Center CH Speaker User manual

Yamaha
Yamaha S250X User manual

Yamaha
Yamaha ESB-1090 User manual

Yamaha
Yamaha BR10 User manual

Yamaha
Yamaha YSP-1 User manual

Yamaha
Yamaha MSP3A User manual

Yamaha
Yamaha NS-AW190 User manual

Yamaha
Yamaha NS-AP3700 User manual

Yamaha
Yamaha NS-B20 User manual

Yamaha
Yamaha DBR Series User manual

Yamaha
Yamaha IL1115 User manual

Yamaha
Yamaha NS-U30 User manual

Yamaha
Yamaha NS-WSW121 User manual