manuals.online logo
Brands
  1. Home
  2. •
  3. Brands
  4. •
  5. Yamaha
  6. •
  7. Synthesizer
  8. •
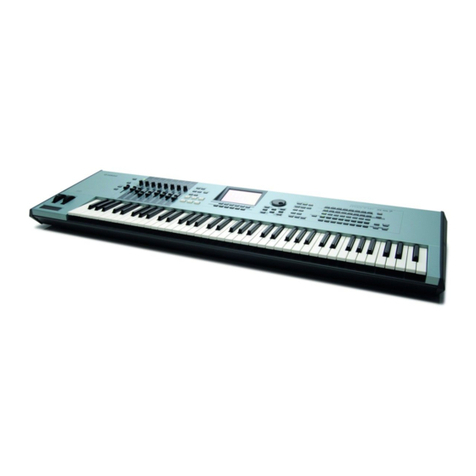
  9. Yamaha MOTIF RACK ES User manual

Yamaha MOTIF RACK ES User manual

y
POWER USER
MUSIC PRODUCTION and PERFORMANCE
With the Motif ES
COPYING VOICE DATA w/ARPEGGIOS
TO A PERFORMANCE or MIX
A Step-by-Step Tutorial
Skills Learned
• How to explore a Voice and analyze its content
• Copy a Voice to a PERFORMANCE or MIX
• Copy System Effects and Arpeggio functions from a Voice to a Performance or Mix
• What changes when a Voice is placed in a Performance Part or Mix Part
Phil Clendeninn
Senior Product Specialist
Technology Products
©Yamaha Corporation of America
Scenario: You have found a Voice that you like
and it has assigned arpeggios (five different
arpeggios can be associated with a Voice). You
want to use the Voice and its assigned arpeggios
in a Pattern/Song Mix or perhaps in a Performance
with other Voices. When you assign a Voice to a
Pattern/Song MIX or to a Performance certain of
the data is stripped off and reassigned to a default
setting. This includes:
• Insertion Effects – which can be activated for
up to eight Parts of any Mix and for all four
Parts of a Performance.1
• Reverb/Chorus assignments - These so-called
“System Effects” which were programmed
individually in Voice mode are now shared by
all PARTS of a MIX or Performance.
• Volume – which is set to a default of 100 on a
scale of 0-127.
• MIDI channel assignment - Each Part of a MIX
is automatically assigned a successively
higher MIDI channel that initially corresponds
to the PART number by default. In a
PERFORMANCE all PARTS are on the same
Basic MIDI channel.
• Arpeggios – If a Voice had arpeggios
associated with it in Voice mode they are
stripped off.
If you wish to copy Voice mode settings, like the
arpeggios and System Effects, to the Voice’s PART
of the MIX follow this step-by-step tutorial.
We will use the USER 001 “Gt: Unplugged” Voice
as an example.
Let’s assume you want to build a Pattern around
this particular Voice. First, let’s learn how to
explore this Voice and see what it has going for it.
To learn about any Voice from the main screen
press the [INFORMATION] button.
1By default the first eight internal Parts of a Mix will
recall their Insertion Effect routing from Voice mode. By
default all four internal Parts of a Performance will recall
their Insertion Effect routing.
This guitar sound is in Bank MSB/Bank LSB
063/0082– that’s the User 1 bank. This Voice is
made from four different Elements. An Element is
a multi-sample in the case of the internal Motif ES
Voices. The polyphony mode is POLY. Portamento
(glide) mode is OFF. The Pitch Bend range is –
2/+2 or up and down a whole step. The Insertion
Effects that are assigned to this Voice are a “3-
band EQ” and a “Vintage Distortion”. The reverb is
a “Woody Room” and the chorus is “Chorus 1”.
• Press the [EXIT] button or press [VOICE] to
return to the main screen. From the main
screen press F6 ARP to learn about the
assigned (associated) Arpeggios. When this
Voice is initially recalled ARP1 is active. It is
from the preset “GtKM” bank (Guitar
Keyboard Mega Voice) of preset arpeggios.
Arp1 007 Unplug D
Arp2 006 Unplug C
Arp3 008 Unplug E
Arp4 009 Unplug G
Arp5 005 Unplug B
Tempo is 113 BPM
Because we are curious and there is no better way
to learn than to explore…let’s see what makes this
Voice tick. If you press the [EDIT] button and
navigate to the Control Sets you can view what
assignments have been made. You will be able to
use these assignments once the Voice has been
placed in a MIX so let’s be aware of what they
are. From the main Voice screen:
• Press [EDIT]
• Press [COMMON]
• Press [F4] CTRL SET (Control Set)
SF1 Control Sets 1 / 2
Set 1: Mod Wheel is assigned to the Common LFO
Set 2: AS1 is set to control the INSERT EFFECT
A’s Low EQ Gain
2You will see these MSB/LSB Bank Select numbers
again when you go to the Voice select screen in MIXING
mode.
2
SF2 Control Sets 3 / 4
Set 3: AS1 is also set to control INSERT EFFECT
B’s Overdrive amount
Set 4: AS2 is set to control the Chorus send
amount
SF3 Control Sets 5 / 6
Set 5: Ribbon control is set to Pitch Coarse
allowing you to bend the pitch. (Shown above)
Set 6: is unassigned (Shown above)
When we place this Voice in either a Performance
Part or a Mix Part, as mentioned, some of its
assigned parameters will be changed, reset or
stripped off completely. Voices are placed in a
somewhat neutral state as you are going to
combine them with other Voices. A PART is an
important concept to understand. It is defined as
a Motif ES Voice that has been placed in a
Performance or a Mix – it is the set of parameters
that are assigned to control the Voice – they are
offsets to the actual Voice parameters. So when
you save a Performance or a Mix you are actually
not saving the Voice data itself but these set of
parameters that are now associated with the
original Voice. This allows you to edit the PART
without destructively editing the Voice data itself.
What this accomplishes is you can use the same
Voice in other Performances and Mixes completely
uniquely. Next we will learn about how to COPY a
VOICE to a multi MIX and then how to COPY it to
a PERFORMANCE.
COPY
As mentioned when you move the “Unplugged”
Voice into a Performance PART or into a Mix PART
you will notice that the Reverb and Chorus
assignments are set to the default (R3 Hall and
Chorus 1), and all the associated arpeggios are
removed. Activating the INSERT Switch restores
the Insertion Effect but to restore the arpeggios
we will use the convenient COPY JOB function.
Here’s how to make it work for you:
Initialize the Mix or the Performance you wish to
use (this process will work equally well for each).
Initialize is a JOB found always at F1.
When you initialize a Performance it will place the
Full Grand piano sound in PART 01. You can
change this to your sound and then use the COPY
function to restore its Voice mode settings. When
you initialize a Mix it places the Full Grand piano
sound in all 16 PARTS. You can change the Part
you want to your sound, then use the COPY
function to restore the Voice’s setting. What
follows are the step-by-step instructions for this
procedure; first for a MIX followed by the step-by-
step for a PERFORMANCE.
For MIX Mode
Select Song Mix or Pattern mix mode:
• Press [MIXING]
• Press [JOB]
• Press [F1] INIT
• Press [ENTER] / [YES] to execute
• Press [MIXING]
• Press [F2] VOICE
• Highlight the Voice in PART 01
• Press [Category Search] or use your favorite
method to select the Voice you want to work
with. In our example select the “USER 001:
Gt:Unplugged”. Bank MSB/Bank LSB: 63/8,
Voice number 1
• Press [JOB]
• Press [F3] COPY
• Set the screen as shown above.
• Press ENTER/YES to execute
This will Copy the ARP settings from the VOICE in
PART 1 to the current Mix
• Set the screen as shown above.
• Press ENTER/YES to execute
This will Copy the REVERB and CHORUS setting
from the VOICE in PART 1 to the current Mix. Take
note that when you copy the Reverb and Chorus
to the current Mix, all the Parts will now use these
effects as they become the SYSTEM Effects for the
entire Mix.
3
Now when you return to the main SONG or
PATTERN screen you will have all five Arpeggios
that were associated with “Unplugged” in Voice
mode associated with this Mix. And the Reverb
and Chorus algorithms of the “Unplugged” Voice
are now the System Effects of this Mix.
• Store the Mix
For Performance
• Select PERFORMANCE mode:
• Press [PERFORM]
• Press [JOB]
• Press [F1] INIT
• Press [ENTER] / [YES] to execute
• Press [PERFORM] to return to the main screen
• Press [F2] VOICE
• Highlight the Voice
• Press [Category Search] or use your favorite
method to select the Voice you want to work
with. In our example select the “USER 001:
Gt:Unplugged”.
• -Press [JOB]
• -Press [F3] COPY
• Set the screen as shown above.
• Press ENTER/YES to execute
This will Copy the ARP settings from the VOICE in
PART 1 to the current location.
• Set the screen as shown above.
• Press ENTER/YES to execute
This will Copy the REVERB and CHORUS setting
from the VOICE in PART 1 to the current location.
Take note that when you copy the Reverb and
Chorus to the current Performance, all the Parts
will now use these effects as they become the
SYSTEM Effects for the Performance. Of course,
you can control the SEND amount from each PART
on the Motif ES Mixer.
Now when you return to the main Performance
screen you will have the 5 Arpeggios that were
associated with “Unplugged” in Voice mode
associated with this Performance.
• Store the Performance.
Phil Clendeninn
Senior Product Specialist
Technology Products
©Yamaha Corporation of America
4

Other manuals for MOTIF RACK ES

3

Other Yamaha Synthesizer manuals

Yamaha MOTIF-RACK User manual

Yamaha

Yamaha MOTIF-RACK User manual

Yamaha YS100 User manual

Yamaha

Yamaha YS100 User manual

Yamaha SY-35 User manual

Yamaha

Yamaha SY-35 User manual

Yamaha MOTIF X5 Quick start guide

Yamaha

Yamaha MOTIF X5 Quick start guide

Yamaha pf10 User manual

Yamaha

Yamaha pf10 User manual

Yamaha S-80 User manual

Yamaha

Yamaha S-80 User manual

Yamaha P-120 P-120S User manual

Yamaha

Yamaha P-120 P-120S User manual

Yamaha Electone CHX-1 User manual

Yamaha

Yamaha Electone CHX-1 User manual

Yamaha PF15 User manual

Yamaha

Yamaha PF15 User manual

Yamaha DS-55 User manual

Yamaha

Yamaha DS-55 User manual

Yamaha DX7 II D Installation and operation manual

Yamaha

Yamaha DX7 II D Installation and operation manual

Yamaha SY99 User manual

Yamaha

Yamaha SY99 User manual

Yamaha PSR-S650 User manual

Yamaha

Yamaha PSR-S650 User manual

Yamaha Portable Grand DGX-220 User manual

Yamaha

Yamaha Portable Grand DGX-220 User manual

Yamaha MX88 User manual

Yamaha

Yamaha MX88 User manual

Yamaha Tyros 3 Operating and maintenance manual

Yamaha

Yamaha Tyros 3 Operating and maintenance manual

Yamaha SY55 User manual

Yamaha

Yamaha SY55 User manual

Yamaha Portatone PSR-9000 User manual

Yamaha

Yamaha Portatone PSR-9000 User manual

Yamaha Montage 6 User manual

Yamaha

Yamaha Montage 6 User manual

Yamaha MOTIF 6 Quick start guide

Yamaha

Yamaha MOTIF 6 Quick start guide

Yamaha EX5R Instruction Manual

Yamaha

Yamaha EX5R Instruction Manual

Yamaha PSR-S670 User manual

Yamaha

Yamaha PSR-S670 User manual

Yamaha TX816 Manual

Yamaha

Yamaha TX816 Manual

Yamaha SY-77 User manual

Yamaha

Yamaha SY-77 User manual

Popular Synthesizer manuals by other brands

Playtime Engineering blipblox quick start guide

Playtime Engineering

Playtime Engineering blipblox quick start guide

Siel DK 80 owner's manual

Siel

Siel DK 80 owner's manual

ARP Omni-2 owner's manual

ARP

ARP Omni-2 owner's manual

NONLINEAR LABS C15 Quick start manual

NONLINEAR LABS

NONLINEAR LABS C15 Quick start manual

Kurzweil PC3 Getting started guide

Kurzweil

Kurzweil PC3 Getting started guide

Reverselandfill Noise Build Document

Reverselandfill

Reverselandfill Noise Build Document

Korg PS60 Easy start guide

Korg

Korg PS60 Easy start guide

Moog Realistic user manual

Moog

Moog Realistic user manual

Fujitsu MB15F74UV datasheet

Fujitsu

Fujitsu MB15F74UV datasheet

Modal 008R user manual

Modal

Modal 008R user manual

Roland SH-1000 Instrction manual

Roland

Roland SH-1000 Instrction manual

Roland GR-20 owner's manual

Roland

Roland GR-20 owner's manual

Kawai K3 owner's manual

Kawai

Kawai K3 owner's manual

CreamWare Noah Hardware guide

CreamWare

CreamWare Noah Hardware guide

Meris HEDRA 500 Series manual

Meris

Meris HEDRA 500 Series manual

Korg Poly-800 owner's manual

Korg

Korg Poly-800 owner's manual

LinPlug Element P user manual

LinPlug

LinPlug Element P user manual

Dreadbox Erebus user manual

Dreadbox

Dreadbox Erebus user manual

manuals.online logo
manuals.online logoBrands
  • About & Mission
  • Contact us
  • Privacy Policy
  • Terms and Conditions

Copyright 2025 Manuals.Online. All Rights Reserved.