15 16
Part 3
Precautions for use:
Adjust the optimal height of the seat according
to the height of the user.
1.
Ensure the brakes work properly.
2.
Better not use it in bad weather like rain storm.
Check the bicycle for scratches.
Check for loose screws.
Check the accessories are complete.
3.
4.
5.
6.
Brake maintenance:
Check brake pads regularly.
Check if the brake disc is deformed.
If it is an oil brake, check for oil leakage.
Clean brake regularly.
Battery maintenance:
When using for the first time, the user must fully
charge the battery to activate battery groups.
1.
2.
reduce the life of the battery.
Must use the specified charger for charging.
3.
4.
If you will not use it for a long time, charge the
battery at least once a month to keep battery
5.
active.
Do not submerge the battery in liquid or anything
6.
may damage the battery.
Turn off the battery when you are not using it.
7.
8.
If the battery has any problems, do not charge
it any more and contact us.
9.
Frame maintenance:
Don’t let the frame rust, when the frame is
exposed to rain, wipe dry after use.
Check regularly for leaks.
Check spokes regularly.
Tire maintenance:
Do not try to disassemble the motor.
1.
Motor maintenance:
Yameebike.com Yameebike.com
1.
2.
3.
4.
1.
1.
2.
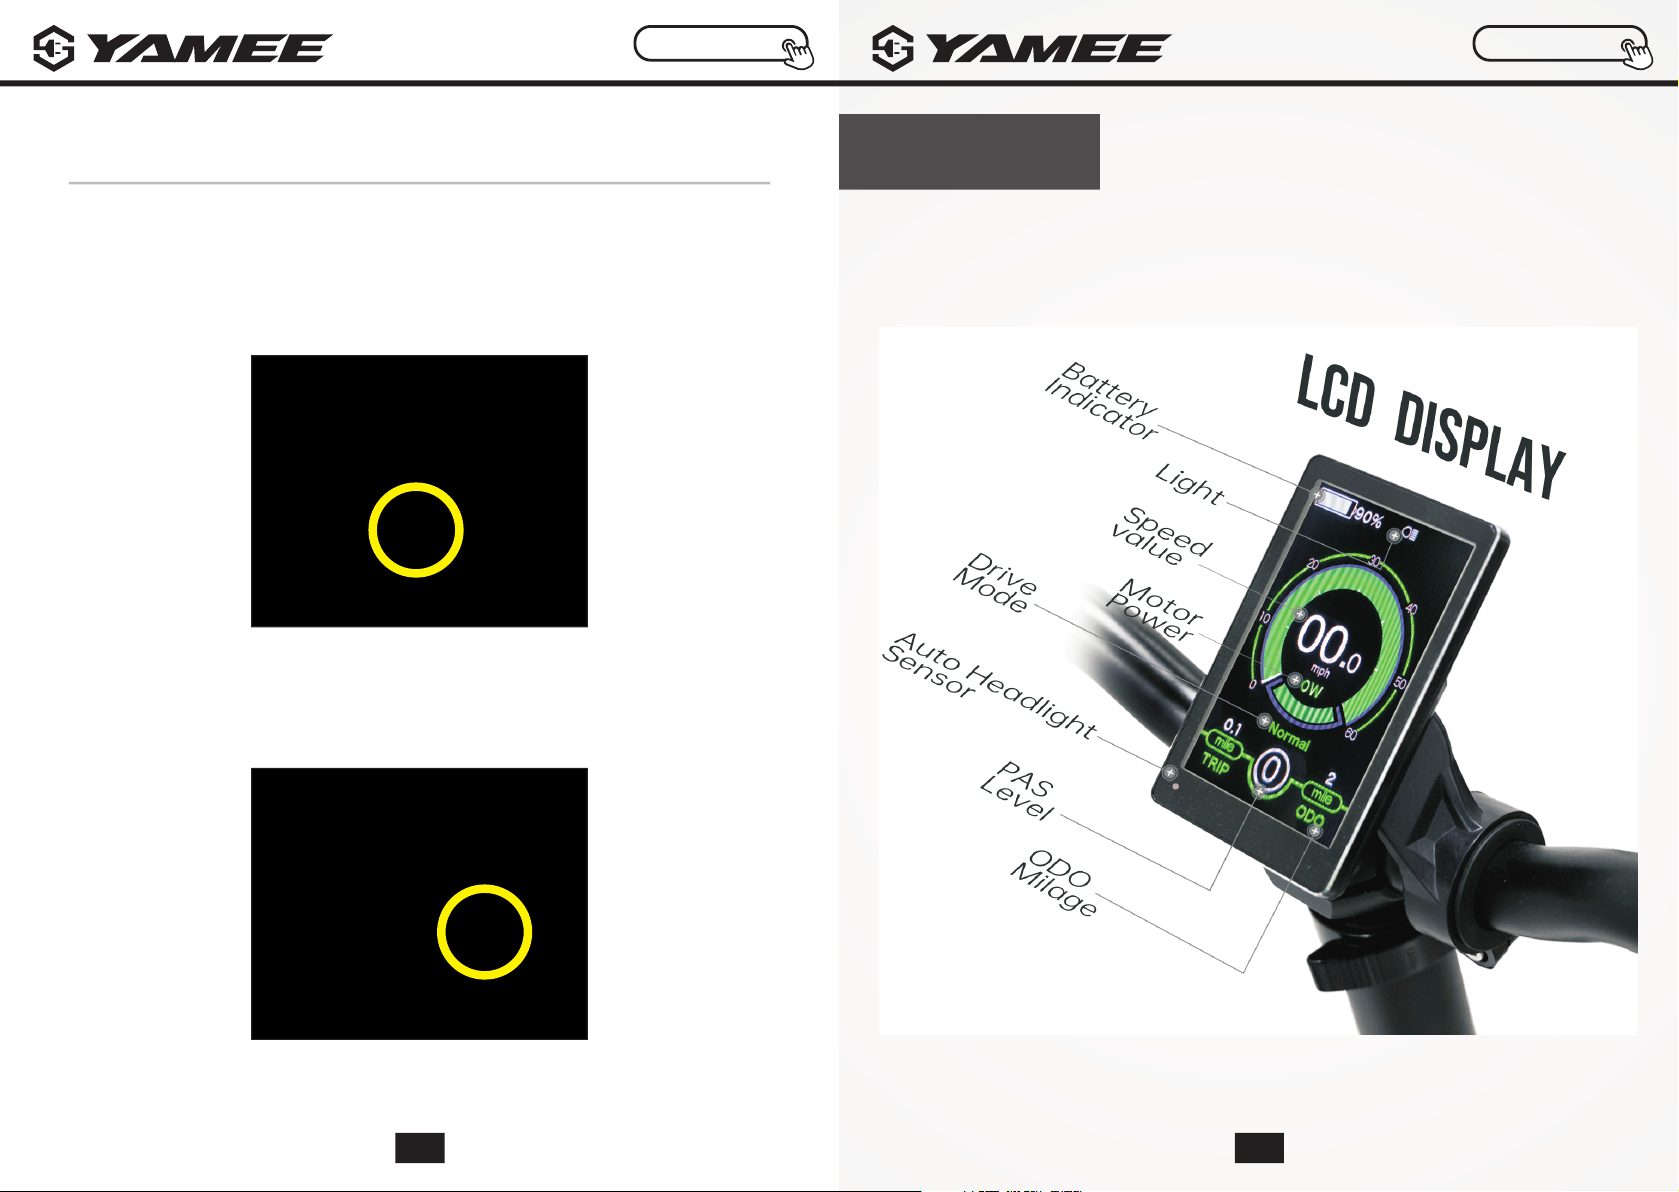
Maintenance
Do not use the battery at a low charge level, it will
Do not charge the battery when it is at a high temperature
(over 212 Fahrenheit), charge in a cool place.
it will extend the life of the battery.
Charge the battery fully before each use ,