manuals.online logo
Brands
  1. Home
  2. •
  3. Brands
  4. •
  5. Yanmar
  6. •
  7. Engine
  8. •
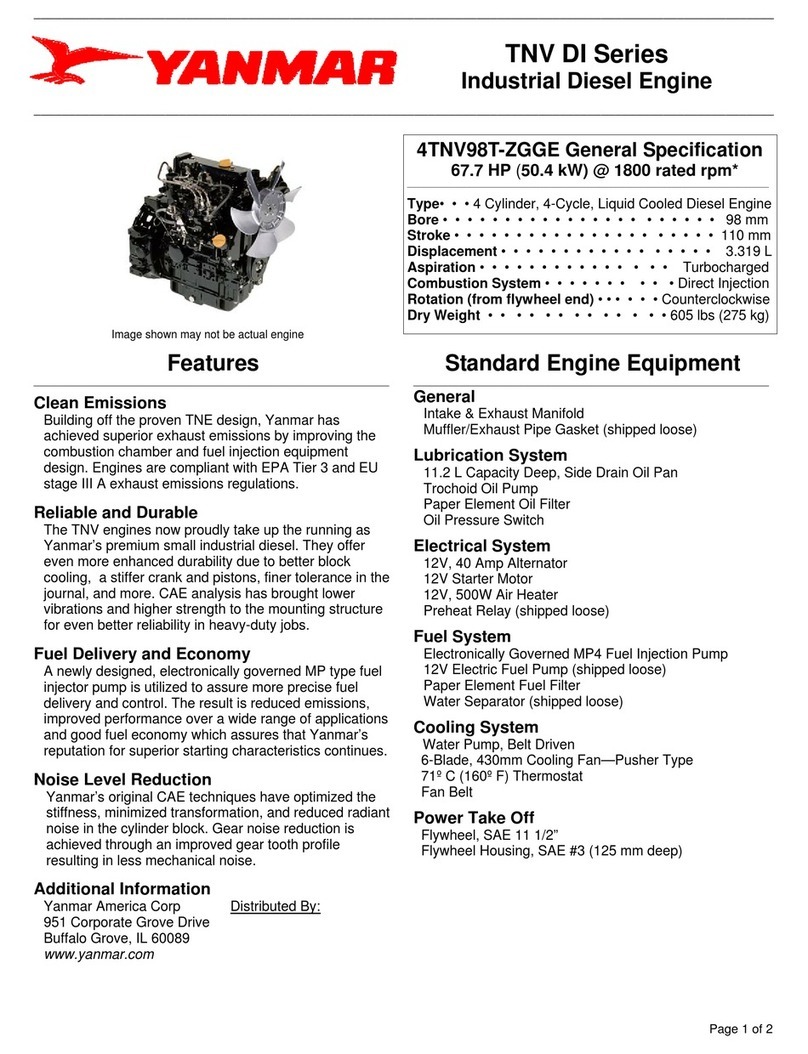
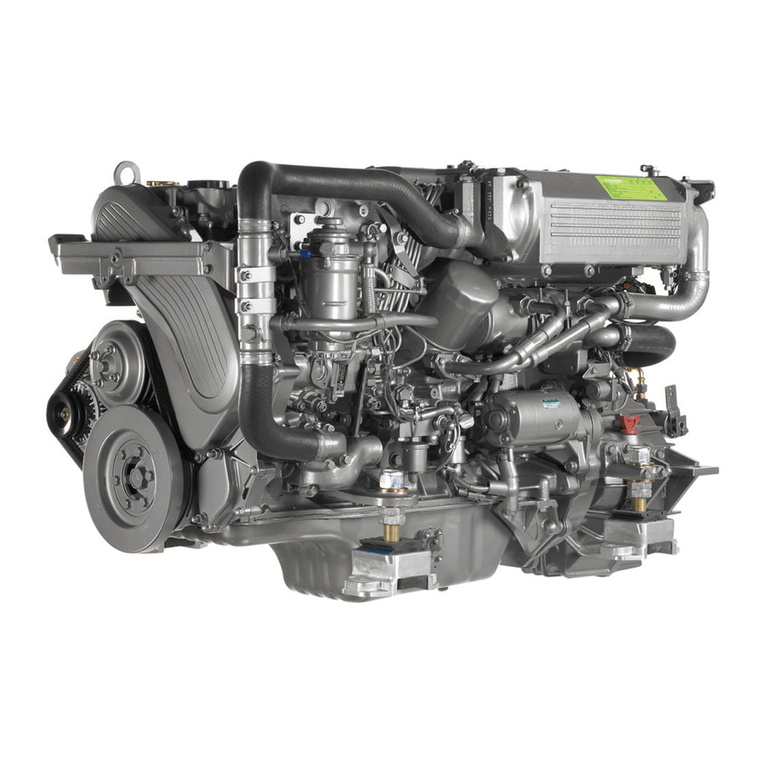
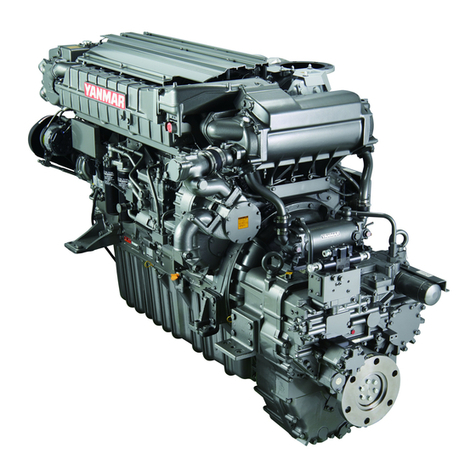
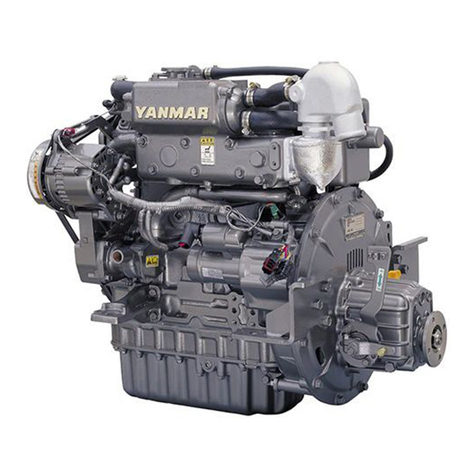
  9. Yanmar 4TNV84T-Z User manual

Yanmar 4TNV84T-Z User manual

1 1
2 2
3 1
4 1
50 Included w/ engine
6 2
7 1
8 2
9 2
10 1
11 1
MODELS
4TNV84T-Z
4TNV98-Z
4TNV98T-Z
NOTE:
PAGE 1 OF 6
129989-08010
Isolator Mount 1/4"-20 KIT
198461-52950
Panel Mounting Bracket
YANMAR CO., LTD.
YANMAR AMERICA CORP.
Item
129927-77930 70A, 12V Relay
Control Panel
Wiring Harness (ECO)
QuantityPart No. Description
119749-91050 Ignition Key, Engine Control Panel
119749-91040
26106-080252
INS-KP4-0012
Sub relay is optional and not included with the engine.
Bolt, M8 x 1.25 - 25 (Flanged hex head)
26366-080002 Nut, M8 x 1.25 (Flanged hex head)
Remarks
KP4 - PANEL KIT
INS-KP4-0012
Installation Document
119749-91060
Relay
119749-91001
129989-09020 Alternator Sub Harness
J59
Main
Relay
J60
Actuator
Relay J63
Sub
Relay
CR4/J62
Preheat
Relay
CR3/J61
Starter
Relay
4
5
6
10
1
2
7
8
9
3
Installation Instructions
NOTE:
1.
NOTE:
2.
3.
4.
WARNING:
NOTE:
Enabling Engine Speed Switch #1 -
Enabling Engine Speed Switch #2 -
1-
2-
3-
4-
Table 1:
PAGE 2 OF 6
M8 x 1.25 1.5 ~ 2.9
KP4 - PANEL KIT
INS-KP4-0012
Fasten Control Panel (1) to the Mounting Bracket (7) using Isolators (3) and Nuts.
M6 x 1.0 1.0~1.2 7~9 9.8~11.8
Install the ECU so that the connector faces downward. Failure to do so may trap water in the connector, resulting in
corrosion of connector pins.
Remote Mounted ECU Applications:
A relay mounting bracket has been provided with the kit. This bracket will allow the relays to be securely fastened to the
engine to reduce vibration and water damage.
Refer to harness drawing for additional design requirements for consideration of application. A troubleshooting guide is available
through Yanmar's Distributor Website or by contacting Yanmar America's Service Department.
Install the ECU in a location that is not subject to steam or high-pressure water for cleaning
10.6 ~ 20.9 14.4 ~ 28.3
57.8 ~ 72.3 78.4 ~ 98.0
Diameter x Pitch Kgf-m
M12 x 1.75 8.0 ~ 10.0
Be sure battery cables are connected correctly. Disconnecting either the positive or negative battery cable while the
equipment is operating will cause premature failure of electronic components. Also, never weld on equipment with the
ECU connected to the wire harness.
Hand tighten all bolts and nuts until assembly is completed, then torque according to specifications in Table 1. The numbers in ()
represent the item numbers.
Constant Speed Applications:
Yanmar America Part Department Phone # : 1-800-966-7685
Please see the next page for detailed installation instructions.
Only the Main and Rack Actuator Relays are required for the function of the Yanmar ECO engines. These relays are
supplied with the distributor standard specification engines in the loose parts box. The optional Sub-Relay connector (CR5)
is intended to activate 4 optional features such as engine stop switch, droop-switch, ECO lamp, and engine speed monitor.
All of these optional features are located in the accessory connector (J18) in the wire harness on pins 3,4,5, and 6. In the
event that these features need to be activated one additional relay P/N: 198461-52950 must be ordered from the Yanmar
A
merica Part De
p
artment.
Locate the 12 pin Deutsch accessory connector and jumper the pin #2 (ground) with pin #12 engine speed switch #2. Use
the female connector that comes attached to each wire harness to make the connections. This will enable the Engine
Speed Switch #2 for constant speed.
Ensure no water is trapped inside the connector when plugging the connector. Water inside the connector may
corrode connector pins, resulting in malfunctioning of the ECU.
YANMAR CO., LTD.
YANMAR AMERICA CORP.
In the event that the 60" wire harness extension needs to be extended please follow the manufacturer's assembly and
wiring procedures. Please visit www.deutschip.com and click on the Connector Repair or Helpful Hints link to download a
more detailed procedure on how to properlyassemble a connector. As always never use scotch locks or butt connectors to
extend the wire harness. All extended wires must be soldered and sealed.
Comply with torque standards in the table to avoid unexpected damage during installation or in the future.
Make sure isolators are not twisted during installation to avoid premature failure of components.
Assemble Control Panel (1) and Mounting Bracket (7) assembly to injection pump side front engine leg using M8 x 25 bolts
(8) and M8 Flange Nuts (9).
The use of the KECMB1 kit is recommended for securing the ECU to the engine for proper harness routing and vibration
resistance.
Locate the 12 pin Deutsch accessory connector and jumper the pin #2 (ground) with pin #11 engine speed switch #1. Use
the female connector that comes attached to each wire harness to make the connections. This will enable the Engine
Speed Switch #1 for constant speed.
M5x0.8 0.4 ~ 0.7 3 ~ 5 4 ~ 6.7
For applications that remotely mount the ECU within the wire harnesses reach please use the following ECU mounting
guidelines:
Foot-lbf N-m
Install the ECU in a location that is well ventilated and not subject to direct sunlight.
Harness Routing Instructions
1.
2.
SAE #3 M10 bolt
SAE #4 M8 bolt
SAE #4 M10 bolt
SAE #5 M10 bolt
3.
Downward loop
PAGE 3 OF 6
Lay the loose harness on engine to gauge fitment and placement of where the relays, ECU, and connectors should go
based on the wiring diagrams provided. Refer to TNV application manual and ECU checklist for cautionary measures to be
taken when mounting a harness to an engine.
Secure largest section of loom to the flywheel housing with the large zip tie and bolt down mount. There will be a series of
bolt holes on the top of the housing that will be M8 or M10 depending on the flywheel housing. See charts below for which
housing will require which bolt to mount the harness to the housing.
YANMAR CO., LTD.
YANMAR AMERICA CORP.
4TNV98(T)
HellermanTyton mount and large
wire tie to hold down the large
section of loom to the flywheel
housing. Make sure mount and loom
have the proper orientation to allow
the loom to rest close to the flywheel
barrel.
4TNV84T
KP4 - PANEL KIT
INS-KP4-0012
Secure the ECU such that the connector faces down and there is a downward loop in the extra harness length to prevent
water from pooling in the connector. An optional ECU mounting bracket (Kit # KECMB1) was used to mount the ECU to the
engine in the following photos.
Wire tie the starter and alternator loom
together above the starter.
ECU is mounted to engine using the
KECMB1 kit, shown behind the ECU in this
picture.
Route ECU loom behind the starter, this will
allow a drainage loop in the harness to
prevent water pooling.
Harness Routing Instructions
4.
5.
PAGE 4 OF 6
Route the EGR branch behind the cooling hoses and fuel injection pump up to the EGR connector. Route the coolant
sensor pig tail across the valve cover using the existing metal clamps to secure the loom.
Relay mounting
bracket fixed to
flywheel housing
Use P-clamp to secure harness to block to
allow for loose routing of air heater wire and
fuel injection pump wiring. Use wire ties to
bundle loose loom.
4TNV98-Z 4TNV98T-Z
4TNV84T-Z
YANMAR CO., LTD.
YANMAR AMERICA CORP.
KP4 - PANEL KIT
INS-KP4-0012
Coolant sensor wire routed
through the EGR coolant clips.
The coolant hoses and harness
are secured with a wire tire close
to the thermostat.
Use P-Clamp on lower bolt
hole to secure harness and
wire ties to bundle loose
loom.
Refer to harness drawing for additional design requirements for consideration of application. A troubleshooting guide is available
through Yanmar's Distributor Website or by contacting Yanmar America's Service Department.
Using the 15mm P-Clamp, secure the fuel injection pump harness branch to the block. The mounting points for the turbo
engines will differ from the naturallyaspirated engines. Please see the pictures below for reference on exact positioning.
This will allow routing of the harness behind the fuel filter and cooler lines up to the EGR and coolant sensor. Please refer
to the corresponding picture below for reference:
Relay mounting
bracket fixed to
flywheel housing
PAGE 5 OF 6 KP4 - PANEL KIT
INS-KP4-0012
YANMAR CO., LTD.
YANMAR AMERICA CORP.
10 AWG Red
16 AWG Black
22 AWG Black
22 AWG Lt Green
22 AWG Yellow
18 AWG Pink/Blk
18 AWG White
22 AWG Pink/Blk
22 AWG Yellow
22 AWG Lt Green
22 AWG Black
22 AWG Purple
22 AWG Red/Blk
22 AWG Brown
22 AWG Lt Green
18 AWG Red/Yel
16 AWG Red/Wht
22 AWG Dk Green
16 AWG Tan
22 AWG White/Blk
22 AWG Dk Blue
22 AWG Black
22 AWG White
16 AWG White/Blk
22 AWG Gray
22 AWG Lt Blue
22 AWG Lt Blue
22 AWG Yellow
22 AWG Yellow/Red
22 AWG Yellow/Blk
22 AWG Yellow/Grn
22 AWG Gray
22 AWG Tan
22 AWG Orange/Blk
22 AWG Green/Blue
22 AWG Yellow/Blue
22 AWG Brown
22 AWG Lt Green
22 AWG Yellow/Org
22 AWG Green/Red
22 AWG Green/Yel
22 AWG Green/Org
22 AWG Green/Blk
22 AWG Green/Brn
22 AWG Yellow
22 AWG Lt Green
16 AWG Black
16 AWG Black
14 AWG Red
22 AWG Tan
22 AWG Black
14 AWG Red/Blk
14 AWG Black
22 AWG Black
14 AWG Purple
22 AWG Gray
16 AWG Pink/Blk
22 AWG White
22 AWG White/Blk
22 AWG Lt Green
18 AWG Orange
18 AWG Dk Green
22 AWG Lt Green
22 AWG Yellow
22 AWG White
22 AWG White
18 AWG Pink/Blk
18 AWG Black
18 AWG Purple
16 AWG Red
14 AWG Red
18 AWG Pink/Blk
16 AWG Red
14 AWG Red
18 AWG Pink/Blk
18 AWG Purple
18 AWG Purple
22 AWG Purple
16 AWG Red/Wht
22 AWG Black
SP12
SP11
SP8
SP7
SP5
SP4
SP3
SP2
SP13
SP10
SP6
SP1
A
CAN High
J3
CAN Terminator
B
CAN Low
C
Shield
Alternator B+ J52 1/4"
Ring
© LOFA Indu stries, Inc. All Copyright and Tra demark Rights Reserved.
INFORMATION CONTAINED IN THIS DOCUMENT IS CONFIDENTIAL AND THE SOLE PROPERTY OF LOFA INDUSTRIES, INC.
Reproduction or dissemination, in whole or in part, in any form or medium, without express prior written permission is strictly
prohibited. Aluflex, CANplus and the CANplus logo are registered trademarks of LOFA Industries, Inc. CP600, CP750, EL240,
EP250 and the LOFA logo are trademarks of LOFA Industries, Inc.
Part Number
Description
Date
250 Hembree Par k Dr Ste 122 ? Roswell GA 30076
Phone: 770.569.9828 ? Fax: 770.569.9829
Rev
2 of 2
MAN UFACTURER OF Q UALI TYEN GINE CO MPONEN TS
INDUSTRIES, INC.
www.LOFA.net
05-Nov-2010
Harness Yanmar Tier 3 Electronic Gen 2
996-2005-01
Ring
5/16" J53 Battery -
Ring
5/16" J50 Battery +
R2
120O
1
J21
Fuel Pump
2
1
Accessory
J18 Ignition (15)
2Ground
3Eng Spd Mon
4Stop Sw 1
5Eco Lamp
6Droop Sw
7Rmax2
8Rev Droop Sw
9Rmax1 Sw
10 Eng Spd Ctrl Sw
11 Eng Spd1 Sw
12 Eng Spd 2 Sw
1
P1 23456
1
P2
2
3
4
5
6
7
8
9
10
11
12
a
Panel
J5 Preheat Lamp
BBattery+ (30)
cSensor Rtn
DStarter (50)
EGround
fCAN Shield
GECU Power
hWarning Lamp
jAccessory (15)
kTachometer
lThrottle
mThrottle Power
nPlug
pOil Pres Sndr
rCharge Lamp
sPlug
tPlug
uCAN Low
vCan High
wPlug
xPlug
A
R1 BC
120O
Ring
5/16" J55 Starter B+
Ring
#10
J68
Starter Sol
Ring
1/4"
J20
Air Heater
Ring
5/16"
J2
Starter B +
1
NRPM
J9
Rev Sensor
2
NRPM-GND
2
GND-A
J12
Temp
Sensor
1
RET
WK
J23
Switch
G
J27
Sender
Oil Pressure
22 AWG Black
CSD-CL
J10
CSD
30
J61 85 86 87 30
J62 85 86 87
+
SS1
Spike
Supressor
-
1
Ignition (15)
J7
CAN Checker
2
CAN High
3
CAN Low
4
Ground
5
Plug
6
Plug
1
L
J67
Alternator
2
IG
3
P
1
A
J11
EGR Valve
2
VBA
3
A
4
B
5
VBB
6
B
1M
ECU
J1
VB
3L
AVB
1H
AVCC
1D
MAIN-RLY
4H
STARTSW
4G
IGNSW
1C
RACK-RLY
3M
AIRHT-RLY
2J
BOOTSW
2M
NC
1G
REAN
1E
APS
3J
NRPM
3H
NRPM-GND
4K
RENRPM
4L
CSD-CL
1F
RPS
4M
RACKSOL
3F
RET
1A
STPM-A
2A
STPM-B
3A
STPM-C
4A
STPM-D
3B
FAIL-LMP
2C
PREHT-LMP
2B
NRPM-N
1B
LOAD-M
3E
SHUDNSW
2E
TW
2F
TAIR
2G
TEGR
3K
APP-OP1
4B
APP-OP2
2D
APP-IP1
3D
APP-IP2
4E
APP-IP5
3C
APP-IP7
4F
APP-IP6
4J
APP-IP3
3G
APP-IP4
1K
CANH
1J
CANL
2K
RECAN
4D
TXD
4C
RXD
2H
GND-A
1L
GND-P
2L
GND
1
J60 23456
1
J59 23456
1
J63 23456
1
ACT PWR
J8
Rack Actuator
2
RACKSOL
3
PLUG
4
RPS
5
AVB
6
GND-A
SP15
SP9
A00D
E39B
E40B
B07
A00E
B48
E14B
A00C
A00B
B66
B50
B08A
E28B
E40D
B58
B53
A00
B60B B59
A00A
B64
E38
B60A
B59B
B60 B59C
B45
B63
B67B
B07C
A55
E44
E43
E08
E07A
E28
E47
E45
E39
E40
E17
E09
E06
E13
E05
E14
E24
E02
E20
E15
E22
E23
E12
E01
E11
E21
E31
E16
E42
E36
E41
E10
E18
E19
E35
E33
E34
E48
E39D
B07A
B07C
B07F
B65
18 AWG Red/WhtB48A
A00F
E48
E07B
22 AWG Black
B51
B63
B65A
22 AWG Yellow
18 AWG Dk Green
10 AWG Red
18 AWG Orange
18 AWG Pink/Blk
18 AWG Red
22 AWG Black
16 AWG Red/Wht
16 AWG Red/Wht
22 AWG Red
18 AWG Pink/Blk
18 AWG Black
22 AWG Black
18 AWG Black
16 AWG Black
16 AWG Black
22 AWG Black
14 AWG Black
E02
E24
E05
E13
E06
E09
E17
B51
E12
A00C
E07A
B07F
E15
E22
22 AWG Lt Green
18 AWG Yellow/Org
10 AWG Black
E23
A00B
E47
E45
E38
E19
22 AWG Pink/Blk
E35
B51
12 AWG Tan
14 AWG Red/Blk
10 AWG Red
E07B
A00E
E48C
E48B
A49
E39A
E40A
E14C
E14A
E39C
E40C
B67
B07D
E28C
E28A
B07G
A00
E07
B64A
B64
B48A
B07A
E33
B65
B59B
E20
B08A
E08
B66
B59C
A00F
E44
B50
A00D
B53
B67B
E10
B07C
E34
12 AWG Red
E21
E01
E31
E11
E36
E42
A49
E43
E16
E41
A55
E18
E48C
E48B
18 AWG Yellow/Org
B48
1
CR5
Sub
Relay
23456 1
CR2
Actuator
Relay
234561
CR1
Main
Relay
23456 30 85 86 87
Relay
Starter
CR3
30 85 86 87
Relay
Preheat
CR4
FU1
10A
FU5
5A
FU2
10A
14 AWG Red
PAGE 6 OF 6 KP4 - PANEL KIT
INS-KP4-0012
YANMAR CO., LTD.
YANMAR AMERICA CORP.
Installation Notes
1. Vibration Resistance, Operating Extremes: 10~55Hz, amplitude 2mm
Shock Resistance: Operating Extremes: 10G; Damage Limits: 100 G
Temperature Range: -40° to 85° C
2. Do NOT use dielectric grease on sealed connectors.
3. Usedielectric grease onunsealedconnections (ringterminal, relays, etc..)
4. Use only Yanmar PN 198461-52950 relays for CR1, CR2 and CR5
(not included with harness).
5. Route harness on engine per Yanmar specifications andattach relays to
mounting bracket (Yanmar PN 129989-08070).
6. Power connections J50 (+) and J53 (-) must be made directly to the battery.
7. Any wires removed from sealed connectors must be replaced by appropriate
sealing plug to prevent moisture entry into the connector.
8. Harness installation should be tested prior to equipment delivery.
9. Disconnect battery prior to servicing the equipment.
10. Disconnect the E-ECU and battery before welding on the equipment.
11. Do not wash E-ECU and harness with high-pressure systems.
12. Replacement for CR3 and CR4 is LOFA PN 341-1270-50
(CIT A3M1ASQ12VDC2D or equivalent).
13. Submit all support and warranty claims to Yanmar.
J20 Air Heater
Oil Press
J23 Sw
J27 Sndr
J9 Rev
Sensor
J8 Rack
Actuator
J10
CSD
J11 EGR
Valve
J12 Coolant
Temp Sensor
P2/J8
Accessory
P1/J7 CAN
Checker
J59 Main
Relay
J60
Actuator
Relay J63 Sub
Relay
F5 Sub
Fuse 5A
F1 Main
Fuse 10A
J5 Inst
Panel
J21 Fuel
Pump
F2 Panel
Fuse 10A
J50
Battery - J53
Battery +
J55
Starter B+
J52
Alternator B+
CR4/J62 Preheat
Relay
CR3/J61 Starter
Relay
A1 M1
A4 M4
996-2005-01
Harness Yanmar Tier 3 Electronic Gen 2
11-Nov-2010
INCH [mm] 1/4 Released
5.0
[127]
3.0
[76]
2.0
[51]
24.0
[610]
60.0
[1524]
17.0
[432]
7.0
[178]
16.5
[419]
4.0
[102]
10.0
[254] 7.0
[178]
4.0
[102]
21.0
[533]
8.5
[216]
11.0
[279]
13.0
[330]
11.0
[279] 8.0
[203]
13.0
[330]
14.0
[356]
10.0
[254]
4.0
[102] 2.0
[51]
24.0
[610]
7.0
[178]
15.0
[381]
10.0
[254]
VIEW A-A
17.0
[432]
1.5
[38]
1.5
[38]
4.0
[102]
J1
E-ECU
R1/J3 CANbus
Terminator
J67
Alternator
J54
Starter B+
J66 Starter
Solenoid

This manual suits for next models

2

Other Yanmar Engine manuals

Yanmar YSE8 User manual

Yanmar

Yanmar YSE8 User manual

Yanmar 3JH4BE User manual

Yanmar

Yanmar 3JH4BE User manual

Yanmar 2QM15 User manual

Yanmar

Yanmar 2QM15 User manual

Yanmar 3TNM74F User manual

Yanmar

Yanmar 3TNM74F User manual

Yanmar 3YM30 User manual

Yanmar

Yanmar 3YM30 User manual

Yanmar 6LYA-STP User manual

Yanmar

Yanmar 6LYA-STP User manual

Yanmar 4JH45 User manual

Yanmar

Yanmar 4JH45 User manual

Yanmar 4JHBE User manual

Yanmar

Yanmar 4JHBE User manual

Yanmar 6CH-WDTE User manual

Yanmar

Yanmar 6CH-WDTE User manual

Yanmar 6LY3 series User manual

Yanmar

Yanmar 6LY3 series User manual

Yanmar 2TD User manual

Yanmar

Yanmar 2TD User manual

Yanmar 3JH5E User manual

Yanmar

Yanmar 3JH5E User manual

Yanmar 3TNV88F User manual

Yanmar

Yanmar 3TNV88F User manual

Yanmar MP series User manual

Yanmar

Yanmar MP series User manual

Yanmar 4TNV98 User manual

Yanmar

Yanmar 4TNV98 User manual

Yanmar 3TNM72-HGE User manual

Yanmar

Yanmar 3TNM72-HGE User manual

Yanmar 4JH2E User manual

Yanmar

Yanmar 4JH2E User manual

Yanmar 2TM User manual

Yanmar

Yanmar 2TM User manual

Yanmar 1GM10 User manual

Yanmar

Yanmar 1GM10 User manual

Yanmar 2TNV70 User manual

Yanmar

Yanmar 2TNV70 User manual

Yanmar 6LY3-STC User manual

Yanmar

Yanmar 6LY3-STC User manual

Yanmar 2TNV70-HGE User manual

Yanmar

Yanmar 2TNV70-HGE User manual

Yanmar 3TNM68 User manual

Yanmar

Yanmar 3TNM68 User manual

Yanmar 1GM User manual

Yanmar

Yanmar 1GM User manual

Popular Engine manuals by other brands

Craftsman 143.994024 Operator's manual

Craftsman

Craftsman 143.994024 Operator's manual

Simu T5EHz manual

Simu

Simu T5EHz manual

Oriental motor AXH Series operating manual

Oriental motor

Oriental motor AXH Series operating manual

Daytona ANIMA 150F owner's manual

Daytona

Daytona ANIMA 150F owner's manual

BONFIGLIOLI C Series Installation use and service manual

BONFIGLIOLI

BONFIGLIOLI C Series Installation use and service manual

Honeywell ScanQuest IS4100 Series Installation and user guide

Honeywell

Honeywell ScanQuest IS4100 Series Installation and user guide

Multiplex ROXXY C50-55-480kV operating instructions

Multiplex

Multiplex ROXXY C50-55-480kV operating instructions

Briggs & Stratton 28W700 Series Illustrated parts list

Briggs & Stratton

Briggs & Stratton 28W700 Series Illustrated parts list

Volvo Penta TAMD71B instruction manual

Volvo Penta

Volvo Penta TAMD71B instruction manual

Perkins 2206J-E13TA Operation and maintenance manual

Perkins

Perkins 2206J-E13TA Operation and maintenance manual

Graco 25A623 instruction manual

Graco

Graco 25A623 instruction manual

Crusader 5.7L Carburetor Owner's operation and maintenance manual

Crusader

Crusader 5.7L Carburetor Owner's operation and maintenance manual

GiBiDi SNAPPER 250 Instructions for installation

GiBiDi

GiBiDi SNAPPER 250 Instructions for installation

Vanguard 25E300 Operator's manual

Vanguard

Vanguard 25E300 Operator's manual

Vanguard 610000 Operator's manual

Vanguard

Vanguard 610000 Operator's manual

Oriental motor PK Series operating manual

Oriental motor

Oriental motor PK Series operating manual

MSSC GDMS-OMD14 user manual

MSSC

MSSC GDMS-OMD14 user manual

woodmizer D17 Safety, Operation, Maintenance & Parts Manual

woodmizer

woodmizer D17 Safety, Operation, Maintenance & Parts Manual

manuals.online logo
manuals.online logoBrands
  • About & Mission
  • Contact us
  • Privacy Policy
  • Terms and Conditions

Copyright 2025 Manuals.Online. All Rights Reserved.