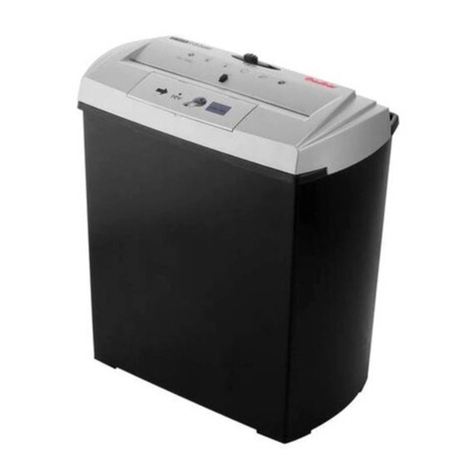
Yard force ER U45 User manual

READ & UNDERSTAND
INSTRUCTION MANUAL
Save all warnings and instructions for future reference.
Model ER U45
ELECTRIC SHREDDER
Original Instructions
Hotline: 1300 418 640
Monday/Friday: 9.00am to 4.30pm
Saturday: 9.00am to 3.00pm
Email: [email protected]

2
Read this manual carefully prior to assembling and operating
the shredder. It is dangerous to operate this product without
being familiar with these instructions.
Keep this manual in a safe place and have it ready for
future reference.

3
ER U45 Original instructions
CONTENT
Intended use
General safety warning
Symbols
Technical specications
Parts description
Package content
Assembly
Operation
Cleaning, maintenance and storage
Troubleshooting
Warranty
6
6~11
12~13
14
14
15
16
16~18
18
19
20

4
A
B C
1
2
4
5
6
7
8
910111213
15
16
17
18
19
20
21
3
21
3
18
14
20
19

5
D E
F
G
15
16
9
11
1012
13
22
23
524
25
F
AUS
EIN
11
2
2

6
INTENDED USE
This shredder is designed for shredding garden material such as tree cuttings, hedge
cuttings and garden waste. Any other use is deemed to be a case of misuse. This shredder is
designed for domestic use only, it is not design for commercial or trade use.
GENERAL SAFETY WARNINGS
IMPORTANT! Read this instruction manual
carefully before operation. Keep the instruction
manual for future reference.
WARNING! This appliance is not intended for
use by persons (including children) with reduced
physical, sensory or mental capabilities, or lack
of experience and knowledge, unless they have
been given supervision or instruction concerning
use of the appliance by a person responsible for
their safety.
Children should be supervised to ensure that
they do not play with the appliance.
Preparation
1. Do not allow children to operate this equipment.
2. Do not operate this equipment in the vicinity of
bystanders.
3. Do not connect a damaged cord to the supply or
touch a damaged cord before it is disconnected from
supply. A damaged cord can lead to be contacted
with live parts.
4. Keep extension cords away from moving hazardous
parts to avoid damages to the cords which can lead
to contact with live parts.
5. Before connect the power cord to the mains, always

7
inspect the machine, the supply and extension cord
for signs of damage or ageing.
6. If an extension cord is used it shall not be of lighter
grade than the supply cord already tted to the
appliance.
7. Wear ear protection and safety glasses at all times
while operating the machine.
8. Avoid wearing clothing that is loose tting or that
has hanging cords or ties. Always wear substantial
footwear and long trousers while operating the
machine.
9. Only operate the machine in open space (e.g. not
close to a wall or other xed object) and on a rm,
level surface.
10. Do not operate the machine on a paved or gravel
surface where ejected material could cause injury.
11. Before starting the machine, check that all screws,
nuts, bolts, and other fasteners are properly secured
and that guards and screens are in place. Replace
damaged or unreadable labels.
12. Do not touch moving hazardous parts before the
machine is disconnected from the mains and the
moving hazardous parts have come to a complete
stop.
13. Connect the machine only to a supply circuit
protected by a residual current device (RCD) with a
tripping current of not more than 30mA.
14. Avoid the machine in bad weather conditions
especially when there is a risk of lightning.
GENERAL SAFETY WARNINGS

8
Operation
1. Before starting the machine, look into the feeding
hopper to make certain that it is empty.
2. Keep your face and body away from the feeding
hopper's opening.
3. Do not allow hands or any other part of the body or
clothing inside the feeding hopper, discharge chute,
or near any moving part.
4. Disconnect the machine from the mains, if the cord
becomes damaged or entangled during use.
5. Keep proper balance and footing at all times, to
always be sure of the footing on slopes and to walk,
never run. Do not overreach. Never stand at a higher
level than the base of the machine when feeding
material into it.
6. Always stand clear of the discharge zone when
operating this machine.
7. When feeding material into the machine be extremely
careful that pieces of metal, rocks, bottles, cans or
other foreign objects are not included.
8. If the cutting mechanism strikes any foreign objects or
if the machine should start making any unusual noise
or vibration, shut off the power source and allow the
machine to stop. Disconnect from supply and take the
following steps:
• Inspect for damage.
• Check for and tighten any loose parts.
• Have any damaged parts replaced or repaired with
parts having equivalent specications.
9. Unplug the machine from the mains, if the cord
becomes damaged or entangled during use.
GENERAL SAFETY WARNINGS

9
GENERAL SAFETY WARNINGS
10. Do not allow processed material to build up in the
discharge zone, this may prevent proper discharge
and can result in kickback of material through the feed
intake opening.
11. If the machine becomes clogged, shut-off the power
source and disconnect from supply before clearing
debris. Keep the power source clear of debris and
other accumulations to prevent damage to the
powered source or possible re. Remember that
operating the starting mechanism on engine powered
machines will still cause the cutting means to move.
12. Keep all guards and deectors in place and in good
working condition.
13. Do not transport this machine while the power source
is running.
14. Shut off the power source and disconnect from supply
whenever
• you leave the work area,
• before cleaning a blockage,
• before checking, cleaning and working on the
machine,
• after striking a foreign object to inspect the
machine for damage,
• if the machine starts to vibrate abnormally for
immediately check.
15. Do not tilt the machine while the power source is
running.
16. If the supply cord is damaged, it must be replaced
by the manufacturer, its service agent or similarly
qualied persons in order to avoid a hazard.

10
GENERAL SAFETY WARNINGS
Maintenance and storage
1. When the machine is stopped for servicing,
inspection, or storage, or to change an accessory,
shut off the power source, disconnect from supply,
make sure that all moving parts have come to a
complete stop and, where a key is tted remove the
key. Allow the machine to cool before making any
inspections, adjustments, etc.
2. Always allow the machine to cool before storing.
3. When servicing the cutting means be aware that,
even though the power source will not start due to the
interlock feature of the guard, the cutting means can
still be moved by a manual starting mechanism.
4. Keep the motor cooling vents clean of debris and
other accumulations to prevent damage to the motor
or possible re.
5. Check the supply and any extension cord regularly for
damage or signs of ageing. Do not use the appliance,
if the cords are damaged.
6. Never attempt to override the interlock feature of the
machine.
Residual risks
Although the safety instructions contain extensive
instructions on safe working with this machine and
despite proper use, additional residual risks may arise
when using this machine. These include:
1. Injuries caused by touching any rotating/moving parts.
2. Injuries caused when changing any parts and
accessories.
3. Injuries caused by projected parts or tool adapter that

11
break during use.
4. Damage to eyes and hearing if effective protections
are not worn.
5. Injuries caused by prolonged use of a tool. When
using any tool for prolonged periods ensure you take
regular breaks.
6. Health hazards caused by breathing dust developed
when using your machine (example: working with
wood, especially oak, beech and MDF.)
PRODUCT SAFETY WARNINGS

12
SYMBOLS
The following symbols are used in this instruction manual
and/or on the shredder to attach your attention to
possible risks. These symbols and the explanations that
accompany them must be understood.
WARNING! OR CAUTION!
READ the instruction manual before using
this shredder
Beware of debris being ejected from the
shredder Keep by standers away
Wear eye and ear protection
Do not use as a step
Wear protective gloves
Wear protective mask
Wait until all machine components have
completely stopped before touching them
Danger - Rotating blade. Keep hands and
feet out of openings while the machine is
running

13
SYMBOLS
Switch off and remove plug from mains
before adjusting, cleaning or if the power
cord is entangled or damaged
Do not expose to rain
Sound power level
Dispose of electrical appliances according to
the regulation and requirement of your local
council.
Australian regulatory compliance mark
92

14
TECHNICAL DATA
Shredder:
Model:
Rated voltage:
Rated input wattage:
No load speed:
Collection bin capacity:
Protection class:
Max. branch cutting diameter:
Sound power level:
Weight:
ER U45
230 - 240V~ 50 Hz
240
0
W (P40)
42 rpm
60 L
IPX4
45 mm
92 dB
28.5 kg
PARTS DESCRIPTION
Parts description (Fig. A)
1. Wheel cover
2. Wheel
3. Foot
4. Locking lever
5. Adjusting screw
6. Power cord
7. Handle
8. Feeding hopper
9. Forward/reverse button
10. ON switch
11. OFF switch
12. Reset button
13. Power on indicator
14. Pusher
15. Shredder unit
16. Base frame
17. Collection bin
18. Inner washer (not visible from outside)
19. Outer washer (not visible from outside)
20. Cotter pin (not visible from outside)
21. Wheel axle
22. Cutting blade cover screw
23. Cutting blade cover
24. Cutting blade
25. Shaving plate

15
PACKAGE CONTENTS
Fig. B
•Remove all packing material.
•Check the completeness of the package content.
•Check the shredder and its accessories for transport damages.
WARNING! Danger of suffocating! Packing materials are not toys!
Children must not play with plastic bags!
WARNING! If any parts are damaged or missing, do not operate this
shredder until the missing parts are replaced.
IF ANY PARTS ARE MISSING OR DAMAGED, PLEASE CONTACT ACTION
SPARES 1300 418 640.
Recycle/dispose of packaging materials in accordance to the regulations and
requirements of your local council.
A. 1 x Shredder unit
B. 1 x Base frame
C. 1 x Collection bin
D. 2 x Wheels
E. 2 x Wheel covers
F. 1 x Instruction manual
G. 2 x Feet
H. 2 x Screw for the foot
I. 4 x Screw for the base frame
J. 1 x Allen key
K. 1 x Pusher
L. 1 x Wheel axle
M. 4 x washer
N. 2 x cotter pins

16
ASSEMBLY
Figure B to F
1. Mount the feet (3) on the base frame (16) with the screws provided.
2. Insert the wheel axle (21) through the holes in the base frame (16), then insert
the inner washers (18) onto each end of the wheel axle (21).
3. Insert the two wheels (2) onto the wheel axle (21), place the outer washers
onto the wheel axle and secure the wheels with the cotter pins (20).
4. Place the wheel caps (2) onto the wheels (1) and click in place.
5. Mount the shredder unit (15) on the base frame (16) and secure with the
screws provided.
6. Push the locking lever (4) down and Insert the collection bin (17), then push
the locking lever (4) up.
WARNING! Garden material greater than 45 mm in diameter
should not be fed into the shredder.
Switching on/off
1. Press the green ON button (10) to switch on the shredder and press the red OFF button
(11) to switch off.
2. The power on indicator (13) will be on when the shredder is switched on.
Note: The shredder cannot be switched on if the locking lever (4) on the collection bin
(17) is pushed down.
OPERATION
Forward/Reverse button
ON/OFF switch
Reset button
Fig.1
Changing turning direction
WARNING! Switch off the shredder and wait till the shredder
completely stop before changing the forward/reverse direction.
1. The cutting blade can rotate in reverse direction to release jammed material.
2. Press the forward/reverse button to position for forward turning direction.

17
2. Press the reset button (12), then the green ON button (10) to restart the motor.
Emptying the collection bin
Empty the collection bin (17) when it is full.
1. Switch off the shredder.
2. Push the locking lever (4) down.
3. Pull the collection bin (17) out and empty it.
4. Put the collection bin (17) back and push the locking lever (4) up.
Note: The shredder will not start if the locking lever (4) is pushed down.
Removing blockage
WARNING! Always use a hook or a stick to remove jammed material.
Never put your hands into the feeding hopper.
WARNING! The shredder must be unplugged and completely
stops before opening the cutting blade cover to remove jammed material.
OPERATION
Resetting the shredder
1. This shredder is equipped with an overload protection. When the cutting blade is
jammed, the motor will switch OFF automatically.
3
.Press the forward/reverse button to position and press the green ON button (10)
continuously for reverse turning direction. The shredder will stop turning reversely when the
green ON button (10) is released.
Adjusting the cutting blade clearance
WARNING! Ensure the product is turned on and working in normal
forward direction.
Adjusting the shaving plate while the motor is turned off
could lead to serious damage of the product.
1. Switch on the device.
2. Slowly turn the adjusting screw
clockwise to decrease the gap and
anti-clockwise to increase the gap
.
If the product fails to shred material, the shaving plate may need adjusting.

18
CLEANING MAINTENANCE AND STORAGE
WARNING! Before cleaning, maintenance or storing, make sure that
the shredder is switched off, the plug is removed from the mains and the
shredder is completely stop.
Cleaning
WARNING! Never use abrasive cleaning agents and flammable
chemicals to clean the shredder.
1. Wipe the shredder with a slightly damp cloth.
2. Do not use a water jet to clean the shredder.
3. Never use solvents such as petrol, alcohol, ammonia solution etc. These solvents may
damage the plastic parts.
Maintenance
1. There is NO user maintainable parts inside the shredder. If the shredder requires service,
it should only be repaired by an authorised service centre.
2. If the power cord is damaged, it should be replaced by an authorised service centre.
Storage
1. Clean the shredder and empty the tank before storage.
2. Store the shredder is a dry, well ventilated area and out of the reach of children.
OPERATION
WARNING! Cutting blade are sharp, always wear protective
gloves when opening the cutting blade cover.
1. Reset the shredder if it is overloaded and automatically stop.
2. Empty the collection bin if it is full.
3. Change the turning direction to reverse to remove the jammed material.
4. Open the cutting blade cover (23) and remove the jammed material if it cannot be
removed from outside.
Shredding tips
1. Always use the pusher to feed small objects into the shredder.
2. Branches and twigs should be shredded shortly after they are cut. They will be come
extremely hard once dry.
3. Garden waste such as fresh foliage, creepers and vines, which contain a lot of moisture
should be dry for a few days before shredding.
4. Always check and ensure that there is no stone or nail in the shredding material before
feeding into the shredder.

19
TROUBLESHOOTING
Problem Possible cause Possible solution
Shredder not running No Power Check power outlet and plug
Locking lever (4) is in down
position
Push the locking lever to ON position
Forward/reverse button is in
middle position
Press the forward/reverse button to
forward position
Shredder is overloaded Reset the shredder by press the reset
button
Shredder is faulty Repair by an authorised service centre
Vibrating Screws are loose Tighten the screws
Cutting blade is worn Replace the cutting blade by an autho-
rised service centre
Not cutting Cutting blade is worn Replace the cutting blade by an autho-
rised service centre
Gap between the cutting
blade and shaving plate is
too big
Adjust the adjusting screw
Shredding material is
not cut cleanly
Gap between the cutting
blade and shaving plate is
too big
Adjust the adjusting screw (5)
Chip size is too big or
too small
The gap between the cutting
blade and shaving plate
either too big or too small
Adjust the adjusting screw (5)

20
WARRANTY
This product is covered by a 1 year parts and labour warrant against manufacturing defects.
Our goods come with guarantees that cannot be excluded under the Australian Consumer
Law.
You are entitled to a replacement or refund for a major failure and for compensation for
any other reasonably foreseeable loss or damage. You are also entitled to have the goods
repaired or replaced if the goods fail to be of acceptable quality and the failure does not
amount to a major failure.
This warranty will not apply:
(i) where this product has been subjected to misuse, abuse, accident or want of care;
(ii) where this product has been used for a purpose for which it was not designed or is not
suited;
(iii) where the service of this product has been undertaken by a non-authorised person or
company or if non-approved parts have been used;
(iv) where this product has been used for trade, industrial or commercial purposes.
Should service become necessary during the warranty period, the purchaser should contact
Action Spares on 1300 418 640.
In order to obtain warranty service, the purchaser must present the store receipt showing the
name of the retailer and the date of purchase.
The period of the warranty begins from the original date of purchase, notwithstanding any
subsequent repair or parts replacement.
Purchaser shall be responsible for all transport charges to and from the Authorised Service
Centre.
Damage in transit is not covered by this warranty. The purchaser should remove from the
product any liquids (if applicable) before sending the product for service or repair.
The product should be packed securely to prevent damage.
WARRANTY EXCLUSIONS
Wear parts or service related parts required when performing normal and regular maintenance
of this product are not covered by warranty unless it is found to be defective by an Autho-
rised Service Centre.
These include, but are not limited to: Filters, “O” rings, washers.
Table of contents
Other Yard force Paper Shredder manuals