YATO YT-82118 User manual

YT-82118
INSTRUKCJA ORYGINALNA 1
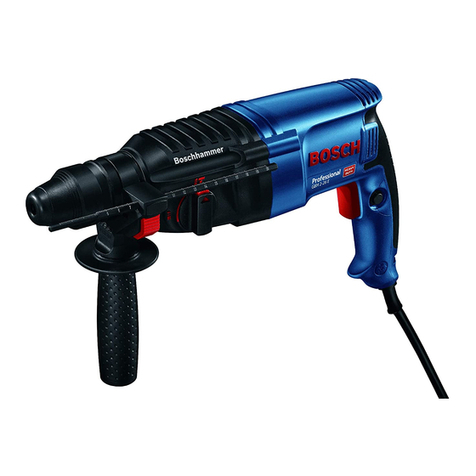
MŁOTOWIERTARKA
ROTARY HAMMER
BOHRHAMMER
ПЕРФОРАТОР
ПЕРФОРАТОР
PERFORATORIUS
PERFORATORS
VRTACÍ KLADIVO
VŔTACIE KLADIVO
FÚRÓKALAPÁCS
CIOCAN ROTOPERCUTOR
MARTILLO PERFORADOR
MARTEAU PERFORATEUR
MARTELLO ROTATIVO
BOORHAMER
ΤΡΥΠΆΝΙ ΚΑΙ ΣΦΥΡΊ
ПЕРФОРАТОР
PL
EN
DE
RU
UA
LT
LV
CZ
SK
HU
RO
ES
FR
IT
NL
GR
BG

INSTRUKCJA ORYGINALNA
2
PL EN DE RU UA LT LV CZ SK H RO ES FR IT NL GR BG
TOYA S.A. ul. Sołtysowicka 13-15, 51-168 Wrocław, Polska
I
V VI
VII VIII
II
III IV
1
3
4
9
7
6
10
2
511
8

INSTRUKCJA ORYGINALNA 3
PL EN DE RU UA LT LV CZ SK H RO ES FR IT NL GR BG
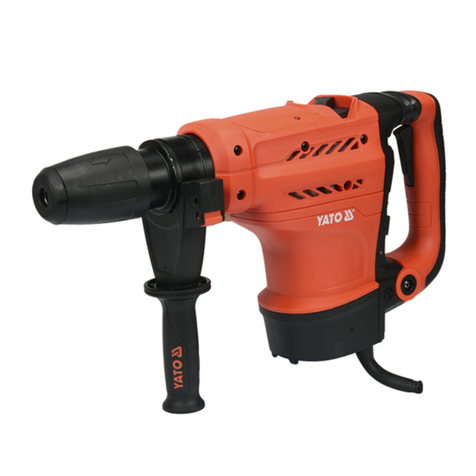
1. korpus z rękojeściągłówną
2. włącznik elektryczny
3. przełącznik rodzaju wiercenia
4. przełącznik rodzaju udaru
5. uchwyt wiertarski
6. rękojeść dodatkowa
7. regulacja obrotów
8. kontrolka
9. wiertło
10. przecinak
11. przebijak
PL
1. body with the main handle
2. electric power switch
3. drilling mode switch
4. impact mode switch
5. drill chuck
6. additional handle
7. rotational speed control
8. indicator light
9. drill bit
10. chisel
11. point chisel
EN
1. Gehäuse mit Hauptgriff
2. Elektroschalter
3. Bohrungsartenschalter
4. Schlagartenschalter
5. Bohrfutter
6. Zusatzgriff
7. Drehzahlregler
8. Kontrollleuchte
9. Bohrer
10. Meißel
11. Lochhammer
DE
1. корпус сосновной рукояткой
2. электрический выключатель
3. переключатель вида сверления
4. переключатель вида удара
5. патрон дрели
6. дополнительная рукоятка
7. регулировка скорости вращения
8. индикатор
9. сверло
10. долото
11. пуансон
RU
1. корпус зосновною рукояткою
2. електричний вимикач
3. перемикач типу свердління
4. перемикач типу удару
5. патрон свердла
6. додаткова рукоятка
7. регулювання обертів
8. індикатор
9. свердло
10. зубило
11. пуансон
UA
1. korpusas su pagrindine rankena
2. elektrinis jungiklis
3. gręžimo tipo jungiklis
4. smūgio tipo jungiklis
5. grąžtųlaikiklis
6. papildoma rankena
7. apsisukimųreguliavimas
8. indikatorius
9. grąžtas
10. prakalas
11. skylmušis
LT
1. korpuss ar galveno rokturi
2. elektriskais slēdzis
3. urbšanas veida pārslēgs
4. trieciena veida pārslēgs
5. urbjpatrona
6. papildrokturis
7. griešanās ātruma regulēšana
8. indikators
9. urbis
10. grieznis
11. caurumsitis
LV
1. tělo příklepové vrtačky s hlavní rukojetí
2. elektrický vypínač
3. přepínačdruhu vrtání
4. přepínačdruhu příklepu
5. sklíčidlo
6. přídavná rukojeť
7. regulace otáček
8. kontrolní led
9. vrták
10. sekáč
11. děrovač
CZ
1. korpus s hlavnou rukoväťou
2. elektrický zapínač
3. prepínačtypu vŕtania
4. prepínačtypu príklepu
5. vŕtačkové skľučovadlo
6. pomocná rukoväť
7. nastavenie otáčok
8. kontrolka
9. vrták
10. plochý sekáč
11. špicatý sekáč
SK
1. főmarkolattal ellátott ház
2. elektromos kapcsológomb
3. fúrásmód kapcsoló
4. ütvefúrás-mód kapcsoló
5. tokmány
6. plusz fogantyú
7. fordulatszám beállítás
8. visszajelzőlámpa
9. fúrószár
10. véső
11. lyukasztó
HU
1. corps avec poignée principale
2. interrupteur électrique
3. commutateur de type perçage
4. commutateur de type percussion
5. mandrin porte-foret
6. poignée supplémentaire
7. régulateur de vitesse
8. voyant lumineux
9. foret
10. burin
11. poinçon
FR
1. κορμός με κύρια λαβή
2. ηλεκτρικός διακόπτης
3. διακόπτης τύπου διάτρησης
4. διακόπτης τύπου κρούσης
5. τσοκ τρυπανιού
6. πρόσθετη λαβή
7. ρύθμιση περιστροφών
8. ενδεικτική λυχνία
9. τρυπάνι
10. κοπίδι
11. διατρητής
GR
1. корпус сглавна ръкохватка
2. бутон за включване
3. превключвател за тип пробиване
4. превключвател за тип удар
5. патронник
6. допълнителна ръкохватка
7. регулиране на оборотите
8. индикаторна светлина
9. свредло
10. длето
11. шило
BG
1. carcasăcu mânerul principal
2. comutator de alimentare
3. comutator pentru modul găurire
4. comutator pentru modul impact
5. mandrină
6. mâner suplimentar
7. buton de reglare a turației
8. lampăindicatoare
9. burghiu
10. daltă
11. daltășpiț
RO
1. corpo con impugnatura principale
2. pulsante di accensione elettrico
3. selettore del tipo di foratura
4. selettore del tipo di percussione
5. portapunte
6. impugnatura supplementare
7. regolatore di velocità
8. spia
9. punta
10. scalpello
11. punzone
IT
1. cuerpo con mango principal
2. interruptor eléctrico
3. selector de tipo de perforación
4. selector de tipo de impacto
5. portabrocas
6. mango adicional
7. regulador de velocidad
8. luz indicadora
9. broca
10. cortador
11. punzón
ES
1. behuizing met hoofdgreep
2. elektrische schakelaar
3. boortypeschakelaar
4. impacttypeschakelaar
5. boorhouder
6. bijkomende handgreep
7. toerentalregeling
8. indicatielampje
9. boor
10. platte beitel
11. puntbeitel
NL

INSTRUKCJA ORYGINALNA
4
PL EN DE RU UA LT LV CZ SK H RO ES FR IT NL GR BG
Przeczytaćinstrukcję
Read the operating instruction
Bedienungsanleitung durchgelesen
Прочитать инструкцию
Прочитать iнструкцiю
Perskaityti instrukciją
Jālasa instrukciju
Přečtet návod k použití
Prečítaťnávod k obsluhe
Olvasni utasítást
Citeşti instrucţunile
Lea la instrucción
Lisez la notice d’utilisation
Leggere il manuale d’uso
Lees de instructies
Διαβάστε τις οδηγίες χρήσης
Прочетете ръководството
Używaj gogle ochronne
Wear protective goggles
Schutzbrille verwenden
Пользоваться защитными очками
Користуйтесь захисними окулярами
Vartok apsauginius akinius
Jālieto drošības brilles
Používej ochranné brýle
Používaj ochranné okuliare
Használjon védőszemüveget!
Intrebuinţeazăochelari de protejare
Use protectores del oído
Portez des lunettes de protection
Utilizzare gli occhiali di protezione
Draag een veiligheidsbril
Χρησιμοποιήστε τα γυαλιά προστασίας
Използвайте защитни очила
Używaćochrony słuchu
Wear hearing protectors
Gehörschutz verwenden
Пользоваться средствами защиты слуха
Користуйтесь засобами захисту слуху
Vartoti ausines klausai apsaugoti
Jālieto dzirdes drošības līdzekļu
Používej chrániče sluchu
Používaj chrániče sluchu
Használjon fülvédőt!
Intrebuinţeazăantifoane
Use protectores de la vista
Portez une protection auditive
Utilizzare i dispositivi di protezione dell’udito
Draag gehoorbescherming
Χρησιμοποιήστε τις ωτασπίδες
Използвайте средства за защита на слуха
Druga klasa bezpieczeństwa elektrycznego
Second class of insulation
Zweite Klasse der elektrischen Sicherheit
Второй класс электрической безопасности
Другий клас електричної ізоляції
Antros klasės elektrinėapsauga
Elektrības drošības II. klase
Druhá třída elektrické bezpečnosti
Druhá trieda elektrickej bezpečnosti
Második osztályú elektromos védelem
Securitatea electricăde clasa a doua
Segunda clase de la seguridad eléctrica
Seconde classe de sécurité électrique
Seconda classe di sicurezza elettrica
Tweede klasse elektrische veiligheid
Δεύτερη τάξη ηλεκτρικής ασφαλείας
Втори клас изолация
Ten symbol informuje o zakazie umieszczania zużytego sprzętu elektrycznego i elektronicznego (w tym baterii i akumulatorów) łącznie z innymi odpadami. Zużyty sprzęt
powinien byćzbierany selektywnie i przekazany do punktu zbierania w celu zapewnienia jego recyklingu i odzysku, aby ograniczaćilość odpadów oraz zmniejszyćstopnień
wykorzystania zasobów naturalnych. Niekontrolowane uwalnianie składników niebezpiecznych zawartych w sprzęcie elektrycznym i elektronicznym może stanowićzagroże-
nie dla zdrowia ludzkiego oraz powodowaćnegatywne zmiany w środowisku naturalnym. Gospodarstwo domowe pełni ważnąrolęw przyczynianiu siędo ponownego użycia
i odzysku, w tym recyklingu zużytego sprzętu. Więcej informacji o właściwych metodach recyklingu można uzyskaću władz lokalnych lub sprzedawcy.
Dieses Symbol weist darauf hin, dass Elektro- und Elektronik-Altgeräte (einschließlich Batterien und Akkumulatoren) nicht zusammen mit anderen Abfällen entsorgt werden
dürfen. Altgeräte sollten getrennt gesammelt und bei einer Sammelstelle abgegeben werden, um deren Recycling und Verwertung zu gewährleisten und so die Abfallmenge und
die Nutzung natürlicher Ressourcen zu reduzieren. Die unkontrollierte Freisetzung gefährlicher Stoffe, die in Elektro- und Elektronikgeräten enthalten sind, kann eine Gefahr
für die menschliche Gesundheit darstellen und negative Auswirkungen auf die Umwelt haben. Der Haushalt spielt eine wichtige Rolle bei der Wiederverwendung und Verwer-
tung, einschließlich des Recyclings von Altgeräten. Weitere Informationen zu den geeigneten Recyclingverfahren erhalten Sie bei den örtlichen Behörden oder Ihrem Händler.
Этот символ информирует озапрете помещать изношенное электрическое иэлектронное оборудование (втом числе батареи иаккумуляторы) вместе сдругими
отходами. Изношенное оборудование должно собираться селективно ипередаваться вточку сбора, чтобы обеспечить его переработку иутилизацию, для
того, чтобы ограничить количество отходов, иуменьшить использование природных ресурсов. Неконтролируемый выброс опасных веществ, содержащихся в
электрическом иэлектронном оборудовании, может представлять угрозу для здоровья человека, иприводить кнегативным изменениям вокружающей среде.
Домашнее хозяйство играет важную роль при повторном использовании иутилизации, втом числе, утилизации изношенного оборудования. Подробную
информацию оправильных методах утилизации можно получить уместных властей или упродавца.
This symbol indicates that waste electrical and electronic equipment (including batteries and storage cells) cannot be disposed of with other types of waste. Waste equipment
should be collected and handed over separately to a collection point for recycling and recovery, in order to reduce the amount of waste and the use of natural resources. Un-
controlled release of hazardous components contained in electrical and electronic equipment may pose a risk to human health and have adverse effects for the environment.
The household plays an important role in contributing to reuse and recovery, including recycling of waste equipment. For more information about the appropriate recycling
methods, contact your local authority or retailer.
Цей символ повідомляє про заборону розміщення відходів електричного та електронного обладнання (втому числі акумуляторів), утому числі зіншими
відходами. Відпрацьоване обладнання повинно бути вибірково зібрано іпередано впункт збору для забезпечення його переробки івідновлення, щоб зменшити
кількість відходів ізменшити ступінь використання природних ресурсів. Неконтрольоване вивільнення небезпечних компонентів, що містяться велектричному та
електронному обладнанні, може представляти небезпеку для здоров’ялюдини івикликати негативні зміни внавколишньому середовищі. Господарство відіграє
важливу роль урозвитку повторного використання та відновлення, включаючи утилізацію використаного обладнання. Більш детальну інформацію про правильні
методи утилізації можна отримати умісцевої влади або продавця.
Stosowaćrękawice ochronne
Use protective gloves
Schutzhandschuhe verwenden
Необходимо пользоваться защитными перчатками
Слід користуватися захисними рукавицями
Vartoti apsaugines pirštines
Lietot aizsardzības cimdus
Používejte ochranné rukavice
Používajte ochranné rukavice
Használjon védőkesztyűt
Utilizarea mănuşilor de protrcţie
Use guantes de protección
Portez des gants de protection
Utilizzare i guanti di protezione
Gebruik beschermende handschoenen
Φορέστε τα γάντια προστασίας
Използвайте защитни ръкавици

INSTRUKCJA ORYGINALNA 5
PL EN DE RU UA LT LV CZ SK H RO ES FR IT NL GR BG
Šis simbolis rodo, kad draudžiama išmesti panaudotąelektrinęir elektroninęįrangą(įskaitant baterijas ir akumuliatorius) kartu su kitomis atliekomis. Naudota įranga turėtų
būti renkama atskirai ir siunčiama įsurinkimo punktą, kad būtųužtikrintas jos perdirbimas ir utilizavimas, siekiant sumažinti atliekas ir sumažinti gamtos ištekliųnaudojimą.
Nekontroliuojamas pavojingųkomponentų, esančiųelektros ir elektroninėje įrangoje, išsiskyrimas gali kelti pavojųžmoniųsveikatai ir sukelti neigiamus natūralios aplinkos
pokyčius. Namųūkis vaidina svarbųvaidmenįprisidedant prie pakartotinio įrenginiųnaudojimo ir utilizavimo, įskaitant perdirbimą. Norėdami gauti daugiau informacijos apie
tinkamus perdirbimo būdus, susisiekite su savo vietos valdžios institucijomis ar pardavėju.
Šīs simbols informēpar aizliegumu izmest elektrisko un elektronisko iekārtu atkritumus (tostarp baterijas un akumulatorus) kopāar citiem atkritumiem. Nolietotas iekārtas ir
jāsavāc atsevišķi un jānodod savākšanas punktāar mērķi nodrošināt atkritumu otrreizējo pārstrādi un reģenerāciju, lai ierobežotu to apjomu un samazinātu dabas resursu
izmantošanas līmeni. Elektriskajās un elektroniskajās iekārtās ietverto bīstamo sastāvdaļu nekontrolēta izdalīšanās var radīt cilvēku veselības apdraudējumu un izraisīt
negatīvas izmaiņas apkārtējāvidē. Mājsaimniecība pilda svarīgu lomu otrreizējās izmantošanas un reģenerācijas, tostarp nolietoto iekārtu pārstrādes veicināšanā. Vairāk
informācijas par atbilstošām otrreizējās pārstrādes metodēm var saņemt pie vietējo varas iestāžu pārstāvjiem vai pārdevēja.
Tento symbol informuje, že je zakázáno likvidovat použité elektrické a elektronické zařízení (včetněbaterií a akumulátorů) společněs jiným odpadem. Použité zařízení by
mělo být shromažďováno selektivněa odesíláno na sběrné místo, aby byla zajištěna jeho recyklace a využití, aby se snížilo množství odpadu a snížil stupeňvyužívání
přírodních zdrojů. Nekontrolované uvolňování nebezpečných složek obsažených v elektrických a elektronických zařízeních může představovat hrozbu pro lidské zdraví a
způsobit negativní změny v přírodním prostředí. Domácnost hraje důležitou roli při přispívání k opětovnému použití a využití, včetněrecyklace použitého zařízení. Další
informace o vhodných způsobech recyklace Vám poskytne místní úřad nebo prodejce.
Tento symbol informuje o zákaze vyhadzovania opotrebovaných elektrických a elektronických zariadení (vrátane batérií a akumulátorov) do komunálneho (netriedeného)
odpadu. Opotrebované zariadenia musia byťseparované a odovzdané do príslušných zberných miest, aby mohli byťnáležite recyklované, čím sa znižuje množstvo odpadov
a zmenšuje využívanie prírodných zdrojov. Nekontrolované uvoľňovanie nebezpečných látok, ktoré sú v elektrických a elektronických zariadeniach, môže ohrozovaťľudské
zdravie a maťnegatívny dopad na životné prostredie. Každá domácnosťmá dôležitú úlohu v procese opätovného použitia a opätovného získavania surovín, vrátane recy-
klácie, z opotrebovaných zariadení, Bližšie informácie o správnych metódach recyklácie vám poskytne miestna samospráva alebo predajca.
Ez a szimbólum arra hívja fel a figyelmet, hogy tilos az elhasznált elektromos és elektronikus készüléket (többek között elemeket és akkumulátorokat) egyéb hulladékokkal
együtt kidobni. Az elhasznált készüléket szelektíven gyűjtse és a hulladék mennyiségének, valamint a természetes erőforrások felhasználásának csökkentése érdekében
adja le a megfelelőgyűjtőpontban újrafeldolgozás és újrahasznosítás céljából. Az elektromos és elektronikus készülékben található veszélyes összetevők ellenőrizetlen
kibocsátása veszélyt jelenthet az emberi egészségre és negatív változásokat okozhat a természetes környezetben. A háztartások fontos szerepet töltenek be az elhasznált
készülék újrafeldolgozásában és újrahasznosításában. Az újrahasznosítás megfelelőmódjaival kapcsolatos további információkat a helyi hatóságoktól vagy a termék
értékesítőjétől szerezhet.
Acest simbol indicăfaptul cădeșeurile de echipamente electrice și electronice (inclusiv baterii și acumulatori) nu pot fieliminate împreunăcu alte tipuri de deșeuri. Deșeurile
de echipamente trebuie colectate și predate separat la un punct de colectare în vederea reciclării și recuperării, pentru a reduce cantitatea de deșeuri și consumul de resurse
naturale. Eliberarea necontrolatăa componentelor periculoase conținute în echipamentele electrice și electronice poate prezenta un risc pentru sănătatea oamenilor și are
efect advers asupra mediului. Gospodăriile joacăun rol important prin contribuția lor la reutilizare și recuperare, inclusiv reciclarea deșeurilor de echipamente. Pentru mai
multe informații în legăturăcu metodele de reciclare adecvate, contactați autoritățile locale sau distribuitorul dumneavoastră.
Este símbolo indica que los residuos de aparatos eléctricos y electrónicos (incluidas las pilas y acumuladores) no pueden eliminarse junto con otros residuos. Los aparatos
usados deben recogerse por separado y entregarse a un punto de recogida para garantizar su reciclado y recuperación a fin de reducir la cantidad de residuos y el uso de
los recursos naturales. La liberación incontrolada de componentes peligrosos contenidos en los aparatos eléctricos y electrónicos puede suponer un riesgo para la salud
humana y causar efectos adversos en el medio ambiente. El hogar desempeña un papel importante en la contribución a la reutilización y recuperación, incluido el reciclado
de los residuos de aparatos. Para obtener más información sobre los métodos de reciclaje adecuados, póngase en contacto con su autoridad local o distribuidor.
Αυτό το σύμβολο δείχνει ότι απαγορεύεται ηαπόρριψη χρησιμοποιημένου ηλεκτρικού και ηλεκτρονικού εξοπλισμού (συμπεριλαμβανομένων των μπαταριών και
συσσωρευτών) με άλλα απόβλητα. Οχρησιμοποιούμενος εξοπλισμός θα πρέπει να συλλέγεται επιλεκτικά και να αποστέλλεται σε σημείο συλλογής για να εξασφαλιστεί η
ανακύκλωσή του και ηανάκτησή του για τη μείωση των αποβλήτων και τη μείωση του βαθμού χρήσης των φυσικών πόρων. Ηανεξέλεγκτη απελευθέρωση επικίνδυνων
συστατικών που περιέχονται στον ηλεκτρικό και ηλεκτρονικό εξοπλισμό μπορεί να αποτελέσει απειλή για την ανθρώπινη υγεία και να προκαλέσει αρνητικές αλλαγές
στο φυσικό περιβάλλον. Το νοικοκυριό διαδραματίζει σημαντικό ρόλο στην συμβολή στην επαναχρησιμοποίηση και ανάκτηση, συμπεριλαμβανομένης της ανακύκλωσης,
χρησιμοποιημένου εξοπλισμού. Για περισσότερες πληροφορίες σχετικά με τις κατάλληλες μεθόδους ανακύκλωσης, επικοινωνήστε με τις τοπικές αρχές ήτον πωλητή.
Ce symbole indique que les déchets d’équipements électriques et électroniques (y compris les piles et accumulateurs) ne peuvent être éliminés avec d’autres déchets.
Les équipements usagés devraient être collectés séparément et remis à un point de collecte afin d’assurer leur recyclage et leur valorisation et de réduire ainsi la quantité
de déchets et l’utilisation des ressources naturelles. La dissémination incontrôlée de composants dangereux contenus dans des équipements électriques et électroniques
peut présenter un risque pour la santé humaine et avoir des effets néfastes sur l’environnement. Le ménage joue un rôle important en contribuant à la réutilisation et à la
valorisation, y compris le recyclage des équipements usagés. Pour plus d’informations sur les méthodes de recyclage appropriées, contactez votre autorité locale ou votre
revendeur.
Dit symbool geeft aan dat afgedankte elektrische en elektronische apparatuur (inclusief batterijen en accu’s) niet samen met ander afval mag worden weggegooid. Afge-
dankte apparatuur moet gescheiden worden ingezameld en bij een inzamelpunt worden ingeleverd om te zorgen voor recycling en terugwinning, zodat de hoeveelheid afval
en het gebruik van natuurlijke hulpbronnen kan worden beperkt. Het ongecontroleerd vrijkomen van gevaarlijke componenten in elektrische en elektronische apparatuur
kan een risico vormen voor de menselijke gezondheid en schadelijke gevolgen hebben voor het milieu. Het huishouden speelt een belangrijke rol bij het bijdragen aan
hergebruik en terugwinning, inclusief recycling van afgedankte apparatuur. Voor meer informatie over de juiste recyclingmethoden kunt u contact opnemen met uw gemeente
of detailhandelaar.
Questo simbolo indica che l’apparecchiatura elettrica e elettronica usurata (comprese le batterie e gli accumulatori) non può essere smaltita insieme con altri rifiuti. Le appa-
recchiature usurate devono essere raccolte separatamente e consegnate al punto di raccolta specializzato per garantire il riciclaggio e il recupero, al fine di ridurre la quantità
di rifiuti e diminuire l’uso delle risorse naturali. Il rilascio incontrollato dei componenti pericolosi contenuti nelle apparecchiature elettriche e elettroniche può costituire il rischio
per la salute umana e causare gli effetti negativi sull’ambiente naturale. Il nucleo familiare svolge il ruolo importante nel contribuire al riutilizzo e al recupero, compreso il
riciclaggio dell’apparecchiatura usurata. Per ottenere le ulteriori informazioni sui metodi di riciclaggio appropriate, contattare l’autorità locale o il rivenditore.
Този символ информира, че изхвърлянето на изхабеното електрическо иелектронно оборудване (включително батерии иакумулатори) заедно сбитовите
отпадъци езабранено. Изхабеното оборудване трябва да се събира отделно ида се предаде впункта за събиране на такива отпадъци, за да се осигури неговото
рециклиране иоползотворяване, да се намали количеството на отпадъците ида се намали разхода на природни ресурси. Неконтролираното изпускане на опасни
съставки, съдържащи се велектрическото иелектронното оборудване, може да представлява заплаха за човешкото здраве ида причини отрицателни промени в
околната среда. Домакинството играе важна роля вприноса за повторната употреба иоползотворяването, включително рециклирането на изхабеното оборудване.
За повече информация относно правилните методи за рециклиране, моля, свържете се сместните власти или спродавача.


INSTRUKCJA ORYGINALNA
6
PL
CHARAKTERYSTYKA NARZĘDZIA
Ręczna młotowiertarka jest narzędziem zwykłym, II klasy izolacji, przeznaczonym do wykonywania otworów oraz kucia w betonie,
kamieniu naturalnym i sztucznym, marmurze itp. za pomocąnarzędzi roboczych wyposażonych w chwyt SDS Plus. Młotowiertar-
ka posiada płynnąregulacjęobrotów wrzeciona oraz dzięki odłączeniu funkcji udaru umożliwia wiercenie w materiałach takich jak:
drewno, metal czy tworzywa sztuczne. Prawidłowa, niezawodna i bezpieczna praca elektronarzędzia jest zależna od właściwej
eksploatacji, dlatego:
Przed przystąpieniem do pracy z narzędziem należy przeczytaćcałą instrukcjęi zachowaćją.
Za szkody powstałe w wyniku nie przestrzegania przepisów bezpieczeństwa i zaleceńniniejszej instrukcji dostawca nie ponosi
odpowiedzialności.
WYPOSAŻENIE
W opakowaniu fabrycznym powinny sięznajdować:
- młotowiertarka
- rękojeść dodatkowa
- ogranicznik głębokości wiercenia
PARAMETRY TECHNICZNE
Parametr Jednostka miary Wartość
Numer katalogowy YT-82118
Napięcie znamionowe [V~] 220 – 240
Częstotliwość znamionowa [Hz] 50
Moc znamionowa [W] 1100
Obroty znamionowe [min-1] 0 – 900
Maks. średnica otworu – beton (z uchwytem SDS PLUS) [mm] 28
Maks. średnica otworu – drewno (z uchwytem kluczykowym) [mm] 35
Maks. średnica otworu – stal (z uchwytem kluczykowym) [mm] 13
Energia udaru [J] 4,5
Częstotliwość udaru [min-1] 4300
Masa [kg] 4,8
Poziom hałasu
- ciśnienie akustyczne LpA ± K [dB(A)] 95,0 ± 3,0
- moc LwA ± K [dB(A)] 109,0 ± 3,0
Poziom drgańah,CHeq ± K (rękojeść główna / dodatkowa) [m/s2] 15,91 ± 1,5 / 12,97 ± 1,5
Klasa izolacji II
Stopieńochrony IP20
Deklarowana, całkowita wartości drgańoraz emisji hałasu zostały zmierzone za pomocąstandardowej metody badańi może być
użyte do porównania jednego narzędzia z drugim. Deklarowana, całkowita wartość drgańoraz emisji hałasu może zostaćużyta
we wstępnej ocenie ekspozycji.
Uwaga! Emisja drgańoraz hałasu podczas pracy narzędziem może sięróżnićod zadeklarowanej wartości, w zależności od
sposobu użycia narzędzia.
Uwaga! Należy określićśrodki bezpieczeństwa mające chronićoperatora, które sąoparte na ocenie narażenia w rzeczywistych
warunkach użytkowania (wliczając w to wszystkie części cyklu pracy, jak na przykład czas kiedy narzędzie jest wyłączone lub
pracuje na biegu jałowym oraz czas aktywacji).
OGÓLNE OSTRZEŻENIA DOTYCZĄCE BEZPIECZEŃSTWA ELEKTRONARZĘDZI
Ostrzeżenie! Należy zapoznaćsięze wszystkimi ostrzeżeniami bezpieczeństwa, ilustracjami oraz specyfikacjami do-
starczonymi z tym elektronarzędziem. Nieprzestrzeganie ich może prowadzićdo porażenia elektrycznego, pożaru albo do
poważnych urazów.
Zachowaćwszystkie ostrzeżenia oraz instrukcje do przyszłego odniesienia się.
Pojęcie „elektronarzędzie” użyte w ostrzeżeniach odnosi siędo wszystkich narzędzi napędzanych prądem elektrycznym zarówno
przewodowych, jak i bezprzewodowych.

INSTRUKCJA ORYGINALNA 7
PL
Bezpieczeństwo miejsca pracy
Miejsce pracy należy utrzymywaćdobrze oświetlone i w czystości. Nieporządek i słabe oświetlenie mogąbyćprzyczynami
wypadków.
Nie należy pracowaćelektronarzędziami w środowisku o zwiększonym ryzyku wybuchu, zawierającym palne ciecze,
gazy lub opary. Elektronarzędzia generująiskry, które mogązapalićpyłlub opary.
Nie należy dopuszczaćdzieci i osób postronnych do miejsca pracy. Utrata koncentracji może spowodowaćutratękontroli.
Bezpieczeństwo elektryczne
Wtyczka przewodu elektrycznego musi pasowaćdo gniazdka sieciowego. Nie wolno modyfikowaćwtyczki w jakikolwiek
sposób. Nie wolno stosowaćżadnych adapterów wtyczki z uziemionymi elektronarzędziami. Niemodyfikowana wtyczka
pasująca do gniazdka zmniejsza ryzyko porażenia prądem elektrycznym.
Unikaćkontaktu z uziemionymi powierzchniami takimi jak rury, grzejniki i chłodziarki. Uziemienie ciała zwiększa ryzyko
porażenia prądem elektrycznym.
Nie należy narażaćelektronarzędzi na kontakt z opadami atmosferycznymi lub wilgocią.Woda i wilgoć, która dostanie się
do wnętrza elektronarzędzia zwiększa ryzyko porażenia prądem elektrycznym.
Nie przeciążaćkabla zasilającego. Nie używaćkabla zasilającego do noszenia, ciągnięcia lub odłączania wtyczki od
gniazdka sieciowego. Unikaćkontaktu kabla zasilającego z ciepłem, olejami, ostrymi krawędziami i ruchomymi częścia-
mi. Uszkodzenie lub splątanie kabla zasilającego zwiększa ryzyko porażenia prądem elektrycznym.
W przypadku pracy poza pomieszczeniami zamkniętymi należy używaćprzedłużaczy przeznaczonych do pracy poza
pomieszczeniami zamkniętymi. Użycie przedłużacza przystosowanego do pracy na zewnątrz pomieszczeńzmniejsza ryzyko
porażenia prądem elektrycznym.
W przypadku, gdy używanie elektronarzędzia w środowisku wilgotnym jest nieuniknione, jako ochronęprzed napięciem
zasilania należy stosowaćurządzenie różnicowoprądowe (RCD). Zastosowanie RCD zmniejsza ryzyko porażania prądem
elektrycznym.
Bezpieczeństwo osobiste
Pozostańczujny, zwracaj uwagęna to, co robisz i zachowuj zdrowy rozsądek podczas pracy elektronarzędziem. Nie uży-
waj elektronarzędzia będąc zmęczonym lub pod wpływem narkotyków alkoholu lub leków. Nawet chwila nieuwagi podczas
pracy może prowadzićdo poważnych urazów osobistych.
Używaj środków ochrony osobistej. Zawsze zakładaj ochronęwzroku. Stosowanie środków ochrony osobistej, takich jak maski
przeciwpyłowe, przeciwpoślizgowe obuwie ochronne, kaski i ochronniki słuchu zmniejszająryzyko poważnych urazów osobistych.
Zapobiegaj przypadkowemu uruchomieniu. Upewnij się, że włącznik elektryczny jest w pozycji „wyłączony” przed podłą-
czeniem do zasilania i/lub akumulatora, podniesieniem lub przenoszeniem elektronarzędzia. Przenoszenie elektronarzędzia z
palcem na włączniku lub zasilenie elektronarzędzia, gdy włącznik jest w pozycji „włączony” może prowadzićdo poważnych urazów.
Przed włączeniem elektronarzędzia usuńwszelkie klucze i inne narzędzia, które zostały użyte do jego regulacji. Klucz
pozostawiony na obracających sięelementach narzędzia może prowadzićdo poważnych urazów.
Nie sięgaj i nie wychylaj sięzbyt daleko. Utrzymuj odpowiedniąpostawęoraz równowagęprzez cały czas. Pozwoli to na
łatwiejsze zapanowanie nad elektronarzędziem w przypadku niespodziewanych sytuacji podczas pracy.
Ubieraj sięodpowiednio. Nie zakładaj luźniej odzieży lub biżuterii. Utrzymuj włosy oraz odzieżz dala od ruchomych czę-
ści elektronarzędzia. Luźna odzież, biżuteria lub długie włosy mogązostaćpochwycone przez ruchome części.
Jeżeli urządzenia sąprzystosowane do podłączenia odciągu pyłu lub gromadzenia pyłu, upewnij się, że zostały one
podłączone i użyte prawidłowo. Użycie odciągu pyłu zmniejsza ryzyko zagrożeńzwiązanych z pyłami.
Nie pozwól, aby doświadczenie nabyte z częstego użycia narzędzia spowodowały beztroskęi ignorowanie zasad bezpie-
czeństwa. Beztroskie działanie może spowodowaćpoważne urazy w ułamku sekundy.
Użytkowanie i troska o elektronarzędzie
Nie przeciążaj elektronarzędzia. Używaj elektronarzędzia właściwego do wybranego zastosowania. Właściwe elektrona-
rzędzie zapewni lepsząi bezpieczniejsząpracęjeżeli zostanie użyte do zaprojektowanego obciążenia.
Nie używaj elektronarzędzia, jeśli włącznik elektryczny nie umożliwia włączenia i wyłączenia. Narzędzie, które nie daje się
kontrolowaćza pomocąwłącznika sieciowego jest niebezpieczne i należy je oddaćdo naprawy.
Odłącz wtyczkęod gniazdka zasilającego i/lub zdemontuj akumulator, jeżeli jest odłączalny od elektronarzędzia przed
regulacją, wymianąakcesoriów lub przechowywaniem narzędzia. Takie środki zapobiegawcze pozwoląna uniknięcie przy-
padkowego włączenia elektronarzędzia.
Przechowuj narzędzie w miejscu niedostępnym dla dzieci, nie pozwól osobom nieznającym obsługi elektronarzędzia lub
tych instrukcji posługiwaćsięelektronarzędziem. Elektronarzędzia sąniebezpieczne w rękach nieprzeszkolonych użytkowników.
Konserwuj elektronarzędzia oraz akcesoria. Sprawdzaj narzędzie pod kątem niedopasowańlub zacięć ruchomych czę-
ści, uszkodzeńczęści oraz jakichkolwiek innych warunków, które mogąwpłynąć na działanie elektronarzędzia. Uszko-
dzenia należy naprawićprzed użyciem elektronarzędzia. Wiele wypadków jest spowodowanych przez niewłaściwe konser-
wowane narzędzia.
Narzędzia tnące należy utrzymywaćczyste i naostrzone. Właściwie konserwowane narzędzia tnące z ostrymi krawędziami
jest mniej skłonne do zakleszczania i jest łatwiej kontrolowaćje podczas pracy.

INSTRUKCJA ORYGINALNA
8
PL
Stosuj elektronarzędzia, akcesoria oraz narzędzia wstawiane itd. zgodnie z niniejszymi instrukcjami, biorąc pod uwagę
rodzaj i warunki pracy. Stosowanie narzędzi do innej pracy niżzostały zaprojektowane, może spowodowaćpowstanie niebez-
piecznej sytuacji.
Rękojeści oraz powierzchnie do chwytania utrzymuj suche, czyste oraz wolne od oleju i smaru. Śliskie rękojeści i po-
wierzchnie do chwytania nie pozwalająna bezpiecznąobsługęoraz kontrolowanie narzędzia w niebezpiecznych sytuacjach.
Naprawy
Naprawiaj elektronarzędzie tylko w uprawnionych do tego zakładach, używających tylko oryginalnych części zamien-
nych. Zapewni to właściwe bezpieczeństwo pracy elektronarzędzia.
DODATKOWE INSTRUKCJE BEZPIECZEŃSTWA
Zakładaćochronniki słuchu. Narażanie na hałas może spowodowaćutratęsłuchu.
Narzędzia używaćz dodatkowymi rękojeściami dostarczonymi z narzędziem. Utrata kontroli może spowodowaćosobiste
obrażenia operatora.
Podczas wykonywania pracy, w której narzędzie wstawione może zetknąć sięz ukrytym przewodem pod napięciem lub
przewodem zasilającym należy trzymaćnarzędzie elektryczne za pomocąizolowanych uchwytów. Narzędzie wstawiane
podczas kontaktu z przewodem pod napięciem może spowodować, że metalowe elementy narzędzia mogąsięznaleźć pod
napięciem, co może spowodowaćporażenie elektryczne operatora narzędzia.
Ostrzeżenia związane z wierceniem za pomocądługich wierteł
Zawsze zaczynaj wiercenie przy niskiej prędkości i tak, aby koniec wiertła miałkontakt z obrabianym przedmiotem. Przy
wyższych prędkościach wiertło prawdopodobnie sięwygnie jeżeli pozwoli mu sięwirowaćswobodnie bez kontaktu z obrabianym
przedmiotem, co będzie skutkowało urazem.
Aplikuj nacisk tylko w prostej linii z wiertłem i nie aplikuj nadmiernego nacisku. Wiertło może sięwygiąć powodując pęknię-
cie i utratękontroli co będzie skutkowało urazem.
MONTAŻELEMENTÓW WYPOSAŻENIA
UWAGA! Montażwyposażenia może byćdokonywany tylko przy odłączonym napięciu zasilającym. Wyciągnąć wtyczkęprzewo-
du narzędzia z gniazda sieciowego!
Montażrękojeści dodatkowej (III)
Obejmęrękojeści dodatkowej nałożyćna obudowęnarzędzia i po ustawieniu uchwytu w najbardziej ergonomicznej pozycji dla
danej pracy, zamocowaćdokręcając rękojeść.
Montażogranicznika głębokości wiercenia (IV)
Poluzowaćmocowania rękojeści dodatkowej. Prostączęść pręta ogranicznika głębokości wiercenia wsunąć w otwór w rękojeści
dodatkowej i po ustawieniu właściwego położenia ponownie dokręcićrękojeść dodatkową. Wygięta część pręta powinna znaleźć
sięmożliwie blisko wiertła. W czasie gdy wiertło będzie sięzagłębiało w otworze podczas wiercenia, pręt ogranicznika oprze się
o wierconąpowierzchnię, co będzie oznaczało osiągnięcie zamierzonej głębokości wiercenia.
Ze względów konstrukcyjnych nie we wszystkich pozycjach rękojeści dodatkowej może byćdostępny pełen zakres długości
ogranicznika.
PRZYGOTOWANIE DO PRACY
Przed rozpoczęciem pracy należy sprawdzićczy korpus obudowy oraz przewód przyłączeniowy z wtyczkąnie sąuszkodzone. W
przypadku stwierdzenia uszkodzeńzabrania siędalszej pracy!
Uwaga! Wszystkie czynności związane z wymianąnarzędzi roboczych (wiertła i przecinaki z chwytem SDS Plus), montażem
osłon i prowadnic, regulacjąitp. należy przeprowadzaćprzy wyłączonym napięciu zasilającym narzędzie, dlatego przed przystą-
pieniem do tych czynności: Wyciągnąć wtyczkęprzewodu narzędzia z gniazda sieciowego!
Zakładanie narzędzi roboczych SDS Plus w uchwycie narzędziowym
Oczyścićwybrane narzędzie z brudu i rdzy oraz posmarowaćuchwyt SDS Plus cienkąwarstwąsmaru.
Przyciągnąć ku sobie uchwyt narzędziowy i przytrzymaćw tej pozycji (V).
Włożyćoczyszczone narzędzie do otworu. W razie potrzeby przekręcićnarzędzie, aby bez oporu weszło do uchwytu.
Puścićuchwyt, narzędzie powinno sięautomatycznie zablokowaćw uchwycie.
Sprawdzićczy narzędzie jest pewnie osadzone. W tym celu wystarczy spróbowaćwyciągnąć narzędzie z uchwytu SDS-Plus.
Jeśli wiertło lub przecinak wysuwa sięz uchwytu, ponowićczynności montażowe.

INSTRUKCJA ORYGINALNA 9
PL
Ustawianie rodzaju pracy (VI)
Narzędzie zostało wyposażone w dwa przełączniki rodzaju pracy. Przełącznik rodzaju wiercenia, znajdujący sięw pobliżu włącz-
nika i przełącznik rodzaju udaru znajdujący sięz boku obudowy.
Przestawićprzełącznik rodzaju wiercenia tak, aby jego skrzydełko wskazywało jeden z symboli: wiertło – wiercenie bez udaru;
wiertło i młotek – wiercenie z udarem.
Przestawićprzełącznik rodzaju udaru tak, aby wskaźnik na obudowie narzędzia wskazywałjeden z symboli na przełączniku:
wiertło i młotek – wiercenie z udarem; młotek – kucie; dłuto ze strzałką– pozycja dłuta. Zmianępozycji przełącznika dokonuje się
wciskając i przytrzymując blokadęprzycisku, a następnie obracając przełącznik.
Wiercenie z udarem polega na tym, że oprócz ruchu obrotowego wiertło wykonuje jednocześnie ruch posuwisto-zwrotny, co
sprawia, że końcówka wiertła uderza w wierconym materiał. Takie wiercenie wymaga wiertełz ostrzem wykonanym z węglików
spiekanych i pozwala na przy wykonywaniu otworów w betonie, murze i twardych materiałach ceramicznych (twarde cegły, ka-
mienie, marmur).
Kucie polega na tym, że zostaje odłączony ruch obrotowy, ale nie ruch posuwisto zwrotny. Kucie wymaga zastosowanie dłuta,
przecinaka lub przebijaka o kształcie dostosowanym do obrabianej powierzchni i rodzaju materiału.
Pozycjędłuta należy ustawićobracając je ręcznie. Po ustawieniu pozycji należy przestawićprzełącznik rodzaju udaru w pozycję
kucie.
Wiercenie bez udaru należy ustawićw przypadku wykonywania otworów w drewnie, metalach i niektórych materiałach cera-
micznych. Do wiercenia za pomocąwiertełnie wyposażonych w uchwyt SDS PLUS należy zastosowaćuchwyt samocentrujący
wiertarski (dostępny osobno) z wrzecionem SDS PLUS. Zaleca sięstosowanie kluczykowego uchwytu wiertarskiego.
Uwaga! W przypadku ustawienia przełącznika rodzaju wiercenia w tryb wiercenia bez udaru, pozycja przełącznika rodzaju udaru
nie ma znaczenia.
Regulacja obrotów (VII)
Młotowiertarka wyposażona jest w płynnąregulacjęobrotów regulacja odbywa sięprzez ustawianie pokrętła. Im większa cyfra
widoczna na pokrętle tym większe obroty. Zmiana prędkości obrotowej pociąga za sobązmianęczęstotliwości udaru oraz energii
pojedynczego uderzenia. Możliwa jest płynna regulacja w zakresie wymienionym w tabeli z danymi technicznymi.
Wyższąprędkość obrotowąnależy ustawićdla wiercenia w metalach i przy wierceniu wiertłami o małej średnicy. Niższa prędkość
obrotowa jest przeznaczona dla wiercenia w materiałach ceramicznych i wiertłami o większej średnicy.
Czynności przygotowawcze
Ustawićnarzędzie w odpowiedni tryb pracy: wiercenie lub wiercenie z udarem, lub kucie.
Wybieraćwłaściwe narzędzie robocze i zamontowaćje w uchwycie narzędziowym.
Założyćochronniki słuchu, ochronęoczu, rękawice robocze.
Włożyćwtyczkęprzewodu do gniazda sieci elektrycznej.
Przyjąć pozycjęgwarantującązachowanie równowagi, chwycićoburącz młotowiertarkęi uruchomićjąnaciskając palcem włącznik
elektryczny (VIII).
Przytrzymaćnarzędzie w tym stanie kilka minut, aby smar dotarłdo wszystkich elementów mechanizmu napędowego.
Wyłączyćmłotowiertarkęprzez zwolnienie włącznika.
Uwaga! W razie wystąpienia podejrzanych zgrzytów, trzasków itp. Natychmiast wyłączyćmłotowiertarkęz sieci elektrycznej i
przekazaćjądo przeglądu uprawnionemu zakładowi serwisowemu.
UŻYTKOWANIE NARZĘDZIA
Uwaga! W czasie użytkowania młotowiertarki należy stosowaćochronniki słuchu!
Wiercenie w drewnie
Przed wykonaniem otworu zaleca sięzamocowaćobrabiany materiałściskami stolarskimi lub w imadle, a następnie punktakiem
lub gwoździem ustalićmiejsce wiercenia. W uchwyt wiertarski zamocowaćwłaściwe wiertło, ustalićprędkość, podłączyćwiertarkę
do sieci elektrycznej i rozpocząć wiercenie. W przypadku wykonywania otworów przelotowych zaleca siępod materiałpodłożyć
podkładkędrewnianą, dzięki czemu krawędźotworu u wylotu nie będzie poszarpana. W przypadku wykonywania otworów o
dużych średnicach wcześniej zaleca sięwywiercićmniejszy otwór prowadzący.
Wiercenie w metalach
Zawsze należy pewnie zamocowaćobrabiany materiał. W przypadku cienkiej blachy zaleca siępodłożyćpod niąkawałek drewna,
aby uniknąć niepożądanych zagięć itp. Następnie zaznaczyćmiejsca wykonywania otworów punktakiem i rozpocząć wiercenie.
Używaćwiertełdo stali. W przypadku wiercenia w żeliwie białym zaleca sięużywanie wiertełz końcówkami z węglików spieka-
nych. Przy wierceniu większych otworów zaleca sięwykonanie wcześniej mniejszego otworu prowadzącego. Przy wierceniu w
stali do chłodzenia wiertła używaćoleju maszynowego. W przypadku aluminium stosowaćjako chłodziwo terpentynęlub parafinę.
W przypadku wierceniu w mosiądzu, miedzi lub żeliwie nie należy stosowaćśrodków chłodzących. W celu schłodzenia często
wyjmowaćwiertło z materiału aby pozwolićmu na ostygnięcie.

INSTRUKCJA ORYGINALNA
10
PL
Wiercenie w materiałach ceramicznych
Wiercenie w twardych, zwartych materiałach: beton, twarda cegła, kamień, marmur itp.
Przy odłączonej od sieci elektrycznej młotowiertarce zamocowaćdo uchwytu narzędziowego wiertło.
W razie potrzeby zamontowaćogranicznik głębokości wiercenia.
Przełącznikiem trybu pracy wybraćwiercenie z udarem lub jeżeli jest dostępne, to wiercenie bez udaru.
Włożyćwtyczkędo gniazda sieci elektrycznej, włączyćwłącznikiem młotowiertarkęi rozpocząć pracę.
W czasie pracy stosowaćregularne przerwy - nigdy nie dopuszczaćdo nadmiernego nagrzania młotowiertarki i narzędzia.
Wiercenie z udarem zaleca sięstosowaćtylko w przypadku zwartych materiałów ceramicznych jak: beton, twarda cegła, kamień
itp. W przypadku wiercenia otworów o dużych średnicach zaleca sięwykonanie otworu wstępnego o mniejszej średnicy, a następ-
nie użyćwiertła o docelowej średnicy. Należy stosowaćwiertła przeznaczone do wiercenia udarowego.
Nie zaleca sięstosowaćwiercenia udarowego w przypadku materiałów ceramicznych o luźnej strukturze takich, jak: glazura,
miękka cegła, tynk itp. Wiercenie udarowe w takich materiałach może doprowadzićdo zniszczenia materiału.
Młotowiertarka jest wyposażona w sprzęgło zapobiegające przeciążeniu silnika elektrycznego w przypadku gdy narzędzie wsta-
wiane zostanie zatrzymane w wyniku pracy. Na przykład w przypadku natrafienia w pręt zbrojeniowy. W takim wypadku wiertło
przestanie sięobracać, mimo że silnik elektryczny nadal będzie pracował.
Także wywieranie zbyt dużego nacisku w trakcie pracy może spowodowaćzadziałanie sprzęgła.
W takim wypadku należy wycofaćnarzędzie wstawiane z otworu, sprawdzićczy młotowiertarka pracuje poprawnie, a następnie
wznowićpracęprzykładając tylko taki nacisk jaki jest konieczny do poprawnej pracy. W przypadku natrafienia na pręt zbrojeniowy
lub inne ukryte przeszkody metalowe, należy je przewiercićbez udaru za pomocąwiertła przeznaczonego do wiercenia w metalu
o tej samej średnicy co wiertło udarowe, a następnie kontynuowaćwiercenie w materiale ceramicznym.
Wiercenie w glazurze, miękkiej cegle, tynku itp.
Wiercićjak w przypadku materiałów twardych lecz bez udaru. Co pewien czas wyjmowaćwiertło z wierconego otworu w celu
usunięcia pyłu i odpadów. W trakcie wiercenia naciskaćnarzędzie ze stałą siłą.
Kucie
Przy odłączonej od sieci elektrycznej zamocowaćdo uchwytu narzędziowego żądane narzędzie: przecinak lub przebijak.
Ustawićprzełącznik rodzaju pracy w pozycjękucie. Włożyćwtyczkędo gniazda sieci elektrycznej, włączyćwłącznikiem młoto-
wiertarkę, poczekaćdo osiągnięcia pełnej prędkości i rozpocząć pracę. Podczas kucia nie należy wbijaćnarzędzia wstawianego
zbyt głęboko w obrabiany materiał. Należy skuwaćmateriałcienkimi warstwami, nie wywierając zbyt dużego nacisku na młoto-
wiertarkę.
Używanie przystawek
Narzędzie nie jest przeznaczone do napędu przystawek roboczych.
Osłona uchwytu wiertarskiego
Jeżeli młotowiertarka została wyposażona w gumowąosłonęuchwytu wiertarskiego, to zaleca sięjąużyćw przypadku wiercenia
gdzie wiertło jest skierowane do góry, na przykład wierceniu w suficie. Po zamontowaniu wiertła w uchwycie należy nałożyćna
nie osłonę. Pyłi odpady powstające podczas wiercenia będągromadziły sięw osłonie, co zapobiegnie zanieczyszczeniu uchwytu
wiertarskiego. Po skończonej pracy osłonęzdjąć z wiertła, oczyścićz pyłu i odpadków, a następnie opłukaćpod strumieniem
letniej wody.
Kontrolka
Narzędzie zostało wyposażone w kontrolkęświetlną. Kontrolka świeci na zielono po wciśnięciu włącznika. Oznacza to zasilanie
narzędzia. Świecenie na czerwono oznacza konieczność wymiany szczotek silnika elektrycznego. Wymiany należy dokonaćw
autoryzowanym serwisie producenta.
Uwagi dodatkowe
W czasie pracy nie należy wywieraćzbyt dużego nacisku na obrabiany materiałi nie wykonywaćgwałtownych ruchów, aby nie
spowodowaćuszkodzenia narzędzia roboczego i wiertarki. W czasie pracy stosowaćregularne przerwy. Nie wolno dopuścićdo
przeciążenia narzędzia, temperatura powierzchni zewnętrznych nigdy nie może przekroczyć60OC. Po zakończonej pracy wyłą-
czyćwiertarkę, wyjąć wtyczkęprzewodu narzędzia z gniazda sieciowego i dokonaćkonserwacji i oględzin.
Smarowanie
Zawsze przed użyciem wiertełlub przecinaków należy je dokładnie oczyścići posmarowaćchwyt SDS Plus cienkąwarstwą
smaru. Zaleca sięstosowanie smaru przeznaczonego do uchwytów wiertarskich SDS Plus. W przypadku niewłaściwej pracy
mechanizmu udarowego, jednąz przyczyn może byćniedostateczne smarowanie przekładni i zespołu korbowego tłoka udaru.
Zaleca sięstosowanie smaru przeznaczonego do przekładni zębatych i korbowych. Uzupełnianie smaru zaleca sięwykonaćw
uprawnionym zakładzie serwisowym.

INSTRUKCJA ORYGINALNA 11
PL
KONSERWACJA I PRZEGLĄDY
UWAGA! Przed przystąpieniem do regulacji, obsługi technicznej lub konserwacji wyciągnij wtyczkęnarzędzia z gniazdka sieci
elektrycznej. Po zakończonej pracy należy sprawdzićstan techniczny elektronarzędzia poprzez oględziny zewnętrzne i ocenę:
korpusu i rękojeści, przewodu elektrycznego z wtyczkąi odgiętką, działania włącznika elektrycznego, drożności szczelin wentyla-
cyjnych, iskrzenia szczotek, głośności pracy łożysk i przekładni, rozruchu i równomierności pracy. W okresie gwarancji użytkownik
nie może domontowaćelektronarzędzi, ani wymieniaćżadnych podzespołów lub części składowych, gdyżpowoduje to utratę
praw gwarancyjnych. Wszelkie nieprawidłowości obserwowane przy przeglądzie, lub w czasie pracy, sąsygnałem do przeprowa-
dzenia naprawy w punkcie serwisowym. Po zakończeniu pracy, obudowę, szczeliny wentylacyjne, przełączniki, rękojeść dodatko-
wąi osłony należy oczyścićnp. strumieniem powietrza (o ciśnieniu nie większym niż0,3 MPa), pędzlem lub suchąszmatkąbez
użycia środków chemicznych i płynów czyszczących. Narzędzia i uchwyty oczyścićsuchączystąszmatą.

12
EN
ORIGINAL INSTRUCTIONS
TOOL DESCRIPTION
The hand-held hammer drill is a normal, class II insulation tool, designed for drilling holes and chiselling concrete, natural and
artificial stone, marble, etc. with tools with SDS Plus attachment. The hammer drill has a smooth adjustment of the spindle speed
and can be used for drilling in such materials as wood, metal or plastics, when the impact function is off. Proper, reliable and safe
operation of the power tool requires an appropriate use, that is why you should:
Read the entire instructions manual before the first use of the tool and keep it for future reference.
The supplier shall not be liable for any damage resulting from failure to comply with the safety instructions and recommendations
specified in this instructions manual.
EQUIPMENT
The factory packaging should contain:
- hammer drill
- additional handle
- drill depth stop
TECHNICAL DATA
Parameter Unit Value
Part no. YT-82118
Rated voltage [V~] 220 – 240
Rated frequency [Hz] 50
Rated power [W] 1100
Rated rpm [min-1] 0 – 900
Max. hole diameter – concrete (with SDS PLUS) [mm] 28
Max. hole diameter – wood (with key chuck) [mm] 35
Max. hole diameter – steel (with key chuck) [mm] 13
Impact energy [J] 4.5.
Impact frequency [min-1] 4300.
Weight [kg] 4.8
Noise level
- sound pressure LpA ± K [dB(A)] 95.0 ± 3.0
- power LwA ± K [dB(A)] 109.0 ± 3.0
Vibration level ah,CHeq ± K (main/additional handle) [m/s2] 15.91 ± 1.5 / 12.97 ± 1.5
Insulation class II
Protection rating IP20
The declared total vibration and noise emission value has been measured using the standard test method and can be used to
compare one tool to another. The declared total vibration and noise emission value can be used in the initial exposure assessment.
Caution! The vibration and noise emission during tool use may differ from the declared value, depending on the manner the tool
is used.
Caution! Safety measures to protect the operator, which are based on an assessment of exposure under actual conditions of
use (including all parts of the work cycle, such as the time when the tool is switched offor idle and the activation time), must be
specified.
GENERAL WARNINGS FOR THE SAFETY OF POWER TOOLS
Warning! Read all safety warnings, illustrations and specifications provided with this power tool. Failure to do so may
result in electric shock, fire or serious injury.
Keep all warnings and instructions for future reference.
The term “power tool” used in warnings applies to all tools driven by power both wired and wireless.
Workplace safety
Keep the workplace well-lit and clean. Disorder and poor lighting can be causes of accidents.
Do not work with power tools in an environment with an increased risk of explosion, containing flammable liquids, gases

13
ORIGINAL INSTRUCTIONS
EN
or vapors. Power tools generate sparks that can ignite dust or fumes.
Children and third persons should not be allowed to enter the workplace. Loss of concentration can result in loss of control.
Electrical safety
The plug of the electric cable must match the power socket. You must not modify the plug in any way. Do not use any
plug adapters with earthed power tools. An unmodified plug that fits the outlet reduces the risk of electric shock.
Avoid contact with earthed surfaces such as pipes, radiators and coolers. Grounding the body increases the risk of electric shock.
Do not expose power tools to contact with atmospheric precipitation or moisture. Water and moisture that gets inside the
power tool increases the risk of electric shock.
Do not overload the power cable. Do not use the power cord to carry, pull or unplug the power plug from the power outlet.
Avoid contact of the power cable with heat, oils, sharp edges and moving parts. Damage or entanglement of the power cord
increases the risk of electric shock.
In the case of working outside closed rooms, use extension cords intended for work outside closed rooms. The use of an
extension cord adapted for outdoor use reduces the risk of electric shock.
When using a power tool in a humid environment is unavoidable as a protection against supply voltage use a residual
current device (RCD). The use of RCD reduces the risk of electric shock.
Personal safety
Stay alert, pay attention to what you do and keep common sense while working with the power tool. Do not use a power
tool when you are tired or under the influence of alcohol or medication. Even a moment of inattention while working can
lead to serious personal injury.
Use personal protective equipment. Always wear eye protection. The use of personal protective equipment such as dust
masks, anti-slip safety shoes, helmets and hearing protection reduce the risk of serious personal injury.
Prevent accidental operation. Make sure that the electric switch is in the “off” position before connecting to the power
supply and / or battery, lifting or moving the power tool. Moving the power tool with the finger on the switch or powering the
power tool, when the switch is in the “on” position can lead to serious injuries.
Before turning on the power tool remove any keys and other tools that were used to adjust it. The key left on the rotating
parts of the power tool can lead to serious injuries.
Do not reach and do not lean too far. Keep the right attitude and balance all the time. This will allow easier control over the
power tool in case of unexpected work situations.
Dress accordingly. Do not wear loose clothing or jewelry. Keep your hair and clothing away from moving parts of the
power tool. Loose clothing, jewelry or long hair can be caught by moving parts.
If the devices are fitted for the connection of dust extraction or dust collection, make sure that they are connected and
used properly. The use of dust extraction reduces the risk of dust hazards.
Do not let the experience acquired from frequent use of the tool resulted in carelessness and ignoring safety rules.
Carefree action can cause serious injuries in a fraction of a second.
Use and care of the power tool
Do not overload the power tool. Use the power tool appropriate for the selected application. The right power tool will pro-
vide a better and safer job if used according to the designed load.
Do not use the power tool, if the electric switch does not allow switching on and off. Power tool, which cannot be controlled
by means of a power switch is dangerous and must be returned for repair.
Disconnect the plug from the power socket and / or remove the battery if it is detachable from the power tool before
adjusting, changing accessories or storing the tool. Such preventive measures will allow you to avoid accidentally turning on
the power tool.
Keep the tool out of the reach of children, do not let people who do not know how to operate the power tool or these
instructions use a power tool. Power tools are dangerous in the hands of untrained users.
Maintain power tools and accessories. Check the tool for mismatches or jams of moving parts, damage to parts and any
other conditions that may affect the operation of the power tool. Damage must be repaired before using the power tool.
Many accidents are caused by incorrectly maintained tools.
Keep cutting tools sharp and clean. Properly maintained cutting tools with sharp edges are less prone to jamming and are
easier to control when working.
Use power tools, accessories and inserted tools etc. in accordance with these instructions, taking into account the type
and conditions of work. The use of tools for work other than designed is likely to result in a dangerous situation.
Handles and gripping surfaces must be dry, clean and free from oil and grease. Slippery handles and gripping surfaces do
not allow for safe operation and control of the tool in dangerous situations.
Repairs
Repair the power tool only in authorized facilities using only original spare parts. This ensures proper operation safety of
the power tool.

14
EN
ORIGINAL INSTRUCTIONS
ADDITIONAL SAFETY INSTRUCTIONS
Use hearing protectors. Exposure to noise can cause hearing loss.
Use the tool with the additional handles provided. Loss of control can cause personal injury to the operator.
Hold the power tool by the insulated handles to avoid the risk when the drill bit attached comes into contact with a live,
concealed cable or power conductor when working. When the bit is in contact with a live wire it may cause the metal parts of
the tool to become live, which may give the user an electric shock.
Safety warnings for drilling with long bits
Always start drilling at low speed and make sure the end of the drill bit is in contact with the workpiece. At higher speeds,
the drill might bend and cause injury if it is allowed to rotate freely without contact with the workpiece.
Apply pressure only in a straight line with the drill and do not press too hard. The drill can bend, causing breakage and loss
of control which will result in injury.
EQUIPMENT INSTALLATION
CAUTION! Only install the equipment when the supply voltage is disconnected. Pull the tool power cord plug out of the mains
socket!
Installing the additional handle (III)
Put the additional handle clamp on the tool body and after setting the handle in the most ergonomic position for the job, fix it by
tightening the handle.
Installing the drilling depth stop (IV)
Loosen the additional handle fasteners. Slide the straight part of the drill depth stop into the hole in the additional handle and
tighten the additional handle again after adjusting the correct position. The bent part of the stop should be as close as possible to
the drill bit. As the drill bit is driven into the hole, the stop will rest against the drilled surface to achieve the intended drilling depth.
Due to design of the tool, the full range of stop lengths may not be available in all positions of the auxiliary handle.
PREPARING FOR WORK
Before starting work, make sure that the housing and the connecting cable with a plug are not damaged. Stop working in case
of damage!
Caution! All activities related to changing tools (drills and chisels with the SDS MAX Plus attachment), installing covers and guides,
adjusting, etc. should be done with the tool disconnected from mains. For this reason, before proceeding: Pull the tool power
cord plug out of the mains socket!
Inserting the SDS Plus work tools into the tool holder
Clean the selected tool from dirt and rust and lubricate the SDS Plus holder with a thin layer of grease.
Pull the tool chuck ring towards you and hold it in this position (V).
Insert the cleaned tool into the hole. If necessary, rotate the tool to make sure it fits in the chuck without any resistance.
Release the chuck ring. The tool should automatically lock inside the chuck.
Make sure the tool has been seated firmly. To do this, simply try pulling the tool out of the SDS-Plus chuck. Repeat all installation
steps, if the drill or chisel comes out of the chuck.
Setting the operating mode (VI)
The tool is equipped with two work mode selector switches. The drilling mode selector located near the switch and the impact type
selector located on the side of the body.
Set the drilling type selector so that its wing indicates one of the following symbols: drill – drilling without impact; drill and hammer
– drilling with impact.
Set the impact selector so that the indicator on the tool housing indicates one of the symbols on the switch: drill and hammer –
impact drilling; hammer – chiselling; chisel and arrow – chiselling position. Changing the position of the switch is done by pressing
and holding the button lock, and then turning the switch.
During hammer drilling, in addition to the rotational movement, the drill bit simultaneously makes a reciprocating movement back
and forth so that its tip strikes the material being drilled. Such drilling requires bits with a blade made of sintered carbide and allows
making holes in concrete, masonry and hard ceramic materials (hard bricks, stones, marble).
For chiselling the rotational movement is stopped, but the reciprocating movement is maintained. Chiselling requires the use of a
chisel or punch with a shape appropriate to the surface being worked and material type.
The position of the chisel must be set by rotating it manually. After setting the position, move the impact mode switch to the
chiselling position.

15
ORIGINAL INSTRUCTIONS
EN
Drilling without impact should be used for wood, metals and some ceramics. For drilling with drill bits without SDS PLUS attach-
ment, use a self-centering drill chuck (sold separately) with an SDS PLUS spindle. It is recommended to use a key drill chuck.
Caution! If the drilling mode switch is set to the no-impact drilling, the position of the impact selector is irrelevant.
Rotational speed control (VII)
The hammer drill is equipped with a smooth adjustment of the rotation, which is done by turning the knob. The bigger the number
visible on the knob, the higher the rotational speed. A change in rotational speed entails a change in the frequency of the impact
and the energy of a single impact. Smooth adjustment is possible within the range specified in the technical data table.
A higher rotational speed should be set for drilling in metals and when drilling with small diameter drill bits. A lower rotational speed
is intended for drilling in ceramic materials and with larger diameter drills.
Preparing to work
Set the tool to the correct operating mode: drilling or hammer drilling or chiselling.
Select the right tool and install it in the chuck.
Wear hearing protectors, eye protection, work gloves.
Insert the plug of the power cord into mains socket.
Stand in a well-balanced position, grab the rotary hammer with both hands and start it by pressing the electrical switch (VIII) with
your finger.
Keep the tool working for a few minutes, until the lubricant has reached all components of the drive mechanism.
Switch the rotary hammer offby releasing the switch.
Caution! When hearing any suspicious grinding or cracking sounds, immediately disconnect the rotary hammer from the mains
and have it check by an authorised service centre.
USING THE TOOL
Caution! Use hearing protectors during use of the hammer drill!
Drilling in wood
Before making a hole, it is recommended to fix the workpiece with G clamps or in a vice, and then use a punch or a nail to mark
the drilling point. Install a correct drill bit in the chuck, set the speed, connect the drill to the mains and start drilling. When making
through holes, it is recommended to place a wooden pad under the material, so that the edge of the hole at the outlet will not be
torn. In the case of drilling holes with large diameters, it is recommended to drill a smaller guide hole beforehand.
Drilling in metals
Always fasten the workpiece securely. For a thin sheet, it is recommended to place a piece of wood under it to avoid unwanted
bends, etc. Then mark the locations of holes with a punch and start drilling. Use drill bits intended for steel. It is recommended
to use sintered carbide drill bits when drilling in white cast iron. When drilling larger holes, it is recommended to make a smaller
guide hole beforehand. When drilling in steel, use general purpose lubricating oil to cool the drill bit. For aluminium, use turpentine
or paraffin as a coolant. Do not use cooling agents when drilling in brass, copper or cast iron. For cooling, remove the drill bit from
the material frequently to allow it to cool down.
Drilling in ceramics
Drilling in hard, compact materials: concrete, hard brick, stone, marble, etc.
With the hammer drill disconnected from the mains, install the drill bit in the chuck.
Install the drill depth stop if required.
Select impact drilling with the operating mode switch or, if available, non-impact drilling.
Insert the plug into the mains socket, switch on the hammer drill with a switch and start work.
Take regular breaks during work. Never allow the hammer drill and tool to overheat.
Hammer drilling is recommended only for compact ceramic materials such as concrete, hard brick, stone, etc. When drilling holes
with large diameters, it is recommended to make a pilot hole with a smaller diameter and then use a drill bit with the required size.
Drill bits designed for impact drilling should be used.
It is not recommended to use impact drilling for loose ceramic materials such as glazed tiles, soft brick, plaster, etc. This may
crack the material.
The hammer drill is equipped with a clutch to prevent overloading of the electric motor in the event that the installed tool gets stuck
during work. For example, if a rebar is hit. In this case, the drill will stop rotating even though the electric motor will continue to run.
Exerting too much pressure during operation may also activate the clutch.
If this happens, withdraw the tool inserted from the hole, check whether the hammer drill is working properly, and then resume
work applying only the pressure necessary for proper operation. If a rebar or other hidden metal objects are found, they should be
drilled through without the impact mode with a bit designed for drilling in metal of the same diameter as the impact drill, and then
drilling in ceramic material should continue.

16
EN
ORIGINAL INSTRUCTIONS
Drilling in glazed tiling, soft brick, plaster, etc.
Drill as in the case of hard materials but without impact. Remove the drill bit from the drilled hole from time to time to remove dust
and waste. During drilling, press the tool firmly with a constant force.
Chiselling
When disconnected from the power supply, attach the required tool in the chuck: chisel or punch.
Set the operating mode switch to the chiselling position. Insert the plug into the mains socket, turn on the hammer drill with the
switch, wait until it reaches full speed and start working. During chiselling, do not drive the tool too deep into the workpiece. The
material should be worked on in thin layers without exerting too much pressure on the hammer drill.
Using attachments
The tool is not intended to be used for driving work attachments.
Drill chuck cover
If the drill is equipped with a rubber drill chuck cover, it is recommended to use it when drilling with the drill pointing upwards, for
example, drilling in a ceiling. After installing the drill in the chuck, put the cover on it. Dust and waste generated during drilling will
accumulate in the guard, which will protect the drill chuck. After finishing work, remove the cover from the drill, clean dust and
waste, then rinse with a jet of lukewarm water.
Indicator light
The tool is equipped with an indicator light. The indicator light is green after pressing the on/offswitch. This means that the tool
is powered. If the light is red, the electric motor brushes must be changed. This must be done by an authorised manufacturer
service centre.
Additional notes
When working, do not exert too much pressure on the workpiece and do not make sudden movements in order not to damage
the bit and the drill. Take regular breaks during work. Do not overload the tool, the temperature of the external surface must never
exceed 60OC. After finishing work, switch offthe drill, unplug the tool cord from mains and perform maintenance and inspection.
Lubrication
Always clean and lubricate the SDS Plus chuck with a thin layer of grease before using drill bits or chisels. It is recommended
to use grease intended for SDS Plus chucks. One of the causes of the impact mechanism malfunctions may be insufficient lu-
brication of the gear and the crank assembly of the impact piston. It is recommended to use grease intended for gear and crank
transmissions. It is recommended to have the grease refilled by an authorised service centre.
MAINTENANCE AND OVERHAUL
ATTENTION! Before any adjustment, technical service or maintenance operations unplug the tool. Once the operations have been
finished, the technical conditions of the tool must be assessed by means of external evaluation and inspection of the following
elements: body and handle, conductor with a plug and deflection, functioning of the electric switch, patency of ventilation slots,
sparking of brushes, noise level of functioning of bearings and gears, start-up and smoothness of operation. During the guarantee
period, the user cannot dismantle the electric tools or change any sub-assemblies or elements, since it will cancel any guarantee
rights. All irregularities detected at overhaul or during functioning of the tools are a signal to have the tool repaired at a service
shop. Once the functioning has been concluded, the casing, ventilation slots, switches, additional handle and protections must be
cleansed with a stream of air (at a pressure not exceeding 0.3 MPa), with a brush or a cloth without any chemical substances or
cleaning liquids. Tools and handles must be cleansed with a clean cloth.

17
ORIGINALANLEITUNG
DE
GERÄTEBESCHREIBUNG
Der manuell bediente Bohrhammer ist ein normales Werkzeug mit der Schutzklasse II, das zum Herstellen von Löchern und zur
Stemmarbeiten im Beton, Natur- und Kunststein, Marmor usw. mit Arbeitswerkzeugen mit SDS-Plus-Schaft bestimmt ist. Der
Bohrhammer hat eine stufenlose Einstellung der Spindeldrehzahl und ermöglicht durch die Abschaltung der Hammerfunktion das
Bohren in Materialien wie Holz, Metall oder Kunststoff. Der korrekte, zuverlässige und sichere Betrieb des Elektrogeräts hängt
von der richtigen Bedienung ab:
Lesen Sie daher vor dem Betrieb die gesamte Bedienungsanleitung durch und bewahren Sie sie auf.
Der Lieferant haftet nicht für Schäden, die sich aus der Nichtbeachtung der Sicherheitsvorschriften und der Bestimmungen dieser
Bedienungsanleitung ergeben.
ZUBEHÖR
In der Werksverpackung sollen eingelegt werden:
- Bohrhammer
- Zusatzgriff
- Bohrtiefenanschlag
TECHNISCHE DATEN
Parameter Maßeinheit Wert
Artikel-Nr. YT-82118
Nennspannung [V~] 220 – 240
Nennfrequenz [Hz] 50
Nennleistung [W] 1100
Nenndrehzahl [min-1] 0 – 900
Max. Lochdurchmesser – Beton (mit SDS-PLUS-Futter) [mm] 28
Max. Lochdurchmesser – Holz (Zahnkranzbohrfutter) [mm] 35
Max. Lochdurchmesser – Stahl (Zahnkranzbohrfutter) [mm] 13
Schlagenergie [J] 4,5
Schlagfrequenz [min-1] 4300
Gewicht [kg] 4,8
Lärmpegel
- Schalldruck LpA ± K [dB(A)] 95,0 ±3,0
- Leistung LwA ± K [dB(A)] 109,0 ±3,0
Schwingungspegel ah,CHeq ± K (Haupt-/Zusatzgriff) [m/s2] 15,91 ± 1,5 / 12,97 ± 1,5
Schutzklasse II
Schutzart IP20
Der erklärte Gesamtschwingungswert und der erklärte Lärmemissionswert wurden nach dem Standardprüfverfahren gemessen
und können zum Vergleich eines Geräts mit dem anderen verwendet werden. Der erklärte Gesamtschwingungswert und der er-
klärte Lärmemissionswert können bei der ersten Expositionsbewertung verwendet werden.
Achtung! Die Schwingungs- und Lärmemission während des Gerätebetriebs kann je nach Einsatz des Geräts vom angegebenen
Wert abweichen.
Achtung! Zum Schutz des Bedieners sind Sicherheitsmaßnahmen festzulegen, die auf einer Bewertung der Exposition unter tat-
sächlichen Einsatzbedingungen (einschließlich aller Teile des Arbeitszyklus, wie z. B. der Zeit, in der das Gerät ausgeschaltet ist
oder im Leerlauf anläuft, sowie der Aktivierungszeit) beruhen.
ALLGEMEINE SICHERHEITSHINWEISE FÜR ELEKTROWERKZEUGE
Warnung! Alle mit diesem Elektrowerkzeug / dieser Maschine mitgelieferten Sicherheitshinweise, Abbildungen und Spezi-
fikationen gründlich lesen. Bei Nichtbeachten ist elektrischer Schlag, Brand oder ernsthafte Verletzungen nicht auszuschließen.
Alle Warnungen sowie Anleitungen für mögliche Bezugnahme aufbewahren.
Der in den Warnungen verwendete Begriff„Elektrowerkzeug / Maschine“ betrifft alle Werkzeuge / Maschinen mit dem Netz- oder
kabellosen Elektroantrieb.

18 ORIGINALANLEITUNG
DE
Sicherheit am Arbeitsplatz
Arbeitsplatz gut beleuchtet und sauber halten. Bei Unordnung oder schwacher Beleuchtung kann es zu Unfällen kommen.
Elektrowerkzeuge / Maschinen nicht in einer Umgebung mit erhöhter Explosionsgefahr, mit brennbaren Flüssigkeiten,
Gasen oder Dämpfen gebrauchen. Bei Einsatz von Elektrowerkzeugen / Maschinen kann der Funkenflug zr Staub- oder Dampf-
entzündung führen.
Kinder und Unbefugte fern vom Arbeitsplatz halten. Bei reduzierter Konzentration kann die Kontrolle über das Werkzeug
verloren gehen.
Elektrische Sicherheit
Der Stecker des Stromkabels muss für die Steckdose geeignet sein. Stecker niemals modifizieren. Keine Steckeradapter
mit geerdeten Elektrowerkzeugen / Maschinen verwenden. Originalstecker, die zur Steckdose passen, minimieren die Gefahr
eines möglichen elektrischen Schlages.
Berührung geerdeter Flächen, wie Rohre, Heizkörper, Kühlgeräte, vermeiden. Die Erdung auf den Körper erhöht die Gefahr
eines möglichen elektrischen Schlages.
Elektrowerkzeuge / Maschinen gegen direkte Regen- oder Schneeeinwirkung schützen. Dringt Wasser oder Feuchte ins
Elektrowerkzeug / die Maschine, erhöht sich die Gefahr eines möglichen elektrischen Schlages.
Stromkabel nicht überlasten. Gerät am Stromkabel werde tragen, noch ziehen, Gerät durch Ziehen des Steckers und
nicht des Stromkabels elektrisch abschalten. Kontakt des Stromkabels mit Wärme, Ölen, scharfen Kanten und beweg-
lichen Teilen vermeiden. Ein beschädigtes oder verwirrtes Stromkabel erhöht die Gefahr eines elektrischen Schlages.
Bei der Arbeit im Freien nur Verlängerungskabel für den Einsatz im Freien verwenden. Mit derartigen Verlängerungskabeln
wird die Gefahr eines elektrischen Schlages minimiert.
Ist der Einsatz der Elektrowerkzeugen / Maschinen in einer feuchten Umgebung unvermeidbar, sind Stromschutzvor-
richtungen zum Schutz gegen die Versorgungsspannung einzusetzen. Dadurch wird die Gefahr eines elektrischen Schlages
minimiert.
Persönliche Sicherheit
Immer achtsam bleiben, alle Tätigkeiten vorsichtig durchführen und Zurechnungsfähigkeit bei der Arbeit mit Elektrowerk-
zeugen / Maschinen behalten. Elektrowerkzeuge / Maschinen bei Müdigkeit oder unter Einfluss von Alkohol, Drogen oder
Arzneimitteln nicht bedienen. Nur eine kurze Unachtsamkeit kann bei der Arbeit ernsthafte Körperverletzungen herbeiführen.
Persönliche Schutzausrüstungen verwenden. Schutzbrille immer tragen. Persönliche Schutzausrüstungen, wie Staubschutz-
masken, rutschfreies Schutzschuhwerk, Schutzhelme und Gehörschutz, reduzieren die Gefahr ernsthafter Körperverletzungen.
Unerwartete Inbetriebnahme des Gerätes vermeiden. Vor dem Netz- / Akkuanschluss oder Vertragen des Elektrowerk-
zeuges / der Maschine sicherstellen, dass der Steuerschalter auf „Aus“ steht. Wird das Elektrowerkzeug / die Maschine
mit dem Finger auf dem Steuerschalter vertragen oder mit dem Steuerschalter auf „Ein“ angeschlossen, kann es zu ernsthaften
Körperverletzungen führen.
Alle Schlüssel und andere Werkzeuge, die zur Einstellung des Elektrowerkzeuges / der Maschine verwendet wurden,
vor Einschalten des Gerätes entfernen. Ein an den rotierenden Komponenten des Elektrowerkzeuges / der Maschine zurück-
gelassener Schlüssel kann zu ernsthaften Verletzungen führen.
Nicht zu weit greifen oder sich beugen. Für eine korrekte Körperstellung während der Arbeit sorgen. Dadurch kann das
Elektrowerkzeug / die Maschine bei unerwarteten Situationen bei der Arbeit einfacher beherrscht werden.
Entsprechende Schutzkleidung tragen. Lose Kleidung oder Schmuck nicht tragen. Lose Haare und die Kleidung fern
von beweglichen Komponenten des Elektrowerkzeuges / der Maschine halten. Lose Kleidungsstücke, Schmuck oder lange
Haare können durch diese Komponenten erfasst werden.
Sind die Geräte für den Anschluss einer Staubabsaugung ausgelegt, sicherstellen, dass sie korrekt angeschlossen und
betrieben wird. Mithilfe einer Staubabsaugung wird die Gefahr ernsthafter Körperverletzungen minimiert.
Nicht zulassen, dass die bei der häufigen Bedienung von Elektrowerkzeugen / Maschinen gewonnenen Erfahrungen
zur Unachtsamkeit und Ignorierung der Sicherheitsgrundsätze führen. Das unvorsitichige Vorgehen kann blitzschnell zu
Körperverletzungen führen.
Elektrowerkzeuge / Maschinen gebrauchen und pflegen
Elektrowerkzeug / Maschine nicht überlasten und nur für den geplanten Einsatz gebrauchen. Ein entsprechendes Elektro-
werkzeug / eine Maschine kann eine leistungsstärkere und sicherere Arbeit gewährleisten, wird das Gerät für die beabsichtigte
Beanspruchung eingesetzt.
Elektrowerkzeug / Maschine nicht überlasten, wenn die Ein- und Ausschaltung mit dem Steuerschalter nicht möglich ist.
Kann keine Kontrolle über das Elektrowerkzeug / die Maschine mit dem Steuerschalter gewährleistet werden, stellt es eine Gefahr
dar und das Gerät ist dann reparieren lassen.
Stecker des Stromkabels ziehen und/oder (abbaubaren) Akku demontieren, bevor eine Einstellung, der Zubehörwechsel
oder die Lagerung des Elektrowerkzeuges / der Maschine durchgeführt wird. Durch diese Sicherheitsmaßnahmen kann eine
unerwartete Inbetriebnahme des Elektrowerkzeuges / der Maschine verhindert werden.
Elektrowerkzeug / Maschine fern von Kindern lagern, Elektrowerkzeug / Maschine durch Personen, die in der Geräte-
bedienung oder diesen Anleitungen nicht unterwiesen sind, nicht bedienen lassen. Von nicht unterwiesenen Personen
bediente Elektrowerkzeuge / Maschinen stellen eine Gefahr dar.

19
ORIGINALANLEITUNG
DE
Elektrowerkzeuge / Maschinen und Zubehör ordnungsgemäß warten. Elektrowerkzeuge / Maschinen auf nicht zusammen-
passende oder verklemmte Werkzeuge, beschädigte Komponenten oder sonstige Fälle kontrollieren, die Funktion des
Elektrowerkzeuges / der Maschine beeinträchtigen können. Alle Schäden vor Einsatz des Elektrowerkzeuges / der Maschi-
ne beheben lassen. Viele Unfälle werden durch eine mangelhafte Wartung des Elektrowerkzeuges / der Maschine herbeigeführt.
Schneidwerkzeuge immer sauber und geschärft halten. Ordnungsgemäß gewartete scharfkantige Schneidwerkzeuge ver-
klemmen sich selten und können bei der Arbeit besser kontrolliert werden.
Nur Elektrowerkzeuge / Maschinen, Zubehör oder sonstige Anbauwerkzeuge usw. nach dieser Bedienungsanleitung ein-
setzen, dabei die Art und die Bedingungen der jeweiligen Arbeit berücksichtigen. Werden Werkzeuge nicht bestimmungs-
gemäß eingesetzt, kann es zu gefährlichen Situationen führen.
Handgriffe und Haleflächen immer trocken, sauber, öl- und schmierstofffrei halten. Durch verschmutzte Handgriffe und
Halteflächen wird eine sichere Bedienung und Kontrolle des Elektrowerkzeuges / der Maschine bei gefährlichen Situationen
unmöglich.
Reparaturen
Elektrowerkzeug / Maschine nur in entsprechenden Vertragswerkstätten unter Einsatz von Originalersatzteilen reparie-
ren lassen. Dadurch wird eine entsprechende Arbeitssicherheit des Gerätes gewährleistet.
ZUSÄTZLICHE SICHERHEITSHINWEISE
Gehörschutz tragen. Lärmbelastung kann zu Hörverlust führen.
Verwenden Sie das Werkzeug mit den zusätzlichen Griffen, die mit dem Werkzeug mitgeliefert werden. Der Verlust der
Kontrolle kann zu Verletzungen des Bedieners führen.
Wenn das eingesetzte Werkzeug bei der Arbeit eine versteckte, unter Spannung stehende Leitung oder die Netzleitung
berühren kann, ist das Elektrowerkzeug an isolierten Haltegriffen zu halten. Bei der Berührung einer unter Spannung ste-
henden Leitung können die Metallelemente des Werkzeugs auch unter Spannung stehen, was zum elektrischen Schlag des
Bedieners führen kann.
Warnhinweise beim Bohren mit langen Bohrern
Bohren Sie immer bei niedriger Drehzahl und so, dass die Bohrerspitze mit dem Werkstück in Kontakt ist. Bei höheren
Drehzahlen wird sich der Bohrer wahrscheinlich verbiegen, wenn er sich frei ohne Kontakt mit dem Werkstück drehen kann, was
zu Verletzungen führt.
Führen Sie den Druck nur in einer Linie mit dem Bohrer aus und üben Sie keinen übermäßigen Druck aus. Der Bohrer
kann sich verbiegen, was zum Bruch und Kontrollverlust, und im Endeffekt zu Verletzungen führen kann.
MONTAGE VON AUSRÜSTUNGSELEMENTEN
ACHTUNG! Das Zubehör darf nur bei ausgeschalteter Versorgungsspannung montiert werden. Ziehen Sie den Stecker des Netz-
kabels des Geräts aus der Steckdose!
Montage des Zusatzhandgriffs (III)
Setzen Sie die Hilfsgriffklemme auf das Werkzeuggehäuse und befestigen Sie sie, nachdem Sie den Griffin die ergonomischste
Stellung für den jeweiligen Einsatz gebracht haben, durch Anziehen des Griffs.
Montage des Bohrtiefenanschlages (IV)
Lösen Sie die Befestigungen des Zusatzhandgriffs. Schieben Sie den geraden Teil des Bohrtiefenanschlags in das Loch im Hilfs-
griffund ziehen Sie den Hilfsgriffnach dem Einstellen der richtigen Stellung wieder fest. Der gebogene Teil des Stabes sollte so
nah wie möglich am Bohrer stehen. Wenn der Bohrer während des Bohrens in das Loch eindringt, liegt die Anschlagstange an der
gebohrten Fläche an, was das Erreichen der vorgesehenen Bohrtiefe bedeutet.
Aus konstruktiven Gründen ist es nicht möglich, dass der gesamte Längenbereich des Anschlags in allen Stellungen des Zusatz-
handgriffs zur Verfügung steht.
VORBEREITUNGEN VOR DEM EINSATZ
Vor Beginn der Arbeit ist sicherzustellen, dass das Gehäuse und das Anschlusskabel mit Stecker nicht beschädigt sind. Wird ein
Schaden festgestellt, sind keine weiteren Arbeiten erlaubt!
Achtung! Alle Tätigkeiten im Zusammenhang mit dem Austausch von Arbeitswerkzeugen (Bohrer und Meißel mit SDS MAX-
Schaft), der Montage von Abdeckungen und Führungen, der Einstellung usw. sollten bei ausgeschalteter Versorgungsspannung
des Werkzeuges durchgeführt werden. Deswegen vor diesen Tätigkeiten: Ziehen Sie den Stecker des Netzkabels des Geräts
aus der Steckdose!

20 ORIGINALANLEITUNG
DE
Einsetzen von SDS Plus-Werkzeugen in das Werkzeugfutter
Reinigen Sie das gewählte Werkzeug von Schmutz und Rost und schmieren Sie den SDS-Plus-Schaft mit einer dünnen Fett-
schicht.
Ziehen Sie das Futter an sich zu und halten Sie es in dieser Stellung (V).
Führen Sie das gereinigte Werkzeug in die Öffnung ein. Falls erforderlich, drehen Sie das Werkzeug so, dass es ohne Widerstand
in das Bohrfutter eindringt.
Lassen Sie das Bohrfutter los, das Werkzeug sollte automatisch im Bohrfutter verriegelt werden.
Überprüfen Sie, ob das Werkzeug sicher sitzt. Versuchen Sie dazu einfach, das Werkzeug aus dem SDS-Plus-Bohrfutter zu
ziehen. Wenn der Bohrer oder Meißel aus dem Bohrfutter gezogen wird, montieren Sie ihn wieder.
Einstellen der Betriebsart (VI)
Das Werkzeug ist mit zwei Betriebsartschaltern ausgestattet. Bohrartschalter, in der Nähe des Ein-Aus-Schalters, und Schlagart-
schalter, seitlich am Gehäuse.
Stellen Sie den Bohrartschalter so ein, dass sein Flügel eines der Symbole zeigt: Bohrer – Bohren ohne Schlag; Bohrer und
Hammer – Bohren mit Schlag.
Stellen Sie den Schlagartschalter so um, dass die Anzeige am Werkzeuggehäuse eines der Symbole auf dem Schalter anzeigt:
Bohrer und Hammer – Schlagbohren; Hammer – Stemmarbeiten; Meißel mit Pfeil – Meißelposition. Bei der Änderung Schalter-
stellung wird die Schaltersperre eingedrückt und gehalten und dann der Schalter gedreht.
Das Schlagbohren bedeutet, daß der Bohrer neben der Drehbewegung gleichzeitig eine Hin- und Herbewegung ausführt, da-
durch schlägt die Bohrerspitze im gebohrenen Material. Bei solchem Bohren sind Bohrer mit der Spitze aus Hartmetallen notwen-
dig und diese Betriebsart macht das Ausführen von Löchern im Beton, Mauerwerk und in harten Keramikmaterialien (Hartziegel,
Steine, Marmor) möglich.
Bei den Stemmarbeiten wird die Drehbewegung abgeschaltet, aber der Hin- und Herbewegung bleibt. Bei den Stemmarbeiten
muss ein Stemmeisen, ein Meißel oder ein Lochhammer mit einer Form, die an die bearbeitete Oberfläche und die Art des Mate-
rials angepasst ist, eingesetzt werden.
Die Lage des Stemmeisens muss durch manuelles Drehen festgelegt werden. Nach der Festlegung der Lage drehen Sie den
Schlagartschalter in die Stellung für die Stemmarbeiten.
Bohren ohne Schlag sollte eingestellt werden, wenn Löcher im Holz, in Metallen und einigen keramischen Materialien gemacht
werden. Für das Bohren mit Bohrern, die nicht mit SDS-PLUS-Schaft ausgestattet sind, verwenden Sie ein selbstzentrierendes
Bohrfutter (separat erhältlich) mit der SDS-PLUS-Spindel. Es wird der Einsatz des Zahnkranzbohrfutters empfohlen.
Achtung! Wenn der Bohrartschalter auf den Bohrmodus ohne Schlag eingestellt ist, het die Stellung des Stoßartschalters keine
Bedeutung.
Drehzahleinstellung (VII)
Der Bohrhammer ist mit einer stufenlosen Drehzahleinstellung ausgestattet, die durch Verstellen des Drehknopfes erfolgt. Je grö-
ßer die auf dem Drehknopf sichtbare Zahl ist, desto höher ist die Drehzahl. Eine Änderung der Drehzahl führt zu einer Änderung
der Schlagfrequenz und der Energie eines einzelnen Schlages. Die Einstellung in dem in der Tabelle mit den technischen Daten
angegebenen Bereich stufenlos.
Beim Bohren in Metallen und mit kleinen Bohrerdurchmessern sollte eine höhere Drehzahl eingestellt werden. Die niedrigere
Drehzahl ist für das Bohren in keramischen Werkstoffen und für die größeren Bohrerdurchmesser vorgesehen.
Vorbereitende Arbeiten
Stellen Sie das Werkzeug in entsprechende Betriebsart: Bohren oder Schlagbohren oder Stemmarbeiten.
Wählen Sie das richtige Arbeitswerkzeug und montieren Sie es im Bohrfutter.
Tragen Sie Gehörschutz, Augenschutz, Arbeitshandschuhe.
Stecken Sie den Stecker des Netzkabels in die Steckdose.
Nehmen Sie eine Position ein, die das Gleichgewicht garantiert, greifen Sie den Bohrhammer mit beiden Händen und starten Sie
ihn, indem Sie den Elektroschalter (VIII) mit Ihrem Finger betätigen.
Halten Sie das Werkzeug in diesem Zustand einige Minuten lang, bis der Schmierstoffalle Komponenten des Antriebsmechanis-
mus erreicht hat.
Schalten Sie den Bohrhammer aus indem Sie den Schalter freilassen.
Achtung! Bei verdächtigem Knirschen, Knacken usw. trennen Sie den Bohrhammer sofort von der Stromversorgung und lassen
Sie ihn von einer autorisierten Servicestelle warten.
BENUTZUNG DES GERÄTS
Achtung! bei der Arbeit mit dem Bohrhammer muss der Gehörschutz getragen werden!
Bohren im Holz
Vor dem Bohren ist es ratsam, das zu bohrende Material mit einer Tischlerzwinge oder in einem Schraubstock einzuspannen.
Table of contents
Languages:
Other YATO Rotary Hammer manuals