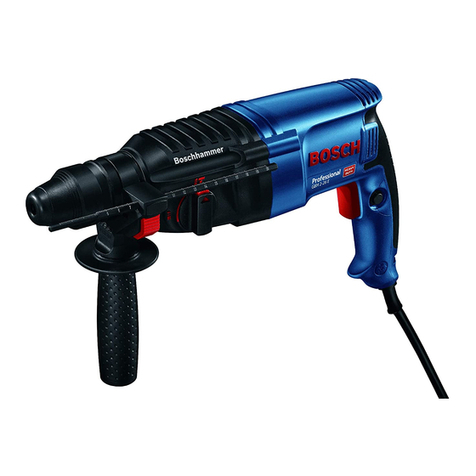
YATO YT-82770 User manual

PL
GB
D
RUS
UA
LT
LV
CZ
SK
H
RO
E
F
I
NL
GR
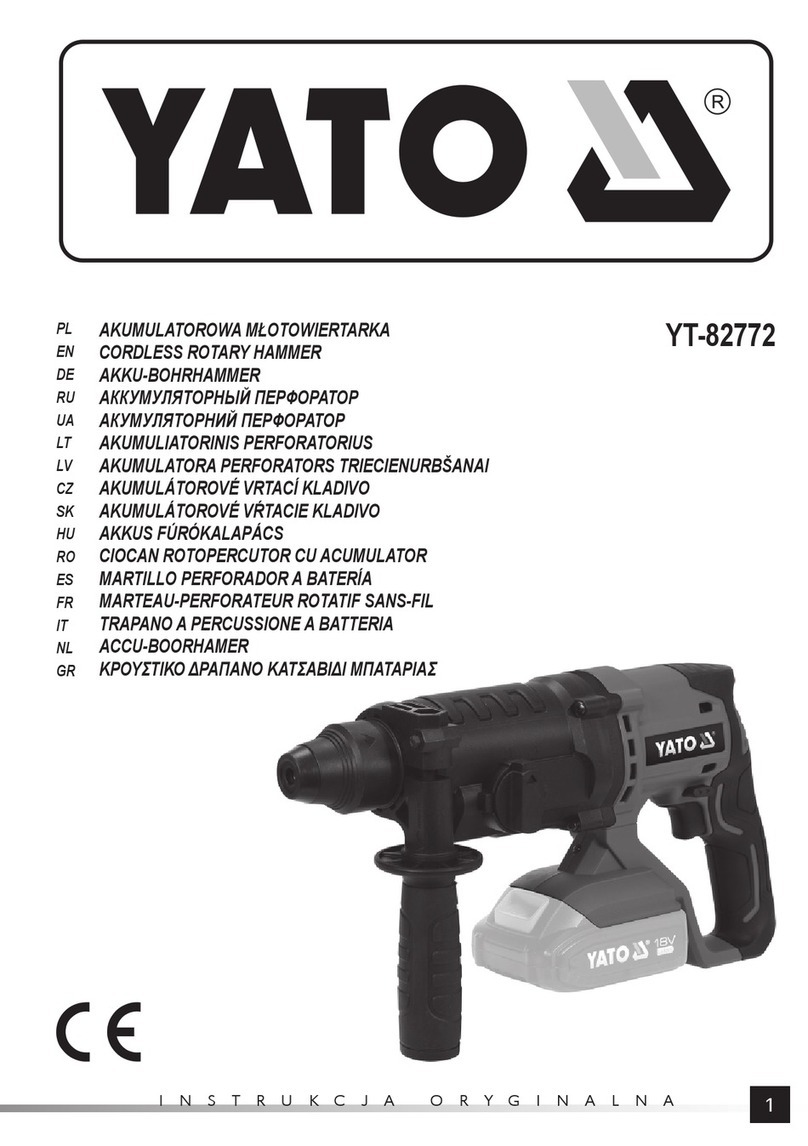
YT-82770
INSTRUKCJA ORYGINALNA 1
AKUMULATOROWA MŁOTOWIERTARKA
CORDLESS ROTARY HAMMER
AKKU-BOHRHAMMER
АККУМУЛЯТОРНЫЙ ПЕРФОРАТОР
АКУМУЛЯТОРНИЙ ПЕРФОРАТОР
AKUMULIATORINIS PERFORATORIUS
AKUMULATORA PERFORATORS TRIECIENURBŠANAI
AKUMULÁTOROVÉ VRTACÍ KLADIVO
AKUMULÁTOROVÉ VŔTACIE KLADIVO
AKKUS FÚRÓKALAPÁCS
CIOCAN ROTOPERCUTOR CU ACUMULATOR
MARTILLO PERFORADOR A BATERÍA
MARTEAU-PERFORATEUR ROTATIF SANS-FIL
TRAPANO A PERCUSSIONE A BATTERIA
ACCU-BOORHAMER
ΚΡΟΥΣΤΙΚΟ ΔΡΑΠΑΝΟ ΚΑΤΣΑΒΙΔΙ ΜΠΑΤΑΡΙΑΣ

INSTRUKCJA ORYGINALNA
2
PL GB D RUS UA LT LV CZ SK H RO E F I NL GR
TOYA S.A. ul. Sołtysowicka 13-15, 51-168 Wrocław, Polska
Rok produkcji:
Production year:
Produktionsjahr:
Год выпуска:
Рік випуску:
Pagaminimo metai:
Ražošanas gads:
Rok výroby:
Rok výroby:
2021 Gyártási év:
Anul producţiei utilajului:
Año de fabricación:
Année de fabrication:
Anno di produzione:
Bouwjaar:
Έτος παραγωγής:
III
IV
III
V VI
VII
5
1
2
3
46
7
8
9
10
11
11

INSTRUKCJA ORYGINALNA 3
PL GB D RUS UA LT LV CZ SK H RO E F I NL GR
PL GB
1. obudowa
2. rękojeść główna
3. rękojeść dodatkowa
4. uchwyt wiertarski SDS+
5. włącznik
6. przełącznik kierunku obrotów
7. przełącznik rodzaju pracy
8. akumulator
9. zatrzask akumulatora
10. ładowarka
11. wskaźnik naładowania akumulatora
1. housing
2. main grip handle
3. auxiliary grip handle
4. SDS+ drill chuck
5. switch
6. rotation direction switch
7 . operation mode switch
8. battery
9. battery latch
10. charger
11. battery charge indicator
D
1. Gehäuse
2. Pistolenhandgriff
3. Zusatzhandgriff
4. SDS+ Bohrfutter
5. Steuerschalter
6. Richtungsumschalter
7. Betriebsmodus-Umschalter
8. Akku
9. Verschluss Akku
10. Ladegerät
11. Ladeanzeige Akku
CZ SKLV
1. korpuss
2. galvenais rokturis
3. papildus rokturis
4. urbjmašīnas turētājs SDS+
5. ieslēdzējs
6. rotāciju virziena pārslēdzējs
7. darba režīma pārslēdzējs
8. akumulators
9. akumulatora sprosts
10. lādētājs
11. akumulatora uzlādēšanas rādītājs
1. kryt
2. hlavní rukojeť
3. pomocná rukojeť
4. rychloupínací sklíčidlo SDS plus
5. spínač
6. přepínačsměru chodu
7. přepínačprovozního režimu
8. akumulátor
9. západka akumulátoru
10. nabíječka
11. ukazatel stavu nabití akumulátoru
1. plášť
2. hlavná rukoväť
3. prídavná rukovať
4. skľučovadlo SDS+
5. vypínač
6. prepínačsmeru otáčok
7. prepínačdruhu práce
8. akumulátor
9. západ akumulátora
10. nabíjačka
11. ukazovateľnabíjania akumulátora
FINL
1. boîtier
2. poignée principale
3. poignée auxiliaire
4. mandrin SDS +
5. interrupteur
6. inverseur
7. mode de commutation
8. batterie
9. loquet de la batterie
10. chargeur
11. indicateur de charge de la batterie
1. corpo
2. impugnatura principale
3. impugnatura ausiliaria
4. SDS+ mandrino
5. interruttore
6. inverter
7. switching
8. batteria
9. fermo della batteria
10. caricabatterie
11. indicatore di carica della batteria
1. behuizing
2. hoofdhandgreep
3. aanvullende handgreep
4. SDS+-boorkop
5. ontstekingschakelaar
6. omkeerschakelaar
7. modusschakelaar
8. accu
9. acuuvergrendeling
10. lader
11. acculadingindicator
HRO E
1. ház
2. főfogantyú
3. kiegészítőfogantyú
4. SDS+ fúrótokmány
5. kapcsoló
6. forgásirány váltó
7. munkamód átkapcsoló
8. akkumulátor
9. akkumulátor rögzítőcsatja
10. akkumulátortöltő
11. az akkumulátor töltöttségének kijelzése
1. carcasă
2. mâner de prindere principal
3. mâner de prindere auxiliar
4. mandrinăSDS+
5. comutator
6. comutator pentru sensul de rotație
7. comutator pentru modul de lucru
8. acumulator
9. închizătoare acumulator
10. încărcător
11. indicator de încărcare a acumulatorului
1. carcasa
2. empuñadura principal
3. empuñadura adicional
4. mandril SDS+
5. interruptor
6. conmutador de sentido de rotaciones
7. conmutador de tipo de trabajo
8. batería
9. pestillo de la batería
10. cargador
11. indicador de carga de la batería
UA LTRUS
1. корпус
2. основная рукоятка
3. дополнительная рукоятка
4. патрон SDS+
5. включатель
6. переключатель направления вращения
7. переключатель режима работы
8. аккумулятор
9. защелка аккумулятора
10. зарядное устройство
11. индикатор зарядки аккумулятора
1. корпус
2. основна рукоятка
3. додаткова рукоятка
4. патрон SDS+
5. вмикач
6. перемикач напрямку обертів
7. перемикач режиму роботи
8. акумулятор
9. засувка акумулятора
10. зарядний пристрій
11. індикатор зарядження акумулятора
1. korpusas
2. pagrindinėrankena
3. papildomoji rankena
4. griebtuvas SDS+
5. jungiklis
6. apsisukimųkrypties perjungiklis
7. darbo režimo perjungiklis
8. akumuliatorius
9. akumuliatoriaus spragtukas
10. įkroviklis
11. akumuliatoriaus įkrovimo indikatorius
GR
1. περίβλημα
2. κύρια λαβή
3. πρόσθετη λαβή
4. στόμιο δράπανου SDS+
5. διακόπτης ενεργοποίησης
6. διακόπτης εναλλαγής της κατευθύνσεως περιστροφής
7. διακόπτης τρόπου εργασίας
8. συσσωρευτής
9. κλείστρο συσσωρευτή
10. φορτιστής
11. δείκτης επιπέδου φορτίσεως του συσσωρευτή

INSTRUKCJA ORYGINALNA
4
PL GB D RUS UA LT LV CZ SK H RO E F I NL GR
Elektronicznie regulowana prędkość obrotowa
Electronic adjustment of the rotation
Elektronisch geregelte Umdrehungsgeschwindigkeit
Электронная регулировка оборотов
Електронне регулювання обертів
Elektroniniu būdu reguliuojamas apsisukimųgreitis
Elektroniski regulēts griezes ātrums
Elektronická regulace otáček
Elektronická regulácia otáčok
Elektromos fordulatszám-szabályozás
Ajustarea electronicăa vitezei de rotire
Velocidad de la rotación ajustada electrónicamente
Vitesse de rotation à commande électronique
Velocità di rotazione regolata elettronicamente
Elektronisch instelbare omwentelingssnelheid
Ηλεκτρονικά ρυθμιζόμενη ταχύτητα περιστροφών
0 - 1850 min-1
Znamionowa prędkość obrotowa
Nominal rotation
Nennumdrehungsgeschwindigkeit
Номинальные обороты
Номінальні оберти
Nominalus apsisukimųgreitis
Nomināls griezes ātrums
Jmenovité otáčky
Menovité otáčky
Névleges fordulatszám
Viteza de rotire nominală
Velocidad de la rotación nominal
Vitesse de rotation nominale
Velocità di rotazione nominale
Nominale omwentelingssnelheid
Ονομαστική ταχύτητα περιστροφής
Przełącznik kierunku obrotów
Rotation selector
Umschalter für die Drehrichtung
Реверсивный переключатель
Реверсивний перемикач
Apsisukimųkrypties perjungiklis
Apgriezienu virziena pārslēdzējs
Přepínačsměru otáčení
Prepínačsmeru otáčok
Forgásirány váltó
Comutatorul direcţiei de rotire
Interruptor de la dirección de la rotación
Commutateur de directions des tours
Selettore della direzione di rotazione
Omkeerschakelaar
Διακόπτης κατεύθυνσης στροφών
18 V
Napięcie znamionowe
Nominal voltage
Nennspannung
Номинальное напряжение
Номінальна напруга
Nominali įtampa
Nomināls spriegums
Jmenovité napětí
Menovité napätie
Névleges feszültség
Tensiunea nominală
Tensión nominal
Tension nominale
Tensione nominale
Nominale spanning
Ονομαστική τάση
Li-Ion
Rodzaj akumulatora
Battery type
Art des Akkumulators
Вид аккумулятора
Вид акумулятора
Akumuliatoriaus tipas
Akumulatora veids
Typ akumulátoru
Druh akumulátora
Az akkumulátor típusa
Genul acumulatorului
Tipo de acumulador
Type de batterie
Tipo della batteria
Baterij type
Είδος συσσωρευτή
SDS+
System mocowania narzędzia roboczego
Working tool attaching system
Befestigungssystem für das Arbeitswerkzeug
Система крепления рабочего инструмента
Система кріплення робочого інструмента
Darbinio įrankio įtvirtinimo sistema
Darbarīka stiprināšanas sistēma
Systém upínání pracovního nástroje
Systém upínania pracovného nástroja
A munkaszerszám rögzítési rendszere
Sistem de fixarea sculei de lucru
Sistema de fijar la herramienta de trabajo
Le Système de fixation de l’outil de travail
Sistema di fissaggio utensile di lavoro
Bevestigingssysteem voor gereedschap
Σύστημα στερέωσης εργαλείου
Częstotliwość udaru
Impact frequency
Stossfrequenz
Частота удара
Частота удару
Smūgiųdažnis
Sitiena frekvence
Frekvence příklepu
Frekvencia príklepu
Ütési frekvencia
Frecvenţa bătăilor de percuţie
Frecuencia del impacto
Fréquence d’impact
Frequenza colpi
Klopfrequentie
Συχνότητα κρούσης
0- 4800 min
-1

INSTRUKCJA ORYGINALNA 5
PL GB D RUS UA LT LV CZ SK H RO E F I NL GR
Przeczytaćinstrukcję
Read the operating instruction
Bedienungsanleitung durchgelesen
Прочитать инструкцию
Прочитать iнструкцiю
Perskaityti instrukciją
Jālasa instrukciju
Přečtet návod k použití
Prečítaťnávod k obsluhe
Olvasni utasítást
Citeşti instrucţunile
Lea la instrucción
Lisez la notice d’utilisation
Leggere il manuale d’uso
Lees de instructies
Διαβάστε τις οδηγίες χρήσης
Używaj gogle ochronne
Wear protective goggles
Schutzbrille tragen
Пользоваться защитными очками
Користуйтесь захисними окулярами
Vartok apsauginius akinius
Jālieto drošības brilles
Používej ochranné brýle
Používaj ochranné okuliare
Használjon védőszemüveget!
Intrebuinţeazăochelari de protejare
Use protectores del oído
Portez des lunettes de protection
Utilizzare gli occhiali di protezione
Draag een veiligheidsbril
Χρησιμοποιήστε τα γυαλιά προστασίας
Używaćochrony słuchu
Wear hearing protectors
Gehörschutz tragen
Пользоваться средствами защиты слуха
Користуйтесь засобами захисту слуху
Vartoti ausines klausai apsaugoti
Jālieto dzirdes drošības līdzekļu
Používej chrániče sluchu
Používaj chrániče sluchu
Használjon fülvédőt!
Intrebuinţeazăantifoane
Use protectores de la vista
Portez une protection auditive
Utilizzare i dispositivi di protezione dell’udito
Draag gehoorbescherming
Χρησιμοποιήστε τις ωτασπίδες
Stosowaćrękawice ochronne
Use protective gloves
Schutzhandschuhe verwenden
Необходимо пользоваться защитными
перчатками
Слід користуватися захисними рукавицями
Vartoti apsaugines pirštines
Lietot aizsardzības cimdus
Používejte ochranné rukavice
Používajte ochranné rukavice
Használjon védőkesztyűt
Utilizarea mănuşilor de protrcţie
Use guantes de protección
Portez des gants de protection
Utilizzare i guanti di protezione
Gebruik beschermende handschoenen
Φορέστε τα γάντια προστασίας
Ten symbol informuje o zakazie umieszczania zużytego sprzętu elektrycznego i elektronicznego (w tym baterii i akumulatorów) łącznie z innymi odpadami. Zużyty sprzęt
powinien byćzbierany selektywnie i przekazany do punktu zbierania w celu zapewnienia jego recyklingu i odzysku, aby ograniczaćilość odpadów oraz zmniejszyćstopnień
wykorzystania zasobów naturalnych. Niekontrolowane uwalnianie składników niebezpiecznych zawartych w sprzęcie elektrycznym i elektronicznym może stanowićzagroże-
nie dla zdrowia ludzkiego oraz powodowaćnegatywne zmiany w środowisku naturalnym. Gospodarstwo domowe pełni ważnąrolęw przyczynianiu siędo ponownego użycia
i odzysku, w tym recyklingu zużytego sprzętu. Więcej informacji o właściwych metodach recyklingu można uzyskaću władz lokalnych lub sprzedawcy.
Dieses Symbol weist darauf hin, dass Elektro- und Elektronik-Altgeräte (einschließlich Batterien und Akkumulatoren) nicht zusammen mit anderen Abfällen entsorgt werden
dürfen. Altgeräte sollten getrennt gesammelt und bei einer Sammelstelle abgegeben werden, um deren Recycling und Verwertung zu gewährleisten und so die Abfallmenge
und die Nutzung natürlicher Ressourcen zu reduzieren. Die unkontrollierte Freisetzung gefährlicher Stoffe, die in Elektro- und Elektronikgeräten enthalten sind, kann eine
Gefahr für die menschliche Gesundheit darstellen und negative Auswirkungen auf die Umwelt haben. Der Haushalt spielt eine wichtige Rolle bei der Wiederverwendung
und Verwertung, einschließlich des Recyclings von Altgeräten. Weitere Informationen zu den geeigneten Recyclingverfahren erhalten Sie bei den örtlichen Behörden oder
Ihrem Händler.
Этот символ информирует озапрете помещать изношенное электрическое иэлектронное оборудование (втом числе батареи иаккумуляторы) вместе сдругими
отходами. Изношенное оборудование должно собираться селективно ипередаваться вточку сбора, чтобы обеспечить его переработку иутилизацию, для
того, чтобы ограничить количество отходов, иуменьшить использование природных ресурсов. Неконтролируемый выброс опасных веществ, содержащихся в
электрическом иэлектронном оборудовании, может представлять угрозу для здоровья человека, иприводить кнегативным изменениям вокружающей среде.
Домашнее хозяйство играет важную роль при повторном использовании иутилизации, втом числе, утилизации изношенного оборудования. Подробную
информацию оправильных методах утилизации можно получить уместных властей или упродавца.
This symbol indicates that waste electrical and electronic equipment (including batteries and storage cells) cannot be disposed of with other types of waste. Waste equipment
should be collected and handed over separately to a collection point for recycling and recovery, in order to reduce the amount of waste and the use of natural resources. Un-
controlled release of hazardous components contained in electrical and electronic equipment may pose a risk to human health and have adverse effects for the environment.
The household plays an important role in contributing to reuse and recovery, including recycling of waste equipment. For more information about the appropriate recycling
methods, contact your local authority or retailer.

INSTRUKCJA ORYGINALNA
6
PL GB D RUS UA LT LV CZ SK H RO E F I NL GR
Цей символ повідомляє про заборону розміщення відходів електричного та електронного обладнання (втому числі акумуляторів), утому числі зіншими
відходами. Відпрацьоване обладнання повинно бути вибірково зібрано іпередано впункт збору для забезпечення його переробки івідновлення, щоб зменшити
кількість відходів ізменшити ступінь використання природних ресурсів. Неконтрольоване вивільнення небезпечних компонентів, що містяться велектричному та
електронному обладнанні, може представляти небезпеку для здоров’ялюдини івикликати негативні зміни внавколишньому середовищі. Господарство відіграє
важливу роль урозвитку повторного використання та відновлення, включаючи утилізацію використаного обладнання. Більш детальну інформацію про правильні
методи утилізації можна отримати умісцевої влади або продавця.
Šis simbolis rodo, kad draudžiama išmesti panaudotąelektrinęir elektroninęįrangą(įskaitant baterijas ir akumuliatorius) kartu su kitomis atliekomis. Naudota įranga turėtų
būti renkama atskirai ir siunčiama įsurinkimo punktą, kad būtųužtikrintas jos perdirbimas ir utilizavimas, siekiant sumažinti atliekas ir sumažinti gamtos ištekliųnaudojimą.
Nekontroliuojamas pavojingųkomponentų, esančiųelektros ir elektroninėje įrangoje, išsiskyrimas gali kelti pavojųžmoniųsveikatai ir sukelti neigiamus natūralios aplinkos
pokyčius. Namųūkis vaidina svarbųvaidmenįprisidedant prie pakartotinio įrenginiųnaudojimo ir utilizavimo, įskaitant perdirbimą. Norėdami gauti daugiau informacijos apie
tinkamus perdirbimo būdus, susisiekite su savo vietos valdžios institucijomis ar pardavėju.
Šīs simbols informēpar aizliegumu izmest elektrisko un elektronisko iekārtu atkritumus (tostarp baterijas un akumulatorus) kopāar citiem atkritumiem. Nolietotas iekārtas ir
jāsavāc atsevišķi un jānodod savākšanas punktāar mērķi nodrošināt atkritumu otrreizējo pārstrādi un reģenerāciju, lai ierobežotu to apjomu un samazinātu dabas resursu
izmantošanas līmeni. Elektriskajās un elektroniskajās iekārtās ietverto bīstamo sastāvdaļu nekontrolēta izdalīšanās var radīt cilvēku veselības apdraudējumu un izraisīt
negatīvas izmaiņas apkārtējāvidē. Mājsaimniecība pilda svarīgu lomu otrreizējās izmantošanas un reģenerācijas, tostarp nolietoto iekārtu pārstrādes veicināšanā. Vairāk
informācijas par atbilstošām otrreizējās pārstrādes metodēm var saņemt pie vietējo varas iestāžu pārstāvjiem vai pārdevēja.
Tento symbol informuje, že je zakázáno likvidovat použité elektrické a elektronické zařízení (včetněbaterií a akumulátorů) společněs jiným odpadem. Použité zařízení by
mělo být shromažďováno selektivněa odesíláno na sběrné místo, aby byla zajištěna jeho recyklace a využití, aby se snížilo množství odpadu a snížil stupeňvyužívání
přírodních zdrojů. Nekontrolované uvolňování nebezpečných složek obsažených v elektrických a elektronických zařízeních může představovat hrozbu pro lidské zdraví a
způsobit negativní změny v přírodním prostředí. Domácnost hraje důležitou roli při přispívání k opětovnému použití a využití, včetněrecyklace použitého zařízení. Další
informace o vhodných způsobech recyklace Vám poskytne místní úřad nebo prodejce.
Tento symbol informuje o zákaze vyhadzovania opotrebovaných elektrických a elektronických zariadení (vrátane batérií a akumulátorov) do komunálneho (netriedeného)
odpadu. Opotrebované zariadenia musia byťseparované a odovzdané do príslušných zberných miest, aby mohli byťnáležite recyklované, čím sa znižuje množstvo odpadov
a zmenšuje využívanie prírodných zdrojov. Nekontrolované uvoľňovanie nebezpečných látok, ktoré sú v elektrických a elektronických zariadeniach, môže ohrozovaťľudské
zdravie a maťnegatívny dopad na životné prostredie. Každá domácnosťmá dôležitú úlohu v procese opätovného použitia a opätovného získavania surovín, vrátane recy-
klácie, z opotrebovaných zariadení, Bližšie informácie o správnych metódach recyklácie vám poskytne miestna samospráva alebo predajca.
Ez a szimbólum arra hívja fel a figyelmet, hogy tilos az elhasznált elektromos és elektronikus készüléket (többek között elemeket és akkumulátorokat) egyéb hulladékokkal
együtt kidobni. Az elhasznált készüléket szelektíven gyűjtse és a hulladék mennyiségének, valamint a természetes erőforrások felhasználásának csökkentése érdekében
adja le a megfelelőgyűjtőpontban újrafeldolgozás és újrahasznosítás céljából. Az elektromos és elektronikus készülékben található veszélyes összetevők ellenőrizetlen
kibocsátása veszélyt jelenthet az emberi egészségre és negatív változásokat okozhat a természetes környezetben. A háztartások fontos szerepet töltenek be az elhasznált
készülék újrafeldolgozásában és újrahasznosításában. Az újrahasznosítás megfelelőmódjaival kapcsolatos további információkat a helyi hatóságoktól vagy a termék
értékesítőjétől szerezhet.
Acest simbol indicăfaptul cădeșeurile de echipamente electrice și electronice (inclusiv baterii și acumulatori) nu pot fieliminate împreunăcu alte tipuri de deșeuri. Deșeurile
de echipamente trebuie colectate și predate separat la un punct de colectare în vederea reciclării și recuperării, pentru a reduce cantitatea de deșeuri și consumul de resurse
naturale. Eliberarea necontrolatăa componentelor periculoase conținute în echipamentele electrice și electronice poate prezenta un risc pentru sănătatea oamenilor și are
efect advers asupra mediului. Gospodăriile joacăun rol important prin contribuția lor la reutilizare și recuperare, inclusiv reciclarea deșeurilor de echipamente. Pentru mai
multe informații în legăturăcu metodele de reciclare adecvate, contactați autoritățile locale sau distribuitorul dumneavoastră.
Este símbolo indica que los residuos de aparatos eléctricos y electrónicos (incluidas las pilas y acumuladores) no pueden eliminarse junto con otros residuos. Los aparatos
usados deben recogerse por separado y entregarse a un punto de recogida para garantizar su reciclado y recuperación a fin de reducir la cantidad de residuos y el uso de
los recursos naturales. La liberación incontrolada de componentes peligrosos contenidos en los aparatos eléctricos y electrónicos puede suponer un riesgo para la salud
humana y causar efectos adversos en el medio ambiente. El hogar desempeña un papel importante en la contribución a la reutilización y recuperación, incluido el reciclado
de los residuos de aparatos. Para obtener más información sobre los métodos de reciclaje adecuados, póngase en contacto con su autoridad local o distribuidor.
Αυτό το σύμβολο δείχνει ότι απαγορεύεται ηαπόρριψη χρησιμοποιημένου ηλεκτρικού και ηλεκτρονικού εξοπλισμού (συμπεριλαμβανομένων των μπαταριών και
συσσωρευτών) με άλλα απόβλητα. Οχρησιμοποιούμενος εξοπλισμός θα πρέπει να συλλέγεται επιλεκτικά και να αποστέλλεται σε σημείο συλλογής για να εξασφαλιστεί η
ανακύκλωσή του και ηανάκτησή του για τη μείωση των αποβλήτων και τη μείωση του βαθμού χρήσης των φυσικών πόρων. Ηανεξέλεγκτη απελευθέρωση επικίνδυνων
συστατικών που περιέχονται στον ηλεκτρικό και ηλεκτρονικό εξοπλισμό μπορεί να αποτελέσει απειλή για την ανθρώπινη υγεία και να προκαλέσει αρνητικές αλλαγές
στο φυσικό περιβάλλον. Το νοικοκυριό διαδραματίζει σημαντικό ρόλο στην συμβολή στην επαναχρησιμοποίηση και ανάκτηση, συμπεριλαμβανομένης της ανακύκλωσης,
χρησιμοποιημένου εξοπλισμού. Για περισσότερες πληροφορίες σχετικά με τις κατάλληλες μεθόδους ανακύκλωσης, επικοινωνήστε με τις τοπικές αρχές ήτον πωλητή.
Ce symbole indique que les déchets d’équipements électriques et électroniques (y compris les piles et accumulateurs) ne peuvent être éliminés avec d’autres déchets.
Les équipements usagés devraient être collectés séparément et remis à un point de collecte afin d’assurer leur recyclage et leur valorisation et de réduire ainsi la quantité
de déchets et l’utilisation des ressources naturelles. La dissémination incontrôlée de composants dangereux contenus dans des équipements électriques et électroniques
peut présenter un risque pour la santé humaine et avoir des effets néfastes sur l’environnement. Le ménage joue un rôle important en contribuant à la réutilisation et à la
valorisation, y compris le recyclage des équipements usagés. Pour plus d’informations sur les méthodes de recyclage appropriées, contactez votre autorité locale ou votre
revendeur.
Dit symbool geeft aan dat afgedankte elektrische en elektronische apparatuur (inclusief batterijen en accu’s) niet samen met ander afval mag worden weggegooid. Afge-
dankte apparatuur moet gescheiden worden ingezameld en bij een inzamelpunt worden ingeleverd om te zorgen voor recycling en terugwinning, zodat de hoeveelheid afval
en het gebruik van natuurlijke hulpbronnen kan worden beperkt. Het ongecontroleerd vrijkomen van gevaarlijke componenten in elektrische en elektronische apparatuur
kan een risico vormen voor de menselijke gezondheid en schadelijke gevolgen hebben voor het milieu. Het huishouden speelt een belangrijke rol bij het bijdragen aan
hergebruik en terugwinning, inclusief recycling van afgedankte apparatuur. Voor meer informatie over de juiste recyclingmethoden kunt u contact opnemen met uw gemeente
of detailhandelaar.
Questo simbolo indica che l’apparecchiatura elettrica e elettronica usurata (comprese le batterie e gli accumulatori) non può essere smaltita insieme con altri rifiuti. Le appa-
recchiature usurate devono essere raccolte separatamente e consegnate al punto di raccolta specializzato per garantire il riciclaggio e il recupero, al fine di ridurre la quantità
di rifiuti e diminuire l’uso delle risorse naturali. Il rilascio incontrollato dei componenti pericolosi contenuti nelle apparecchiature elettriche e elettroniche può costituire il rischio
per la salute umana e causare gli effetti negativi sull’ambiente naturale. Il nucleo familiare svolge il ruolo importante nel contribuire al riutilizzo e al recupero, compreso il
riciclaggio dell’apparecchiatura usurata. Per ottenere le ulteriori informazioni sui metodi di riciclaggio appropriate, contattare l’autorità locale o il rivenditore.

INSTRUKCJA ORYGINALNA 7
PL
CHARAKTERYSTYKA PRODUKTU
Wiertarko - wkrętarka jest uniwersalnym, niewymagającym zewnętrznego źródła zasilania narzędziem przenośnym, przeznaczo-
nym dla majsterkowiczów do wykonywania otworów w różnorodnych materiałach (np. drewno i materiały drewnopochodne, me-
tale), do wkręcania i wykręcania wkrętów i śrub, a także dzięki funkcji wiercenia z udarem w twardych materiałach ceramicznych
(np. betonie). Jej szczególne zalety doceniąmajsterkowicze wykonujący różnorodne prace montażowe i wykończeniowe. Produkt
nie jest przeznaczony do zastosowańkomercyjnych. Prawidłowa, niezawodna i bezpieczna praca elektronarzędzia jest zależna
od właściwej eksploatacji, dlatego:
Przed przystąpieniem do pracy z narzędziem należy przeczytaćcałą instrukcjęi zachowaćją.
Za szkody powstałe w wyniku nie przestrzegania przepisów bezpieczeństwa i zaleceńniniejszej instrukcji dostawca nie ponosi
odpowiedzialności.
WYPOSAŻENIE
Urządzenie jest dostarczane w stanie kompletnym i nie wymaga montażu. Wraz z wiertarko - wkrętarkąsądostarczane: akumu-
lator, ładowarka.
PARAMETRY TECHNICZNE
Parametr Jednostka miary Wartość
Numer katalogowy YT-82770
Napięcie robocze [V] 18 DC
Obroty (bieg jałowy) [min-1] 0 - 1850
Częstotliwość udaru [min-1] 0- 4800
Energia udaru [J] 2
Poziom hałasu
- ciśnienie akustyczne LpA ± KpA [dB] 83,0 ± 3,0 / 91,0 ± 3,0
- moc akustyczna LwA ± KwA [dB] 94,0 ± 3,0 / 102,0 ± 3,0
Stopieńochrony IPX0
Klasa izolacji III
Poziom drgańah± K [m/s2] 16,9 ± 1,5 / 15,9 ± 1,5
Masa [kg] 2,0
Uchwyt narzędziowy SDS+
Maksymalna średnica wiercenia
- w drewnie [mm] 40
- w betonie [mm] 18
- w stali [mm] 13
Rodzaj akumulatora Li-Ion
Pojemność akumulatora [Ah] 3
Energia akumulatora [Wh] 54
Ładowarka
Napięcie wejściowe [V~] 100 - 240
Częstotliwość sieci [Hz] 50 - 60
Moc znamionowa [W] 50
Napięcie wyjściowe [V] 21 DC
Prąd wyjściowy [A] 1,5
Czas ładowania [h] 1,5
OGÓLNE WARUNKI BEZPIECZEŃSTWA
UWAGA! Przeczytaćwszystkie poniższe instrukcje. Nieprzestrzeganie ich może prowadzićdo porażenia elektrycznego, pożaru
albo do uszkodzeńciała. Pojęcie „narzędzie elektryczne” użyte w instrukcjach odnosi siędo wszystkich narzędzi napędzanych
prądem elektrycznym zarówno przewodowych jak i bezprzewodowych.
PRZESTRZEGAĆPONIŻSZYCH INSTRUKCJI
Miejsce pracy
Miejsce pracy należy utrzymywaćdobrze oświetlone i w czystości. Nieporządek i słabe oświetlenie mogąbyćprzyczynami
wypadków.

INSTRUKCJA ORYGINALNA
8
PL
Nie należy pracowaćnarzędziami elektrycznymi w środowisku o zwiększonym ryzyku wybuchu, zawierającym palne
ciecze, gazy lub opary. Narzędzia elektryczne generująiskry, które mogąspowodowaćpożar w kontakcie z palnymi gazami
lub oparami.
Nie należy dopuszczaćdzieci i osób postronnych do miejsca pracy. Utrata koncentracji może spowodowaćutratękontroli
nad narzędziem.
Bezpieczeństwo elektryczne
Wtyczka przewodu elektrycznego musi pasowaćdo gniazdka sieciowego. Nie wolno modyfikowaćwtyczki. Nie wolno
stosowaćżadnych adapterów w celu przystosowania wtyczki do gniazdka. Niemodyfikowana wtyczka pasująca do gniazdka
zmniejsza ryzyko porażenia prądem elektrycznym.
Unikaćkontaktu z uziemionymi powierzchniami takimi jak rury, grzejniki i chłodziarki. Uziemienie ciała zwiększa ryzyko
porażenia prądem elektrycznym.
Nie należy narażaćnarzędzi elektrycznych na kontakt z opadami atmosferycznymi lub wilgocią.Woda i wilgoć, która
dostanie siędo wnętrza narzędzia elektrycznego zwiększa ryzyko porażenia prądem elektrycznym.
Nie przeciążaćkabla zasilającego. Nie używaćkabla zasilającego do noszenia, podłączania i odłączania wtyczki od
gniazdka sieciowego. Unikaćkontaktu kabla zasilającego z ciepłem, olejami, ostrymi krawędziami i ruchomymi elemen-
tami. Uszkodzenie kabla zasilającego zwiększa ryzyko porażenia prądem elektrycznym.
W przypadku pracy poza pomieszczeniami zamkniętymi należy używaćprzedłużaczy przeznaczonych do pracy poza
pomieszczeniami zamkniętymi. Użycie odpowiedniego przedłużacza zmniejsza ryzyko porażenia prądem elektrycznym.
W przypadku, gdy używanie elektronarzędzia w środowisku wilgotnym jest nieuniknione, jako ochronęprzed napięciem
zasilania należy stosowaćurządzenie różnicowoprądowe (RCD). Zastosowanie RCD zmniejsza ryzyko porażania prądem
elektrycznym.
Bezpieczeństwo osobiste
Przystępuj do pracy w dobrej kondycji fizycznej i psychicznej. Zwracaj uwagęna to, co robisz. Nie pracuj będąc zmęczonym
lub pod wpływem leków lub alkoholu. Nawet chwila nieuwagi podczas pracy może prowadzićdo poważnych obrażeńciała.
Używaj środków ochrony osobistej. Zawsze zakładaj gogle ochronne. Stosowanie środków ochrony osobistej, takich jak
maski przeciwpyłowe, obuwie ochronne, kaski i ochronniki słuchu zmniejszająryzyko poważnych obrażeńciała.
Unikaj przypadkowego włączenia narzędzia. Upewnij się, że włącznik elektryczny jest w pozycji „wyłączony” przed pod-
łączeniem narzędzia do sieci elektroenergetycznej. Trzymanie narzędzia z palcem na włączniku lub podłączanie narzędzia
elektrycznego, gdy włącznik jest w pozycji „włączony” może prowadzićdo poważnych obrażeńciała.
Przed włączeniem narzędzia elektrycznego usuńwszelkie klucze i inne narzędzia, które zostały użyte do jego regulacji.
Klucz pozostawiony na obracających sięelementach narzędzia może prowadzićdo poważnych obrażeńciała.
Utrzymuj równowagę. Przez cały czas utrzymuj odpowiedniąpostawę.Pozwoli to na łatwiejsze zapanowanie nad narzę-
dziem elektrycznym w przypadku niespodziewanych sytuacji podczas pracy.
Stosuj odzieżochronną. Nie zakładaj luźniej odzieży i biżuterii. Utrzymuj włosy, odzieżi rękawice robocze z dala od
ruchomych części narzędzia elektrycznego. Luźna odzież, biżuteria lub długie włosy mogązaczepićo ruchome części na-
rzędzia.
Stosuj odciągi pyłu lub pojemniki na pył, jeśli narzędzie jest w takie wyposażone. Zadbaj o to, aby je poprawnie podłą-
czyć.Użycie odciągu pyłu zmniejsza ryzyko poważnych obrażeńciała.
Ostrożność w używaniu elektronarzędzia
Przed włożeniem baterii akumulatorów należy sięupewnić, czy włącznik jest w pozycji „wyłączony”. Wkładanie baterii
akumulatorów do elektronarzędzia, gdy włącznik jest w pozycji „załączony,” może spowodowaćwypadki.
Należy używaćwyłącznie ładowarki zalecanej przez producenta. Użycie ładowarki przeznaczonej do jednego typu baterii
akumulatorów, do ładowania innego typu baterii akumulatorów może byćprzyczynąpożaru.
Należy używaćelektronarzędzi wyłącznie z bateriąakumulatorów określonąprzez producenta. Użycie innej baterii akumu-
latorów może byćprzyczynąobrażeńlub pożaru.
W czasie, gdy bateria akumulatorów nie jest używana, należy jąprzechowywaćz dala od metalowych przedmiotów
takich, jak spinacze do papieru, monety, gwoździe, śruby, lub inne małe metalowe elementy, które mogązewrzećzaciski.
Zwarcie zacisków akumulatora może spowodowaćoparzenia lub pożar.
W niekorzystnych warunkach, z akumulatora może wydostaćsięciecz; należy unikaćz niąkontaktu. Jeżeli przypadko-
wo nastąpi zetknięcie sięz cieczą, należy przemyćwodą. Jeżeli ciecz trafido oczu, należy szukaćpomocy medycznej.
Wydostająca sięz akumulatora ciecz może spowodowaćpodrażnienia lub oparzenia.
Naprawa
Naprawęelektronarzędzia należy zlecaćwyłącznie osobie wykwalifikowanej, wykorzystując wyłącznie oryginalne części
zamienne. Zapewni sięprzez to, że elektronarzędzie będzie dalej bezpieczne.

INSTRUKCJA ORYGINALNA 9
PL
DODATKOWE INSTRUKCJE BEZPIECZEŃSTWA
Zakładaćochronniki słuchu podczas pracy wiertarkąudarową.Narażanie na hałas może spowodowaćutratęsłuchu.
Narzędzia używaćz dodatkowymi rękojeściami dostarczonymi z narzędziem. Utrata kontroli może spowodowaćosobiste
obrażenia operatora.
Stosowaćmaski przeciwpyłowe. Użycie masek przeciwpyłowych zmniejsza ryzyko poważnych obrażeńciała.
Podczas wykonywania pracy, w której narzędzie wstawione może zetknąć sięz ukrytym przewodem pod napięciem
trzymaćnarzędzie elektryczne za pomocąizolowanych uchwytów. Narzędzie wstawiane podczas kontaktu z przewodem
pod napięciem może spowodować, że metalowe elementy narzędzia mogąsięznaleźć pod napięciem, co może spowodować
porażenie elektryczne operatora narzędzia.
OBSŁUGA PRODUKTU
Przygotowanie produktu do pracy
Uwaga! Wszystkie czynności wymienione w niniejszym rozdziale należy wykonywaćprzy odłączonym napięciu zasilającym -
akumulator musi zostaćodłączony od narzędzia!
Instrukcje bezpieczeństwa ładowania akumulatora
Uwaga! Przed rozpoczęciem ładowania upewnićsię, czy korpus zasilacza, przewód i wtyczka nie sąpopękane i uszkodzone. Za-
brania sięużywania niesprawnej lub uszkodzonej stacji ładującej i zasilacza! Do ładowania akumulatorów wolno używaćjedynie
stacji ładującej i zasilacza dostarczonych w zestawie. Używanie innego zasilacza może spowodowaćpowstanie pożaru lub znisz-
czenie narzędzia. Ładowanie akumulatora może odbywaćsięjedynie w pomieszczeniu zamkniętym, suchym i zabezpieczonym
przed dostępem osób niepowołanych, a zwłaszcza dzieci. Nie wolno używaćstacji ładującej i zasilacza bez stałego dozoru osoby
dorosłej! W razie konieczności opuszczenia pomieszczenia, w której odbywa sięładowanie, należy odłączyćładowarkęod sieci
elektrycznej przez wyjęcie zasilacza z gniazda sieci elektrycznej. W przypadku wydobywania sięz ładowarki dymu, podejrzanego
zapachu itp. należy natychmiast wyjąć wtyczkęładowarki z gniazda sieci elektrycznej!
Wiertarko - wkrętarka dostarczana jest z akumulatorem nie naładowanym, dlatego przed rozpoczęciem pracy należy go ładować
zgodnie z procedura opisanąponiżej za pomocąznajdujących sięw zestawie zasilacza i stacji ładującej. Akumulatory typu Li-Ion
(litowo – jonowe) nie wykazujątzw. “efekt pamięciowego”, co pozwala je doładowywaćw dowolnym momencie. Zalecane jest jednak
rozładowanie akumulatora podczas normalnej pracy, a następnie naładowanie do pełnej pojemności. Jeżeli ze względu na charakter
pracy nie jest możliwe za każdym razem takie potraktowanie akumulatora, to należy to zrobićprzynajmniej co kilka, kilkanaście cykli
pracy. W żadnym wypadku nie wolno rozładowywaćakumulatorów zwierając elektrody, gdyżpowoduje to nieodwracalne uszkodze-
nia! Nie wolno także sprawdzaćstanu naładowania akumulatora, przez zwieranie elektrod i sprawdzanie iskrzenia.
Przechowywanie akumulatora
Aby wydłużyćczas życia akumulatora należy zapewnićwłaściwe warunki przechowywania. Akumulator wytrzymuje około 500
cykli „ładowanie - rozładowanie”. Akumulator należy przechowywaćw zakresie temperatur od 0 do 30 stopni Celsjusza, przy
względnej wilgotności powietrza 50%. Aby przechowywaćakumulator przez dłuższy czas, należy go naładowaćdo ok 70% po-
jemności. W przypadku dłuższego przechowywania należy okresowo, raz w roku naładowaćakumulator. Nie należy doprowadzać
do nadmiernego rozładowania akumulatora, gdyżskraca to jego żywotność i może spowodowaćnieodwracalne uszkodzenie.
W trakcie przechowywania akumulator będzie sięstopniowo rozładowywał, ze względu na upływność. Proces samoistnego roz-
ładowania zależy od temperatury przechowywania, im wyższa temperatura, tym szybszy proces rozładowania. W przypadku nie-
właściwego przechowywania akumulatorów może dojść do wycieku elektrolitu. W przypadku wycieku należy zabezpieczyćwyciek
za pomocąśrodka neutralizującego, w przypadku kontaktu elektrolitu z oczami, należy obficie przemyćoczy wodą, a następnie
niezwłocznie skorzystaćz pomocy lekarskiej. Zabronione jest korzystanie z narzędzia z uszkodzonym akumulatorem.
W przypadku całkowitego zużycia akumulatora należy go oddaćdo specjalistycznego punktu zajmującego sięutylizacjątego
typu odpadów.
Transport akumulatorów
Akumulatory litowo – jonowe wg przepisów prawnych sątraktowane jak materiały niebezpieczne. Użytkownik narzędzia może
transportowaćnarzędzie z akumulatorem oraz same akumulatory drogąlądową. Nie musząbyćwtedy spełnione dodatkowe
warunki. W przypadku zlecenia transportu osobom trzecim (na przykład wysyłka za pomocąfirmy kurierskiej) należy postępować
zgodnie z przepisami dotyczącymi transportu materiałów niebezpiecznych. Przed wysyłkąnależy skontaktowaćsięw tej spra-
wie z osobąo odpowiednich kwalifikacjach. Zabronione jest transportowanie uszkodzonych akumulatorów. Na czas transportu
demontowane akumulatory należy usunąć z narzędzia, odsłonięte styki zabezpieczyć, np. zakleićtaśmąizolacyjną. Akumulatory
zabezpieczyćw opakowaniu w taki sposób, aby nie przemieszczały sięwewnątrz opakowania w trakcie transportu. Należy także
przestrzegaćprzepisów krajowych dotyczących transportu materiałów niebezpiecznych.
Ładowanie akumulatora
Uwaga! Przed ładowaniem należy odłączyćzasilacz stacji ładującej od sieci elektrycznej przez wyciągnięcie wtyczki zasilacza
z gniazda sieci elektrycznej. Ponadto należy oczyścićakumulator i jego zaciski z brudu i pyłu za pomocąmiękkiej, suchej szmatki.

INSTRUKCJA ORYGINALNA
10
PL
Akumulator posiada wbudowany wskaźnik naładowania. Naciskając przycisk zaświecąsiędiody (II), im więcej, tym bardziej nała-
dowany akumulator. Jeżeli po naciśnięciu przycisku diody sięnie świecąoznacza to rozładowany akumulator.
Odłączyćakumulator od narzędzia.
Wsunąć akumulator w gniazdo ładowarki (II).
Podłączyćładowarkędo gniazda sieci elektrycznej.
Zaświeci sięczerwona dioda, co oznacza proces ładowania.
Po zakończeniu ładowania zgaśnie dioda czerwona, a zaświeci siędioda zielona, oznaczająca pełne naładowanie akumulatora.
Należy wyciągnąć wtyczkęzasilacza z gniazda sieci elektrycznej.
Wysunąć akumulator ze stacji ładującej, naciskając przycisk zatrzasku akumulatora.
Uwaga! Jeżeli po podłączeniu ładowarki do sieci elektrycznej zaświeci sięzielona dioda oznacza to w pełni naładowany akumu-
lator. W takim wypadku ładowarka nie rozpocznie procesu ładowania.
Montażrękojeści dodatkowej (III)
Założyćrękojeść dodatkowąw żądanym położeniu i zacisnąć jądokręcając rękojeść uchwytu.
Montażi demontażnarzędzia wstawianego w uchwycie wiertarskim (IV)
Produkt zostałwyposażony w uchwyt wiertarski SDS+, którego nie można zdemontować.
Montażnarzędzia wstawianego wyposażonego w uchwyt SDS+ należy przeprowadzićw następujący sposób.
Uchwyt SDS+ narzędzia wstawianego należy dokładnie oczyścić, a następnie posmarowaćcienkąwarstwąsmaru stałego ogól-
nego przeznaczenia.
Tylnączęść uchwytu pociągnąć w kierunku rękojeści produktu i przytrzymaćw tej pozycji. Wsunąć narzędzie wstawiane do
uchwytu. Sprawdzićczy narzędzie wstawiane nie wysunie sięsamoistnie podczas pracy. Narzędzie powinno miećmożliwość
ruchu w kierunku przód – tyłw niewielkim zakresie, natomiast nie powinno siędaćwysunąć całkowicie z chwytu.
W przeciwnym przypadku należy powtórzyćmontaż.
Demontażnarzędzia wstawianego z uchwytu wiertarskiego należy przeprowadzićw kolejności odwrotnej do montażu.
Ustawianie trybu pracy (V)
Funkcja pracy z udarem ułatwia wiercenie przy wykonywaniu otworów w betonie, murze i twardych materiałach ceramicznych
(twarde cegły, kamienie, marmur). W tym celu przełącznik udaru ustawićna pracęz udarem, symbol wiertła i młotka.
W czasie wiercenia otworów w innych materiałach, funkcjęwiercenia z udarem należy wyłączyć, ustawiając przełącznik na pracę
bez udaru, symbol wiertła - jeżeli jest to możliwe.
Możliwe jest teżustawienie funkcji podkuwania, w tym trybie zostająodłączone obroty, nie zostaje natomiast wyłączony udar.
W tym celu należy nastawićprzełącznik trybu pracy w pozycjępodkuwania, symbol młotka.
Ustawianie kierunku obrotów (VI)
Ustawićprzełącznik kierunku obrotów na pozycjęoznakowanąza pomocąsymboli kierunku lub liter. Symbol skierowany w stronę
uchwytu wiertarskiego lub litera R oznacza obroty w prawo – wiercenie wiertłem prawoskrętnym, wkręcanie śrub prawoskrętnych,
wykręcanie śrub lewoskrętnych. Symbol skierowany w stronęprzeciwnądo uchwytu wiertarskiego lub litera L oznacza obroty
w lewo – wiercenie wiertłem lewoskrętnym, wkręcanie śrub prawoskrętnych, wykręcanie śrub lewoskrętnych. Uwaga! Zmiana
kierunku obrotów może byćdokonana jedynie przy zatrzymanych obrotach wrzeciona.
Obok wskaźnika naładowana akumulatora umieszczono także wskaźnik kierunku obrotów, który w momencie uruchomienia pro-
duktu pokazuje wybranąnastawęza pomocąpodświetlenia symbolu kierunku obrotów.
Ustawianie prędkości i momentu obrotowego
Produkt nie posiada osobnych regulatorów pozwalających ustawićprędkość obrotowąi moment obrotowy. Zwiększanie nacisku
na włącznik spowoduje zwiększanie prędkości obrotowej i momentu obrotowego, ażdo osiągnięcia maksymalnej prędkości obro-
towej i maksymalnego momentu obrotowego. W przypadku wiercenia z udarem zwiększanie nacisku na włącznik zwiększa także
częstotliwość udaru.
Czynności przygotowawcze do pracy
Przed przystąpieniem do pracy:
Zamocowaćobrabiany materiałdo imadła lub za pomocąścisków stolarskich.
Używaćnarzędzi roboczych właściwych dla wykonywanej pracy. Zadbaćo to, by były naostrzone i w dobrym stanie.
Założyćodzieżrobocząi środki ochrony wzroku i słuchu.
Zamontowaćakumulator w produkcie.
Chwycićmłotowiertarkęoburącz za rękojeść i uchwyt dodatkowy (VII).
Przyjąć pewnąi stabilnąpostawę.
Włączyćmłotowiertarkęwciskając palcem włącznik elektryczny.

INSTRUKCJA ORYGINALNA 11
PL
Uwaga! W przypadku zaobserwowania podejrzanych hałasów, trzasków, podejrzanego zapachu itp. natychmiast wyłączyćmło-
towiertarkęi zdemontowaćakumulator z narzędzia.
Wyłączenie młotowiertarki następuje przez całkowite zwolnienie nacisku na włącznik. Narzędzie wstawiane może wirowaćjesz-
cze jakiśczas po wyłączeniu produktu. Produkt można odłożyćlub przystąpićdo innych czynności związanych z produktem
dopiero po całkowitym zatrzymaniu narzędzia wstawianego.
UŻYTKOWANIE PRODUKTU
Stosowanie prawego lub lewego kierunku obrotów
Obroty prawe stosowaćw trakcie wiercenia powszechnie stosowanymi wiertłami prawoskrętnymi.
Obroty lewe stosowaćw przypadku zakleszczenia sięwiertła prawoskrętnego w materiale oraz przy wykręcaniu wkrętów.
W przypadku wykręcania wkrętów stosowaćminimalne obroty.
Wiercenie w drewnie
Przed wykonaniem otworu zaleca sięzamocowaćobrabiany materiałściskami stolarskimi lub w imadle, a następnie punktakiem
lub gwoździem ustalićmiejsce wiercenia. W uchwyt wiertarski zamocowaćwłaściwe wiertło, ustalićprędkość, podłączyćwiertarkę
do sieci elektrycznej i rozpocząć wiercenie.
W przypadku wykonywania otworów przelotowych zaleca siępod materiałpodłożyćpodkładkędrewnianą, dzięki czemu krawędź
otworu u wylotu nie będzie poszarpana.
W przypadku wykonywania otworów o dużych średnicach wcześniej zaleca sięwywiercićmniejszy otwór prowadzący.
Wiercenie w metalach
Zawsze należy pewnie zamocowaćobrabiany materiał.
W przypadku cienkiej blachy zaleca siępodłożyćpod niąkawałek drewna aby uniknąć niepożądanych zagięć itp. Następnie
zaznaczyćmiejsca wykonywania otworów punktakiem i rozpocząć wiercenie. Używaćwiertełdo stali. W przypadku wiercenia w
żeliwie białym zaleca sięużywanie wiertełz końcówkami z węglików spiekanych. Przy wierceniu większych otworów zaleca się
wykonanie wcześniej mniejszego otworu prowadzącego. Przy wierceniu w stali do chłodzenia wiertła używaćoleju maszynowego.
Dla aluminium stosowaćjako chłodziwo terpentynęlub parafinę.
Przy wierceniu w mosiądzu, miedzi lub żeliwie nie należy stosowaćśrodków chłodzących. W celu schłodzenia często wyjmować
wiertło z materiału aby pozwolićmu na ostygnięcie.
Wiercenie w materiałach ceramicznych
Wiercenie w twardych, zwartych materiałach (beton, twarda cegła, kamień, marmur itp.)
Przed wykonaniem właściwego otworu nawiercićbez udaru mniejszy otwór. Właściwy otwór wykonywaćz włączonąfunkcją
udaru. Stosowaćwiertła udarowe z węglików spiekanych, w dobrym stanie.
Wiercenie w glazurze, miękkiej cegle, tynku itp.
Wiercićjak w punkcie powyżej lecz bez udaru.
Co pewien czas wyjmowaćwiertło z wierconego otworu w celu usunięcia pyłu i odpadów. W trakcie wiercenia naciskaćnarzędzie
mocno ze stałą siłą.
W przypadku wiercenia w którym wiertarka jest skierowana chwytem ku górze zaleca sięzastosowanie osłony chwytu wiertar-
skiego (dostępnej osobno), która zapobiegnie dostaniu siępyłu powstającego podczas pracy do wnętrza uchwytu wiertarskiego.
Osłona jest wykona z elastycznego tworzywa sztucznego i posiada otwór przez który należy przełożyćwiertło zamocowane w
uchwycie.
Ustawianie położenia dłuta
Niektóre narzędzia wstawiane przeznaczone do podkuwania w celu bezpiecznej i ergonomicznej pracy wymagająustawienia pod
określonym kątem, na przykład dłuta lub przecinaki. Można do tego celu użyćodpowiednego trybu pracy. Zamocowaćnarzędzie
wstawiane w uchwycie zgodnie z zaleceniami podanymi w instrukcji. Ustawićprzełącznik na symbol młotka ze strzałką, a na-
stępnie nacisnąć włącznik. Narzędzie wstawiane zacznie siępowoli obracaćzgodnie z wybranym kierunkiem obrotów. Zwolnić
nacisk na włącznik po osiągnięciu przez narzędzie wstawiane pożądanej pozycji. Przestawićprzełącznik trybu pracy w pozycję
podkuwanie – symbol młotka, a następnie rozpocząć pracę.
Wycinanie otworów
Wiertarka może byćwykorzystana do wykonywania większych otworów w drewnie za pomocąspecjalnych wierteło stałej średni-
cy lub wymiennych końcówek z zestawu pił- wyrzynarek do otworów.
W celu uniknięcia powstania zadziorów, poszarpanych krawędzi wykonywanego otworu u wylotu otworu, pod materiałpodłożyć
kawałek drewna odpadowego.

INSTRUKCJA ORYGINALNA
12
PL
Używanie przystawek
Wiertarki ze zmiennym kierunkiem obrotów nie powinny byćużywane do napędu przystawek roboczych.
Uwagi dodatkowe
W czasie pracy nie należy wywieraćzbyt dużego nacisku na obrabiany materiałi nie wykonywaćgwałtownych ruchów, aby nie
spowodowaćuszkodzenia narzędzia wstawianego i produktu.
W czasie pracy stosowaćregularne przerwy.
Nie wolno dopuścićdo przeciążenia narzędzia – temperatura powierzchni zewnętrznych nigdy nie może przekroczyć60 oC.
Po zakończonej pracy wyłączyćprodukt, zdemontowaćakumulator i dokonaćkonserwacji oraz oględzin.
Deklarowana, całkowita wartość drgańzostała zmierzona za pomocąstandardowej metody badańi może byćużyta do porówna-
nia jednego narzędzia z drugim. Deklarowana, całkowita wartość drgańmoże zostaćużyta we wstępnej ocenie ekspozycji.
Uwaga! Emisja drgańpodczas pracy narzędziem może sięróżnićod zadeklarowanej wartości, w zależności od sposobu użycia
narzędzia.
Uwaga! Należy określićśrodki bezpieczeństwa mające chronićoperatora, które sąoparte na ocenie narażenia w rzeczywistych
warunkach użytkowania (wliczając w to wszystkie części cyklu pracy, jak na przykład czas kiedy narzędzie jest wyłączone lub
pracuje na biegu jałowym oraz czas aktywacji).
KONSERWACJA I PRZEGLĄDY
UWAGA! Przed przystąpieniem do regulacji, obsługi technicznej lub konserwacji wyciągnij wtyczkęnarzędzia z gniazdka sieci
elektrycznej lub odłącz akumulator. Po zakończonej pracy należy sprawdzićstan techniczny elektronarzędzia poprzez oględziny
zewnętrzne i ocenę: korpusu i rękojeści, przewodu elektrycznego z wtyczkąi odgiętką, działania włącznika elektrycznego, drożno-
ści szczelin wentylacyjnych, iskrzenia szczotek, głośności pracy łożysk i przekładni, rozruchu i równomierności pracy. W okresie
gwarancji użytkownik nie może domontowaćelektronarzędzi, ani wymieniaćżadnych podzespołów lub części składowych, gdyż
powoduje to utratępraw gwarancyjnych. Wszelkie nieprawidłowości obserwowane przy przeglądzie, lub w czasie pracy, sąsygna-
łem do przeprowadzenia naprawy w punkcie serwisowym. Po zakończeniu pracy, obudowę, szczeliny wentylacyjne, przełączniki,
rękojeść dodatkowąi osłony należy oczyścićnp. strumieniem powietrza (o ciśnieniu nie większym niż0,3 MPa), pędzlem lub
suchąszmatkąbez użycia środków chemicznych i płynów czyszczących. Narzędzia i uchwyty oczyścićsuchączystąszmatą.

13
ORIGINAL INSTRUCTIONS
GB
PRODUCT CHARACTERISTICS
A drill driver is a universal portable device that does not need any external source of power supply, intended for handymen for
making holes in various materials (e.g. wood and wood-related materials, metals), for screwing and unscrewing various screws
and bolts, and also for impact drilling in hard ceramic materials (e.g. concrete). Its particular advantages will be appreciated by
handymen performing various assembly and finishing works. This product is not designed for commercial applications. Correct,
reliable and safe operation of this power tool depends on proper operation, therefore:
Before starting the work with this tool, please read this manual and keep it properly.
The supplier does not assume any liability for damages resulting from failure to follow safety regulations and recommendations
specified in this manual.
EQUIPMENT
The device is delivered complete and does not require assembly. This drill driver is supplied with: battery, charger.
TECHNICAL PARAMETERS
Parameter Measuring unit Value
Catalogue number YT-82770
Operating voltage [V] 18 DC
Rotation (idle running) [min-1] 0 - 1850
Impact frequency [min-1] 0- 4800
Max. torque [Nm] 2
Noise level
- acoustic pressure LpA ± KpA [dB] 83,0 ± 3,0 / 91,0 ± 3,0
- acoustic power LwA ± KwA [dB] 94,0 ± 3,0 / 102,0 ± 3,0
Protection class IPX0
Insulation class III
Oscillation level ah± K [m/s2] 16,9 ± 1,5 / 15,9 ± 1,5
Weight [kg] 2,0
Tool chuck SDS+
Maximum drilling diameter
- in wood [mm] 40
- in concrete [mm] 18
- in steel [mm] 13
Battery type Li-Ion
Battery capacity [Ah] 3
Battery energy [Wh] 54
Charger
Input voltage: [V~] 100 - 240
Mains frequency [Hz] 50 - 60
Rated power [W] 50
Output voltage: [V] 21 DC
Output current: [A] 1,5
Charging time [h] 1,5
GENERAL SAFETY CONDITIONS
NOTE! Get acquainted with all the instructions below. Failure to observe them may lead to an electric shock, fire or injuries. The
notion of electric tool used in the instructions applies to all the tools which are powered with electric current, both wire tools and
wireless ones.
OBSERVE THE FOLLOWING INSTRUCTIONS
Place of work
The place of work must be properly illuminated and clean. Disorder and poor illumination may be a cause of accidents.
Do not work with electric tools in explosive environments, or those which contain inflammable liquids, gases or vapours.
Electric tools generate sparks, which may cause a fire in case of contact with inflammable gases or vapours.
Do not allow children and outsiders to the place of work. A lack of concentration may result in a loss of control over the tool.

14
GB
ORIGINAL INSTRUCTIONS
Electric safety
The plug of the power supply cable must fit the mains socket. Do not modify the plug. Do not use any adapters what-
soever in order to adapt the plug to the socket. Unmodified plug which fits the socket reduces the risk of an electric shock.
Avoid contact with grounded surfaces, such as pipes, heaters and refrigerators. Grounding of the body increases the risk
of an electric shock.
Do not expose electric tools to precipitation or humidity. Water and humidity which gets into the electric tool increases the
risk of an electric shock.
Do not overload the power supply cable. Do not use the power supply cable in order to carry the tool or to connect and
disconnect the plug from the mains socket. Avoid contact of the power supply cable with heat, oils, sharp tools and
moving elements. Damage to the power supply cable increases the risk of an electric shock.
In case work is realised outside closed areas, it is necessary to use extension cords designed for applications outside
closed areas. Using a correct extension cord permits to reduce the risk of an electric shock.
If operating a power tool in a damp location is unavoidable, use a residual current device (RDC) protected supply. Use of
an RCD reduces the risk of electric shock.
Personal safety
Commence work in good physical and psychological conditions. Pay attention to what you do. Do not work if you are
tired or under effects of medicines or alcohol. Even a moment’s inattention during work may lead to serious injuries.
Always use individual means of protection. Always wear goggles. Using individual means of protection, such as dust-masks,
protective shoes, helmets and hearing protections permits to reduce the risk of serious injuries.
Avoid accidental activation of the tool. Make sure the switch is in the OFF position, before you connect the tool to the
mains. Holding the tool with a finger on the switch or connecting an electric tool when the switch is in the ON position may lead
to serious injuries.
Before you turn an electric tool on remove all the spanners and other tools, which have been used for adjustments. A
spanner left on rotating elements of the tool may lead to serious injuries.
Keep your balance. Maintain an appropriate position. It will permit to control the electric tool in case of unpredicted situations
during its operation.
Use protective clothes. Do not wear loose clothes or jewellery. Keep your hair, clothes and gloves away from moving
elements of the electric tool. Loose clothes, jewellery or long hair may get caught on moving elements of the tool.
Use dust extractors or dust containers, if the tool is equipped with any. Make sure they are properly connected. Using of
dust extractors permits to reduce the risk of serious injuries.
Operation of the electric tool
Do not overload the electric tool. Use a proper tool for the given purpose. A correct selection of the tool for the given work
will result in a more efficient and safer work.
Do not use the electric tool if the switch is not functioning properly. A tool which may not be controlled by means of a switch
is dangerous and must be repaired.
Disconnect the plug from the mains socket before any adjustment, replacement of accessories or storage of the tool. It
will permit to avoid accidental activation of the electric tool.
Store the tool away from children. Do not allow untrained persons to operate the tool. An electric tool may be dangerous
in hands of an untrained person.
Make sure the tool is properly maintained. Check the tool in order to detects any unfitting or loose moving elements.
Check whether the elements of the tool are not damaged. In case any damaged elements of the tool are detected, they
must be repaired before the electric tool is operated. Many accidents are caused by improper maintenance of tools.
Cutting tools must be sharp and clean. Properly maintained cutting tools are easier to control during work.
Use electric tools and accessories in accordance with the aforementioned instructions. Use the tool in accordance with
its purpose, taking into account the kind and conditions of work. Should the tool be used for other applications than the ones
it has been designed for, the risk of a dangerous situation increases.
Repairs
The tool may be repaired only by authorised service centres, which must use solely original spare parts. It will guarantee
a proper level of safety of operation of the electric tool.
ADDITIONAL SAFETY INSTRUCTIONS
Wear hearing protectors when working with hammer drill. Exposure to noise can cause a loss of hearing.
Use this tool with auxiliary handle grips supplied with the tool. Losing control may cause personal injury to the operator.
Loss of control may cause personal injuries of the operator. Use of anti-dust mask reduces the risk of serious body injuries.
While working, whenever the inserted tool may come into contact with hidden live wire, hold the power tool using insulated hand-
les. Inserted accessory when coming into contact with a live wire may cause metal components of the tool to become energized,
which could result in electric shock to the operator of a tool.

15
ORIGINAL INSTRUCTIONS
GB
PRODUCT HANDLING
Product preparation to work
Note! All actions mentioned in this chapter should be carried out with supply voltage off- the battery must be disconnected from
the tool!
Safety recommendations for battery loading
Attention! Before loading may start make sure the body of the charger, the cable and the plug are not broken or damaged. It
is prohibited to use a damaged loading dock and charger! For the purpose of loading batteries only the charging dock and the
charger provided may be used. Using another charger may be a cause of fire or damage the tool. Batteries may be charged only
in a dry room, protected from unauthorised persons, particularly children. Do not use the charging dock and the charger without
permanent supervision of an adult! If it is necessary to leave the room where loading is taking place, it is required to disconnect the
charger from the mains, removing the charger from the mains socket. In case when smoke comes out of the charger, or a strange
smell is emitted, etc., it is required to immediately remove the plug of the charger from the mains socket!
The drill and automatic return screwdriver is provided with an unloaded battery, so before work may commence, it is required
to charge it following the procedure below, using the charger and charging dock provided. Li-ION batteries do not show the so
called “memory effect”, so it is allowed to charge them at any moment. However, it is recommended to discharge them during
normal work, and then load them to their full capacity. If due to the nature of the task it is not possible to do so each time, then it
is required to do it at least from time to time. Under no circumstances is it allowed to discharge the batteries short-circuiting the
electrodes, since this would cause irreversible damage! It is also prohibited to check the load of the batteries, short-circuiting the
electrodes for sparking.
Storage of the battery
In order to prolong the life of the battery, it is required to provide adequate storage conditions. The batteries can go through ap-
proximately 500 „loading - discharging” cycles. The battery must be stored between 0 and 30°C, at the relative humidity of 50%. In
order to store the battery for a prolonged period, it is required to charge it to approximately 70% of its capacity. In case of prolonged
storage, it is required to recharge the battery once a year. Do not permit excessive discharging of the battery, since this would
reduce its life and may cause irreversible damage.
During storage, the battery will be gradually unloading due to leakage conductance. The process of automatic unloading depends
on the temperature of storage, since the higher the temperature, the fastest the process. In case of incorrect storage of batteries,
there is a danger of electrolyte leakage. In case of leakage, it is required protect the leakage with neutralizing agent. In case of
contact of electrolyte with the eyes, it is required to rinse the eyes abundantly, and then immediately seek medical assistance. It
is prohibited to use a tool with a damaged battery.
In case the battery is completely worn out, it is required to deposit it at a special point dedicated to disposal of such waste.
Transport of the batteries
Lithium-ion batteries are in accordance with legal regulations treated as dangerous waste. The user of the tool may transport the
tool with the battery or only batteries by land. Then no additional conditions must be complied with. In transport is realised by third
parties (for example dispatch through courier service), then it is required to proceed in accordance with regulations for transport
of dangerous materials. Before shipment, contact an authorised person.
It is prohibited to transport damaged batteries. During transport the battery must be removed from the tool, and the exposed
contacts protected, e.g. with insulating tape. Protect the batteries so that they do not move inside the package during transport. It
is also required comply with the national regulations for transport of dangerous materials.
Charging the battery
Attention! Before charging you should disconnect the charger from the mains by unplugging the power supply plug from the mains.
In addition, you should clean the battery and its terminals of dirt and dust with a soft, dry cloth.
The battery has a built-in charge indicator. When you press the button, LEDs will light up (II), the more LEDs will light up, the more
fully the battery pack is charged. If the button is pressed and the LEDs are offit means that the battery is discharged.
Disconnect the battery from the tool.
Push the battery in the charger socket (II).
Plug the charger into a mains socket.
When the red LED lights up, it means the loading process.
When charging is complete, the red LED goes off, and green LED lights up, indicating a full charge of the battery.
Unplug the charger from the mains outlet.
Remove the battery from the charging station, by pressing the battery latch button.
Attention! If, when the charger is connected to the power supply, the green LED is on, this indicates a fully charged battery. In this
case, the charger does not start charging.

16
GB
ORIGINAL INSTRUCTIONS
Installation of the additional handle (III)
Install the additional handle in the desired position and tighten it, turning the grip of the handle.
Assembly and disassembly of a tool inserted in drill chuck (IV)
The product has been fitted with SDS+ drill chuck which cannot be dismantled.
The assembly of a tool inserted fitted with SDS+ chuck should be carried out as follows.
SDS+ chuck of the inserted tool should be thoroughly cleaned and then lubricated with a thin layer of solid oil of general use.
The rear part of the tool should be pulled in direction of product’s grip handle and held in this position. Slide the tool inserted
into the chuck. Check whether the tool inserted slides out by itself during the work. The tool should be able to move forward and
backward to a slight extent, however it should not slide out completely from the chuck.
Otherwise, it should be assembled again.
Disassembly of the tool inserted from the drill chuck should be carried out in reverse order.
Setting the operation mode (V)
The hammer action operation facilitates drilling in concrete, walls and hard ceramic materials (hard bricks, stones, marble). The
hammer action selector must be set to hammer action indicated with a symbol of a drill and a hammer.
It is also possible to set the hammering function. In this mode rotation is stopped, but the hammer action is still on.
In order to do so, set the operating mode selector to the hammer symbol.
Setting direction of rotation (VI)
Set the switch of rotation direction to a position marked with direction symbol or letters. The symbol directed towards the drill
chuck or R letter indicates rotation to right - drilling with right-handed drill bit, screwing right-handed screws, unscrewing left-han-
ded screws. The symbol directed opposite to the drill chuck or L letter indicates rotation to left - drilling with left-handed drill bit,
screwing right-handed screws, unscrewing left-handed screws. Note! Reversing the direction of rotation can only be done when
the spindle rotation is stopped.
Next to the battery charge indicator also was placed a rotation direction indicator, which indicates the setting by means of highli-
ghting the direction of rotation as soon as the product has been started.
Setting the speed and torque
The ;product does not have separate regulators that allow setting the speed and torque. Increasing pressure on the switch will
result in increase of rotational speed and torque until maximum rotational speed and maximum torque. For impact drilling, an
increase of pressure on the switch also results in increase of impact frequency.
Preparatory activities
Before starting the work:
Affix the workpiece to the vice or using carpenter’s clamps.
Use work tools appropriate for the specific job. Make sure the work tools are sharpened and in good condition.
Wear working clothes as well as eye and ear protection.
Mount the battery in the product.
Using both hands grab the drill driver using a grip handle and auxiliary handle (VII).
Adopt a firm and stable posture.
Turn on the drill driver by pressing on the electric switch with a finger.
Note! Should any suspicious noise, cracks, suspicious odour, etc. were observed, immediately switch offthe drill driver and
detach the battery from the tool.
Switching offthe drill driver is done by releasing the pressure on the switch. The tool inserted may rotate for some time after
switching offthe product. You may put the product aside or attend to other activities connected with the product only after the tool
inserted stops completely.
PRODUCT USE
Using right or left rotation direction
Right rotation to be applied when drilling with commonly used right-hand drill bits.
Left rotation to be applied in case the right-hand drill bit is cogged in the material and when unscrewing screws.
When unscrewing the screws, use minimum rotation.
Drilling in wood
Before drilling a bore it is recommended to fix the workpiece with a carpenter’s clamp or in the vice, and then mark the place of
drilling using a punch or nail. Attach the drill bit to the drill chuck, fix the speed, connect the drill to the mains and start drilling.

17
ORIGINAL INSTRUCTIONS
GB
In case of drilling through bores, it is recommended to place a wooden pad under the material, to prevent the bore edge at the
outlet from being jagged.
When making large diameter bores, it is recommended to drill a smaller guiding bore earlier.
Drilling in metals
It is required to secure the work piece firmly.
In case of thin sheet metal, it is advisable to place a piece of wood beneath to avoid unwanted bends etc. Then mark the place of
bores to be drilled with the punch and start drilling. Use drill bits for steel. When drilling in white cast iron, it is recommended to use
drill bits with self-bonded carbide tips. When drilling larger bores, it is recommended to make a smaller guiding bore earlier. When
drilling in steel use machine oil for cooling the drill bit. For aluminium, use turpentine or paraffin as a coolant.
Never use coolants when boring in brass, copper or cast iron. In order to cool it down, often remove the drill bit from the material
to let it cool.
Drilling in ceramic materials
Drilling in hard, compact materials (concrete, hard brick, stone, marble, etc.)
Prior to drilling the right bore, drill a smaller bore without hammer function. Make the right bore with the hammer function on. Use
hammer self-bonded carbide tips in good condition.
Drilling in glaze, soft brick, plaster, etc.
Drill as specified above but with hammer function off.
Occasionally remove the drill bit from the drilled bore in order to get rid of dust and waste. When drilling, press the tool strongly
with constant force.
In case of drilling, where the drill chuck is directed upwards it is recommended to use a cover of a drill chuck (offered separately),
which protects the dust from penetration into a tool chuck. A cover is made of flexible plastic and has a slot through which a drill
bit mounted in a drill chuck should be inserted.
Adjustments of the angle of the chisel
Certain hammering tools require adjustments to a certain angle, in order to guarantee a safe and ergonomic operation, for exam-
ple chisels and cutters. It is possible to use for this purpose an adequate operating mode selector. Install the tool in the chuck in ac-
cordance with the recommendations indicated in the manual. Set the selector to the hammer symbol with an arrow, and then press
the switch. The tool will start to rotate in accordance with the selected direction of rotation. Release the switch, once the tool has
reached the required position. Set the operating mode selector to the hammering position – hammer symbol, and then start work
Cutting out holes
Drill can be used for drilling larger bores in wood using a special fixed-diameter drill bits or replaceable tips from a set of jigsaws
for holes.
To prevent burrs, jagged edges of the bore at the bore outlet, place a piece of waste wood beneath the material.
Using attachments
Drills with variable rotation direction should not be used to drive attachments.
Additional notes
Do not exert too much pressure on the processed material during operation and do not make any sudden movements to prevent
damage to the tool inserted and the product.
Make regular breaks during the work.
Do not overload the tool - temperature of outside surfaces can never exceed 60 °C.
After the work is complete switch offthe product, dismount the battery and perform maintenance and inspection operations.
Declared total value of vibration was measured by means of standardized test method and can be used to compare one tool with
the other. Declared total value of vibration can be used in the initial exposure assessment.
Note! Emission of vibration when working with the tool may vary from the declared value, depending on how the tool is used.
Note! It is required to determine safety measures to protect the operator, which are based on the exposure assessment in real
conditions of use (including all elements of work cycle, such as for example time when tool is switched offor idling and time of
activation).
MAINTENANCE AND OVERHAUL
ATTENTION! Before any adjustment, technical service or maintenance operations unplug the tool. Once the operations have been
finished, the technical conditions of the tool must be assessed by means of external evaluation and inspection of the following
elements: body and handle, conductor with a plug and deflection, functioning of the electric switch, patency of ventilation slots,
sparking of brushes, noise level of functioning of bearings and gears, start-up and smoothness of operation. During the guarantee

18
GB
ORIGINAL INSTRUCTIONS
period, the user cannot dismantle the electric tools or change any sub-assemblies or elements, since it will cancel any guarantee
rights. All irregularities detected at overhaul or during functioning of the tools are a signal to have the tool repaired at a service
shop. Once the functioning has been concluded, the casing, ventilation slots, switches, additional handle and protections must be
cleansed with a stream of air (at a pressure not exceeding 0.3 MPa), with a brush or a cloth without any chemical substances or
cleaning liquids. Tools and handles must be cleansed with a clean cloth.

19
ORIGINALANLEITUNG
D
PRODUKTBESCHREIBUNG
Der Bohrschrauber ist ein mobiles, kabelloses Mehrzweckwerkzeug für Bastler, um verschiedene Materialien (bspw. Holz und
Holzwerkstoffe, Metalle zu bohren, Schrauben und Blechschrauben ein- und auszuschrauben, sowie harte Keramikstoffe (bspw.
Beton) mit der Schlagbohrfunktion zu bohren. Die besonderen Vorteile dieses Werkzeugs werden von den Bastlern bei differenten
Montage- und Ausbauarbeiten geschätzt. Das Produkt ist nicht für kommerziellen Einsatz bestimmt. Der korrekte, zuverlässige
und sichere Werkzeugbetrieb setzt eine fachmännische Bedienung voraus, deshalb:
diese Anleitung vor Arbeitsbeginn gründlich lesen und sicher aufbewahren.
Der Lieferant kann nicht für Schäden haftbar gemacht werden, die infolge der Nichtbeachtung der Sicherheitsvorschriften und der
Empfehlungen in dieser Anleitung entstehen.
ZUBEHÖR
Das Gerät wird zusammengebaut ausgeliefert und benötigt keine Montageeingriffe. Ein Akku, ein Netzgerät.
TECHNISCHE DATEN
Parameter ME Wert
Katalog-Nr. YT-82770
Betriebsspannung [V] 18 DC
Drehzahl (Leerlauf) [min-1] 0 - 1850
Schlagbohrfrequenz [min-1] 0- 4800
Schlagbohrenergie [J] 2
Lärmpegel
- Schalldruck LpA ± KpA [dB] 83,0 ± 3,0 / 91,0 ± 3,0
- Schallleistung LwA ± KwA [dB] 94,0 ± 3,0 / 102,0 ± 3,0
Schutzgrad IPX0
Isolationsklasse III
Vibrationspegel ah± K [m/s2] 16,9 ± 1,5 / 15,9 ± 1,5
Gewicht [kg] 2,0
Bohrfutter SDS+
Bohrungsdurchmesser, max.
- Holz [mm] 40
- Beton [mm] 18
- Stahl [mm] 13
Akku Li-Ion
Akkukapazität [Ah] 3
Akkuenergie [Wh] 54
Netzgerät
Eingangsspannung [V~] 100 - 240
Netzfrequenz [Hz] 50 - 60
Nennleistung [W] 50
Ausgangsspannung [V] 21 DC
Ausgangsstrom [A] 1,5
Ladedauer [h] 1,5
ALLGEMEINE SICHERHEITSBEDINGUNGEN
ACHTUNG! Die nachstehenden Anweisungen durchlesen. Die Nichteinhaltung der nachstehenden Anweisungen kann einen
elektrischen Schlag, Brand oder Körperverletzungen führen. Der Begriff„Elektrowerkzeug” bezieht sich auf alle mit dem elektri-
schen Strom angetriebenen Werkzeuge sowohl mit der Netzleitung als auch ohne Netzleitung.
DIE NACHSTEHENDEN ANWEISUNGEN EINHALTEN!
Arbeitsplatz
Der Arbeitsplatz soll gut beleuchtet sein und In der Sauberkeit gehalten werden. Das Durcheinander und nicht ausreichende
Beleuchtung können Arbeitsunfälle verursachen.
Die Elektrowerkzeuge dürfen in der Umgebung mit erhöhter Explosionsgefahr, oder brennbaren Flüssigkeiten Gasen
oder Dunste nicht verwendet werden. Die Elektrowerkzeuge erzeugen Funken, die in Berührung mit brennbaren Gasen oder

20 ORIGINALANLEITUNG
D
Dunsten Brand verursachen können.
Kindern und unbefugte Personen fern von dem Arbeitsplatz halten. Die Konzentrationsschwäche kann zum Verlieren des
Beherrschens über dem Werkzeug führen.
Elektrische Sicherheit
Leitungsstecker muss an die Netzsteckdose passen. Der Stecker darf nicht modifiziert werden. Keine Adapter zur An-
passung des Leitungssteckers an die Netzsteckdose verwenden. Der nicht modifizierte Leitungsstecker, der genau an die
Netzsteckdose passt vermindert die Gefahr des elektrischen Schlages.
Den Kontakt mit geerdeten Flächen wie Rohre, Heizkörper, Kühlschränke vermeiden. Die Körpererdung erhöht das Ri-
siko des elektrischen Schlages. Die Elektrowerkzeuge dürfen dem Einfluss von atmosphärischen Niederschlägen oder
Der Feuchtigkeit nicht ausgesetzt werden. Wasser und Feuchtigkeit, die in das Innere des Elektrowerkzeuges eindringen,
erhöhen die Gefahr des elektrischen Schlages.
Den Netzkabel nicht überlasten. Die Netzkabel nicht zum Tragen, Abschalten und Einschalten des Leitungssteckers zum
Netzsteckdose verwenden. Den Kontakt des Leitungskabels mit der Wärme, Öl, scharfen Kanten und beweglichen Teilen
vermeiden. Beschädigung des Leitungskabels erhöht die Gefahr des elektrischen Schlages.
Be idem Einsatz außerhalb der geschlossener Räumen sollen für Außen geeignete Verlängerungsschnüre verwendet
werden. Die Verwendung der geeigneten Verlängerungsschnüre vermindert die Gefahr des elektrischen Schlages.
In dem Fall, wenn der Einsatz des Elektrowerkzeuges in einem feuchten Umfeld unvermeidlich ist, dann muss man als
Schutz vor der Spannung der Stromversorgung ein Differentialstromgerät (RCD) verwenden. Die Anwendung des RCD
verringert das Risiko eines elektrischen Stromschlags.
Personensicherheit
Dei Arbeit soll bei guter körperlicher und geistlicher Verfassung ausgeführt werden. Immer darauf achten was gemacht
wird. Die Arbeit darf nicht bei der Ermündung oder unter Einfluss von Alkohol oder Medikamenten ausgeführt werden.
Sogar eine momentane Unaufmerksamkeit während der Arbeit kann zu ernsthaften Körperverletzungen führen.
Die persönlichen Schutzmittel verwenden. Immer die Schutzbrille tragen. Die Verwendung von persönlichen Schutzmitteln
wie Staubmasken, Schutzschuhe, Helme und Gehörschutz vermindern die Gefahr der ernsthaften Körperverletzungen.
Das zufällige Einschalten des Elektrowerkzeuges vermeiden. Bitte prüfen ob der Schalter in der Stellung „AUS” steht
bevor das Elektrowerkzeug an das elektrische Netz angeschlossen wird. Das Halten der Finger auf dem Schalter oder
Anschluss des Elektrowerkzeuges bei dem eingeschalteten Schalter kann zu ernsthaften Körperverletzungen führen.
Vor Einschalten des Elektrowerkzeuges sollen alle Schlüssel und Werkzeuge entfernt werden, die zur Einstellung ver-
wendet worden waren. Der an den beweglichen Teilen des Werkzeuges hintergelassene Schlüssel kann ernsthafte Körperver-
letzungen herbeiführen.
Gleichgewicht halten. Durch die ganze Zeit entsprechende Arbeitsstellung einnehmen. Dadurch lässt sich das Elektrowerk-
zeug in den unerwarteten Notfällen bei der Arbeit leichter beherrschen.
Schutzkleidung tragen. Keine lose Kleidung oder Schmuck tragen. Haare, Kleidung und Arbeitshandschuhe fern von
den beweglichen Teilen des Elektrowerkzeuges halten. Lose Kleidung, Schmuck oder lange Haare können an die bewegliche
Teile des Elektrowerkzeuges anhaken.
Staubabsaugung oder Staubbehälter verwenden falls das Werkzeug damit ausgestattet wird. Bitte sorgen Sie dafür damit
sie sachgemäß angeschlossen sind. Verwendung der Staubabsaugung vermindert die Gefahr der ernsthaften Körperverletzungen.
Verwendung des Elektrowerkzeuges
Das Elektrowerkzeug nicht überlasten. Das zur ausführende Aufgabe geeignete Werkzeug verwenden. Entsprechende
Auswahl des Werkzeuges gewährleistet eine leistungsfähige und sichere Arbeit.
Das Werkzeug darf nicht verwendet werden, falls der Netzschalter nicht funktioniert. Das Werkzug, welches sich mit dem
Schalter nicht kontrollieren lässt, ist gefährlich und soll zur Reparatur geliefert werden.
Den Leitungsstecker von der Netzsteckdose herausziehen wenn das Werkzeug eingestellt oder Zubehör ausgetauscht
bzw. das Werkzeug aufbewahrt wird. Dadurch wird das zufällige Einschalten des Elektrowerkzeuges vermieden.
Das Elektrowerkzeug vor den Zutritt von Kindern schützen. Die bei der Bedienung des Werkzeuges nicht eingeschulten
Personen dürfen das Werkzeug nicht verwenden. Das Elektrowerkzeug kann in den Händen der nicht geschulten Personen
gefährlich sein.
Entsprechende Instandhaltung des Werkzeuges gewährleisten. Das Werkzeug auf nicht eingepasste Teile und Spiele der
beweglichen Teile prüfen. Bitte überprüfen, ob irgendein Bestandteil des Werkzeuges nicht beschädigt ist. Die Störun-
gen sollen vor dem Einsatz des Werkzeugen beseitigt werden. Viele Unfälle sind durch nicht sachgemäße Instandhaltung
des Werkzeuges verursacht.
Schneidewerkzeugen sollten sauber und geschärft sein. Sachgemäß geschärfte Schneidenwerkzeuge lassen sich besser
während der Arbeit kontrollieren.
Dei Elektrowerkzeuge und Zubehör gemäß der vorstehenden Anweisungen benutzen. Die Werkzeuge entsprechend der
Aufgabe und die Arbeitsbedingungen einsetzen. Die nicht bestimmungsgemäße Verwendung des Werkzeuges kann das
Risiko der Gefahren erhöhen.
Instandsetzungen
Table of contents
Languages:
Other YATO Rotary Hammer manuals