YEDI GV029 User manual

For Cooking & Demo Videos Go To: www.yedihousewareappliances.com/breadmaker
Follow us on Instagram @yedihouseware
THE YEDI HOUSEWARE
BREAD MAKER

CONTENTS
Important Safeguards ....................................................................3
Parts and Accessories..................................................................4
Control Panel Buttons Explained ..................................................5
How to Make Bread .......................................................................9
Delay Timer .....................................................................................13
Recommended Recipes.................................................................14
Soft Bread ...............................................................................14
Sweet Bread ...........................................................................14
Natural Sourdough Bread.....................................................15
French Bread ..........................................................................15
Whole Wheat Bread ..............................................................16
Quick Bread............................................................................16
Sugar Free Bread ...................................................................17
Multigrain Bread ....................................................................17
Milky Loaf Bread ....................................................................18
Cake.........................................................................................18
Raw Dough .............................................................................19
Leaven Dough ........................................................................19
Bake .........................................................................................19
Jam ..........................................................................................20
Yogurt......................................................................................20
Gluten Free Bread .................................................................20
Sticky Rice ...............................................................................21
Stir Fry......................................................................................21
Ferment...................................................................................21
Tips ...................................................................................................21

CONTENTS
Cleaning & Care Maintenance...................................................... 23
Measurement & Conversion Chart...............................................24
Technical Specifications ................................................................25
FAQ ..................................................................................................26
Warranty ..........................................................................................27

IMPORTANT SAFEGUARDS
When using the electrical appliance, basic precautions should
always be followed. See below:
1. Read all instructions, product labels and warnings carefully
before using the bread maker.
2. Do not touch hot surfaces. Use handles.
3. Always wear cooking mitts.
4. To avoid electrical shock, do not immerse cord, plug, or
appliance in water or other liquid.
5. Supervision is necessary when any appliance is used by or
near children.
6. Unplug from outlet when not in use and before cleaning.
Allow to cool before attaching or removing parts.
7. The use of accessory attachments not recommended by
the appliance manufacturer may cause fire, electric shock
or injury.
8. Do not use outdoors.
9. Avoid contact with moving parts.
10. Do not use the appliance for other than intended
or specified uses.
11. Do not place the appliance on unstable surfaces or near a
hot gas or electric burner, or in an oven.
12. Do not let the cord hang over the edge of the table or
counter or touch hot surfaces including the stove.
13. Extreme caution is needed when moving an appliance
containing hot oil or other hot liquids.
14. To disconnect, press and hold the START/STOP button for
a full second; remove plug from the wall outlet.
15. Do not scratch, damage, modify, forcefully bend, pull, twist
or fold the power cord.
16. Use only 120-VOLT AC electrical current.
3

SAVE THESE INSTRUCTIONS
HOUSEHOLD USE ONLY
1. A short power-supply cord should be used to reduce the
risk resulting from becoming entangled in or tripping over
a longer cord.
2.Longer extension cords are available and may be used if
care is exercised in their use.
3. If a longer extension cord is used:
a. The marked electrical rating of the extension cord
should be at least as great as the electrical rating of the
appliance
b. Don't drape the cord over the countertop or tabletop
where it can be pulled on by children or tripped over
unintentionally. If the appliance is of the grounded type,
the extension cord should be a grounding-type
3-wire cord.
PARTS AND ACCESSORIES
1. Steel Housing
2. Display Screen
3. Steel Lid
4. Handle
5. Viewing Window
6. Fruit/Nut Dispenser
7. Air Vent
8.Baking chamber
9. Bread Pan
10. Stirring paddle (Includes 2)
11. Hook
12. Measuring Spoon
13. Measuring Cup
14. Cooking Mitts
4
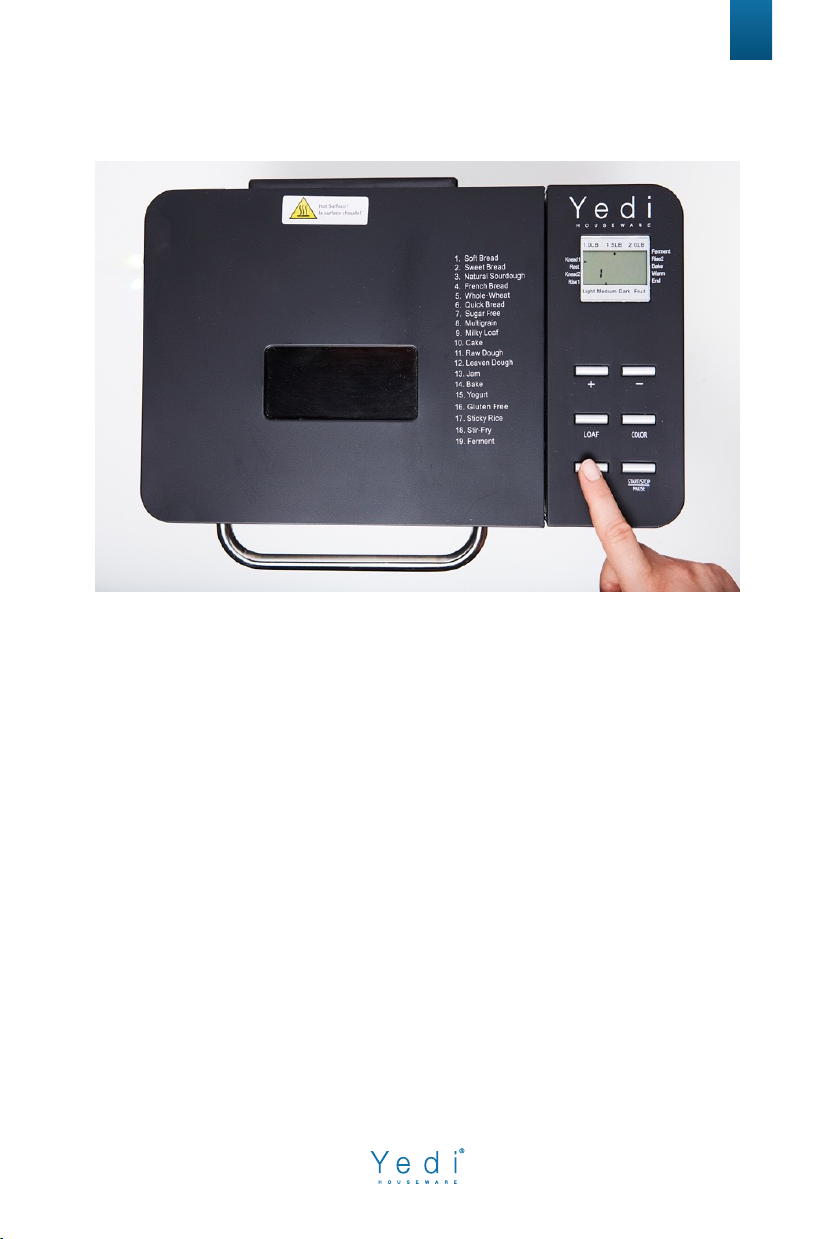
CONTROL PANEL BUTTONS EXPLAINED
5
“MENU” Button - The MENU button is used to select your desired cooking
program. Press the MENU button repeatedly to scroll through the cooking
programs until you see the number on the display screen corresponding to
the cooking program you desire to use. The PROGRAM LIST is as follows:
1. Soft Bread
2. Sweet Bread
3. Natural Sourdough Bread
4. French Bread
5. Whole Wheat
6. Quick Bread
7. Sugar Free
8. Multigrain Bread
9. Milky Loaf Bread
10. Cake
11. Raw Dough
12. Leaven Dough
13. Jam
14. Bake
15. Yogurt
16. Gluten Free
17. Sticky Rice
18. Stir-fry
19. Ferment
6
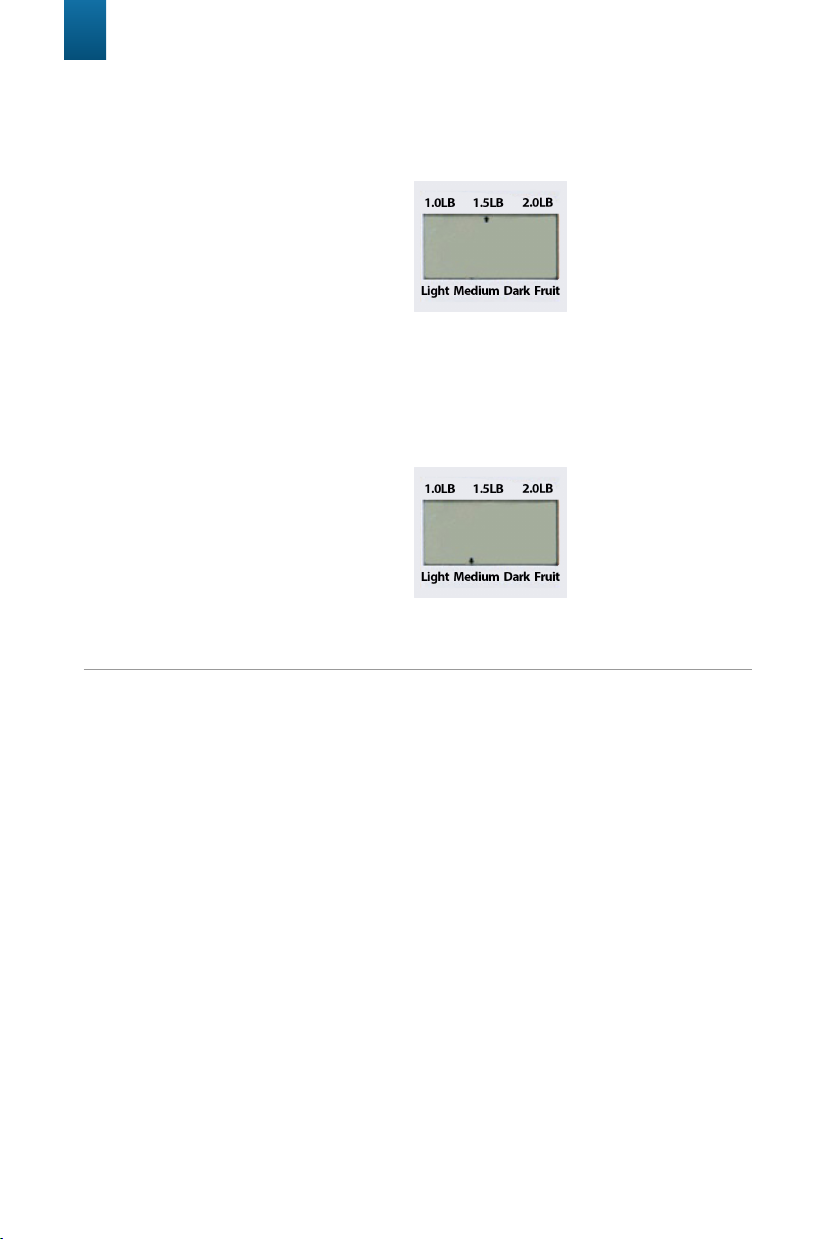
“LOAF” Button: Press the LOAF button repeatedly to select the desired bread
size (this function is just available for programs 1 to 9 and 16). The arrow
location will indicate your loaf size/weight. You can choose between 3
options:
• 1.0 LB
• 1.5 LB
• 2.0 LB
“COLOR” Button: Press the COLOR button repeatedly to select the desired
crust color (this function is just available for programs 1 to 10, 14 & 16). The
arrow location will indicate your colored crust choice. You can choose
between 3 options:
“START/STOP/PAUSE” Button:
1. Once you’ve selected your desired settingsand are ready to begin
cooking, press the START/STOP/PAUSE button once. A short beep will
be heard. The colon “:” in the time display will begin to flash, and the
cooking cycle will start. When the bread maker cycle begins, all the
buttons/functions will be locked. If you need to access the unit's buttons/
functions, please hold the START/PAUSE button for 2 seconds.
2. When you press and hold the START/STOP button for at least 2 seconds
you will hear a prompt sound “Buzz”, the unit will stop working
immediately. However, please note this does not shut off the appliance.
To shut it off you will need to disconnect the power cable.
3. To pause a program, you should quickly tap the PAUSE button and then
the program will stop its countdown. While the machine is paused you
can add some ingredients or check your mix. Tap the PAUSE button
again and the cooking program will resume.
• Light
• Medium
• Dark

INDICATORS
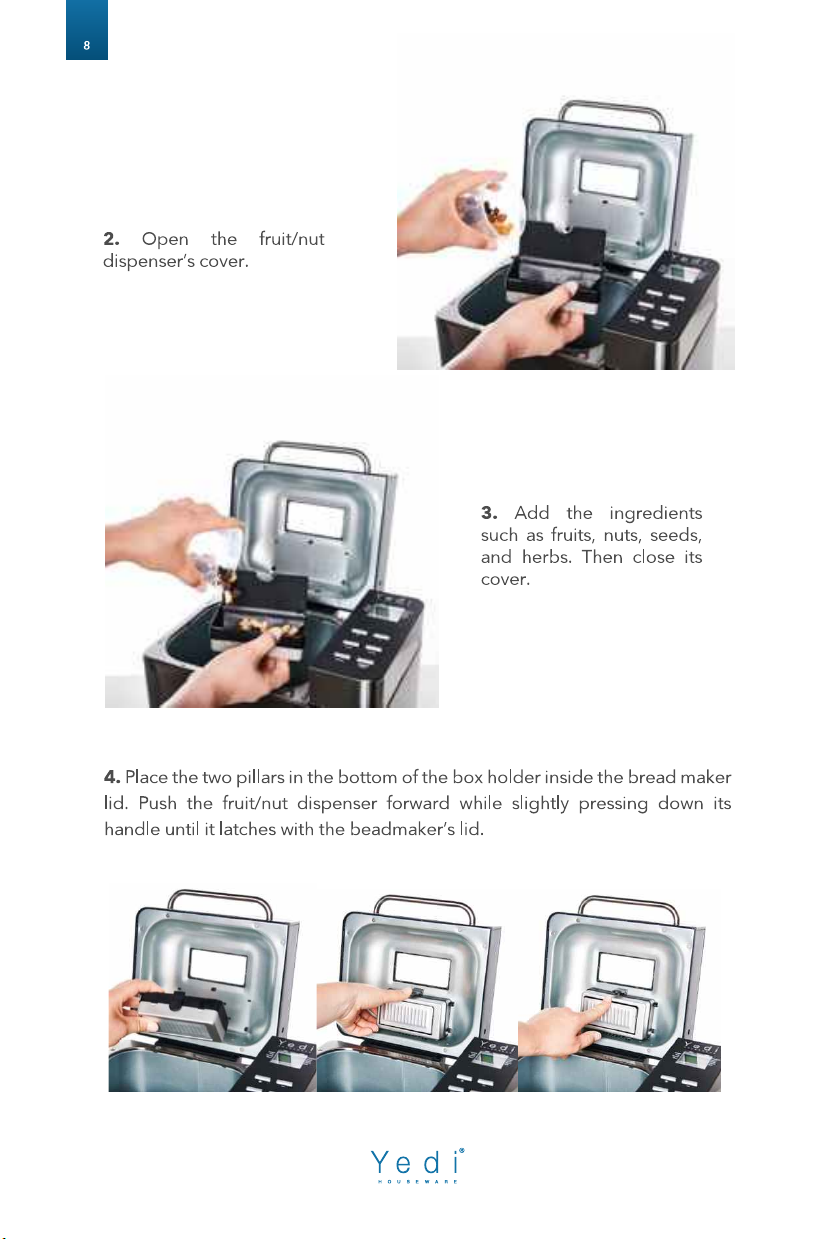
AUTOMATIC FRUIT/NUT DISPENSER
(Optional Use)
7
When cooking bread an arrow will point to what part of the bread making
process the machine is in. See below the 9 different stages of the bread cook-
ing process:
For Demo Video Go Here: www.yedihousewareappliances.com/breadmaker
Note: Assemble to the bread maker before cooking. See instructions below:
Fruit Indicator: Whenever making bread with dry fruits or nuts, the bread
maker will sound a buzzer for 10 seconds and the arrow will point to the “Fruit”
label. If using the fruit/nut dispenser, its contents will be automatically
released at this time.
Note: This can also be done manually by carefully opening the beadmaker lid
and dropping your desired fruits & nuts into the mix.
1. Knead1
2. Rest
3. Knead2
4. Rise1
5. Ferment
6. Rise2
7. Bake
8. Warm
9. End
1. Open the cover of the
bread maker. Press the
fruit/nut dispenser’s small
black handle down to
unlock and remove the
fruit/nut dispenser form the
beadmaker.

BEFORE FIRST USE
HOW TO MAKE BREAD
The appliance may emit a slight smell and/or smoke when you
turn it on for the first time. Do not worry, this is normal and will
soon stop. Make sure the appliance has sufficient ventilation.
Please check whether all parts and accessories are complete and
free of damage.
Clean all the parts according to the section “CLEANING AND
CARE MAINTENANCE”.
Assemble the bread pan and then set the bread maker on BAKE
mode and bake empty for 10-minutes. Then let it cool down
and clean all the parts again.
Dry all parts thoroughly and assemble them if necessary.
YOU’RE NOW READY TO USE YOUR YEDI!
9
1. Open the lid and take out the bread pan by holding it from the handle
and turning it slightly counterclockwise until it's released. Then pull it up and
out of the baking chamber.
For Demo Video Go Here: www.yedihousewareappliances.com/breadmaker
Table of contents


