IM 700929-01E 1/2
r’s
Thank you for purchasing the Model 700929, 10:1 Probe (Safety Probe Supporting Isolated Input). This
user’s manual explains usage, specifications, and the handling precautions of the 700929. To ensure
correct use, please read this manual thoroughly before beginning operation. After reading this manual,
keep it in a safe place.
Model 700929
10:1 Probe
(Safety Probe Supporting Isolated Input)
Notes
• The contents of this manual are subject to change without prior notice as a result of continuing
improvements to the product’s performance and functionality. The figures given in this manual may
differ from those that actually appear on your product.
• Every effort has been made in the preparation of this manual to ensure the accuracy of its
contents. However, should you have any questions or find any errors, please contact your nearest
YOKOGAWA dealer.
• Copying or reproducing all or any part of the contents of this manual without the permission of
YOKOGAWA is strictly prohibited.
Conventions Used in This Manual
Improper handling or use can lead to injury to the user or damage to the instrument.
This symbol appears on the instrument to indicate that the user must refer to the
user’s manual for special instructions. The same symbol appears in the corresponding
place in the user’s manual to identify those instructions. In the manual, the symbol is
used in conjunction with the word “WARNING” or “CAUTION.”
WARNING Calls attention to actions or conditions that could cause serious or fatal injury to the
user, and precautions that can be taken to prevent such occurrences.
CAUTION Calls attentions to actions or conditions that could cause light injury to the user or
damage to the instrument or user’s data, and precautions that can be taken to prevent
such occurrences.
Note Calls attention to information that is important for proper operation of the instrument.
French
Une manipulation ou une utilisation incorrectes risquent de blesser l’utilisateur ou
d’endommager l’instrument. Ce symbole apparaît sur l’instrument pour indiquer
à l’utilisateur qu’il doit se reporter au manuel de l’utilisateur afin d’y lire les
instructions spécifiques correspondantes. Ce même symbole apparaît à la section
correspondante du manuel de l’utilisateur pour signaler lesdites instructions. Dans le
manuel de l’utilisateur, ce symbole est accompagné des termes AVERTISSEMENT et
ATTENTION.
AVERTISSEMENT Attire l’attention sur des gestes ou des conditions susceptibles de provoquer
des blessures graves (voire mortelles), et sur les précautions de sécurité
pouvant prévenir de tels accidents.
ATTENTION Attire l’attention sur des gestes ou des conditions susceptibles de provoquer des
blessures légères ou d’endommager l’instrument ou les données de l’utilisateur, et
sur les précautions de sécurité susceptibles de prévenir de tels accidents.
Safety Precautions
This product is designed to be used by a person with specialized knowledge. To use this product
correctly and safely, make sure to observe the following safety precautions when handling the product.
YOKOGAWA assumes no liability for the customer’s failure to comply with these safety precautions.
This manual is part of the product and contains important information. Keep this manual in a safe place
so that you can refer to it immediately when using the product until you dispose of the product. Also,
before starting to use the probe, read the user’s manual of the measuring instrument to thoroughly
familiarize yourself with its specifications and handling.
The following symbols are used on this instrument.
Handle with care. Refer to the user’s manual or service manual. This symbol appears on
dangerous locations on the instrument which require special instructions for proper handling
or use. The same symbol appears in the corresponding place in the manual to identify those
instructions.
French
À manipuler délicatement. Toujours se reporter aux manuels d’utilisation et d’entretien. Ce
symbole a été apposé aux endroits dangereux de l’instrument pour lesquels des consignes
spéciales d’utilisation ou de manipulation ont été émises. Le même symbole apparaît à l’endroit
correspondant du manuel pour identifier les consignes qui s’y rapportent.
Notes about Usage
WARNING
Purpose of the product
The product is used in combination with a measuring instrument to observe and measure
electrical signals. Do not use for any other purpose.
Be careful of electric shock
Never use the probe with wet hands or when the probe itself is wet. Doing so may cause
electric shock. Be careful of electric shock when you connect the probe to the device under
measurement.
Do not operate in wet or damp conditions
To prevent electric shock, do not operate the probe in wet or damp conditions.
Avoid exposed circuitry
To prevent electric shock, remove metal and jewelry such as watches and rings. Do not
touch exposed connections or components when power is present on the device.
Do not operate in explosive atmosphere
To prevent injury or fire hazard, do not operate the probe in an atmosphere of flammable or
explosive gases or vapors.
Do not operate with suspected failures
Stop using the probe if you suspect that the probe is damaged. Consult your nearest
YOKOGAWA dealer.
Do not operate with a damaged signal cable
If the signal cable is torn and the inner metal is exposed or if a color different from the outer
sheath appears, stop using the cable.
Do not disassemble or modify
Do not disassemble or modify the product. YOKOGAWA assumes no liability if you
disassemble or modify the product.
French
AVERTISSEMENT
But du produit
Le produit est utilisé en association avec un instrument de mesure pour observer et mesurer
des signaux électriques. Ne l’utilisez pas à d’autres fins.
Faites attention au choc électrique
N’utilisez jamais la sonde les mains mouillées ou lorsque la sonde elle-même est mouillée.
Cela pourrait provoquer un choc électrique. Faites attention au choc électrique lorsque vous
connectez la sonde à l’appareil à mesurer.
N’opérez pas dans des conditions mouillées ou humides
Pour éviter un choc électrique, ne faites pas fonctionner la sonde dans des conditions
mouillées ou humides.
Évitez les circuits exposés
Pour éviter un choc électrique, retirez le métal et les bijoux tels que les montres et les
bagues. Ne touchez pas les connexions ou composants exposés en présence de courant
sur l’appareil.
N’opérez pas dans une atmosphère explosive
Pour éviter les blessures et les risques d’incendie, n’utilisez pas la sonde dans une
atmosphère de gaz ou des vapeurs inflammables ou explosifs.
N’opérez pas en cas de défaillances suspectées
Arrêtez d’utiliser la sonde si vous pensez qu’elle est endommagée. Consultez votre
revendeur YOKOGAWA le plus proche.
N’opérez pas avec le câble de signal endommagé
Si le câble de signal est coupé et que le métal interne est exposé ou si une couleur différente
de la gaine extérieure apparaît, arrêtez d’utiliser le câble.
Ne démontez ou modifiez pas
Ne démontez ou modifiez pas le produit. YOKOGAWA n’assume aucune responsabilité si
vous démontez ou modifiez le produit.
Regulations and Sales in Various Countries and Regions
Waste Electrical and Electronic Equipment (WEEE)
(EU WEEE Directive valid only in the EEA* and UK WEEE Regulation in the UK)
This product complies with the WEEE marking requirement. This marking indicates
that you must not discard this electrical/electronic product in domestic household
waste. When disposing of products in the EEA or UK, contact your local Yokogawa
office in the EEA or UK respectively.
* EEA: European Economic Area
UKCA Marking
This product complies with the UKCA (UK Conformity Assessed) marking.
Authorized Representative in the EEA (AR)
Yokogawa Europe B. V. is the authorized representative of Yokogawa Test & Measurement
Corporation for this product in the EEA. To contact Yokogawa Europe B. V., see the separate list of
worldwide contacts, PIM 113-01Z2.
Disposal
When disposing of YOKOGAWA products, follow the laws and ordinances of the country or region
where the product will be disposed of.
1 Overview
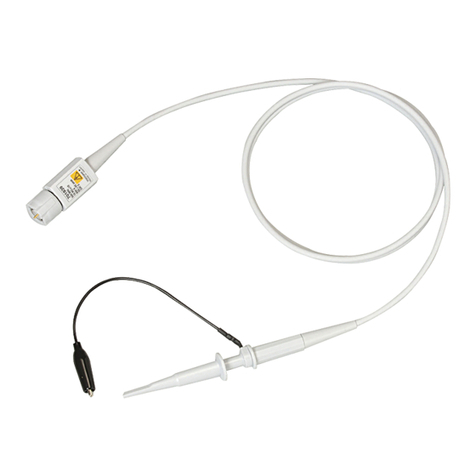
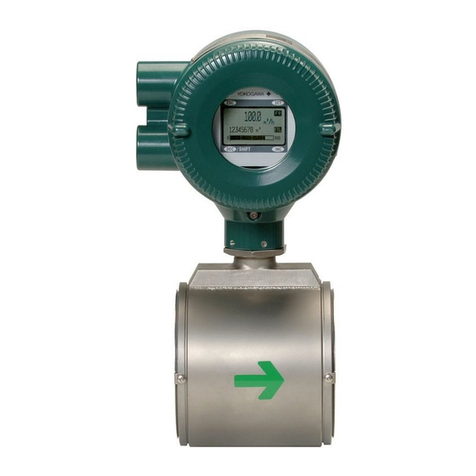
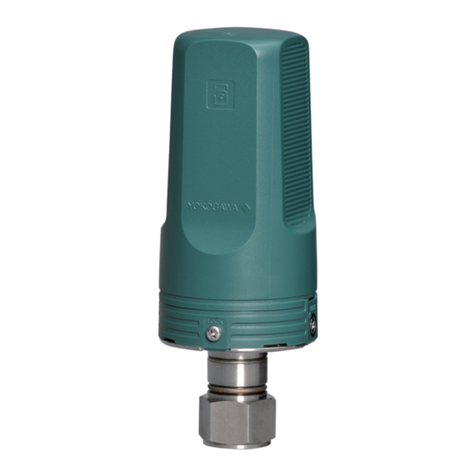
Model 700929 is a dedicated 10:1 safety probe supporting isolated input that enables safer, high-
voltage measurement when used in combination with an isolated input measuring instrument
(waveform measuring instrument). The probe body and the BNC connector, except for the probe tip,
are isolated so that dangerous voltages cannot be accidentally exposed. Make sure that you also
fully understand the conditions for using the measuring instrument when using the probe.
2 Configuration
The 700929 consists of a probe unit and its standard accessories.
Safety clip lead
Safety plug-on clip
Safety clip lead
B8023ZC
Name Part No.
Standard Accessories
Phase adjustment knob
Manual Title Manual No. Description
Model 700929 10:1 Probe
(Safety Probe Supporting Isolated Input)
User's Manual
IM 700929-01E This manual. Explains usage,
specifications, and the handling
precautions of the 700929
Model 700929 10:1 Probe IM 700929-92 Document for China
Safety Instruction Manual IM 00C01C01-01Z1 Safety manual
(European languages)
Inquiries PIM 113-01Z2 List of worldwide contacts
The “E”, “Z1”, and “Z2” in the manual numbers are the language codes.
Note
When storing the probe in the case, remove the safety plug-on clip and the safety clip lead from
the probe unit, and attach the included protection cover to the probe tip.
3 How to Use
WARNING
• Use this probe only with YOKOGAWA’s isolated input measuring instruments. Even with
YOKOGAWA’s measuring instruments, this probe can be used only when specified as an
accessory.
• Do not apply a voltage exceeding the maximum input voltage or the derating voltage by
frequency to the probe. EN 61010-031 is a compliant safety standard that is applied to
the probe alone. For the actual safety standards and operating conditions, comply with
the conditions of the measuring instrument. Failure to follow this precaution may cause
accidents, such as electric shock or damage to the measuring instruments.
• The actual maximum input voltage is limited to the lower of the maximum input voltage of
the probe or the maximum input voltage of the measuring instrument. For the maximum
input voltage of the measuring instrument, see the specifications of the measuring
instrument. Convert the attenuation ratio of the probe and make sure not to apply an
excessive input voltage to the measuring instrument.
• When the input coupling of the measuring instrument is AC, a DC voltage is applied to
the measuring instrument’s input at the same electric potential as the probe’s input. Make
sure not to exceed the maximum input voltage of the measuring instrument.
• Be careful of electric shock when connecting the probe to the device under measurement.
After use, turn off the power to the device under measurement, disconnect the probe
from the device, and then disconnect the probe from the measuring instrument.
CAUTION
• Avoid shock to the probe body. Do not bend or pull the cables excessively. Doing so may
damage or disconnect the probe.
• Use a soft cloth to clean the probe. Do not immerse the probe body in liquid. Do not use
abrasive cleaners or volatile solvents such as benzine on the probe.
IM 700929-01E
15th Edition
15th Edition: May 2022 (YMI). All Rights Reserved. Copyright © 1995 Yokogawa Electric Corporation.
Copyright © 2014 Yokogawa Test & Measurement Corporation. Printed in Japan
*IM 700929-01E/15*

