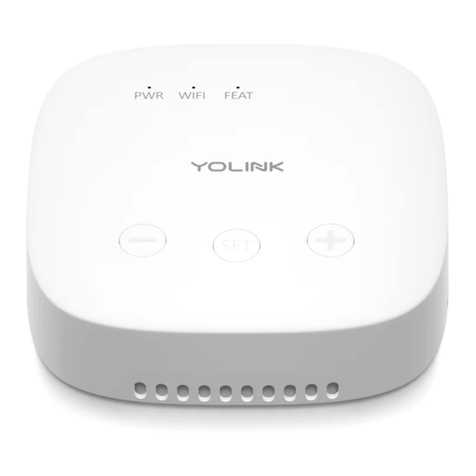
Yolink YS5707-UC Guide

Dimmer Switch
YS5707-UC
Installation Manual & User Guide
Rev 1.2
February 2, 2023

SECTION TOPIC PAGE
A Welcome! 1
B Introduction 2
C Before You Begin 3
D What's in the Box? 5
E Install the YoLink App 6
F Add Your Dimmer Switch to the App 8
G Installation 10
H Get to Know Your Dimmer Switch 14
I App Functions: Device Screen 15
J App Functions: Schedule 16
K App Functions: Timer 17
L App Functions: Device Details Screen 18
M App Functions: Smart - Scene 19
N App Functions: Smart - Automation 20
O Third-party Assistants & Integrations 21
P About Control-D2D (Device Pairing) 23
Q Firmware Updates 26
R Factory Reset 26
S Specifications 27
T Warnings 28
U 1-Year Limited Electrical Warranty 29
V FCC Statement 30
W Contact Us & Customer Support 31
TABLE OF CONTENTS

User Guide Conventions
To assure your satisfaction with your purchase, please read
this user guide we have prepared just for you. The following
icons are used to convey specific types of information:
Very important information (can save you time!)
1
Good to know info but may not apply to you
Mostly unimportant (it’s ok to breeze past it!)
Thank you for purchasing YoLink products!
Whether you are adding additional YoLink products or if
this is your first YoLink system, we appreciate you
trusting YoLink for your smart home & automation
needs. Your 100%satisfaction is our goal. If you
experience any problems with your installation, with our
Dimmer Switch, or if you have any questions that this
manual does not answer, please contact us right away.
See the Contact Us section, on the last page, for more
info.
Thank you!
Eric Vanzo
Customer Experience Manager
Welcome!
A

Introduction
B
The YoLink Dimmer Switch is a smart dimmer style single-
pole light switch, for 120 to 250 VAC circuits and dimmable
light bulbs.
For full functionality, including functionality of the YoLink
app, your smart Dimmer Switch connects to the internet by
connecting wirelessly to one of our hubs (original YoLink
Hub or the SpeakerHub), not via WiFi or other wireless
methods. If you do not already have a YoLink hub, and
unless there is an existing YoLink wireless network in your
building (for example, an apartment complex or condo
building with a building-wide YoLink system), please
purchase and set-up your hub before proceeding with the
installation of your new Dimmer Switch.
Please note: the Dimmer Switch requires a neutral wire! It
will not function without a neutral wire. As explained in the
Installation section, you must identify the neutral wire in the
switch’s electrical box. If a neutral wire is not present, one
must be installed. Consult with or hire a qualified and
properly licensed electrician, as required.
Also note: the Dimmer Switch is not compatible with 3-
way switches or 3-way style wiring, but 3-way operation
functionality can be accomplished using two YoLink
Dimmer Switches, wired as standard switches, and paired
using Control-D2D pairing. This pairing process is
explained in the Control-D2D pairing section of this user
guide.
Refer to the Before You Begin section for additional
important information prior to installing your Dimmer
Switch.
2

The Dimmer Switch is generally compatible with the
following light bulb types, at their respective maximum
loads:
3
Before You Begin
C
LED –150 Watts
Fluorescent/CFL –150 Watts
Halogen –450 Watts
Incandescent –450 Watts
Refer to the Device Settings section to calibrate your
Dimmer Switch if the lights flicker.

4
Before You Begin, Continued
C
Medium Phillips Screwdriver Small Slotted Screwdriver
Multimeter
Tools you will need:
Tools you
may
need:
Wire-strippers/Wire Cutters
Do NOT overload or use your dimmer switch to control
receptacles, motor-driven appliances, or transformer-supplied
appliances.
Do review the environmental limitations of the Dimmer Switch
prior to installation. The Dimmer Switch is intended for indoor
locations, only!
Do familiarize yourself with this user guide prior to beginning
installation.
Do ensure that you are comfortable working with electricity and
handling the associated tools, or hire a qualified electrician to
install your Dimmer Switch!

What’s in the Box?
D
Dimmer Switch, with Faceplate
Quick Start Guide
5
Wire Connectors (4)
Faceplate Screws (2)
Electrical Box Screws (2)

Retain your username and password in a secure location
If you encounter an error message attempting to create
an account, disconnect your phone from WiFi, and try
again, connected only to the cellular network
Apple phone/tablet
iOS 9.0 or higher
Android phone/tablet
4.4 or higher
Install the YoLink App
E
If you are new to YoLink, please install the app on your phone or
tablet, if you have not already. Otherwise, please proceed to part
F.
Scan the appropriate QR code below or find the “YoLink app” on
the appropriate app store.
Open the app and tap Sign up for an account. You will be
required to provide a username and a password. Follow the
instructions, to set up a new account
Allow notifications, if prompted.
1
6

Install the YoLink App, Continued
E
QR code scanner icon
You will immediately receive an email from
no[email protected] with some helpful information. Please
mark the yosmart.com domain as safe, to ensure you receive
important messages in the future.
2
Log in to the app using your new username and password. The
app opens to the Favorite screen, as shown. This is where your
favorite devices will be shown. You can organize your devices
by room, in the Rooms screen, later.
3
Tap Add Device (if shown) or tap the scanner icon
4
7

XXX
Add Your Dimmer Switch to the App
F
Approve access to the camera, if requested. A viewfinder will
be shown on the app.
5
Hold the phone over the QR code (on the Dimmer Switch
“Remove After Registering” decal, as well as on the rear of
the Dimmer Switch) so that the code appears in the
viewfinder. If successful, the Add Device screen will be
displayed
6
Refer to Figure 1 on the next page. You can edit the name of
the Dimmer Switch, and assign it to a room, if desired. Tap
the Favorite heart icon to add this device to your Favorites
screen. Tap Bind device
7
5
8

If successful, close the Device Bound pop-up message by
tapping Close
8
Tap Done as shown in Figure 2.
9
If this is your first YoLink system, please visit our product
support area at yosmart.com for an introduction to the app,
and for tutorials, videos, and other support resources.
Ensure your YoLink Hub or SpeakerHub is setup and online
before proceeding to the next step.
10
9
Add Your Dimmer Switch to the App, Cont.
F
Figure 2
Figure 1

Installation
G
Turn off the circuit that serves the switch at
the circuit breaker panel (or other means of
disconnecting the AC power to the circuit).
Do NOT work on “hot” electrical wiring!
1
2
10
Using a slotted screwdriver, remove the switch faceplate, then
using a slotted or Phillips screwdriver, remove the switch and
pull it away from the wall.
3
Before removing any wiring from the switch, identify the wires
on the switch and in the electrical box:
Ground wire: this wire is typically a bare copper wire, but it
may have a green jacket (insulation), or it may have another
color insulation with green tape identifying it as a ground.
Additional means of identification are the wire is terminated on
(connected to) a green screw on the switch, and/or the screw
or wire connection has a designation such as “GND” and/or
includes the universal earth ground icon:
Verify that power has been removed to the light switch, by
testing the switch, and by using a multimeter or other type of
voltage tester before removing any wires from the switch.
If replacing an existing switch, proceed to the next step. For
new installations, skip ahead to step 5.

Installation, Continued
G
11
Switch Leg Wire: this wire is typically black, but may be red or
another color. This is the wire that is energized when the switch
is on. After you have identified the ground and the hot wires on
the existing switch, the remaining wire should be the switch leg
wire. This wire can also be helpful in identifying the neutral wire.
While the existing switch you are replacing with the Dimmer
Switch may not have required a neutral wire, the light that it
controlled does require a neutral wire. Follow the switch leg
wire to its connections to another wire, or for it to join a “multi-
conductor” cable (a larger jacketed cable with two or more
different conductors within it). If the switch leg wire is in a
yellow jacketed cable, for example, that also has a white and a
bare copper wire with in it, this cable most-likely serves the
existing light, and you have also identified the neutral wire.
Neutral Wire: this wire is typically white. As explained above,
the light that is controlled by the existing switch will require a
neutral wire, making it easier to identify if it is in the box.
Otherwise, look for multiple white wires under one wire
connector in the electrical box. If you find a white wire with
black tape, this is likely a wire NOT used as a neutral; do not use
this wire! If you are still unable to identify a neutral wire, stop
and consult an electrician to have one installed, otherwise
contact us regarding questions about returning your Dimmer
Switch, if so desired.
Line or Hot Wire: this wire is typically black, but can be red or
another color, but if not it may be marked as the hot wire with
black or red tape. One of the wires on the existing light switch
should be the hot wire. Another way of identifying this wire is
that it may be connected to other wires in the box. If the box
contains multiple switches, for example, there will typically be a
hot wire that connects to each switch. Observe each of the
non-ground wires on the switch, looking for connections to
other black (or red) wires under a “wire-nut” or similar wire
connector.

Installation, Continued
G
12
Identify each wire with a marker, tape or other labeling
method, as desired, so they are not confused with each other
during the wire termination step.
4
5
Neutral
Hot
Switch Leg
(to Lights)
Ground
Figure 1
Connect the Dimmer Switch’s “pigtail” wires (pre-installed
colored wires, connected to the switch) to your identified
wires. As shown in the example shown in Figure 1 below, and
using the included or existing “wire-nut” connectors:
Connect the switch’s green pigtail to the ground wire(s).
Connect the switch’s white pigtail to the neutral wire(s).
Connect the switch’s black pigtail to the hot wire(s).
Connect the switch’s red pigtail to the light switch leg wire.

Installation, Continued
G
13
Check each wiring connection by gently tugging on each
conductor, ensuring it does not pull out of the wire-nut or
appear loose. Re-do any that do not pass this test.
6
Gently push the wiring and the switch into the electrical box,
then secure the switch to the box using the included or
existing screws (if more suitable for the box).
7
Using the included screws, secure the faceplate mounting
plate to the switch, then mount the outer part of the faceplate
onto the mounting plate, snapping it into place. (If this switch
is in a multi-gang box, use the existing faceplate or furnish
one suitable for the switches in the electrical box.)
8
Turn on power to the circuit by returning the circuit breaker to
the on position (or reconnect power per your applicable circuit
disconnection method).
9
Test the switch by turning the light on and off.
10

Brightness Decrease Button
Short press to decrease the
brightness in order 100%->80%-
>60%->40%->20%
Long Press to decrease by 1%
Brightness Increase Button
Short press to increase the
brightness in order 20%->40%-
>60%->80%->100%
Long Press to increase by 1%
Brightness LED
Indicate the current lighting
brightness
20%-40%-60%-80%-100%
Status LED
Get to Know Your Dimmer Switch
H
Please take a moment to familiarize yourself with your
Dimmer Switch, in particular the LED behaviors.
14
Blinking Red Once, then Green Once
Device Start-up
Blinking Red And Green Alternately
Restoring to Factory Defaults
Red
Dimmer is off
Blinking Green
Connecting to Cloud
Fast Blinking Red
Unpairing Device-to-Device
Green
Dimmer is on
Slow Blinking Green
Updating
Fast Blinking Green
Pairing Device to Device

D App Functions: Device Screen
I
Brightness Status
-Shows the current brightness level
Product Support
Device Settings
-Tap to go to Details screen
Connection Status
Brightness Control
-Slide to set the desired brightness
Power Button
-Tap to turn on/off the dimmer
Real-time Status
-Turned on or turned off
Timer
-Set the one-time timer to automatically
turn on/off after the timer ends
Schedule
-Set schedules to automatically turn
on/off the dimmer
15

D App Functions: Schedule
J
16
Tap to add a schedule
Tap to enable or disable a schedule
Swipe left to edit or delete a
schedule
Tap to edit the schedule
Tap to save the settings
Set the preferred state
“on”, ”off”, or “on and off”.
Set the schedule time
Apply special brightness
Set repeating frequency
You can have a maximum 6 schedules at one time.
The schedule runs on the device without an internet connection.
You can add more schedules in Automation settings. Automation
settings are saved in the cloud.

D App Functions: Timer
K
17
Tap to save the settings
Tap to choose action “on”, “off”,
or “on and off”
Set the timer duration
Apply special brightness
The timer will run only once. You can set a new timer after
the timer has already run once or after you cancel it.
The timer runs on the device without an internet connection.

D App Functions: Device Details Screen
L
18
Device type (Temp Humidity Sensor)
Device name
-Tap to edit the device name
Room
-Tap to assign a device to a room
Favorite
-Tap the heart icon, the device will be
displayed on the Favorite tab
History
-Tap to view the device on/off
history, logged with date and time
Device Status
-Turned on or turned off
Device Time
-Tap to sync with mobile
Device Status LED
-Tap to enable or disable the device
status LED
Device Brightness LED
- Tap to enable or disable the
device brightness LED
Dimming Calibration
-Set the dimming range to find the
proper minimum level of brightness
by dimming up/down the brightness
and checking if the light flickers.
Device EUI
-Device’s unique ID number
SN
-Device’s unique serial number, tap
to save the device’s QR code, if
desired
Signal Intensity
-Indicate how strong the signal is
from the nearest hub
Firmware
-Indicates the current firmware
version. If a second number is shown
with the words “Ready” there is a
newer firmware version available. Tap
the word Ready to start the update
Power on status after power
outage
-Switch to Last State or On or Off
*Default is set to Off State
Gentle On
-The ramp-up duration (turning on)
Gentle Off
-The ramp-down duration (turning off)
Model
-Dimmer Switch (YS5707-UC)
Table of contents
Other Yolink Switch manuals