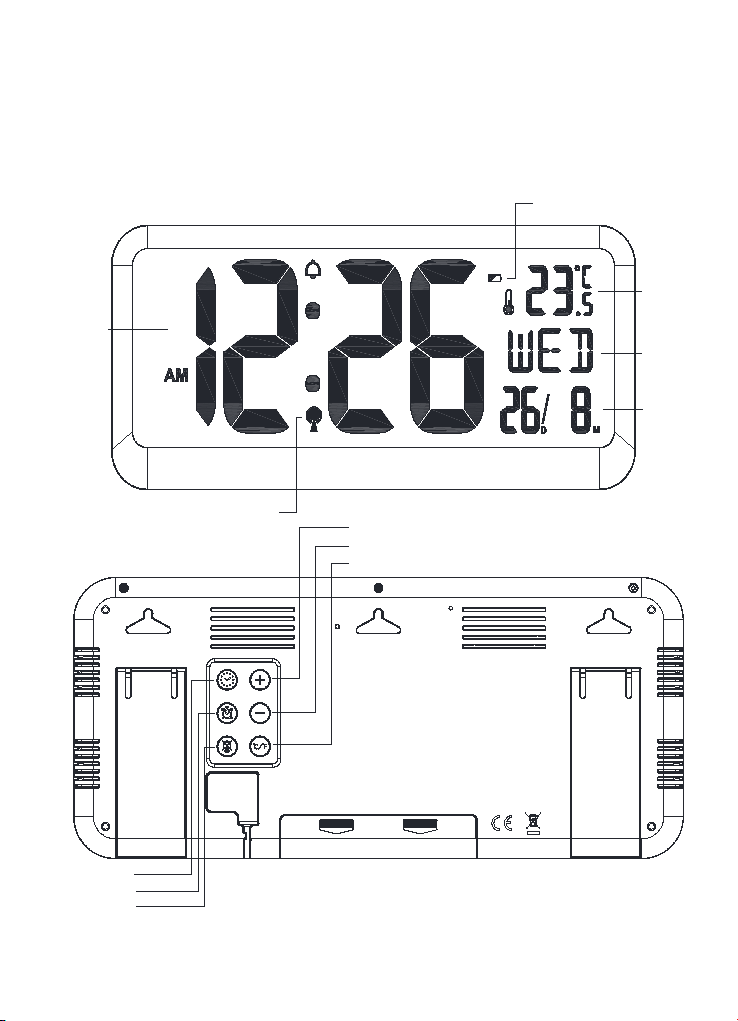
Initial operation
Open Production battery compartment cover.
Insert 4 x AA batteries observing polarity [ “+” and “ –“ marks].
When you insert the batteries, all the icon on the LCD display will briefly light up for 3 seconds, and you will
hear a beep tone, and detect indoor temperature.
Reception of the Radio signal
At 1:00 /2:00 / 3:00 am, the clock automatically carries out the synchronization procedure with the MSF
signal to correct any deviations to the exact time. If this synchronization attempt is unsuccessful, the system
will automatically attempt another synchronization at the next full one hour. This procedure is repeated
automatically up to total 5 times.
To start manual MSF signal reception, press and hold down the “UP”button for two seconds. If no signals
received within 7 minutes, then the MSF signal search stops.
During RC reception,to stop searching radio signal, press the “DOWN”button once.
F.Y.I.:
A flashing radio mast icon indicates that the MSF signal reception has started.
A continuously displayed radio mast icon indicates that the MSF signal was received successfully.
We recommend a minimum distance of 2.5 meters to all sources of interference, such as televisions or
computer monitors.
Radio reception is weaker in rooms with concrete walls (e.g.: in cellars) and in offices. In such extreme
circumstances, place the system close to the window.
During the RC receive mode, all button operation have no function, If you want to carry out other
functions of operation, please press “UP”button to exit the RC receiving mode.
Manual time setting
Press and hold down the “CLOCK” button for 2 seconds, the 12/24 hour mode display starts toflash. Now
use “UP” and“DOWN” buttonsto set the correct 12/24 hour mode.
Press “CLOCK” to confirm your setting, the Hour display starts to flash. Now use “UP” and“DOWN”
buttonsto set the correct hour.
Press “CLOCK” to confirm your setting, the Minute displays starts to flash. Now use “UP” and“DOWN”
buttonsto set the correct minute.
Press “CLOCK” button to confirm your setting, the Month and Date icon display starts to flash. Now use
“UP” and“DOWN” buttonsto set the date display on Month/Date or Date/Month.
Press “CLOCK” button to confirm your setting, the Year display 2020 starts to flash. Now use “UP” and
“DOWN” buttons to set the correct year.
Press “CLOCK” button to confirm your setting, the Month display starts to flash. Now use “UP” and
“DOWN” buttons to set the correct month.
Press “CLOCK” button to confirm your setting,the Date display starts to flash. Now use “UP” and“DOWN”
buttons to set the correct date.
Press “CLOCK” to confirm your setting and to end the setting procedures, enter the clock mode.