INSTALLATION ADVICE:
As the detector responds to changes in temperature, avoid the following situations:
Ø Avoid pointing the detector towards objects with highly reflective surfaces, such as mirrors etc.
Ø Avoid mounting the detector near heat sources, such as heating vents, air conditioning units,
light etc.
Ø Avoid pointing the detector towards objects that may move in the wind, such as curtains, tall
plants etc.
CONNECTION:
Warning. Danger of death through electric shock!
l Must be installed by professional electrician.
l Disconnect power source.
l Cover or shied any adjacent live components.
l Ensure device cannot be switched on.
l Check power supply is disconnected.
Ø Please loose the screws on the side. (Refer to figure 1)
Ø Please open the upper cover with anti-clockwise whirl as per the diagram.(Refer to figure 2)
Ø Connect the power and the load according to the connection-wire diagram.
Ø Fix the bottom on the selected position with the inflated screw.
Ø Install back the upper cover on the sensor, then you could switch on the power and test it.
Figure 1 Figure 2
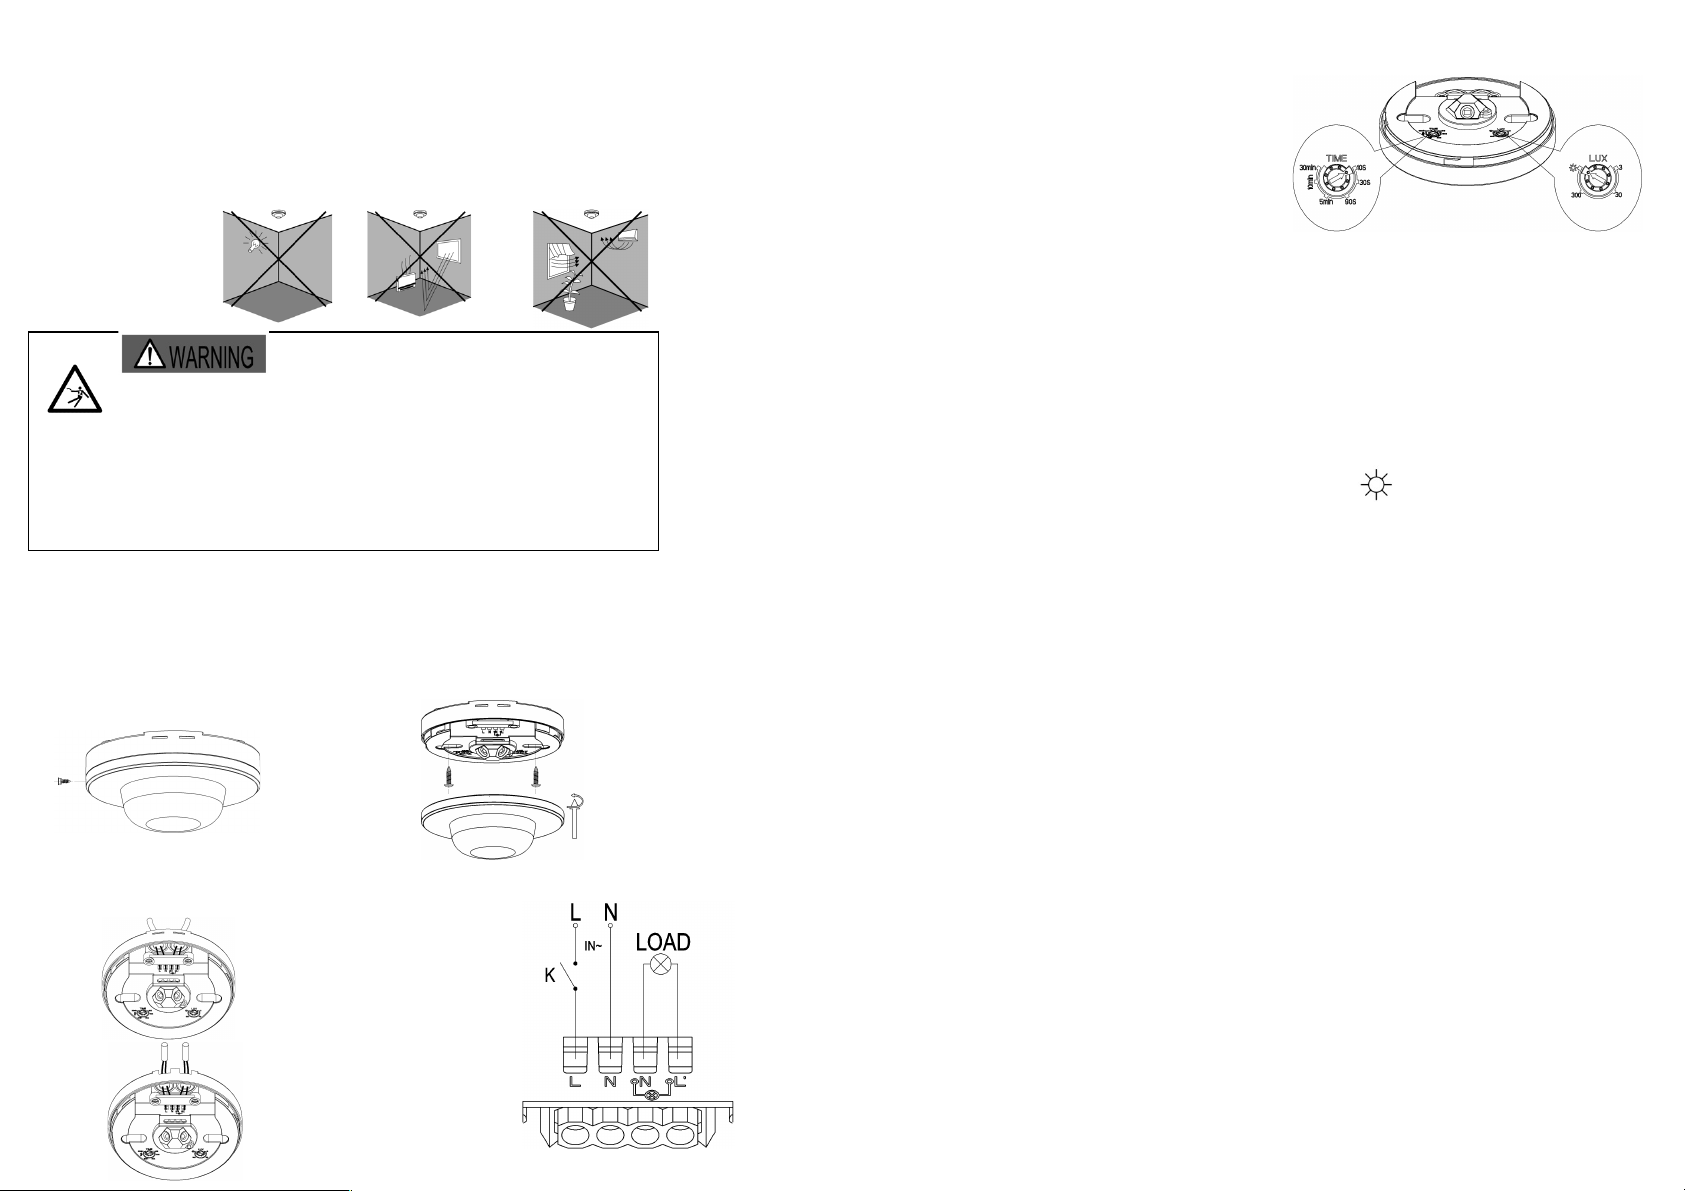
CONNECTION-WIRE DIAGRAM (See the right figure)
TEST:
Ø Turn the TIME knob anti-clockwise on the
minimum (10s).Turn the LUX knob clockwise
on the maximum (sun).
Ø Switch on the power; the sensor and its
connected lamp will have no signal at the
beginning. After Warm-up 30sec, the sensor
can start work .If the sensor receives the induction signal, the lamp will turn on. While there is no
another induction signal any more, the load should stop working within 10sec±3sec and the
lamp would turn off.
Ø Turn LUX knob anti-clockwise on the minimum (3). If the ambient light is more than 3LUX, the
sensor would not work and the lamp stop working too. If the ambient light is less than 3LUX
(darkness), the sensor would work. Under no induction signal condition, the sensor should stop
working within 10sec±3sec.
Note: when testing in daylight, please turn LUX knob to (SUN) position, otherwise the
sensor lamp could not work! If the lamp is more than 60W, the distance between lamp and
sensor should be 60cm at least.
SOME PROBLEM AND SOLVED WAY:
Ø The load does not work:
a. Please check if the connection of power source and load is correct.
b. Please check if the load is good.
c. Please check if the settings of working light correspond to ambient light.
Ø The sensitivity is poor:
a. Please check if there is any hindrance in front of the detector to affect it to receive the
signals.
b. Please check if the ambient temperature is too high.
c. Please check if the induction signal source is in the detection field.
d. Please check if the installation height corresponds to the height required in the
instruction.
e. Please check if the moving orientation is correct.
Ø The sensor can not shut off the load automatically:
a. Please check if there is continual signal in the detection field.
b. Please check if the time delay is set to the maximum position
c. Please check if the power corresponds to the instruction.
The wires come in and
out from the bottom
The wires come in and
out from the side


