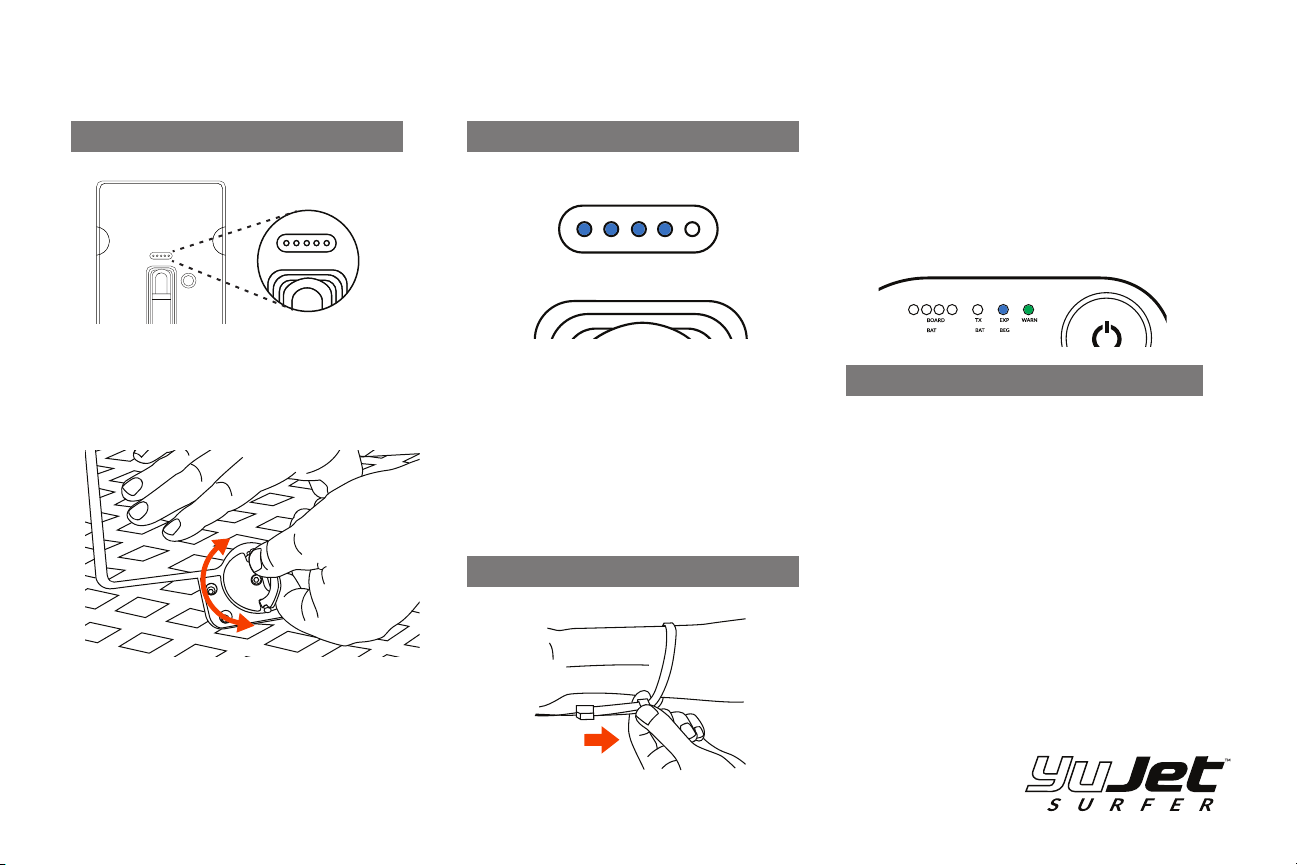
The YuJet baery has a set of LED lights on the top of
the baery for easy viewing while riding. These LEDs
indicate the baery level and acvaon. If these lights
turn on the baery is acvated and will display the
remaining baery level.
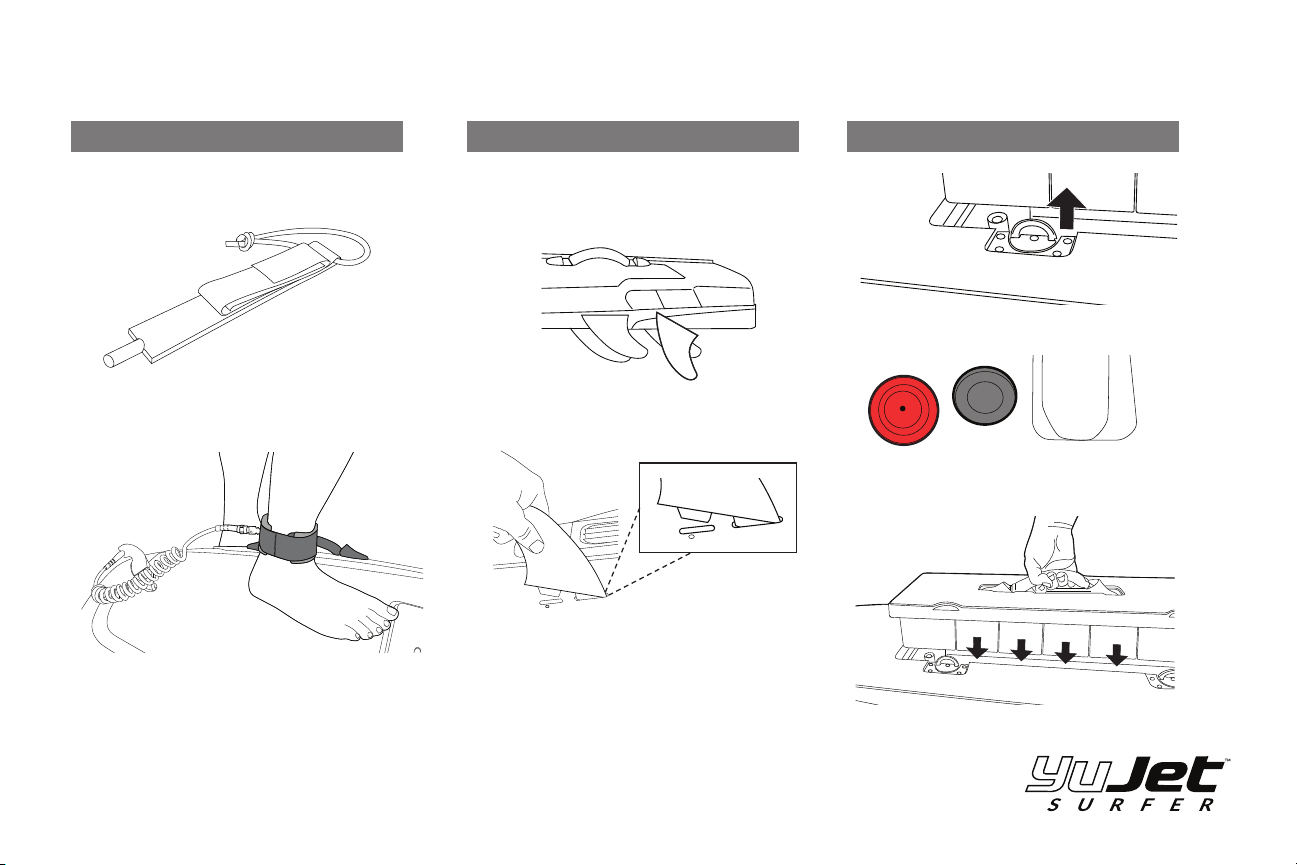
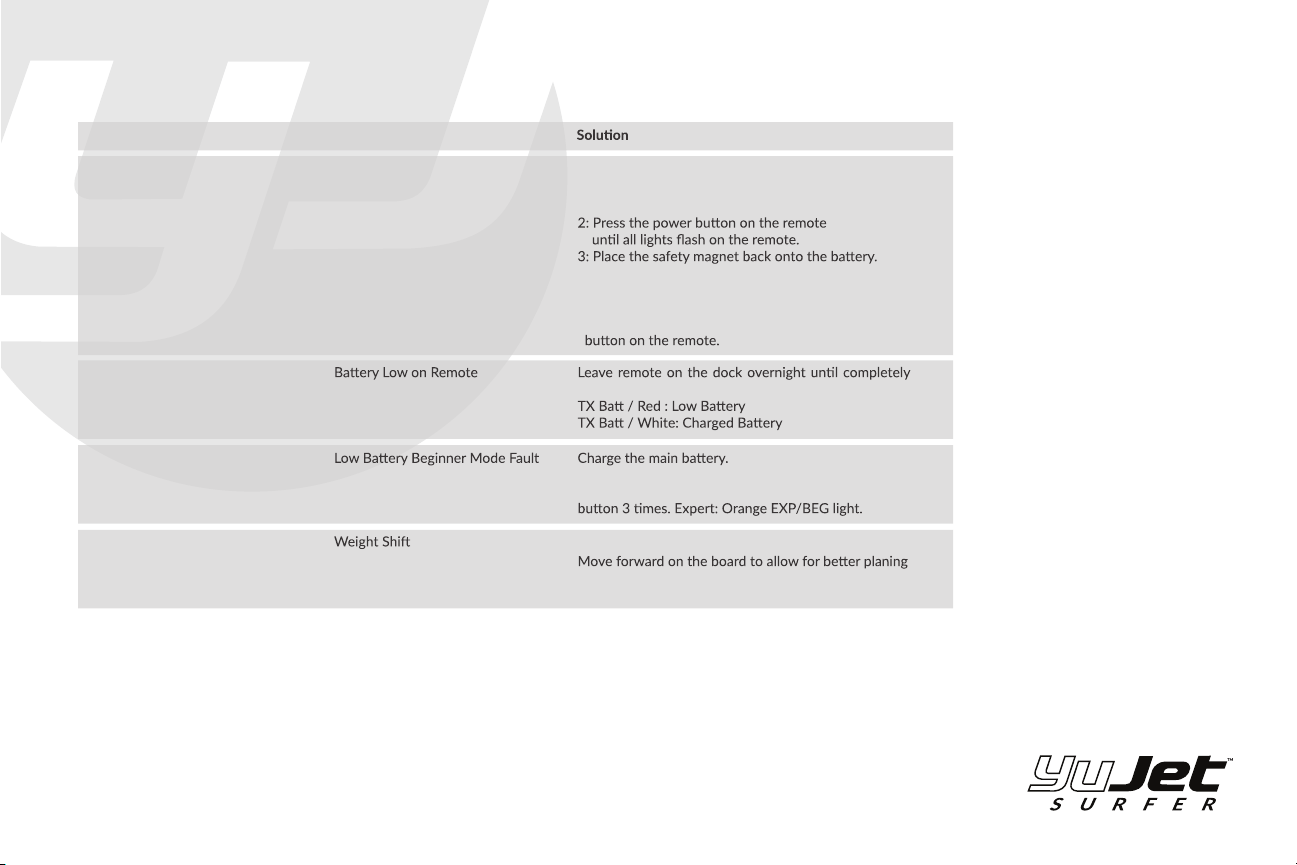
The LED and baery acvaon will turn off if le
unaended for a length of me. To reacvate the
baery, remove the safety magnet, wait for a few
seconds, then place the safety magnet back onto the
baery.
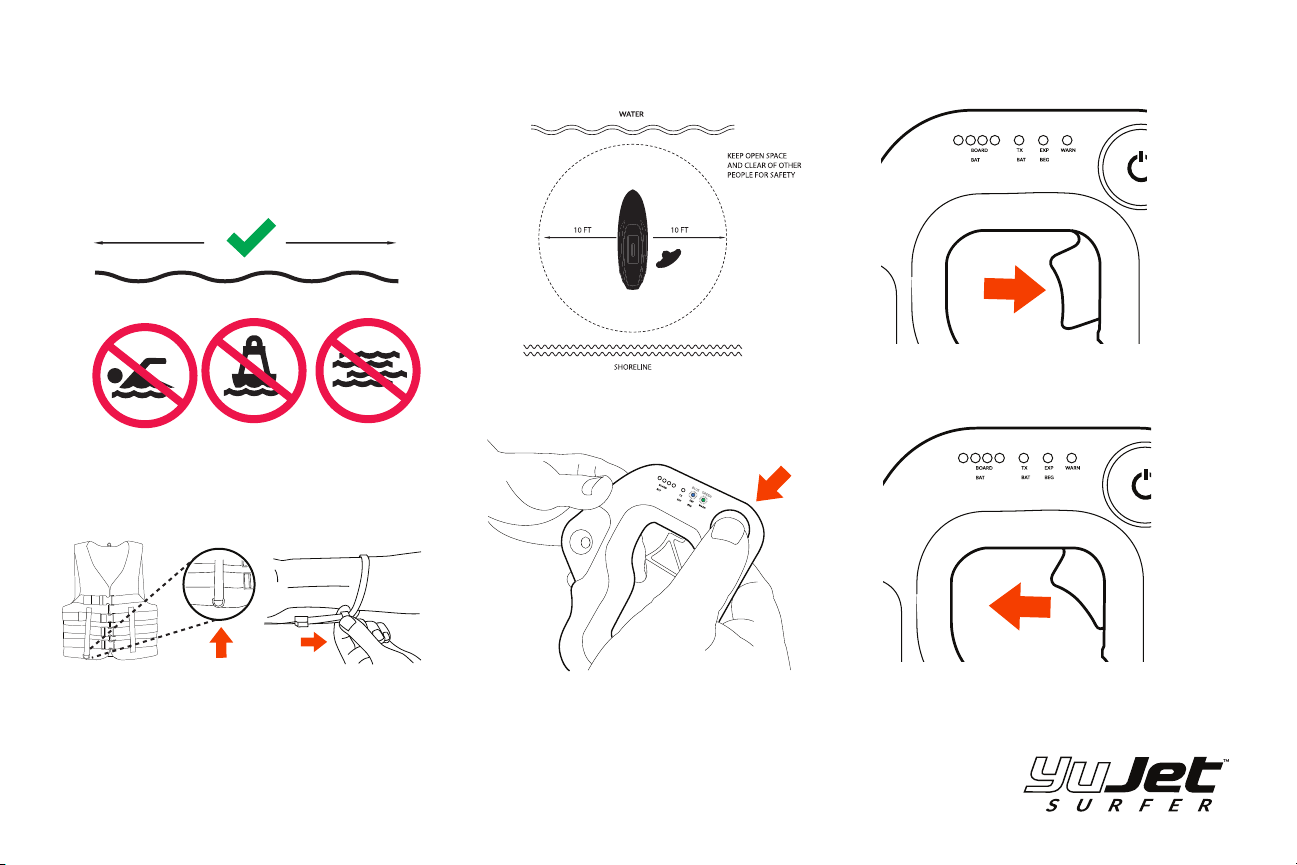
LED Indicaons
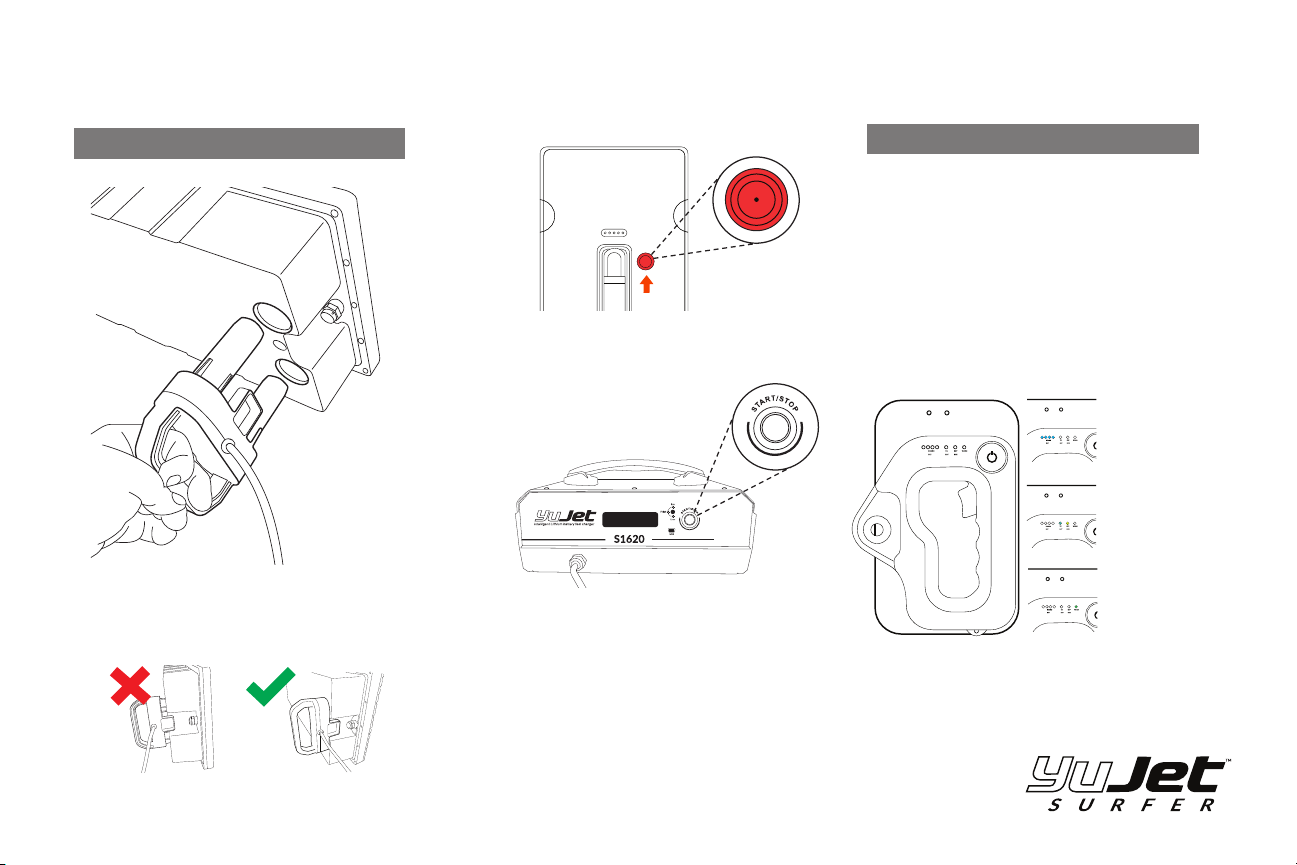
Wrist Strap: The wrist strap must be used at all me
while operang the YuJet personal watercra. In the
event of a fall the wrist strap prevents the remote from
being thrown out of reach of the user. The remote is
fully waterproof and will float in case the wrist strap
breaks.
The YuJet PWC has two modes of operaon. Out of the
box your YuJet personal watercra will be set to
beginner mode. At any me, the user can change from
either mode by tapping the power buon 3 mes. Your
board will remain in that mode unl you choose another
mode.
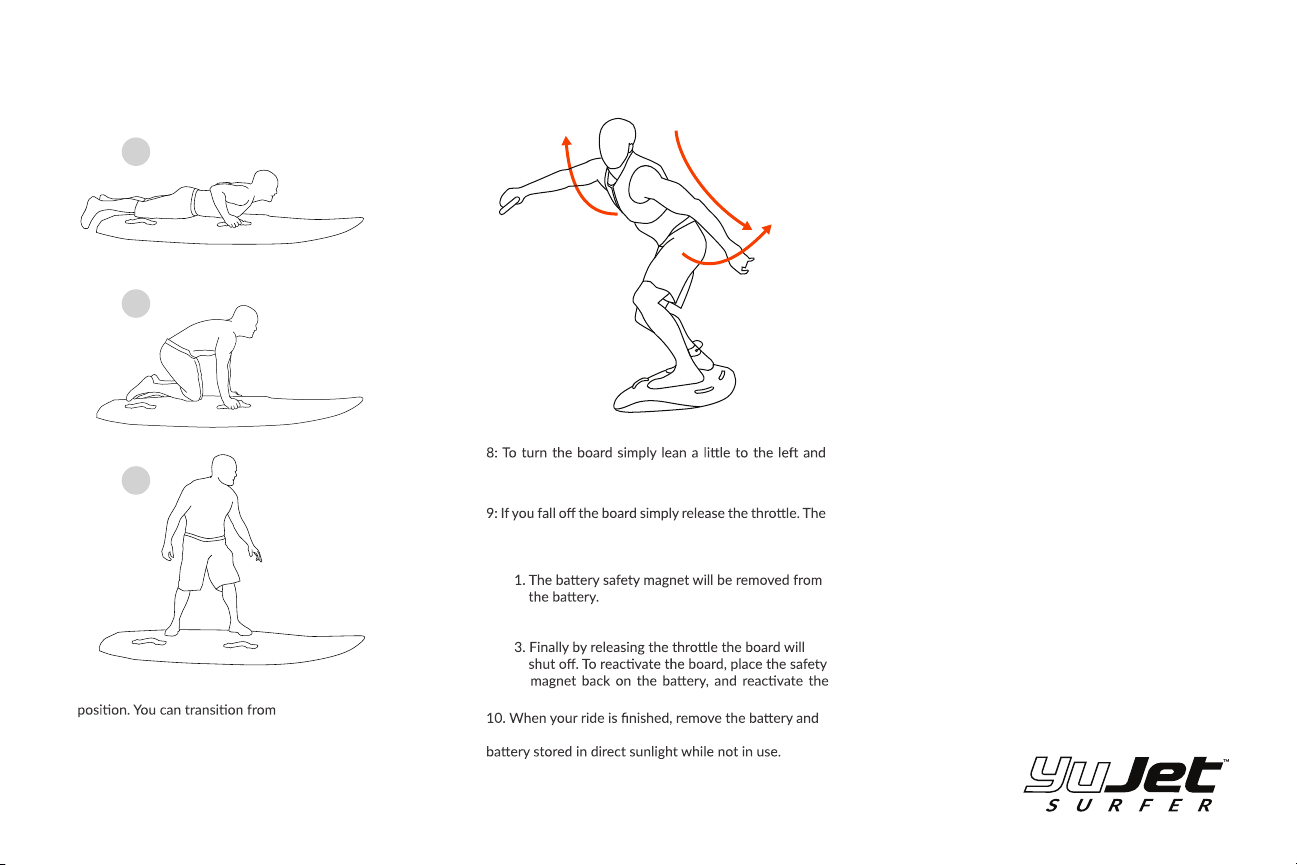
Beginner mode: (Blue BEG indicaon) is designed to
have a smooth power curve and limited maximum
speed. This is perfect for the new user, or the user wants
to conserve baery power for longer rides.
Expert Mode: (Orange EXP indicaon) unleashes the full
potenal of the YuJet personal watercra. This mode
gives you the most amount of acceleraon and top end
speed. This mode is great for the experienced rider with
speeds up to 25 mph. (speed is dependent on rider
weight and water condions)
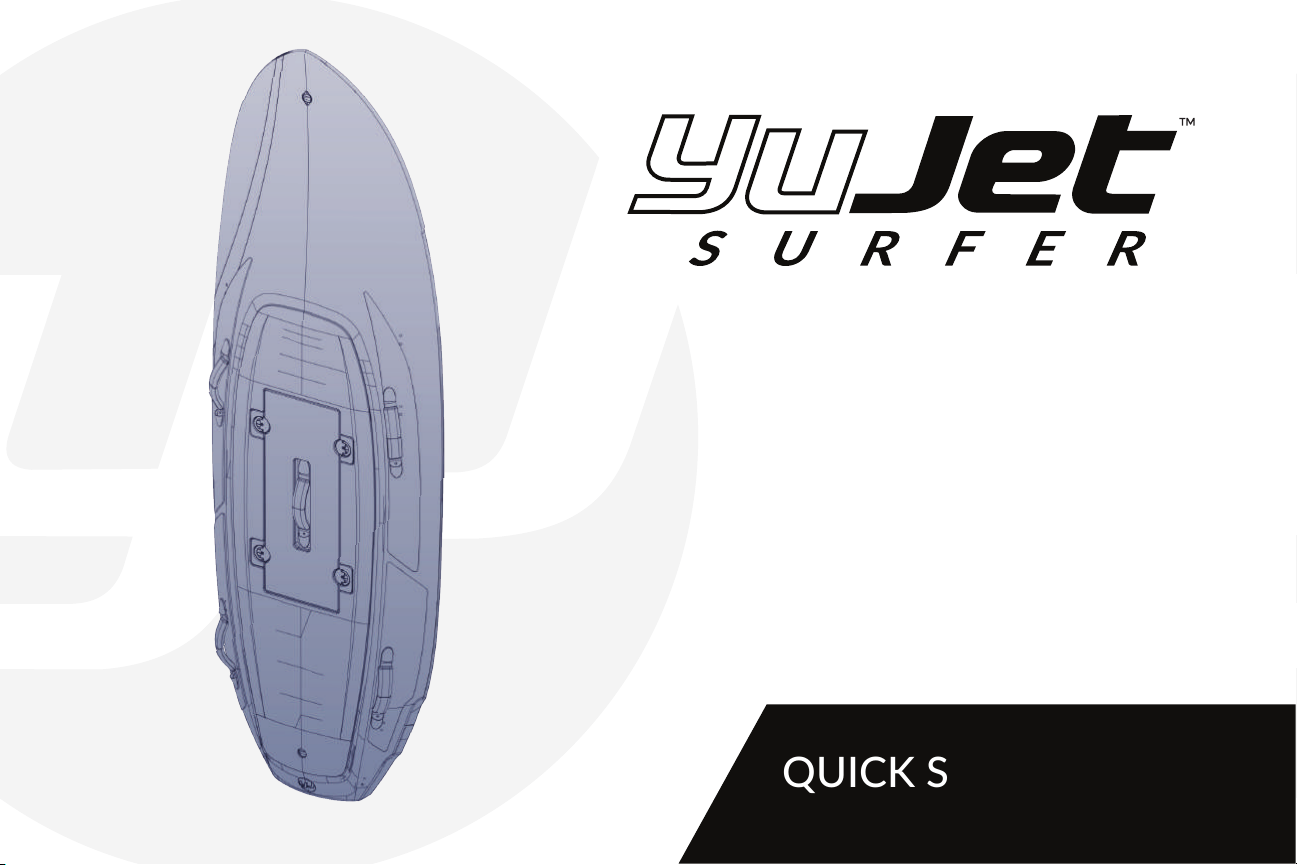
4: The baery is acvated by adding the safety magnet
to the contact area. The LED baery status indicator will
light up and remain on showing the level of baery
power.
5: Secure the latches by turning them 180º and lowering
the tabs. If you find it difficult to turn the tabs, press
down or tap the top of the baery unl the latches are
free to turn.
BOARD SETUP
BATTERY STATUS
REMOTE OPERATION
BEGINNER AND SPORT MODE
INSTALLING THE BATTERY
5% 25% 50% 75% 100%