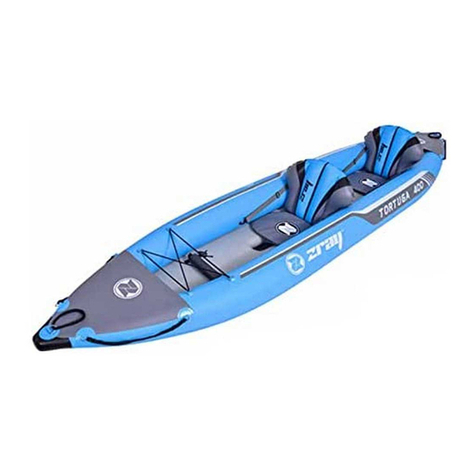
Z-RAY ST.CROIX User manual

37326
INSTRUCTIONS FOR USE
ST.CROIX
Important safety guidelines for using the sports kayak Please read
carefully before using the kayak 37325
Z-RAY ST.CROIX KAYAK
Machine Translated by Google

The following picture shows you the parts, system and details of the kayak.
Please familiarize yourself with each part before use.
Thank you for purchasing a PATHFINDER KAYAK.
FOREWORD
CONTENTS
The kayak was developed for sailing on lakes, rivers and canals in which
the maximum wind conditions are 4 and the wave height does not exceed
0.5 meters.
Before using the kayak, please read these operating instructions carefully
and keep them in a safe place.
SOLVE PROBLEMS ------------------------------------------------ - 9
FOREWORD------------------------------------------------- ------------ 1
DISMANTLING------------------------------------------------- ------------------- 8th
INFLATE THE KAYAK ------------------------------------------------- 5
MAINTENANCE AND STORAGE------------------------------------- 8
USER INSTRUCTIONS--------------------------------------- 6
IMPORTANT NOTES------------------------------------------------ 4
ISO 6185-1 TYPE III KAYAK
1
Machine Translated by Google

FOREWORDFOREWORD
Capacity(people)
Max. motorization
Max. load capacity
37326
37325 37326
37325
/
1
1 1
1
Repair patches 2
/
Air pump
2
/ /
paddle 1
1
Model
2
2
Removable PVC seat 1
Footrest
item number
2
Model
item number
2 3
80 kg/176 Lbs 160 kg/352 Lbs
Dimensions inflated
ACCESORIES
screw
network
Safety valve
DATA
Oar holder
tether
Inflatable I-
Support floor
Inflatable
Seat
ST.CROIX
1 PERSON
274x77x48 cm
(108“x30“x19“)
ST.CROIX
2 PERSON
ST.CROIX
1 PERSON ST.CROIX
2 PERSON
350x78x52 cm
(138“x31“x20“)
Machine Translated by Google

- WARNING: It is the responsibility of the kayak user to comply with all local and
- Inflate the kayak with a hand or foot operated air pump.
to keep: Otherwise you will end up with an incorrectly inflated kayak. Pump each one
Very important: Children and non-swimmers should always wear a safety vest.
(A) and the shaft (B) into the connector and tighten the screw terminals
Inflating the screw-in valve:
Take a rudder connector (C) and screw each of the two
1 ) B efestigen S ie
Screw terminals open with a few turns. Then insert a rudder blade
IMPORTANT INSTRUCTIONS INFLATE KAYAK
4
1) Fully inflate the
footrest.
the large ring of the
valve cap on the valve base.
2 ) F ü g e n S i e d i e
2) Screw the middle part
of the valve cap 3) Screw the
5
on the valve base and small valve cap tight.
Paddling on the footrest
In order to increase the enjoyment and safety of using the kayak, we recommend
that you strictly adhere to the safety warnings.
- Never leave children unattended in the kayak. Make sure that children and
there are other sharp-edged objects.
- Be careful when boarding the kayak.
- Please inflate the chambers in numerical order. Be sure to note the
People who cannot swim must be accompanied continuously by at least one adult
Air pressure recommendation! Overinflating can cause the kayak's air chambers to burst
be supervised by a supervisor.
- Take a safety course to learn how to handle different situations
bring or damage the seams.
- Always keep usable safety equipment in an easily accessible place in the kayak
Do not use high pressure compressors. It is very important to remember the number sequence
acts correctly and behaves correctly.
serious injuries.
ready. Bring emergency telephone numbers, safety instructions and rules (e.g. “Do not enter the...
- This is not a life saving device. Use only under expert supervision. Never in that
- The number of people and the total weight should never exceed the capacity
Chamber until solid.
Jump into product. Never leave in or near water when not in use.
Overloading violates the regulations.
to comply. Please adhere to the requirements of your local authorities.
then pump it up.
3) Support yourself while
of the kayak.
Never allow yourself to be towed by vehicles. The device must be assembled and operated by adults
Inflating and using the footrest:
B: Shaft C: connector
A: Rudder blade
ab.
Footrest in the front room
become.
- Always follow these rules - otherwise you risk drowning, paralysis and more
nationwide regulations regarding the safety of boats and the necessary safety equipment
Jump water!” or “Do not use alone!”) clearly visible.
- Choose an area where there are no stones, gravel, horse mackerel or
- If a hole or leak is suspected in the kayak, use is not permitted.
- Lay the kayak completely flat and locate your pump.
- A safety vest must be provided for each passenger.
Always get in the middle - this ensures maximum stability.
- Be aware of wind and currents.
- Never navigate alone.
inflated, they must not be inflated excessively. Because when the air is in
See the image below:
Structure of the paddle
firmly on again. Repeat these steps to attach the other side of the rudder.
Will the kayak be used in cold weather or without direct sunlight on the tubes?
Attention: Do not inflate excessively and do not use a high-pressure pump!
Air pressure must always be monitored.
As the hoses heat up due to rising temperatures or sunlight, the internal pressure
also increases. The kayak does not have a safety valve, so it has to
Machine Translated by Google

OPERATION MANUAL
OPERATION MANUAL
INFLATE KAYAK
Do not be careless with the safety rules, it could injure you and others
Take the return route into account.
2. The air pump, paddle, repair kit...
1. Obtain information about the local laws, regulations and risks involved
Alpha flag is a sign of how many divers are present. ALWAYS DISTANCE
1. 1 safety vest for each passenger
Obtain additional information and also inform passengers:
Please note the following rules while navigating.
Preparation before departure
of the kayak. (Check the laws and rules)
Check the required safety equipment
Accesories:
Check the operational readiness of the kayak and the
4. The boat documents and your boat license (if necessary)
4. Navigate only in safe waters.
7. Keep away from fire. Smoking prohibited!
5. Make sure at least 1 other passenger can operate the kayak.
3. Respect local rules and orders.
4. Educate all passengers about the basics.
9. Slalom riding is not permitted.
2. Learn to always maintain control of the kayak.
11. Avoid places where there are swimmers or divers.
8. Make sure passengers remain seated.
4. The footrest will not interfere with the occupant's feet if the kayak capsizes
the printed mark next to the product's valve. If the printed one
over-inflate.)
Related to water activities and kayak operation. 2. Check
weather forecasts, local currents and wind conditions.
1. Check the air pressure. Check the appropriate filling STOP (at least 50 meters).
Always keep your eyes open! - Especially when driving near a beach. The
Nominal filling pressure reached. (Air chamber only up to firm and #3 supportive. Not
caught.
Marking measured with a plastic ruler is approximately 10 cm tall
you let them hang out of the kayak.
3. Notify a trusted person on shore when you expect to be back
6 7
familiarize yourself with the surroundings so you can reach a safe place more quickly.
2. Check the valves. 3.
Check that the kayak is loaded evenly.
5. If you drive in the dark, you need lighting
3. The mandatory equipment
10. Be very careful when investing. Arms and legs can be injured if
1. Stay responsible and follow the rules.
All passengers must remain sober during a journey.
6. Please do not overestimate your physical abilities and remember
6. Never consume alcohol or drugs before using the kayak.
5. Remember, weather conditions can change very quickly. Make
bring danger.
Come back.
Machine Translated by Google

Spray a mixture of water and water onto the area where the hole might be
Cut a piece of the repair material into a round shape that is larger than that
Soap. When bubbles form there is a hole there.
Check the valves - there could be a hole there.
Find the hole. Clean the area around the hole well.
Tape the cut out piece and the circled area. Then bring glue
place to store. This will extend the life of your kayak and avoid
Certain household cleaners, chemicals and other liquids (such as battery acid, oil
Follow the next two steps to ensure you can enjoy your kayak for years to come.
If you live in an area where you cannot use the kayak all year round, we strongly
advise you to deflate the kayak during the off-season
you can check whether the valve caps are loose. If the valve caps are OK, it could
be due to temperature fluctuations. If the kayak is inflated during the day, for
example at a temperature of 35°C, and at night it cools down to around 25°C, then it could
If the valves and temperature fluctuations are not the reason, then you should look
for where a leak or hole could be:
Allow to dry for approx. 12 hours after repair. Then glue over the edges again
of the part so that this area is completely sealed. (Let it dry for approx. 4 hours).
2. You can store the kayak inflated or folded. ÿ Please
only store in cool and dry rooms at temperatures above zero. ÿ
Please DO NOT hang up the kayak.
ÿDo not place sharp or heavy objects in or on the kayak.
and fuels) can damage the PVS fabric. If there is contact with such
1. After each trip you should clean the kayak to prevent damage from sand,
salt water or sun.
The kayak is a seasonal item and can therefore be easily stored. If you are in
Warning:
If you find the kayak too soft, it doesn't necessarily have to be a hole. First
Attach the cut part and press firmly.
3. Fold the kayak
Clean the boat thoroughly, dry it and store it in a protected place until next season
the pressure will decrease and the kayak will feel softer the next morning.
Should substances come, check thoroughly for leaks and other damage.
Safety risks that may arise while the boat is not in use.
98
The kayak must be completely dry before storage so that no mold forms
To clean you can use a garden hose, a sponge and gentle soap
MAINTENANCE AND STORAGE
REPAIRS
SOLVE PROBLEMS
DISMANTLING
Damage plastic parts. Store all kayak accessories in a dry, well-ventilated
area. Make sure all parts are complete before storing
use.
Damage. You can circle the area with the help of a pencil. Bring
are dry.
Do not use any solvents to clean the kayak: solvents can
You can patch small holes or punctures with the included repair kit.
1. Remove all accessories ÿ paddle, repair kit.... 2.
Open all valves to release the air
(sold separately) on the entire affected area.
4. Put the kayak, air pump, paddle, etc. into the carrying bag
can.
Machine Translated by Google
Table of contents
Other Z-RAY Boat manuals
Popular Boat manuals by other brands

Hobie
Hobie Hobie T2 owner's manual

Hunter
Hunter H19 owner's manual

Bestway
Bestway Hydro-Force Waypoint Elite owner's manual

Walker Bay
Walker Bay Airis Sport Owners & safety manual

Horizon Yacht Charters
Horizon Yacht Charters Lagoon 42 Information & operation manual

Pro-Line Boats
Pro-Line Boats 24 Super Sport 2006 owner's manual

Nacra
Nacra F20 Carbon Assembly & rigging manual

Bayliner
Bayliner 1994 4788 Motoryacht owner's manual

Everglades
Everglades 340 DC owner's manual

Aquaglide
Aquaglide BLACKFOOT ANGLER 160 owner's manual

PURSUIT
PURSUIT 2870 Walkaround owner's manual

Yamaha
Yamaha SUV1200 WaveRunner 2003 Owner's/operator's manual