Z-Wave ZRC-100 User manual

1
ZRC-100
(Z-Wave Remote Controller)

2
Table of Contents
Introduction.................................................... 4
Glossary .......................................................... 5
ZRC-100 Operations ....................................... 6
Product Overview............................................. 7
Description of Function Keys.............................. 7
ZRC-100 User Interface Layout ......................... 8
Operations ..................................................... 10
Add/Delete Devices .......................................... 11
Device Control ................................................. 14
Scene Setup ................................................... 15
Scene Control ................................................. 18
Comfort Control .............................................. 19
Sensor Information ......................................... 20
Device Configure ............................................. 20
Scene Configure ............................................. 23
Comfort / Sensor Configure ............................. 25
Shortcut Key .................................................. 27
Z-Wave Advanced Setup ................................. 29
Learning Mode ................................................ 29
Configure Association ...................................... 31
Change Device Configuration ............................ 37
Resetting Your Network..................................... 39
System Settings .............................................. 40
About ZRC-100 ................................................ 42
Z-Wave Network Setup ................................... 43
Rediscover Network ......................................... 43
Re-scan (Rediscover) Devices from network ....... 44
Delete Dead Node from Network ....................... 46
Listening Mode................................................. 47
Create a Secondary Controller ........................... 48
Create a Primary Controller ............................... 49
WIRELESS INFORMATION ............................... 51
MAINTENANCE................................................. 51
FREQUENTLY ASKED QUESTIONS .................... 51
Z-Wave Frequently Asked Questions................... 51
3
TECHNICAL SPECIFICATIONS.......................... 55
CHECKING THE ACCESSORIES ......................... 56
FCC NOTICE .................................................... 56
WARNINGS...................................................... 56
CAUTION ........................................................ 57

4
ZRC-100
(Z-Wave Remote Controller)
Operating Instructions
Introduction
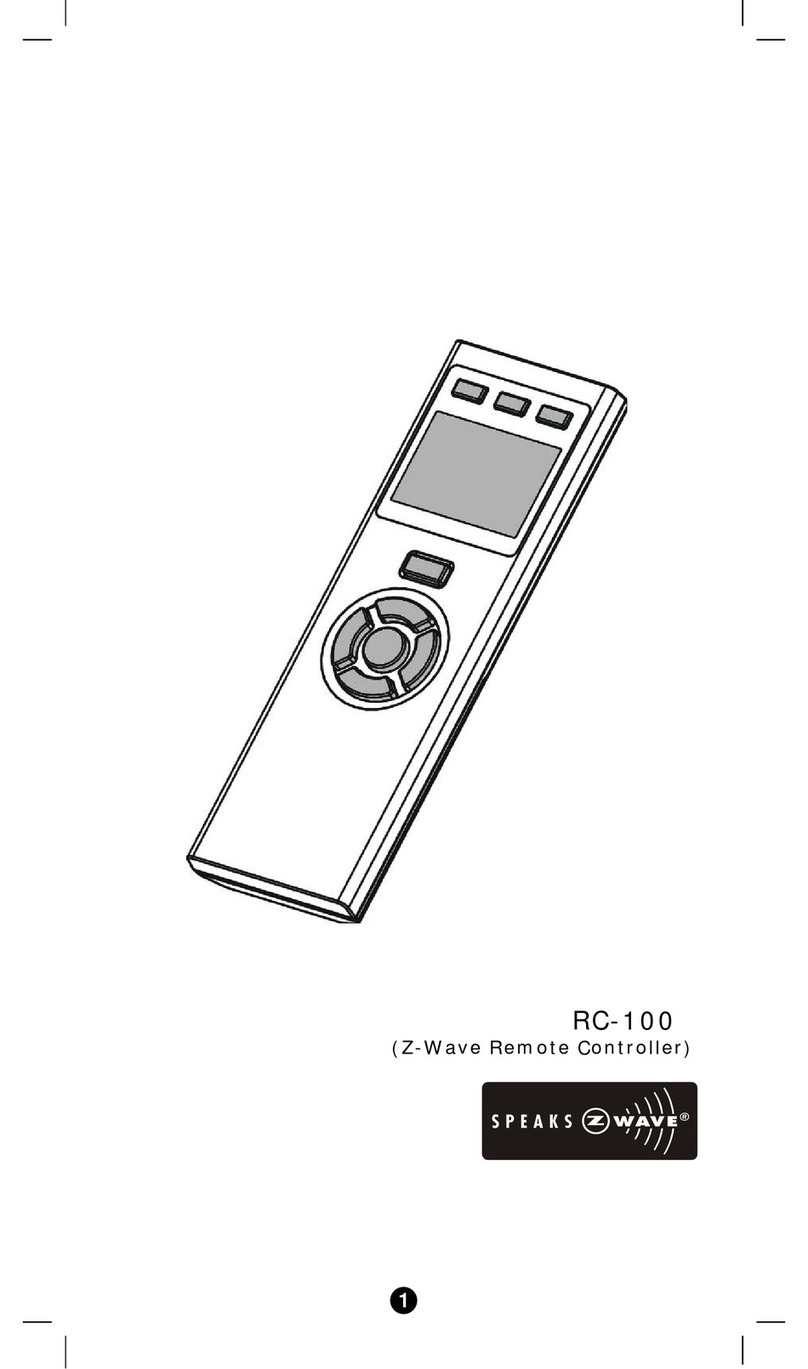
The ZRC-100 (Figure 1) is a portable Z-Wave remote controller with
multi-channel support; also it is a Z-Wave Enabled Security Controller.
It can control the secured door locks when it is in the security network.
Also, it can be configured as a primary or secondary controller within a
Z-Wave home automation network. It works with almost every Z-
Wave enabled devices, binary switches, dimmers, thermostats, secured
door locks, binary or multi-level sensors. Users can control their Z-
Wave enabled devices individually or through “Scene” control. Scene
is a collection of Z-Wave devices configured to a user-preferred
settings, levels, modes or operating conditions. The ZRC-100 also
equipped with a backlit LCD screen and an intelligent Self Navigated
Button (SNB) system. Users can setup and operate their Z-Wave
devices through the LCD and the SNB system using their ZRC-100,
and enjoy a networked, wireless home automation system anywhere at
home.
Figure 1 ZRC-100

5
Glossary
Device or Node
Devices and nodes are all terms to describe
an individual ZWave device. These are all
interchangeable when setting up your Z-
Wave network.
Inclusion Add a Z-Wave device to the network.
Exclusion Delete a Z-Wave device from the network.
Remove To take a device out of a group, scene or
association group while that device still
exists in the same Z-Wave network.
Z-Wave
Network
A collection of Z-Wave devices controlled
by primary and secondary controllers
operating on the same system. A Z-Wave
network has its own unique ID code so that
controllers not in the network cannot control
the system.
Primary
Controller
The first controller used to set up your
devices and network. Only the Primary
Controller can be used to include or delete
modules from a network. It is recommended
that you mark the primary controller for each
network for ease in modifying your network.
Secondary
Controller
A controller containing network information
about other modules within the network and
is used for controlling devices. Secondary
controller is created from the Primary
Controller and cannot include or delete
modules to the network.
Inclusion
Controller
A controller containing network information
about other modules within the network and
is used for controlling devices. Inclusion
controller is created from the Primary
Controller in a SIS enabled Z-Wave network.
Inclusion Controller has the ability to add
and remove devices from the network.
Scene
A collection of Z-Wave devices configured
to turn to a specific level, setting, mode, or
perform an operation. Scenes are usually
activated by a controller, timed event, or
specific conditions.

6
ZRC-100 Operations
Welcome to the world of Z-Wave home automation, you can use your
ZRC-100 to control almost every Z-Wave certified products inside
your house. The following section will guide you through the set up
processes and operation procedures for your ZRC-100.
Please note that all Z-Wave devices, light switches, dimmers, shutter
switches, thermostat and secured door lock made from various vendors
are compatible with your ZRC-100 as long as they are Z-Wave
certified or carry the following Z-Wave logo:
(Please carefully read through the following sections of this user
manual and store for future reference.)
Before using the ZRC-100, please install the batteries:
•4xAAA batteries are required for operation.
•Remove the battery cover on the back of your remote.
•Check the polarity of the batteries and the "+/-" marks inside the
battery compartment.
•Insert the batteries.
•Push the battery cover back in place.
LCAUTION (battery safety)
−Use new batteries of the recommended type and size only.
−Never mix used and new batteries together.
−To avoid chemical leaks, remove batteries from the remote
controller if you do not intend to use the remote for an
extended period of time.
−Dispose of used batteries properly; do not burn or bury them.

7
Product Overview
Figure 2 Setup and control keys of ZRC-100
Description of Function Keys
Keys Functions
Short cut keys for:
1. Device and scene control
2. Short cut to user selected control
menu
Back to previous screen
4-way directional keys for setup and control
OK key for confirmation
Short cut keys LCD screen
BACK key with
backlit
Navigation + OK
ke
y
s with backlit

8
ZRC-100 User Interface Layout
Home (A1)
Device (A2)
Scene (A3)
Comfort (A4)
Sensor (A5)
All Off (A6)
Devices List (A2.1)
Scenes List (A3.1)
Comforts List (A4.1)
Sensors List (A5.1)
or
•Press cordkeys to select control category.
•Press BACK key to go back to previous page.
•Press and hold BACK key for 2 seconds to go
back to root menu.
Control
menu

9
Setup (B1)
Add Device (B2)
Delete Device (B3)
Add to Scene (B4)
Device Config. (B6)
Scene Config. (B7)
Comfort Config. (B8)
Sensor Config. (B9)
Shortcut Key (B10)
Advanced Setup (B11)
System Settings (B12)
About (B13)
Select Scene (B4.1)
Device Configure (B6.1)
Sensor Configure (B9.1)
Shortcut Key (B10.1)
Learning Mode (B11.1)
Select Scene (B5.1)
Scene Configure (B7.1)
Comfort Configure (B8.1)
Config. Assoc. (B11.2)
Configuration (B11.3)
Reset to Default (B11.4)
LCD Contrast (B12.1)
B.L. Brightness (B12.2)
Sleep Timer (B12.3)
+
•Press and hold ef keys simultaneously for 3
seconds to enter Setup menu.
•Press BACK key to go back to previous page.
•Press and hold BACK key for 2 seconds to go
back to root menu.
Setup
menu
Remove fr. Scene (B5)
(remove from scene)

10
Operations
The ZRC-100 remote controller can be set up as a Primary or
Secondary Controller within a Z-Wave network.
The ZRC-100 can control Z-Wave devices individually or as a group
using Scene or Association. A single Z-Wave network can include 232
nodes. If necessary, more than one network can be bridged to extend
the number of nodes supported, although this is normally not needed in
a residential environment.
ZRC-100 control capability
Total number of controllable
End-point (EP) / device / sensor
128 items
(listed on the “Device” and “Sensor” page)
Total number of thermostats 6 thermostats
(listed on the “Comfort” page)
Total number of scenes 12 scenes (listed on the “Scene” page)
Each Scene supports up to 32 Z-Wave devices or End-point (EP)
Network Setup (C1)
Rediscover N.W. (C2)
(Rediscover network)
Delete Dead Node (C4)
Listening Mode (C5)
Re-scan Devices (C3)
+
•Press and hold cd keys simultaneously for 3
seconds to enter Network Setup menu.
•Press BACK key to go back to previous page.
•Press and hold BACK key for 2 seconds to go
back to root menu.
Network
Setup
menu
Create Sec. (C6)
(
Create secondary
)
Create Pri. (C7)
(Create primary)

11
Remark:
zThe hard keys are valid if the backlit is turned on and vise versa.
User can follow the Self Navigated Button (SNB) and LCD
display for all setup procedures and operation.
zUser can press “ ” key to go back to the previous page or
press and hold “ ” key for 2 seconds to go back to the
root menu at any setup /operation screen.
Add/Delete Devices
Adding Device to the Network
Step Setup Key LCD Indication
1
Press and hold ef
keys simultaneously for
3 seconds under the
Home page.
⇓
2
Select “Add Device".
3
Press key to add
the device into Z-Wave
network.
Home
Device >
Scene >
Comfor
t
>
OK to Enter
Setup
Add Device >
Delete Device >
Add to Scene >
OK to Enter
Add Device
Press PROG on tar
g
e
t
>>>>
Setup
Add Device >
Delete Device >
Add to Scene >
OK to Enter

12
4
Press the program button
on the target device.
⇓
Note 1: If you can’t add your Z-Wave device, this device might have
been included in another Z-Wave network. In this case, please delete
this device following the steps in the [Deleting Device from the
Network] section then add this device again.
Note 2: This step can be skipped if the device is already included in the
network.
Note 3: In a Z-Wave network, only the primary controller or inclusion
controller can add or include devices into its network. If ZRC-100 is
configured as a secondary controller, it will report “Error” if users
attempt to use ZRC-100 to add a device into its network.
Note 4: If no ACK signal received for more than 60 seconds, the “Add
Device” mode will exit automatically.
Deleting Device from the Network
Step Setup Key LCD Indication
1
Press and hold ef
keys simultaneously for
3 seconds under the
Home page.
⇓
Home
Device >
Scene >
Comfor
t
>
OK to Enter
Add Device
Press PROG on tar
g
e
t
>>>>
Savin
g
Data …
Add Device
Press PROG on tar
g
e
t
>>>>
O
K

13
2
Select “Delete
Device".
3
Press key to delete
the device from Z-Wave
network.
4
Press the program button
on the target device.
⇓
Note 1: If no ACK signal received for more than 60 seconds, the
“Delete Device” mode will exit automatically.
Note 2: In a Z-Wave network, only the primary controller or inclusion
controller can delete or exclude devices into its network. If ZRC-100 is
configured as a secondary controller, it will report “Error” if users
attempt to use ZRC-100 to delete a device from its network.
Setup
Add Device >
Delete Device >
Add to Scene >
OK to Enter
Delete Device
Press PROG on tar
g
e
t
>>>>
Savin
g
Data …
Delete Device
Press PROG on tar
g
e
t
>>>>
O
K
Delete Device
Press PROG on target
>>>>
Setup
Add Device >
Delete Device >
Add to Scene >
OK to Enter

14
Device Control
After adding devices to your ZRC-100, you can turn the device using
the corresponding Device Control function.
Step Setup Key LCD Indication
1
Select “Device"and
press key to
confirm.
A corresponding Device
control page will be
displayed.
⇓
2
For on/off switches,
press fkey to turn on
the device and ekey to
turn off the device.
3
To operate dimmer and
motorized curtain:
Press and hold the f
key until reach to your
desired level and release
the key to open the
curtain or to increase the
dimmer intensity.
Press and hold the e
key until reach to your
desired level and release
the key to retract the
curtain or to reduce the
dimmer intensity.
Home
Device >
Scene >
Comfor
t
>
OK to Enter
Devices List
Switch 001 Off
eOff and On f
Devices List
Switch 001 Off
eOff and On f
Dimmer 002 Off
Devices List
Switch 001 Off
eOff and On f
Dimmer 002 Off

15
4
You can turn off all the
devices in the network
by selecting “All Off"
function under the Home
page.
⇓
Note 1: The screen will display LOCK /UNLK if this is a secured door
lock device.
Note 2: You can rename your device, please refer to user manual [step
of B6 - Device Config.].
Scene Setup
Scene is a collection of Z-Wave devices configured to user specified
levels, settings, modes, or operating conditions. Scenes are usually
activated by a controller, timed event, or specific conditions. For
example, a user prefers to set the dimmer to a low intensity level and
close the motorized curtain when he watch movie. He can define a
scene to control the dimmer and motorized curtain using a single scene
command.
You can control up to 12 scenes (Scene On/Off) with your ZRC-100.
Each Scene supports up to 32 Z-Wave devices or End-Point (EP).
Adding Device/End-point to a Scene
Step Setup Key LCD Indication
1
Press and hold ef
keys simultaneously for
3 seconds under the
Home page.
Home
Device >
Scene >
Comfor
t
>
OK to Enter
Home
Senso
r
>
All Off
OK to Enter
Home
Device >
Scene >
Comfor
t
>
OK to Enter

16
⇓
2
Select “Add to Scene"
and press key.
3
Select a Scene which
you want to add the
device into Scene and
press key.
4
Press the program button
on the target device.
⇓
5
Adjust the target device
on/off or dim level with
its program button, to the
desired level.
Setup
Add Device >
Delete Device >
Add to Scene >
OK to Enter
Setup
Add Device >
Delete Device >
Add to Scene >
OK to Enter
Select Scene
Scene 1
Scene 2
Scene 3
OK to Enter
Add Device
Press PROG on tar
g
e
t
>>>>
Add Device
Set Desired level
>>>>
OK to Save
Add Device
Press PROG on tar
g
e
t
>>>>
O
K

17
Note 1: Your target device must be included in the network before this
setup procedure, please refer to [Adding Device to the Network]
section.
Note 2: If no ACK signal received for more than 60 seconds, the “Add
Device” mode will exit automatically.
Removing Device/End-point from a Scene
Step Setup Key LCD Indication
1
Press and hold ef
keys simultaneously for
3 seconds under the
Home page.
⇓
2
Select “Remove from
Scene"and press
key.
3
Select a Scene which
you want to delete the
device from Scene and
press key.
4
Press the program button
on the target device.
⇓
Home
Device >
Scene >
Comfor
t
>
OK to Enter
Setup
Add Device >
Delete Device >
Add to Scene >
OK to Enter
Setup
Remove fr. Scene >
Device Confi
g
. >
Scene Confi
g
. >
OK to Enter
Select Scene
Scene 1
Scene 2
Scene 3
OK to Enter
Remove Device
Press PROG on tar
g
e
t
>>>>

18
Note 1: This process will only remove the target device/EP from its
assigned scene but will not exclude it from the network.
Note 2: If no ACK signal received for more than 60 seconds, the
“Remove Device” mode will exit automatically.
Scene Control
After the scene setup is done, you can trigger the desired scene via
scene control function on ZRC-100.
Step Setup Key LCD Indication
1
Select “Scene"and
press key to
confirm.
A corresponding Scene
Control page will be
displayed.
⇓
2
Select your Scene and
press fkey to turn on
the Scene and ekey to
turn off the Scene.
Remove Device
Press PROG on tar
g
e
t
>>>>
O
K
Home
Device >
Scene >
Comfor
t
>
OK to Enter
Scenes List
Scene 1
eOff and On f
Scene 2
Scene 3
Scenes List
eOff and On f
Scene 2
Scene 3
Scene 1

19
Comfort Control
After adding “Thermostat"or “Z-Wave to AC IR extender"to
your ZRC-100, you can change the operation mode, set target
temperature and fan speed via the corresponding Comfort Control
function.
Step Setup Key LCD Indication
1
Select “Comfort"and
press key to
confirm.
A corresponding
Comfort Control page
will be displayed.
⇓
2
Select your Thermostat
and press key to
entry the Thermostat
control page.
3
Use ef keys to
switch the operation
mode, set target
temperature or fan
speed.
Home
Device >
Scene >
Comfor
t
>
OK to Enter
Comforts List
Thermostat003 >
OK to Enter
Thermostat003
Mode Cool
Tar
g
et Tem
p
. 75oF
Fan S
p
eed A
_
Lo
eControl f
Thermostat003
Mode Hea
t
Tar
g
et Tem
p
. 68oF
Fan S
p
eed A
_
Lo
eControl f

20
Sensor information
After adding “Binary Sensor / Multi-level Sensor"to your ZRC-100,
you can monitor the sensor temperature via the corresponding Sensor
function.
Step Setup Key LCD Indication
1
Select “Sensor"and
press key to
confirm.
A corresponding Sensor
page will be displayed.
⇓
Device Configure
It is allow to Move/Rename/Delete the device after added into the
network under the Device Configure function.
Step Setup Key LCD Indication
1
Press and hold ef keys
simultaneously for 3
seconds under the Home
page.
⇓
Home
Device >
Scene >
Comfor
t
>
OK to Enter
Setup
Add Device >
Delete Device >
Add to Scene >
OK to Enter
Home
Sensor >
All Off
OK to Enter
Sensors List
Sensor 003 75
Other manuals for ZRC-100
1
Table of contents
Other Z-Wave Remote Control manuals

Z-Wave
Z-Wave RaZberry2 User manual

Z-Wave
Z-Wave RC-100 User manual

Z-Wave
Z-Wave RC-100 User manual

Z-Wave
Z-Wave ZRC-100 User manual

Z-Wave
Z-Wave Z-URC 550EU User manual

Z-Wave
Z-Wave Control4 User manual

Z-Wave
Z-Wave ZWN-SC7 User manual

Z-Wave
Z-Wave ZME_KFOB User manual

Z-Wave
Z-Wave HSK-100Z User manual

Z-Wave
Z-Wave Z-URC XpressZetup User manual