manuals.online logo
Brands
  1. Home
  2. •
  3. Brands
  4. •
  5. ZANE ARTS
  6. •
  7. Tent
  8. •
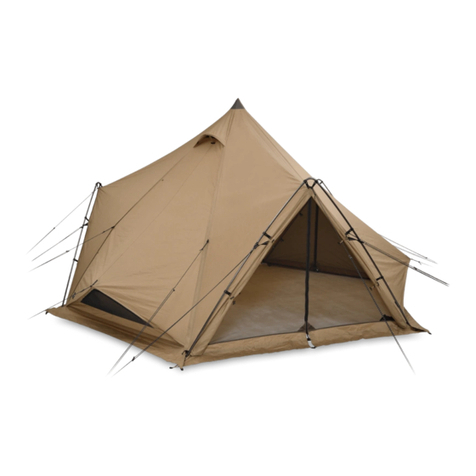
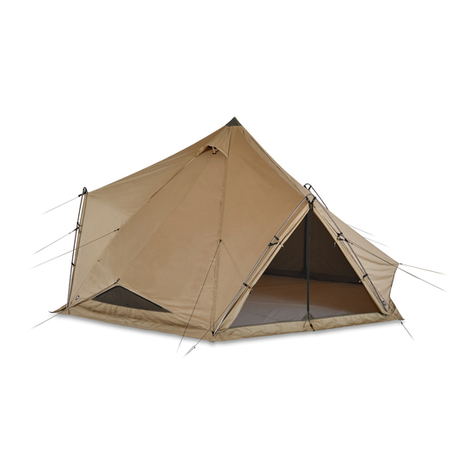
  9. ZANE ARTS ZEKU - M INNER TENT User manual

ZANE ARTS ZEKU - M INNER TENT User manual

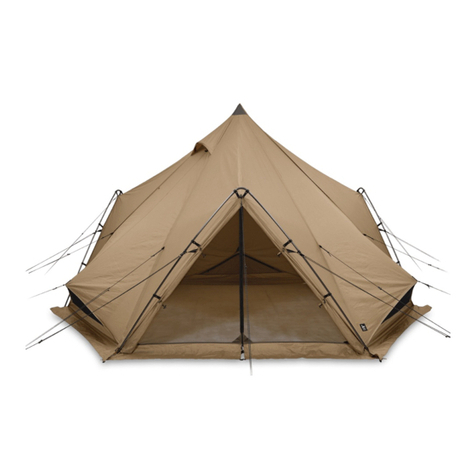
PS-103 / ZEKU-M INNER TENT
MANUAL - Ver 2.01
EN
2
■ITEMS INCLUDED
Please check the contents of the set before fully opening the
tent. If you find something missing, please contact the store
where you purchased it or us directly.
Tent dody
×1
Strage case
×1
※Not include pegs and hammer
3
Pegs not include, please prepare the following recommended
pegs and the required number of pegs in advance.
【Recommend 󱗓Required number】
●TO-518 / GRART STAKE 18 × 1
Pegs not include
Chemically treated fibers are used in the fabric of this product.
Chemically treated fibers may liquefy when burned, the liquefied
fabric may stick to skin and cause serious burns.
Do not use any open flames or fire inside tent
Do not remove the fire prohibition tag
Do not cut or remove the fire-prohibited tag sewn into the
product. Products without a fire-prohibited tag cannot be
guaranteed or repaired.
■ABOUT THIS PRODUCT
Please take some time to understand the characteristics of
this product before using it.
4
■ PRECAUTIONS FOR SETUP AND USE
Be sure to read and understand the following contents
before use to prevent harm to the user and others, and
damage to property.
●Fire is not allowed in tents, shelters, and tarps. It is extremely
dangerous as there is a risk of fire, oxygen deficiency, carbon
monoxide poisoning, etc. Do not use firearms and keep fire
away from tents, shelters, and tarps.
●If the weather is bad, such as a typhoon or storm, or if you
anticipate such weather, stop camping immediately.
●Do not set up in a place that is easily affected by wind or
where there is a risk of falling rocks, avalanches, or rising
water.
INDICATES CONTENT THAT MAY RESULT
IN DEATH OR SERIOUS INJURY.
!
!
DANGER
5
●Not for permanent use. If this product is set up permanently, it
will deteriorate and be damaged in a short period of time due
to the effects of ultraviolet rays and other elements.
●Set up on a flat surface with good drainage. Moisture and
dirt can lead to deterioration, and rough terrain can lead to
damage to product.
●Remove any items that may damage the product, such as
rocks and branches, before setting up.
●When setting up the product, be sure to have two or more
people, and pay attention to surroundings.
●Do not set up when the wind is strong. The main body may
blow away or product may be damaged by the force of the
wind.
●When setting up, be prepared for wind gusts and be sure that
the main body and frame don’t fly away by keeping your
hands on the frame and main body while working.
●If the weather suddenly changes hold on to the product for as
long as needed to keep it down.
INDICATES CONTENT THAT MAY CAUSE
INJURIES OR PROPERTY DAMAGE.
WARNING
!
6
■PRECAUTIONS FOR TEARDOWN AND
AFTER USE CARE
Be sure to read and understand the following contents
before use to prevent harm to the user and others, and
damage to property.
●When taking down the product, be sure to have two or more
people.
●Please take down the product in the reverse order of the
setup. Not following the instructions properly may damage
the product.
●After use, clean the fabric and allow it to dry thoroughly
before storing. If it is stored with dirt or moisture uncleaned, it
may cause colors to transfer or mold odors to form, and may
cause the seam tape to come off and diminish its
waterproofness.
INDICATES CONTENT THAT MAY CAUSE
MINOR INJURIES OR PROPERTY DAMAGE.
WARNING
!
7
●Rope, webbing, plastic and metal parts should also be
thoroughly dried before storage. If it is stored while moist or
uncleaned, it may be damaged by corrosion.
●Salt can accelerate the deterioration of fabrics. If used near
the sea, rinse with fresh water and dry well before storing.
●Use a soft towel to gently clean or wipe moisture off fabrics.
Rubbing can damage the coating of the fabric.
●Do not use solvents such as paint thinners. There is a risk of
delaminating or discoloration of the water-repellent finish.
●Please do not wash. It will lead to deterioration of the fabric
and damage to other parts.
●Please keep out of reach of infants and children.
8
■ SETUP PROCEDURES
Set up according to the numerical order.
【Prepare in Advance】
※Ready Pegs and Hammer
Recommed pegs TO-518 / GRART STAKE 18 × 1
※Close all zippers Center
pole set
1
Hook
2
9
A
B
Center
pole set
1 CENTER POLE SET
1
A: Assemble the ZEKU-M body.
B: Remove the center pole once.
10
A: Insert the center pole through the entrance /exit of the inner tent.
B: After aligning the tip of the pole with the top of the inner tent,
install the bottom of the pole into the center of the inner tent.
C: Align the inner tent with the top of the main body and
stand the center pole up.
D: Set the pole in the center of the main body.
Set the pole
in the center
of the main body
A
D
C
Main body
Inner tent
B
2 CENTER POLE SET
1
Insert the end of
the pole into the hole
in the center of the
bottom of the tent
Inner tent
(pentagon)
Body
(hexagon)
11
The inner tent has a set position to attach to the main body.
As shown in the figure below, set the entrance and exit
of the inner tent toward the panel side with the upper ventilator.
Zipper
Upper ventilator
Inner tent doorway
Extension frame
Extension frame
Extension frame
1 HOOK
2
12
A: Attach a total of 7 hooks, 5 in the bottom corners and 2 at the
top of the extension frame.
B: Drive pegs into the ground through the loop at the
bottom center of the doorway.
A
A
Adjust tension as needed
B
2 HOOK
2
13
■WARRANTY AND REPAIR
If you find any defects in the product, please contact the store where you
purchased it or us directly. We will replace or repair any item found to have
a manufacturing defect free of charge. We will repair products with damage
caused by wear and aging at a reasonable price. Please note that it may be
difficult to obtain some materials due to the discontinuation of products and
parts, and repairs may not be possible based on the condition of the
product.
※When sending a product for repair, please remove dirt and moisture from
the product before sending it. Moisture and dirt may interfere with repairs.
Items that are not clean and dry upon arrival for repair will incur additional
charges at their own expense for cleaning. Thank you for your
understanding.
Zain Arts Co., Ltd.
7190-2 Shimauchi, Matsumoto, Nagano 390-0851
Phone: 0263-87-2955 FAX: 0263-87-2966
[email protected]

This manual suits for next models

1

Other ZANE ARTS Tent manuals

ZANE ARTS ZEKU-L INNER TENT User manual

ZANE ARTS

ZANE ARTS ZEKU-L INNER TENT User manual

ZANE ARTS TP-003/GEU User manual

ZANE ARTS

ZANE ARTS TP-003/GEU User manual

ZANE ARTS PS-011 User manual

ZANE ARTS

ZANE ARTS PS-011 User manual

ZANE ARTS GIGI-2 User manual

ZANE ARTS

ZANE ARTS GIGI-2 User manual

ZANE ARTS ROGA-4 User manual

ZANE ARTS

ZANE ARTS ROGA-4 User manual

ZANE ARTS PS-111 User manual

ZANE ARTS

ZANE ARTS PS-111 User manual

ZANE ARTS ZEKU-L User manual

ZANE ARTS

ZANE ARTS ZEKU-L User manual

ZANE ARTS DT-002 User manual

ZANE ARTS

ZANE ARTS DT-002 User manual

ZANE ARTS PS-011 User manual

ZANE ARTS

ZANE ARTS PS-011 User manual

ZANE ARTS ZEKU-M User manual

ZANE ARTS

ZANE ARTS ZEKU-M User manual

ZANE ARTS PS-122 User manual

ZANE ARTS

ZANE ARTS PS-122 User manual

ZANE ARTS PS-033 User manual

ZANE ARTS

ZANE ARTS PS-033 User manual

ZANE ARTS PS-003 User manual

ZANE ARTS

ZANE ARTS PS-003 User manual

Popular Tent manuals by other brands

Eagle Peak 6ftx4ft Foldable Greenhouse Canopy instruction manual

Eagle Peak

Eagle Peak 6ftx4ft Foldable Greenhouse Canopy instruction manual

Kettler PNAL20025-0200 Assembly instructions

Kettler

Kettler PNAL20025-0200 Assembly instructions

Coleman 2000004412 Setup instructions

Coleman

Coleman 2000004412 Setup instructions

Clam Stealth Spearfisher manual

Clam

Clam Stealth Spearfisher manual

Ardisam Eskimo QUICKFISH Series Assembly and use instructions

Ardisam

Ardisam Eskimo QUICKFISH Series Assembly and use instructions

Crivit 313762 Operation and safety notes

Crivit

Crivit 313762 Operation and safety notes

Creative Products LOUNGER M Installation

Creative Products

Creative Products LOUNGER M Installation

NETTUNO Marine Equipment EXCELLENT Assembly instructions

NETTUNO Marine Equipment

NETTUNO Marine Equipment EXCELLENT Assembly instructions

Yarden 80548 instruction manual

Yarden

Yarden 80548 instruction manual

GigaTent CT041 owner's manual

GigaTent

GigaTent CT041 owner's manual

Marmot Odyssey 4 quick guide

Marmot

Marmot Odyssey 4 quick guide

Elite Greenhouses KENSINGTON 6 x 6 manual

Elite Greenhouses

Elite Greenhouses KENSINGTON 6 x 6 manual

Bestway 68107 owner's manual

Bestway

Bestway 68107 owner's manual

KING CANOPY C61013PC manual

KING CANOPY

KING CANOPY C61013PC manual

Instant Promotion Spider Dome Pro Setup guide

Instant Promotion

Instant Promotion Spider Dome Pro Setup guide

Barronett Blinds BE650BW owner's manual

Barronett Blinds

Barronett Blinds BE650BW owner's manual

Napier BACKROADZ 19100 instructions

Napier

Napier BACKROADZ 19100 instructions

Outsunny 84D-220V00 quick start guide

Outsunny

Outsunny 84D-220V00 quick start guide

manuals.online logo
manuals.online logoBrands
  • About & Mission
  • Contact us
  • Privacy Policy
  • Terms and Conditions

Copyright 2025 Manuals.Online. All Rights Reserved.