manuals.online logo
Brands
  1. Home
  2. •
  3. Brands
  4. •
  5. Zanussi
  6. •
  7. Cooker
  8. •
  9. Zanussi ZE 942 Operating and safety instructions

Zanussi ZE 942 Operating and safety instructions

Other manuals for ZE 942

2

Other Zanussi Cooker manuals

Zanussi ZCV55001XA User manual

Zanussi

Zanussi ZCV55001XA User manual

Zanussi RCZ28-SSBL User manual

Zanussi

Zanussi RCZ28-SSBL User manual
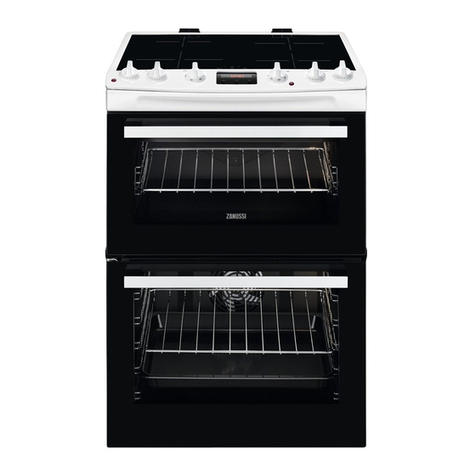
Zanussi ZCE 620 X User manual

Zanussi

Zanussi ZCE 620 X User manual

Zanussi EC19 User manual

Zanussi

Zanussi EC19 User manual

Zanussi MC 5634 User manual

Zanussi

Zanussi MC 5634 User manual

Zanussi ZCI660EXC User manual

Zanussi

Zanussi ZCI660EXC User manual

Zanussi ZCE 700 User manual

Zanussi

Zanussi ZCE 700 User manual

Zanussi ZX 5050 E User manual

Zanussi

Zanussi ZX 5050 E User manual

Zanussi ZCG563 User manual

Zanussi

Zanussi ZCG563 User manual

Zanussi ZCG560N User manual

Zanussi

Zanussi ZCG560N User manual

Zanussi ZCI66280BA User manual

Zanussi

Zanussi ZCI66280BA User manual

Zanussi ZCV66030BA User manual

Zanussi

Zanussi ZCV66030BA User manual

Zanussi MC 9634 Operating and safety instructions

Zanussi

Zanussi MC 9634 Operating and safety instructions

Zanussi R 140 I Assembly instructions

Zanussi

Zanussi R 140 I Assembly instructions

Zanussi ZCK68300B User manual

Zanussi

Zanussi ZCK68300B User manual

Zanussi ZCG63260XE User manual

Zanussi

Zanussi ZCG63260XE User manual

Zanussi ZCI66250BA User manual

Zanussi

Zanussi ZCI66250BA User manual

Zanussi N 900 User manual

Zanussi

Zanussi N 900 User manual

Zanussi ZCV551MW User manual

Zanussi

Zanussi ZCV551MW User manual

Zanussi MC 5634 Assembly instructions

Zanussi

Zanussi MC 5634 Assembly instructions

Zanussi Mixed Fuel Cookers User manual

Zanussi

Zanussi Mixed Fuel Cookers User manual

Zanussi ZL 76 AMS User manual

Zanussi

Zanussi ZL 76 AMS User manual

Zanussi EC9512 Assembly instructions

Zanussi

Zanussi EC9512 Assembly instructions

Zanussi GC 9601 Operating and safety instructions

Zanussi

Zanussi GC 9601 Operating and safety instructions

Popular Cooker manuals by other brands

Logik LFTG50A12 installation manual

Logik

Logik LFTG50A12 installation manual

Smeg SUK61CMA5 user manual

Smeg

Smeg SUK61CMA5 user manual

Rayburn 200G/L Gas Fired Cooker Installation and servicing instructions

Rayburn

Rayburn 200G/L Gas Fired Cooker Installation and servicing instructions

VacPak-It SV158 manual

VacPak-It

VacPak-It SV158 manual

Electrolux N7E Installation and operating manual

Electrolux

Electrolux N7E Installation and operating manual

Electrolux EKE6100 Instruction book

Electrolux

Electrolux EKE6100 Instruction book

ARO SHC5065 instruction manual

ARO

ARO SHC5065 instruction manual

Baumatic BCE905SS user manual

Baumatic

Baumatic BCE905SS user manual

Bosch HCE744350R instruction manual

Bosch

Bosch HCE744350R instruction manual

Modena FC 7645 SGM User manual book

Modena

Modena FC 7645 SGM User manual book

Stanley Donard 60 Installation and operating instructions

Stanley

Stanley Donard 60 Installation and operating instructions

Bartscher 201TC manual

Bartscher

Bartscher 201TC manual

Parkinson Cowan 50 GR/BU installation instructions

Parkinson Cowan

Parkinson Cowan 50 GR/BU installation instructions

Creda S150E Installation and user instructions

Creda

Creda S150E Installation and user instructions

Creda HB48309 instructions

Creda

Creda HB48309 instructions

Bosch HCE743220F instruction manual

Bosch

Bosch HCE743220F instruction manual

Tricity Bendix SE545P manual

Tricity Bendix

Tricity Bendix SE545P manual

NEFF E1461A2/01 Instructions for use

NEFF

NEFF E1461A2/01 Instructions for use

manuals.online logo
manuals.online logoBrands
  • About & Mission
  • Contact us
  • Privacy Policy
  • Terms and Conditions

Copyright 2025 Manuals.Online. All Rights Reserved.

b3.
as
ZANUSSI
_
Instructions
_
for
the
use
and
care
of
ZE
942
cooker
Contents
Instructions
for
the
owner
Installation
.
Technical
data
.
Use
Electric
oven
ao
te.
be
Digital
electric
programmer
.
Using
the
programmer.
Cooking
procedure
.
Maintenance
&
cleaning
Instructions
for
the
installer
Installation
.
A
Electrical
connection
.
Maintenance.
Caution
.
Page
.
Page
.
Page
.
Page
.
Page
.
Page
.
Page
12
.
Page
14
CO
OO
Go
H
WD
CO
.
Page
16
.
Page
18
.
Page
19
Before
you
start
operating
the
appliance,
be
sure
to
remove
the
plastic
films
protecting
the
stainless
steel
or
anodized
aluminium
parts.
Important:
During
normal
cooking
operations
the
appliance
will
get
very
hot.
Therefore,
do
not
let
children
play
near
the
appliance.
Instructions
for
the
owner
Installation
Oven:
Oven
heating
element
Removable
grill
Oven
lamp
Maximum
power
absorbed
Power
Supply:
50
Hz
Total
power:
mm.
180
mm.
145
mm.
180
mm.
145
It
is
mandatory
that
all
operations
required
for
the
installation,
the
adjustments,
the
conversion
to
the
type
of
gas
available
etc.
be
carried
out
by
QUALIFIED
PERSONNEL
in
accordance
with
existing
rules
and
regulations.
The
relevant
instructions
are
to
be
found
in
the
special
chapter
for
the
installer.
This
appliance
meets
the
requirements
laid
down
in
EEC
Directive
No
76/889
dated
4/11/1976
relating
to
the
suppression
of
radio
and
TV
interference.
Technical
Features
Dimensions:
width
depth
height
Oven
volume
Cooking
programmer
DIEHL
Hob*:
Front
left
dia.
Back
left
dia.
Back
right
dia.
Front
right
dia.
Maximum
Power
Absorbed:
mm
900
mm
598
mm
597
dm"
52,5
h
12
W
1500
W
1000
W
1500
W
1000
kW
5,0
kW
2,5
kW
2,0
W
15
kW
2,515
V
240
kW
7,515
(*)
The
front
left
heating
element
is
automatically
switched
on
or
off
by
means
of
the
electric
programmer.
CAD
Use
and
care
A
A
-
Ceramic
hob
F
-
Handle
B
-
Control
panel
G
-
Oven
door
C
-
Side
grilles
H
-
Removable
base
D
-Grilles
I
-
Front
panel
E
-
Dripping
pan
L
-
Removable
drawer
4
Controll
panel
1
2
3
4
6
1.
Programmer
5.
Front
left
heat
zone
control
knob
2.
Thermostat
light
6.
Back
left
heat
zone
control
knob
3.
Oven
knob
7.
Back
right
heat
zone
control
knob
4.
Grill
knob
8.
Front
right
heat
zone
control
knob
Oven
Q
-
Removable
grill
R
-
Oven
light
S
-
Fan
T
-
Filter
U
-Enamelled
panels
Operation
Ceramic-glass
hob
This
hob
consists
in
a
perfectly
flat
surface,
made
of
a
special
material
resistant
to
high
temperatures
and
to
shocks.
The
heating
elements
are
placed
under
the
ceramic-glass
surface,
in
contact
with
it,
directly
underneath
the
silk-screened
areas
on
the
hob
itself.
This
surface,
which
is
perfectly
flat,
avoids
any
risk
of
the
saucepans
being
upset;
furthermore
it
allows
use
of
the
areas
adjoining
the
heat
sources
as
dish
warmer
areas.
Important:
Be
very
careful
when
frying
food
in
hot
oil
or
fat
as
the
overheated
splashes
could
easily
flare
up.
Electric
oven
The
oven
is
evenly
heated
throughout.
A
fan
in
the
back
wall
distributes
heated
air
round
the
food
during
cooking
so
that
everything
cooks
in
the
same
time
regardless
of
where
it
is
placed
in
the
oven
or
how
much
is
being
cooked.
Foods
of
different
types,
provided
they
require
the
same
cooking
temperature,
can
be
cooked
together
and
there
is
no
possibility
of
any
flavours
or
smells
being
transmitted
from
one
food
to
another.
The
oven
has
a
removable
grill.
Cooking
by
either
oven
or
grill
can
be
manual
or
automatic
(without
or
with
the
programmer).
This
includes
a
digital
clock,
a
minute
minder
and
controls
by
which
the
oven
can
be
set
to
come
on
and
go
off
unattended.
Indicator
light
on
the
control
panel
shows
the
behaviour
of
the
thermostat
during
cooking.
A
light
comes
on
inside
the
oven
when
it
is
switched
on
and
remains
on
until
the
oven
goes
off.
The
grill
cannot
be
used
at
the
same
time
as
the
oven.
6
The
grill
control
provides
a
variety
of
heat
settings.
Control
Knobs
On.the
control
panel
of
the
oven
there
are
the
knobs
for
the
operation
of
the
four
ceramic-glass
heating
elements.
Programmed
heating
element
(Fig.1)
The
front
left
heating
element
can
be
programmed
to
switch
on
and
off
automatically
at
a
preset
cooking
time;
the
operations
for
the
programming
are
quoted
in
the
paragraph
"Electric
programmer”.
|
The
knob
has
7
settings.
The
selected
temperature
is
kept
constant
through
a
temperature
feeler
which
automatically
turns
the
respective
heating
element
on
and
off
as
required.
When
set
on
”max.”,
the
temperature
feeler
is
cut
out
and,
consequently,
the
relevant
heating
element
remains
turned
on
at
peak
power.
Figure
1
Using
the
oven
As
soon
as
the
oven
is
switched
on
the
fan
starts
and
runs
until
the
oven
control
is
switched
off
again
(fig.2).
The
food
should
be
put
into
the
oven
before
switching
on,
even
when
cooking
manually-
the
speed
of
heating
up
is
so
fast
that
there
is
no
need
to
preheat.
The
oven
shelves
can
be
fully
filled.
Most
normal
types
and
materials
of
cooking
utensils
can
be
used.
During
cooking
the
door
should
be
opened
as
little
as
possible
to
avoid
heat
loss
and
so
excessive
electricity
consumption.
Figure
2
Cooking
manually
When
cooking
manually
ensure
that
the
programmer
is
not
in
operation
_
accidentally.
Arrange
the
food
in
the
oven,
shut
the
door
and
turn
the
oven
control
(See
Fig.
2)
to
the
required
temperature
setting.
When
the
knob
is
set
to
&
the
oven
temperature
light
will
come
on,
also
an
~
internal
oven
light.
This
setting
is
NOT
a
cooking
position
but
is
intended
for
rapid
thawing
of
frozen
food.
|
Positions
from
50
°C
to
MAX
are
cooking
positions
and
give
a
full
range
of
temperatures.
The
oven
temperature
light
will
come
on
until
‘the
oven
has
reached
the
correct
temperature;
after
that
it
will
come
on
and
off
showing
how
the
temperature
is
being
maintained.
Cooking
automatically
The
oven
or
grill
can
cook
automatically
when
the
programmer
is
set
to
switch
it
on
and
off
at
the
times
given
without
the
need
for
anyone
to
be
in
attendance.
Most
foods
cook
well
automatically
but
preference
should
be
given
to
those
which
will
not
be
affected
by
the
waiting
period
before
the
oven
comes
on.
Automatic
timer
The
automatic
timer
makes
it
possible
for
the
oven
and/or
front
left
hot
plate/heat
area
to
be
turned
on
and
off
automatically
at
the
pre-set
time.
Furthermore,
the
timer
will
show
the
time
of
the
day
and
will
also
ring
a
bell
at
the
end
of
the
cooking
cycle.
Operating
the
automatic
timer
The
figure
3
shows
the
control
knobs
of
the
automatic
timer.
With
knobs
1,2
and
3
you
can
carry
out
all
required
adjustments,
as
described
hereunder.
Knob
1
By
turning
this
knob
clockwise,
you
can
set
the
timer
to
the
correct
time
o
or
reset
it
after
a
power
failure.
`
Knob
2
By-turning
this
knob
clockwise,
you
can
set
the
following
functions
on
dial
4:
Cooking
duration
(210
mins.
max.);
Stopping
the
ringing
bell
(position
"ECH
Manual
operation
of
the
oven
and/or
hot
plate/heat
area
(position
d
).
Figure
3
Knob
3
|
By
depressing
and
turning
this
knob
clockwise
as
well
as
anticlockwise,
you
can
set
the
cooking
start
time
on
dial
5.
-
Attention:
When
setting
the
timer
to
the
correct
time
of
the
day,
make
sure
that
both
the
electric
clock
and
dial
5
actually
show
the
same
time.
Manual
operation
The
oven
and/or
hot
plate/heat
area
can
also
be
operated
manually
.
Turn
knob
2
clockwise
until
the
symbol
di
coincides
with
the
index
of
dial
4.
Semi-automatic
operation
Isr
alternative:
Start
cooking
immediately
through
manual
operation;
end
of
cooking
through
the
timer.
Place
the
food
to
be
cooked
in
the
oven
and/or
on
the
hot
plate/heat
area.
Turn
knob
2
clockwise
and
set
the
cooking
duration
on
dial
4.
Turn
the
thermostat
knob
and/or
the
hot
plate/heat
area
knob,
respectively,
to
the
required
temperature.
2nd
alternative:
Cooking
start
through
the
timer;
End
of
cooking
through
manual
operation.
Place
the
food
to
be
cooked
in
the
oven
and/or
on
the
hot
plate/heat
area.
Depress
knob
3
and
turn
it
clockwise
until
the
cooking
start
time
appears
on
dial
5.
Turn
knob
2
clockwise
and
set
the
maximum
cooking
duration
(210
mins)
on
dial
4.
Turn
the
thermostat
knob
and/or
the
hot
plate/heat
area
knob,
respectively,
to
the
required
temperature.
Important:
When
the
cooking
time
has
elapsed,
turn
knob
2
clockwise
until
the
"OT
coincides
with
the
index
on
dial
4.
Then
turn
the
control
knob
to
$X
or
d.
|
Turn
the
thermostat
knob
and/or
hot
plate/heat
area
knob
to
”0”.
Fully
automatic
operation
Place
the
food
to
be
cooked
in
the
oven
and/or
on
the
hot
plate/heat
area.
Turn
knob
2
clockwise
and
set
the
required
cooking
time
(max.
210
mins)
on
dial
4.
Depress
knob
3
and
turn
it
clockwise
until
the
cooking
start
time
appears
on
dial
5.
Turn
the
thermostat
knob
and/or
the
hot
plate/heat
area
knob
to
the
required
temperature.
After
completion
of
the
cooking
cycle,
the
symbol
”0”
will
coincide
with
the
index
on
dial
4.
On
this
setting,
the
oven
and/or
hot
plate/heat
area
are
electrically
turned
off.
Furthermore,
the
buzzer
reminds
you
that
the
cooking
cycle
is
completed.
To
turn
off
the
buzzer,
turn
knob
2
clockwise
until
the
symbol
PX
coincides
with
the
index
on
dial
4.
How
to
use
the
automatic
timer
Cooking
end
time:
19,00
hours;
Cooking
duration:
2
hours
(120
mins).
Place
the
food
to
be
cooked
in
the
oven
and/or
on
the
hot
plate/heat
area.
Turn
knob
2
clockwise
and
set
the
cooking
duration
(120
mins.)
on
dial
4.
Depress
knob
3
and
turn
it
until
you
set
on
dial
5
the
cooking
start
time
(5
o'clock
=
17,00
hours).
Turn
the
thermostat
knob
and/or
the
hot
plate/heat
area
knob
to
the
required
temperature.
|
After
this,
the
oven
and/or
hot
plate/heat
area
will
automatically
turn
on
at
17,00
hours
and
then
at
19,00
hours
after
completion
of
the
cooking
cycle.
Minute
minder
Turn
knob
2
clockwise
and
set
the
selected
time
(max.
210
mins.)
on
dial
4.
To
turn
off
the
buzzer,
turn
knob
2
until
the
symbol
PX
coincides
with
the
index
of
dial
4.
Note:
`
There
is
no
difference
between
automatic
cooking
and
normal
cooking
inasmuch
as
the
function
of
the
automatic
timer
is
to
control
the
selected
cooking
time
while
you
are
absent
or
engaged
in
other
activities.
`
`
,
Therefore,
completely
automatic
cooking
is
most
suitable
for
foods
or
dishes
that
require
no
special
care.
The
cooking
start
time
can
be
pre-set
up
to
a
maximum
of
12
hours
in
advance.
Using
the
grill
As
with
the
oven
the
grill
control
(see
Fig.4)
can
be
set
to
a
number
of
different
heat
settings.
At
MAX
the
thermostat
controlling
the
heat
does
not
operate
and
the
element
stays
on
continuously
to
give
the
highest
heat
possible.
Foods
to
be
grilled
are
placed
on
the
wire
grid
in
the
grill
pan,
which
can
be
curved
either
upwards
or
downwards
to
give
the
required
distance
from
the
element.
The
pan
is
then
put
into
the
third
runner
position,
counting
from
the
bottom
of
the
oven
upwards.
10
Figure
4