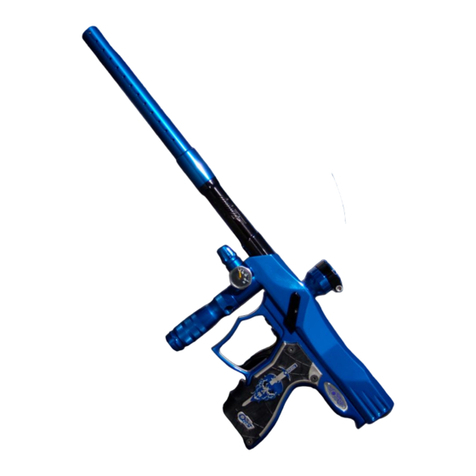
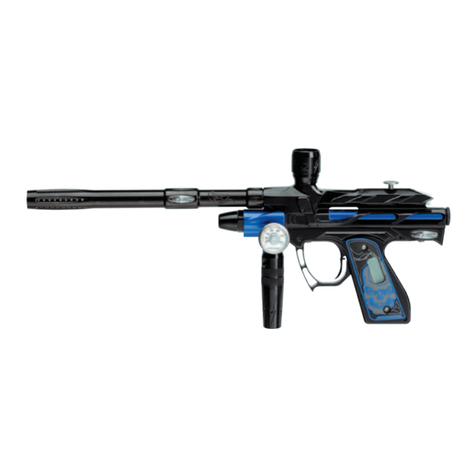
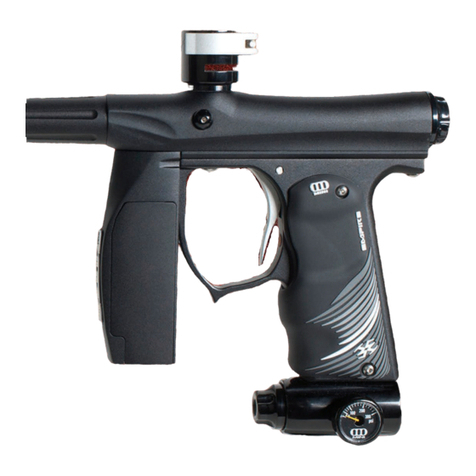
Zap ZXS-600E User manual


SAFETY RULES
RULES FOR SAFE HANDLING
-Always wear proper paintball eye protection and never remove them when
operating the marker
or
nearplaying area.
-Treat every paintball marker
as
if It were loaded.
-Never point a paintball marker at anyone not wearing the proper paintball eye
protection.
-Always use a barrel plug as well as the safety when not playing.
-Never look down the barrel
of
a paintball marker. Accidential discharge into the
eyes may cause permanent injury or death.
-Always measure the velocity (speed)
of
the marker before playing paintball.
Note: Paintball velocity can be tested at most regulation paintball fields with a
chronograph.
-Never shoot your marker with the velocity exceeding 300 fps.
-Only play
In
a proper palntball facility.
-Avoid shooting an opponent at point blank range (20 feet
or
less).
-Paintballs can stain, so never fire your marker at the property
of
others.
-Do not shoot fragile objects (i.e. Windows, lights, etc.)
• 1 •

Pressurize
and
load
the
marker only
when
the
marker
will
be
immediately
used.
Unload
and
remove
the
CO
2 cylinder immediately after
use
for
safe
storage.
Always remove gas source before disassembly.
Keep
exposed
skin
away
from
escaping
CO
2 gas
when
installing or
removing
cylinder.
CO
2 gas
is
very
cold
and
can
cause
frostbite under certain conditions.
Do
not
field
strip or otherwise disassemble this marker while it
is
pressurized
with
gas.
Store
the
paintball marker
unloaded
and
degassed
in
a
locked
place.
Follow warnings listed
on
gas
source
for
handling
and
storage.
Use
only
.68
caliber paintballs. Never
load
or fire
any
foreign
objects.
Dress
appropriately
and
avoid
exposing
any
skin
when
playing the
game
of
paintball. Alight layer of clothing
will
absorb
some
of
the
impact
and
protect
you
from
the
paintballs.
Never
consume alcoholic beverages
before
and/or during
the
use
ofthis
marker.
Handling paintball markers
while
under
the
influence ofdrugs
or
alcohol
is
a
criminal disregard for public
safety.
The
green light
on
the
left side of
the
handle indicates that
the
marker
is
turned
on
and
ready
to
fire.
When
the
light
is
on
be
sure
to
point
the
marker
in
a
safe
direction
and
place
a
barrel
plug
in
the
barrel
until
you
are
ready
to
play.
Always
use
a barrel
plug
and
point
the
marker
In
a
safe
direction.
Do
not rely
on
the green on/off light or safety
to
indicate whether or not
the
marker
is
on
or
off.
·2·

OPERATING YOUR ELECTRONIC MARKER
Always
follow
all safety
rules
when
operating
the
marker.
Misuse
or
abuse
of
the
marker
can
cause
serious
injury
or
death.
This markeroperates
only
on
C02
or
compressed air.
Do
not
use any othergas
to
power
this
marker.
Doing so may cause serious
injury
or
death and may damage the marker.
1.
Attach barrel and place barrel plug into the end
of
the barrel.
2.
Place marker in safe mode by pushing the safety to the right.
3.
Put goggles on. Attach air cylinder to the gas connector located at the bottom of
the handle.
4. Tum the marker on by pushing the on/off button located on the left side grip. A
green light will blink when the marker is activated.
5.
Attach a hopper to the feed port and press it in firmly.
6.
Load the hopper with paintballs.
7.
Take marker off safe by pressing the safety to the left.
8.
Remove barrel plug.
Check the velocity of marker with a chronograph to verify that the velocity does not
exceed 300 fps or the set field limit.
If
you do not own or have access to a
chronograph, please go to your closest paintball field to have your marker tested.
·3·
9

10.
To
adjust
the
velocity of
the
mar1<er,
use
an
allen
key
and
tum it clockwise to
increase the
pressure
of
the
regulator (this
will
increase the velocity of
the
marker).
To
decrease
the
velocity tum
the
allen
key
counterclockwise. If
the
velocity
is
still too
high
or
too
low
(make
sure
the
air
source (cylinder)
have
been
removed
then,
remove
the
rear
cap
of
the
marker
as
stated
in
the
field
stripping
section
of
the
manual.
Once
the
cap
has
been
removed
use
a slot screwdriver
to
adjust
the
bolt
cap.
Tuming
the
bolt
cap
clockwise
will
decrease
your
velocity,
turning
the
bolt
cap
counterclockwise
will
increase your
velocity.
The
bolt
cap
should
never
be
further out
than
the
back
of
the
bolt; this
will
cause
the
mar1<er
not
to
feed
properly.
**
The
regulator
pressure
should
never
be
above
100
psi.
Doing
this
may
cause
injury
or
damage
to
the
marker
...
11.
*To
tum
off
the
mar1<er,
remove
the
hopper
and
any palntballs that
remain
in
the
feed
port.
Point
the
mar1<er
in
a
safe
direction away
from
any
people,
animals
or
objects,
and
shoot
the
mar1<er
to
remove
any
paintballs that
may
be
in
the
barrel.
Remove
air cylinder
from
the
mar1<er
and
press
the
on/off button located
on
the
left
grip.
When
the
mar1<er
is
off
the
green
light
will
no
longer
be
seen.
Counter Clockwise
Clockwise
·4·

CIRCUIT BOARD LAYOUT
Most maMers
\\11J
rome
equipped with the ability to select various rates
of
fire (unless
restricted
by
local legislation).
To
adjust the fire rate remove the left grip from the grip
frame. bypressing button 'B' you can select a different fire rate. The fire rate will be
shown by the blinking
LED
light (see charge below). Ifyou push button 'B' and the
light pattern does not change then your marker is not equipped with various fire rate
capability.
Press Button Fire Rate LightWill Blink
0 Single Shot 1 Short
1 Turbo 1 Long
3 2 Shot 2 Short
4 3 Shot 3 Short
5 5 Shot 5 short
6 Full Auto Steady On
Pressing the button again will return to single shot
In order to fire 2 shot bust, 3
shot burst, 5 shot burst
or
full auto you must hold the
trigger back to fire the full
sequence. Releasing the
trigger at any time will stop
the sequence and reset for
the next trigger pull.
E
A.
On/Off Button
B.
Fire Rate Selection Button
C.
Led Light
D.
Solendoid Connection
E.TriggerButton
F.
Battery Connection
F
o
C
BOA
~
[:!J
D
·5·

FIELD STRIPPING YOUR ELECTRONIC MARKER
Always follow all safety rules when operating the
market
Misuse or abuse
of
the marker can cause serious injury
or
death.
1.
Turn offmarker.
2.
Remove air cylinder from marker.
3.
Remove hopper and paintballs from marker.
4. Remove barrel (#1).
5.
Remove grip frame screws (#34).
6. Remove grip frame (#18) from body (#2)
.•
Be sure not to lose the valve o-ring
(#21)
or
the
L.P.
Connector o-ring (#28)
.•
7.
Remove rear cap screws (#16) (pin). Pull the rear cap (#14) from the body.
8. Remove the bolt retaining pin (#6).
9.
Remove bolt (#9) from rear
of
marker.
·6·

TO FULLY DISASSEMBLE THE ELECTRONIC MARKER
Always follow all safety rules when operating the marker.
Misuse or abuse
of
the marker can cause serious injury or death.
10.
Unscrew
bolt
cap
(#13)
and
remove
bolt
spring
(#12)
and
spring retainer
(#11).
11.
Remove
the
grips
(#33)
from
the
grip
frame
(#16)
by
unscrewing
the
screws
(#34).
12.
Remove
regulator
mounting
screws
(#51).
"Ensure that the air cylinder
has
been
removed"
13.
Unplug
the
solenoid
connector
from
the
circuit
board
(#31).
14.
Remove
the
L.P.
Hose
(#49)
and
fitting (#50)
from
the regulator
body
(#44).
15.
Unscrew
the
valve
plug
(#36)
from
the
valve
housing.
Be
sure
not
to
lose
the
valve
stem
(#35) or valve spring (#36)
when
removing
the
valve
plug.
Avoid
getting
any
debris
on
the
valve
stem,
as
this
will
affect the
markers
performance.
16.
Unscrew
the
regulator adjuster
(#40).
Be
sure
not
to
lose
the
spring
plate
(#63) or
spring
(#41)
when
removing
the
regulator adjuster.
17.
Remove
the
air connector locking screw
(#64
).
16.
Unscrew
the
air connector
(#56)
from
the
regulator
body
(#44).
Be
sure
not
to
lose
the
regulator
pin
(#54),
pin
spring
(#55) or regulator seat
(#53)
when
remov-
ing
the
air connector.
19.
The
solenoid
assembly
should
never
be
removed
from
the
regulator
body
.
• 7 •

CARE AND CLEANING OF YOUR ELECTRONIC
MARKER
Always
follow
all safety rules when operating the marker.
Misuse
or
abuse
of
the marker can cause serious
injury
or
death.
This marker contains delicate electronic parts
QQ.n.Q1
subject the marker
to
water
or
any other liquid that may destroy the electronic components.
Always remove air
source
(cylinder) before
disassembling the marker
Oiling your marker: The only components that require oil are the bolt o-rings. Use a
high grade, lightweight lubricating oil.
Cleaning: Always remove battery before cleaning marker.
To
clean your
barrel, remove itfrom the marker and rinse thoroughly with warm
water.
To
clean the body, wipe down with a damp cloth ensuring not to
get any water into the grip frame.
To
clean the Inside
of
the body, remove from grip frame as
outlined in the field stripping section
of
this manual. Rinse with
warm water and be sure
to
dry before reassembling marker.
To
clean the grips, remove them as outlined in the in the field
stripping section
of
this manual. Rinse with warm water and be
sure to dry completely before reassembling.
·8·
ALWAYS REMOVE AIR SOURCE (CYLINDER) AND PAINTBALLS BEFORE
DISASSEMBLING
MARKER
Problem Reason Correction
ALWAYS
REMOVE
AIR
SOURCE
(CYLINDER)
AND
PAiNTBALLS
BEFORE
DISASSEMBLING
MARKER
Velocity
jumps
up
and
down
Low
battery
will
cause
the
Install
new
battery
in
marker.
constantly.
valve
to
open
for
different
intervals.
ALWAYS
REMOVE
AIR
SOURCE
(CYLINDER)
ANP
PAINTBALLS
BEFORE
PISASSEMBLING
MARKER
Low
velocity
I C02 I
air
source
has
fallen
Re-fill
C02
tank
or
regulate
below
700
PSI
thus
air
source
pressure
to
750
PSI
Valve
open
long
less
pressure
in
valve
to
close
it
rapidly
and
more
air
escapes
before
valve
closes.
ALWAYS
REMOVE
AIR
SOURCE
(CYLINDERl
AND
PAINTBALLS
BEFORE
DISASSEMBLING
MARKER
Low
velocity
If
bolt
o-ring(s)
are
cut
or
Check
bolt
o-ring
for
breaks
or
swollen
air
may
be
escaping
swelling
and
replace
<Proper
air
pressure<
around
bolt
or
the
swollen
If
necessary.
o-ring(s)
will
be
causing
excessive
drag,
slowing
the
forward
motion
of
the
bolt.
If
rear
cap
o-rings
are
broken,
then
air
will
escape
.
• 9 •

Problem Reason Correction
ALWAYS
REMOVE
AIR
SOURCE
(CYLINDER)
AND
PAINTBALLS
BEFORE
DISASSEMBLING
MARKER
Regulator
hard
to
adjust.
Regulator
piston
o-ring
Check
regulator
piston
o-ring
swollen
or
cut.
and
replace
if
necessary.
ALWAYS
REMOVE
AIR
SOURCE
(CYLINDER)
AND
PAINTBALLS
BEFORE
DISASSEMBLING
MARKER
Velocity
of paintballs
in
Battery
is
low
and
doesn't
Install
new
battery
in
marker.
turbo
I multi-fire
mode
have
enough
power
to
hold
drops
after first
shot
is
fired.
the
valve
open
for
the
full
cycle
time
or
regulator
pressure
is
too
low.
Adjust
regulator
pressure.'
ALWAYS
REMOVE
AIR
SOURCE
(CYLINPER)
ANP
PAINTBALLS
BEFORE
DISASSEMBLING
MARKER
Double
feeding
balls.
Detent
wire
is
bent
or
Check
detent wire
and
replace
missing.
if
necessary.
ALWAYS
REMOVE
AIR
SOURCE
{CYLINDER]
AND
PAINTBALLS
BEFORE
DISASSEMBLING
MARKER
Bolt
sticking
forward.
Broken
shell
from
a
Remove
and
clean
bolt,
paintball
or
other
debris
clean
inner
section
of
body
wedged
between
the
bolt
to
remove
debris.
and
the
body.
ALWAYS
REMOVE
AIR
SOURCE
(CYLINDER)
AND
PAiNTBALLS
BEFORE
DISASSEMBLING
MARKER
* REGULATOR
SHOULD
NEVER
BE
ADJUSTED
ABOVE
100 PSI.
THIS MAY
CAUSE
DAMAGE
TO
THE
MARKER.
·10·

Problem Reason Correction
When
air
source
is
applied
o-R'ng(s)
on
gas
feeder
Remove
gas
feeder
and
check
air
leaks
from
the
bolt
area
is
art
or
swoUen
allowing
o-ring
for
damage
and
replace
and
bolt
is
stuck
in
the
forward
high
pressure
all'
to
flow
into
necessary.
position.
"Pressure
gauge
the
valve.
spikes
up
past
120
PSI""
Regulator
seat
is
damaged
Remove
gas
feeder
and
check
causing
air
to
flow
through
regulator
seat
for
damage
and
valve.
replace
if
necessary.
ALWAYS
REMOVE
AIR
SOURCE
(CYLINDER)
AND
PAINTBALLS
BEFORE
DISASSEMBLING
MARKER
Air
leaking
from
barrel.
Damaged
valve
seat.
(cuts
Remove
valve
stem
and
check
or
debris
in
seal)
for
damage
and
replace
if
necessary
ALWAYS
REMOVE
AIR
SOURCE
(CYLINDER)
AND
PAINTBALLS
BEFORE
DISASSEMBLING
MARKER
Power
is
on
but
marker
Solenoid
connector
has
Remove
grip
and
reposition
will
not
fire.
come
loose
from
circuit
connector.
board.
ALWAYS
REMOVE
AIR
SOURCE
(CYLINDER)
AND
PAINTBALLS
BEFORE
DISASSEMBLING
MARKER
Marker
will
not
turn
on.
No
battery
or
dead
battery.
Install
new
battery
in
marker
Battery
connector
has
come
Remove
grip
and
reposition
loose
from
board.
connector.
"
11
"

·12·

WARRANTY
INFORMATION
All ZAP Xtreme Sportz Paintball
Mar1<ers
include a 90 day unlimited
warranty. The warranty is effective from the date
of
purchase.
To
register
on-line for your warranty, go to www.zappaintball.com
or
call
1-800-265-6555.
To
find an authorized warranty service centre across North America, go to
www.paintball-ptLcom. Please keep your sales receipt for future use.
•
13·

NOTES
·14·

Table of contents