8
7. BREAK BEAM EYES OPERATION
The MINI uses a break beam eye system to determine the absence or
presence of a paintball for the purposes of reduced paint breakage and
optimum rates of fire. When the Break Beam System is activated the marker
will not fire unless the Break Beam Eye System detects a paintball. The MINI
board is pre-programmed to activate the eye system each time the marker
is powered up.
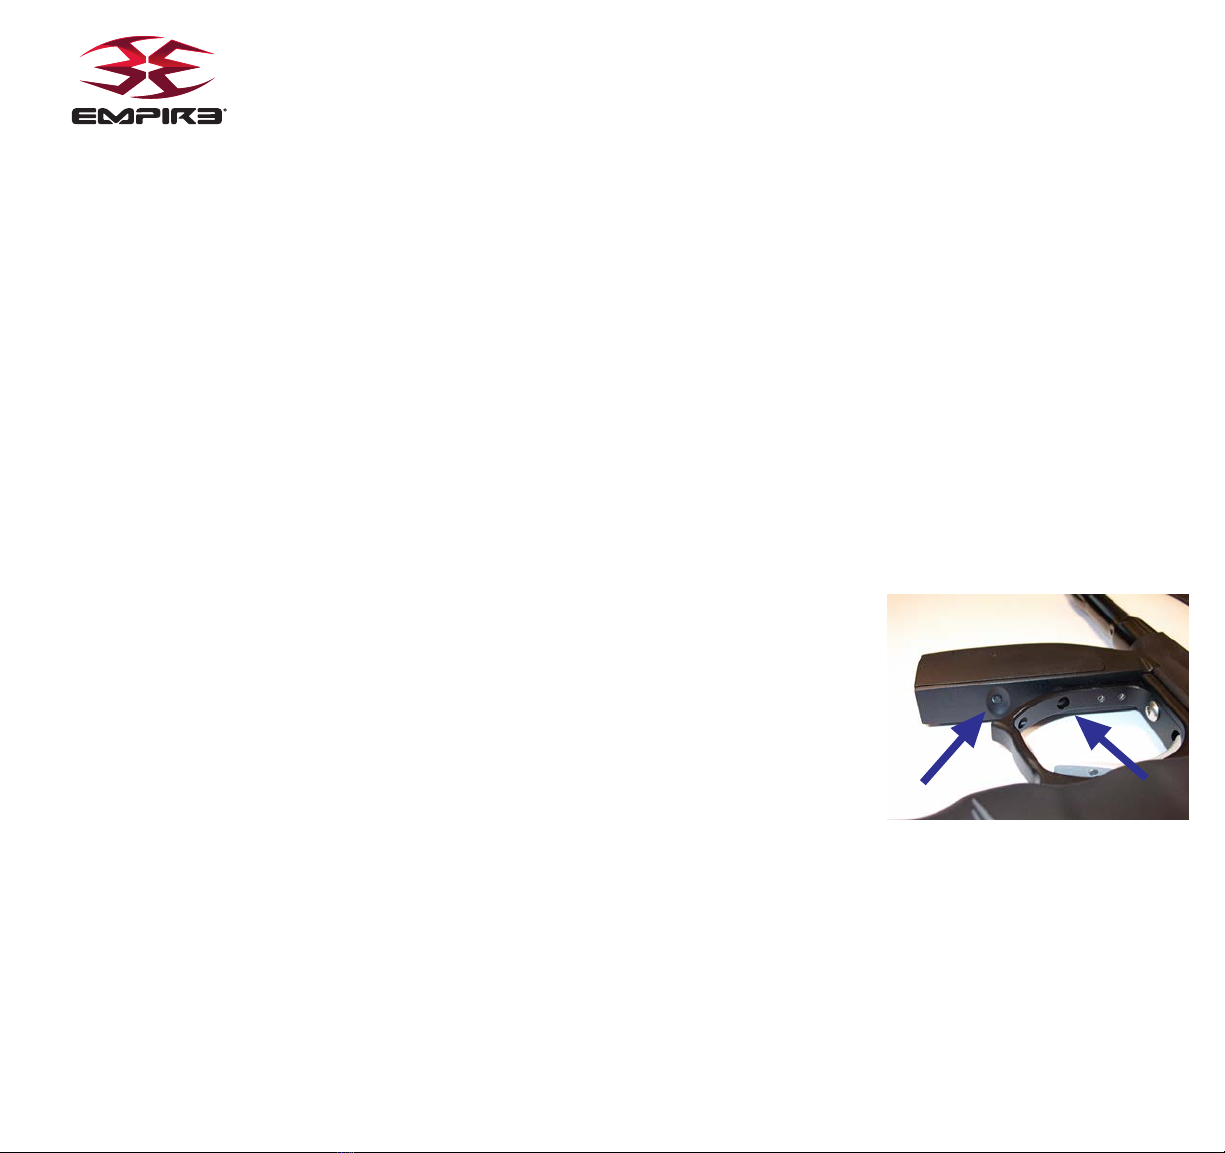
To turn the eyes OFF, ensure that there are no paintballs in the MINI breech
or feed-neck, make sure the marker is switched On, and then press the
button once. A fast, flashing LED will indicate that the eye system has been
deactivated.
To turn the eyes back ON, tap the button one time.
A slow consistent single blinking Green LED indicates that the eyes are ON
with no ball in the breech and a double blink LED indicates that there is a
ball in the breech.
If the Break Beam Eye System malfunctions, the marker assumes there was
a ball broken and the Rate of Fire (ROF) is limited to 8.0 balls-per-second
(bps) to prevent further ball breaks. The LED indicator will flash slowly. Turn
the Break Beam Eye System OFF to allow firing at Max ROF cap setting.
Break Beam Sensor Status is indicated by blinking frequency of the LED
(See table below for explanation). Color would be determined by battery
level, as listed in the chart in Section 4.
Blink Frequency Break Beam (BB) Eye Status
Single Blink BB Sensor System active, no ball in breech
Double Blink BB Sensor System active, ball in breech
Flashing BB Sensor System has malfunctioned
Fast Flashing BB Sensor System Deactivated
For optimal performance of the MINI eyes, keep the inside of the MINI breech
clean and clear of broken paint, paint residue, or other debris. Although the
eyes can be cleaned via cleaning the breech of the MINI marker, if the eye
board needs to be accessed, please follow the steps outlined in the Main
Body Assembly section of this manual.
TRIGGER PULL INDICATION
If the trigger is being pressed, the LED will display a dim Red LED which can be
seen between blinks of the Eye Setting LED.
8. UNLOADING THE MINI
- Always keep your Mini pointed in a safe direction and always keep your
protective eye, face and ear wear on until marker is completely unloaded.
- Be sure your finger is away from the trigger area.
- Place the barrel plug, sock, or barrel blocking device into the end of the barrel.
- Turn the Mini Off by pressing and holding the On/Off button. The LED will
turn from green to red. Observe the light to make sure it is no longer lit.
- Remove your pressurized gas source by slowly and carefully unscrewing it.
- If you are using an electronic loader make sure loader is completely
turned Off.
- Slightly tilt the marker so that the loader is lower than the body.
- Remove the loader by undoing the clamp and spinning it in a clockwise
direction and gently lifting it.
- Read the pressure gauge and make sure the pressure reads 0 PSI.
- DO NOT look down the barrel but look down the feedneck to make
sure there are no paintballs in the breech.
- Remove the barrel from the marker.
- Make sure there are no more paintballs remaining in the barrel.
9. REGULATOR AND VELOCITY ADJUSTMENT
The MINI utilizes a fully functional MINI Bottomline Regulator at the bottom
of the grip frame that doubles as an ASA adaptor/receiver for a standard
threaded pre-set output compressed air system. This unique regulator
system channels air through a chamber in the grip frame eliminating the
need for external macro line and fittings. The MINI Bottomline Regulator
controls the amount of air pressure going from your compressed air system
into the maker itself.
The MINI regulator should be pre-set at 200 PSI, as this is the best operating
pressure for firing the marker. However, if over time you do need to adjust
the pressure, only use the Regulator Adjuster Screw on the front of your MINI
Bottomline Regulator. Never adjust the regulator above 200psi.