English
-9-
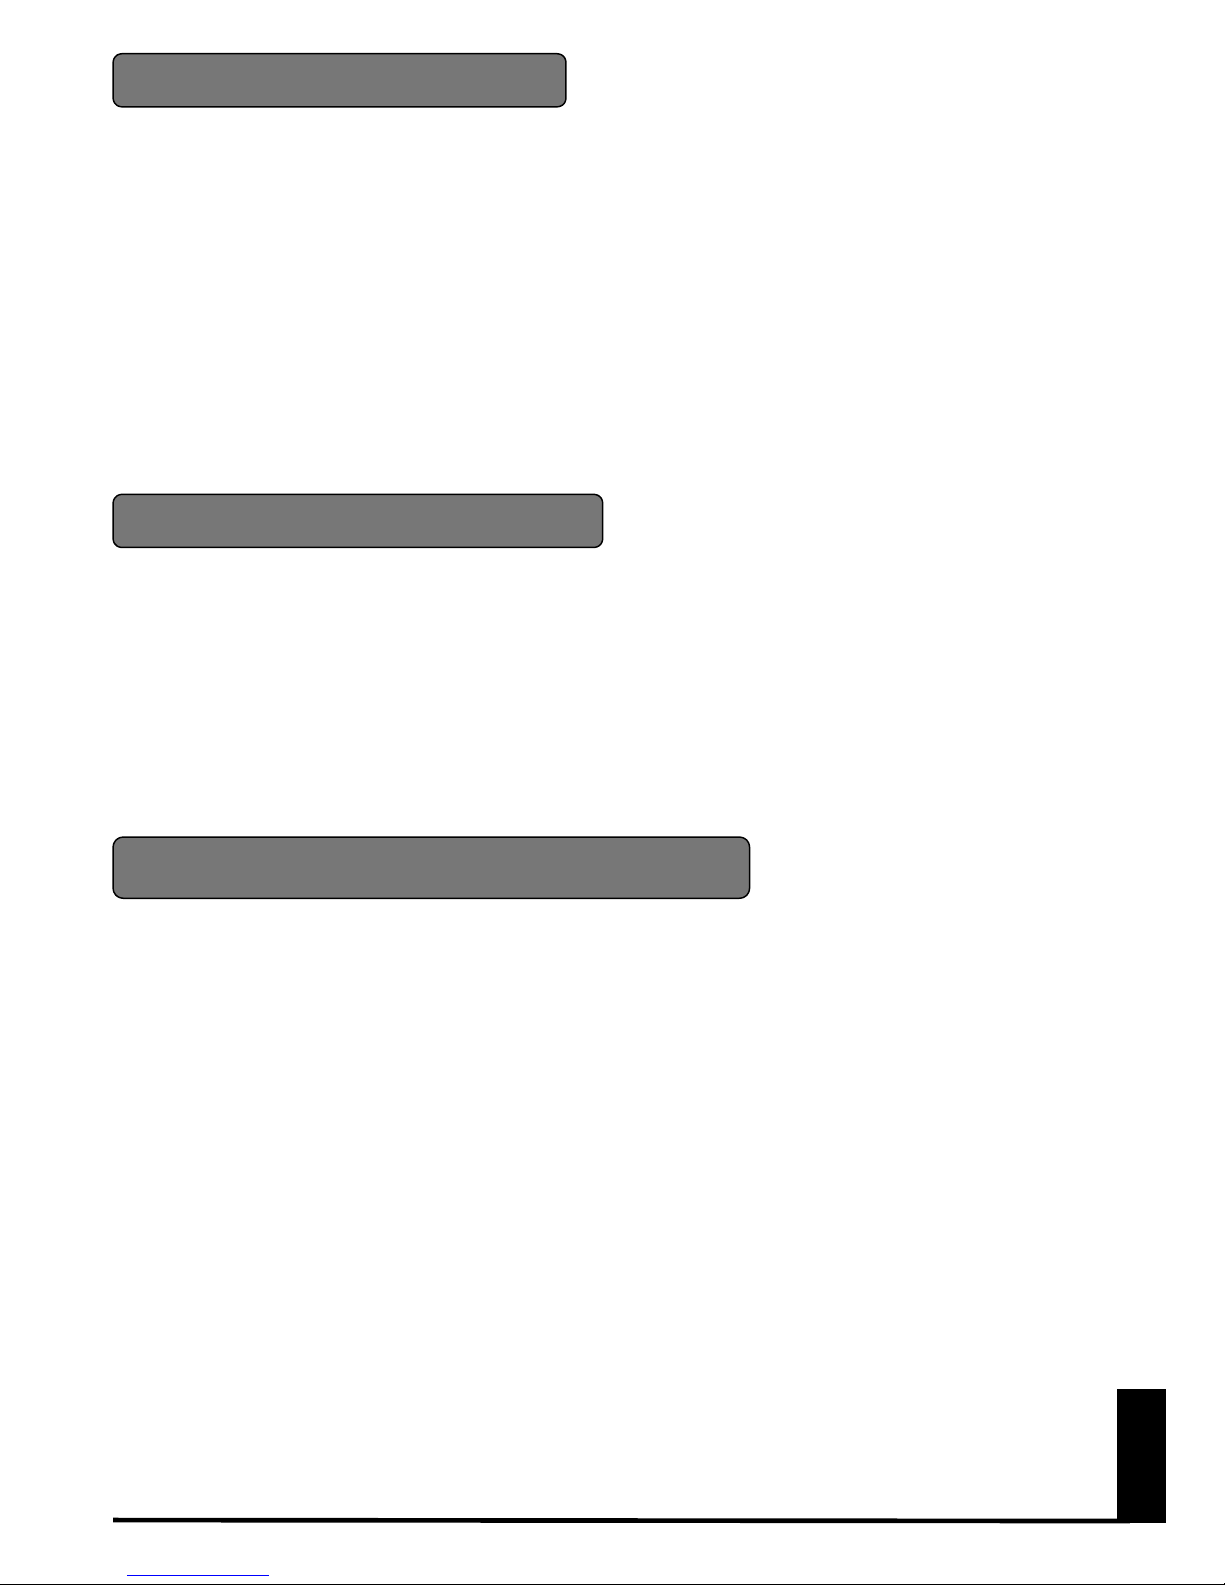
FIRST TIME INSTALLATION
DX2000
has “Easy Installation” system which
allows users to set up the receiver setting only
minimum configuration for viewing channels.
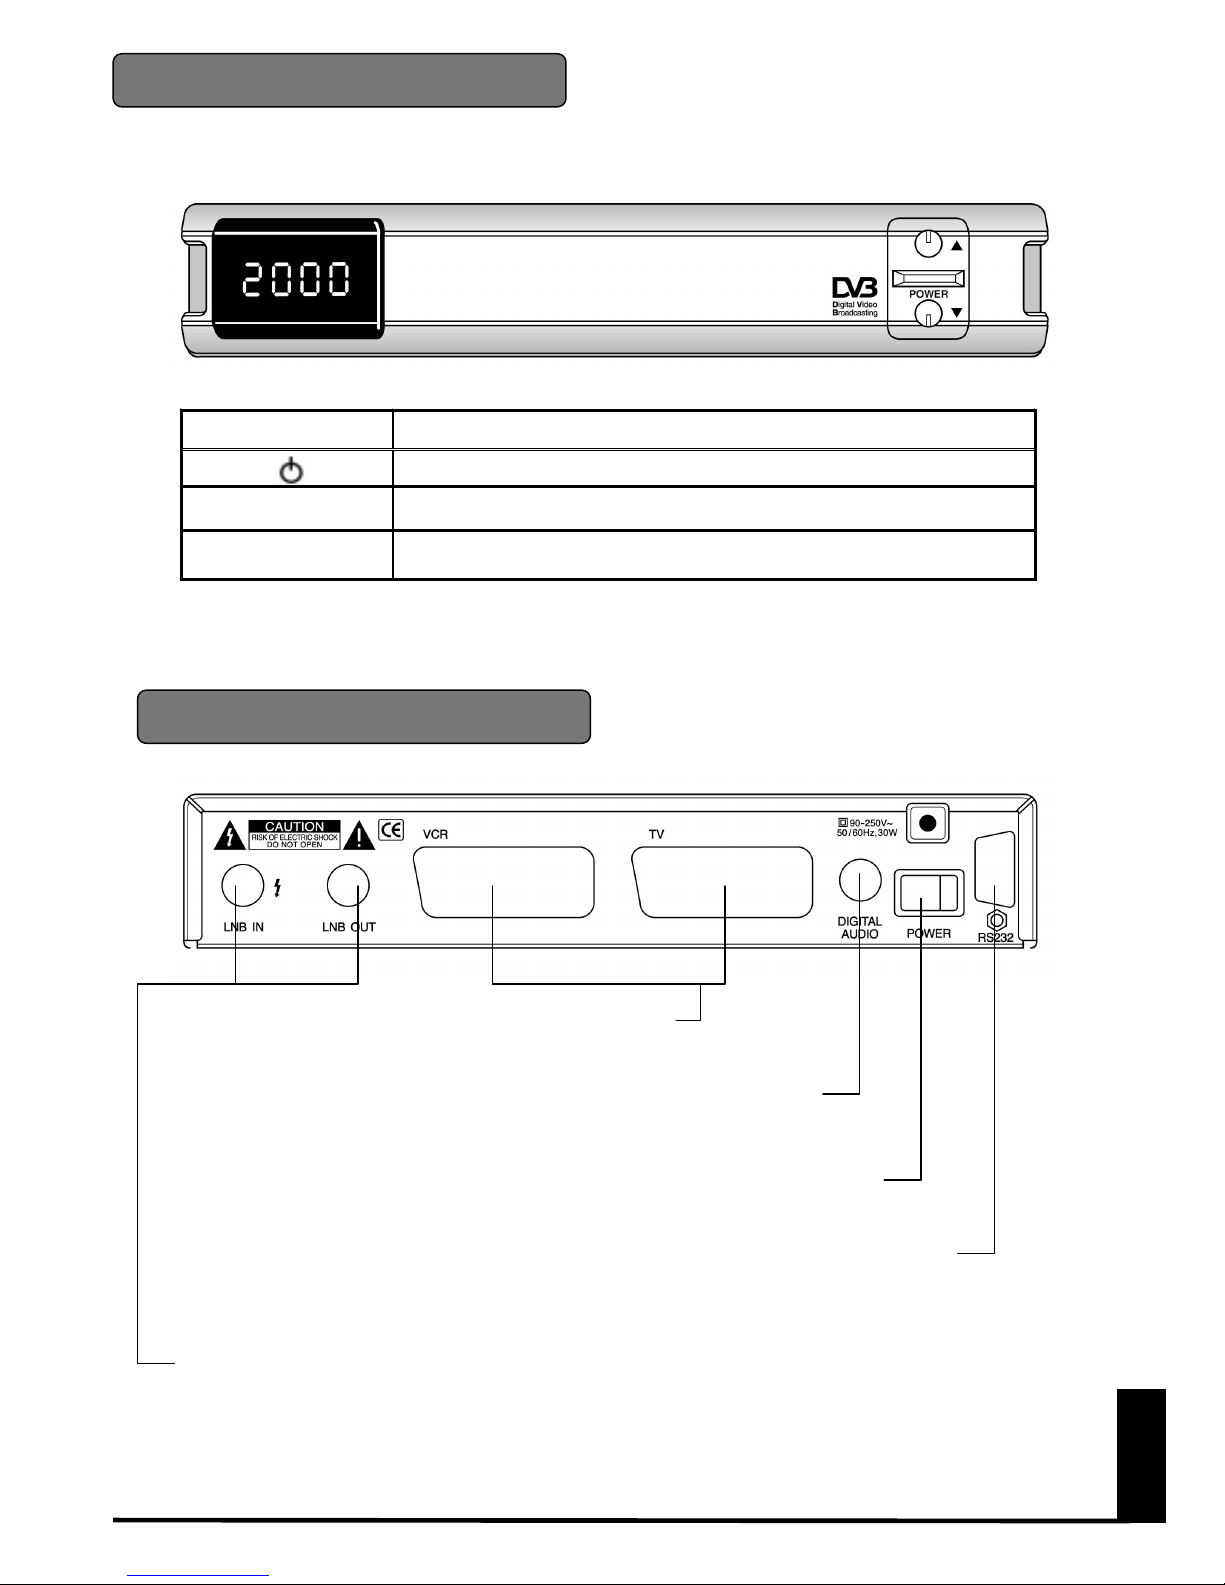
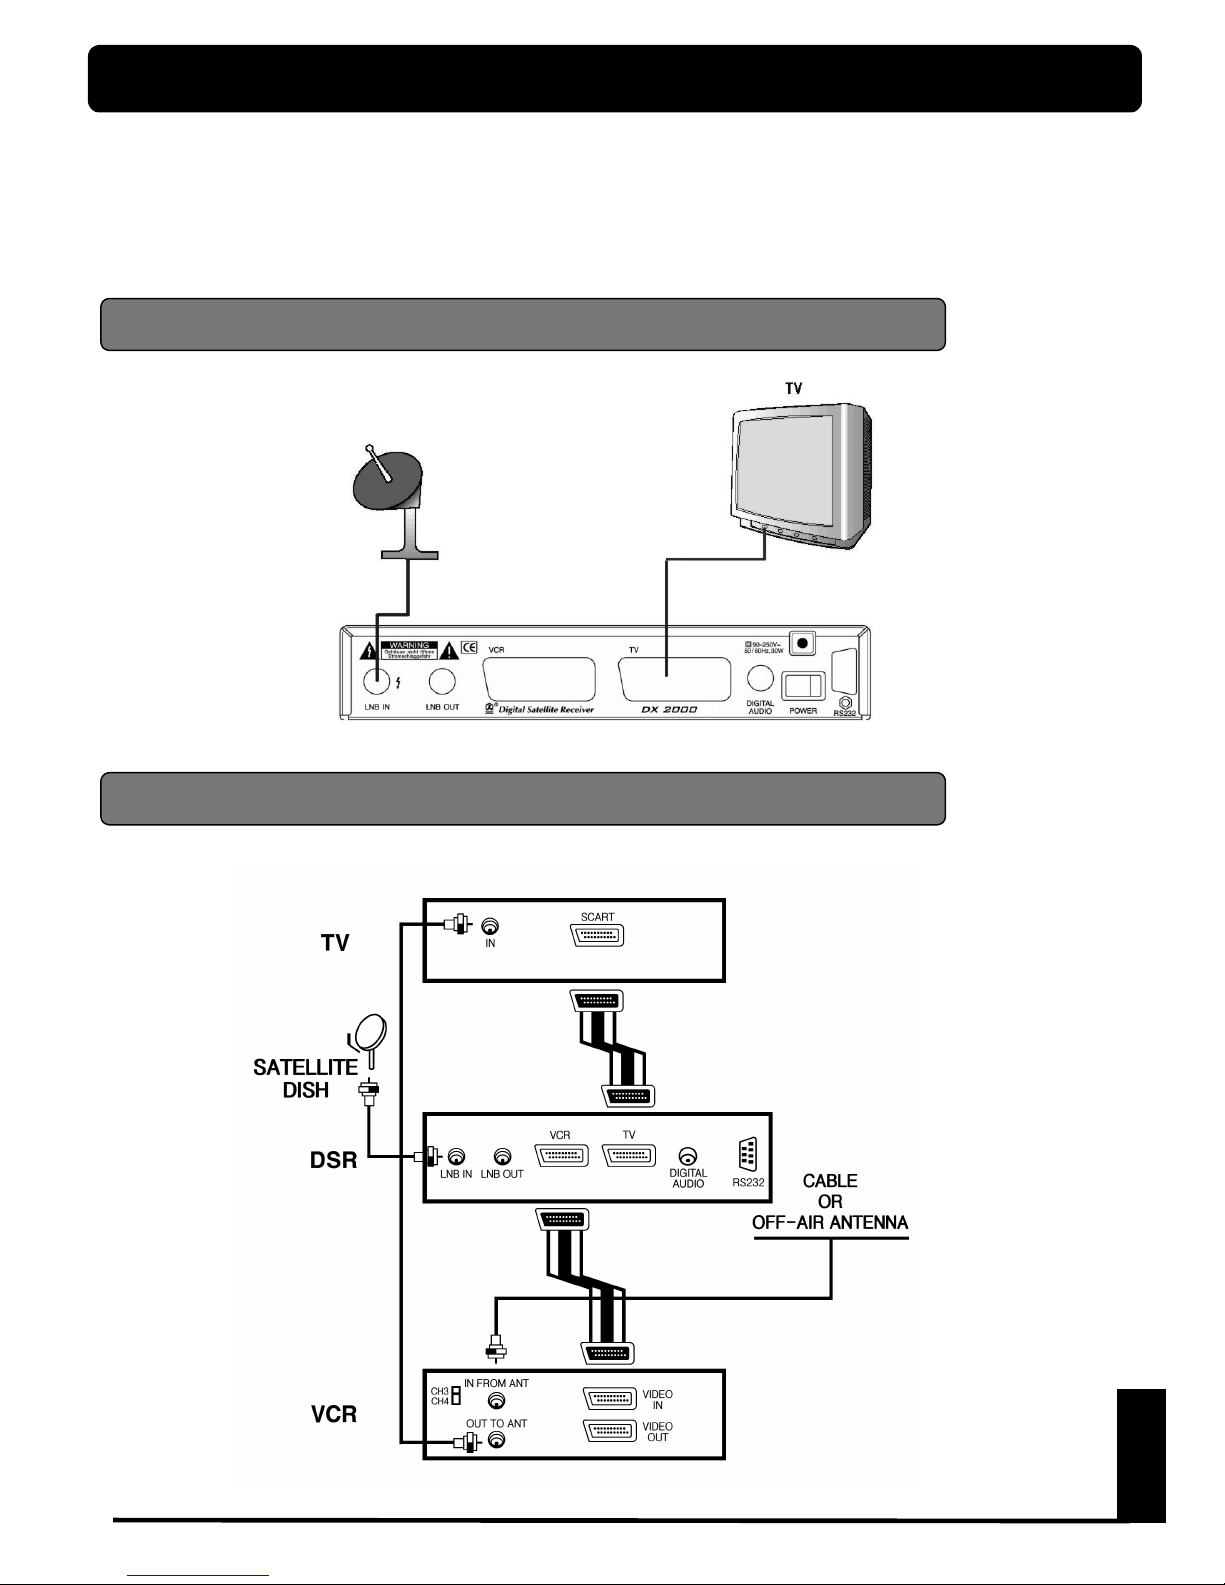
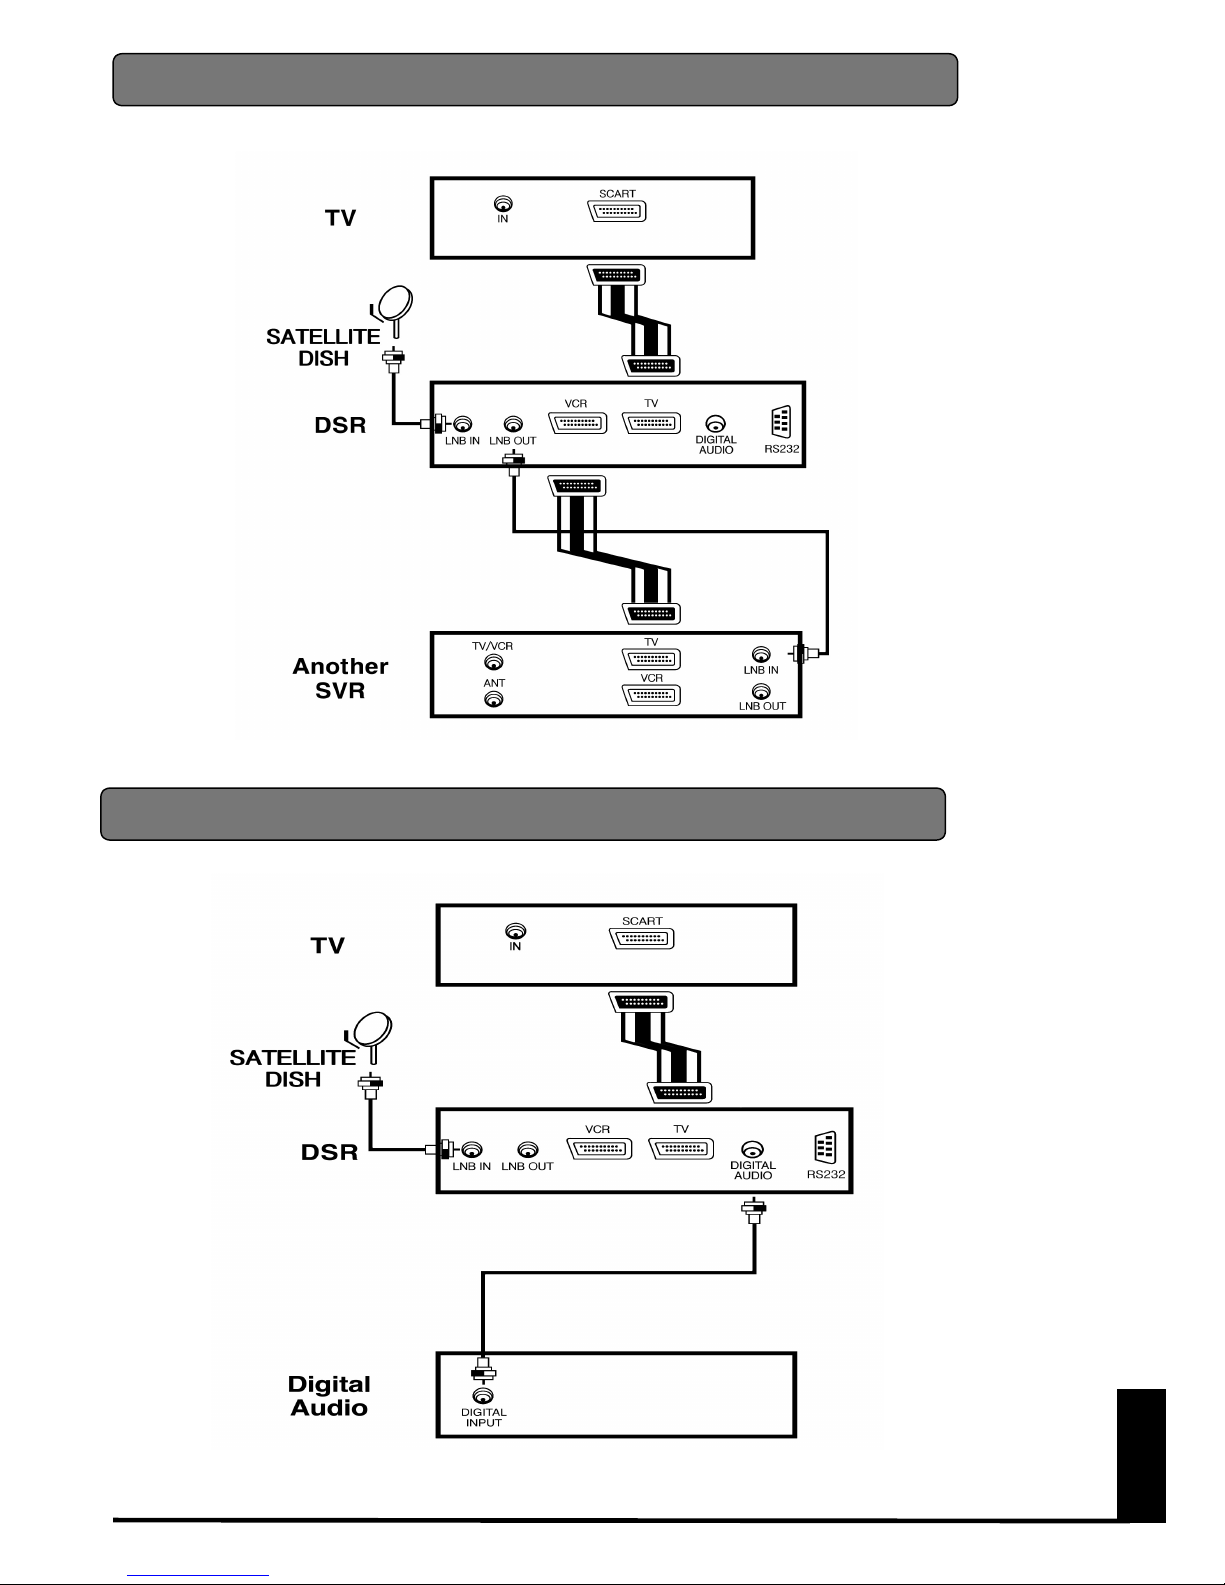
Once you have correctly connected the
DX 2000
, you also have to perform a “EASY
INSTALLATION”. During this procedure,
helpful menu information is displayed.
This “EASY INSTALLATION” menu is similar
to other application of MS WINDOWS 95/98
and designed for users to install without
difficulties.
Turn on the
DX 2000
, then press MENU key
on the remote control, the Main Page box will
be displayed on the upper left side of the
screen. Select by using the PR DOWN button
the menu “User Installation” and press OK,
suddenly the submenu appears.
After moving with same buttons to the “Easy
Installation” line the Welcome picture of “Easy
Installation Page” will be displayed and this
picture indicates that you have started the
installation procedure.
During the installation the OK button always
confirms a selection within these menus.
Selecting NEXT on screen menu and pressing
OK button will take you to the next step in the
installation process.
You can always go back to the previous menu
by selecting BACK and pressing OK button.
Use the PR ▲▼
▲▼▲▼
▲▼ buttons to move upwards and
downwards form one line to another line. Use
to change settings or press OK button
then Down List Box will be appeared. You can
also use the numeric buttons on the remote
control to select a line a menu and to enter
numeric value.
If you want to start installation procedure
select NEXT and press OK button.
If you do not want, select EXIT and press OK
button.
NOTE : If you are operating a standard
one or two satellite antenna system (ASTRA,
HOTBIRD) you easily can watch channels
just after connecting antenna signal and TV.
DX 2000
is comfortably preprogrammed
for nearly all channels of European satellites
so that normally you do not need to go
through this FIRST TIME INSTALLATION
procedure.