manuals.online logo
Brands
  1. Home
  2. •
  3. Brands
  4. •
  5. ZEITGEIST
  6. •
  7. Bicycle
  8. •
  9. ZEITGEIST AIR User manual

ZEITGEIST AIR User manual

Page 1
All Rights Reserved. Zeitgeist LLC
A S S E M B L Y I N S T R U C T I O N S
Congratulations on the purchase of your very own Zeitgeist AIR. You’ll find that the assembly of
your meticulously-engineered electric bicycle is straightforward and will take 30 minutes or
less. Just grab a tool kit with an Allen Wrench, some WD40 and a cleaning cloth.
The assembly process consists of attaching the seat, front wheel, handlebar, and pedals.
Anyone who follows these instructions can do it; however, if you have any issues don’t hesitate
to reach out to our team for assistance.
If you’re not entirely comfortable assembling the AIR by yourself, we recommend that you
swing by any bike shop in your area, who should be able to complete the assembly for you in
under one hour of labor or at a flat rate.
The salient advantage that Zeitgeist AIR has over most e-bikes on the market (that tend to have
non-standard components) is that it’s built like a high-end, non-electric road bike and all major
components are easy for any bike mechanic to work with, swap and replace. A major plus,
when it comes to flat repair, tune-ups and regular maintenance
We are excited to get you riding soon!
Page 2
All Rights Reserved. Zeitgeist LLC
1. Set Ebike box upright, remove strapping, cut open along top edge, exposing the
bike, being careful of the sharp staples.
Page 3
All Rights Reserved. Zeitgeist LLC
2. Unpack all items from the box and lay them out in an easy-to-handle
arrangement. Good news- your Zeitgeist AIR comes partially assembled!
3. Remove all packing material.
Page 4
All Rights Reserved. Zeitgeist LLC
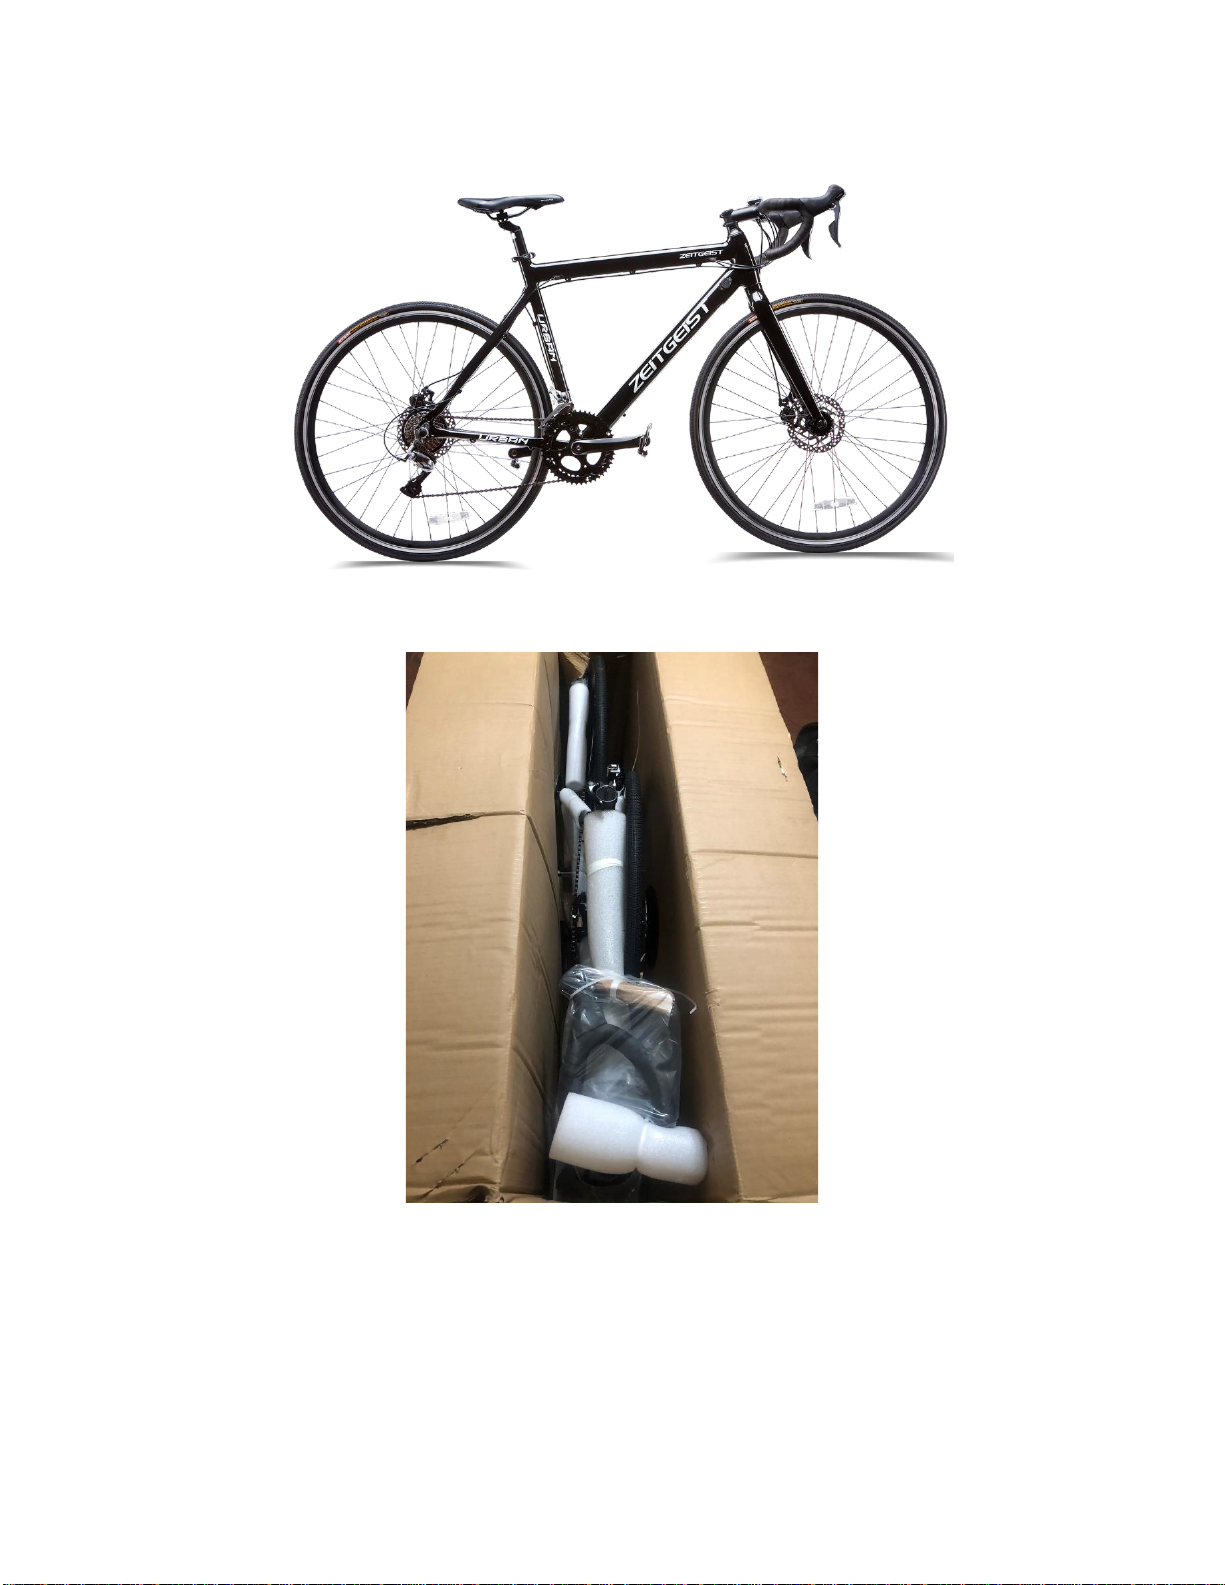
4. Place bike upright resting on front fork. Get the quick release seat clamp from
the plastic bag and place it on the bike frame where the seat will slide in. Insert
seat post. Adjust and tighten seat quick release clamp.
The seat will fit tightly into the tube. If sliding in the seat post is difficult, use a
small amount of WD40.
Page 5
All Rights Reserved. Zeitgeist LLC
5. On the handlebar stem, loosen the Allen (hex) bolt with an Allen Wrench,
reverse the stem 180 degrees into the forward position and tighten. Be sure the
stem is on straight.
Page 6
All Rights Reserved. Zeitgeist LLC
6. Get handlebar mount clamp and associated Allen heads from the plastic bag.
Position handlebars as desired and tighten down with an Allen Wrench.
7. Adjust the handlebars to a comfortable position, and tighten Allen heads
snugly. Tighten bolts in a X pattern for easiest tightening.
Page 7
All Rights Reserved. Zeitgeist LLC
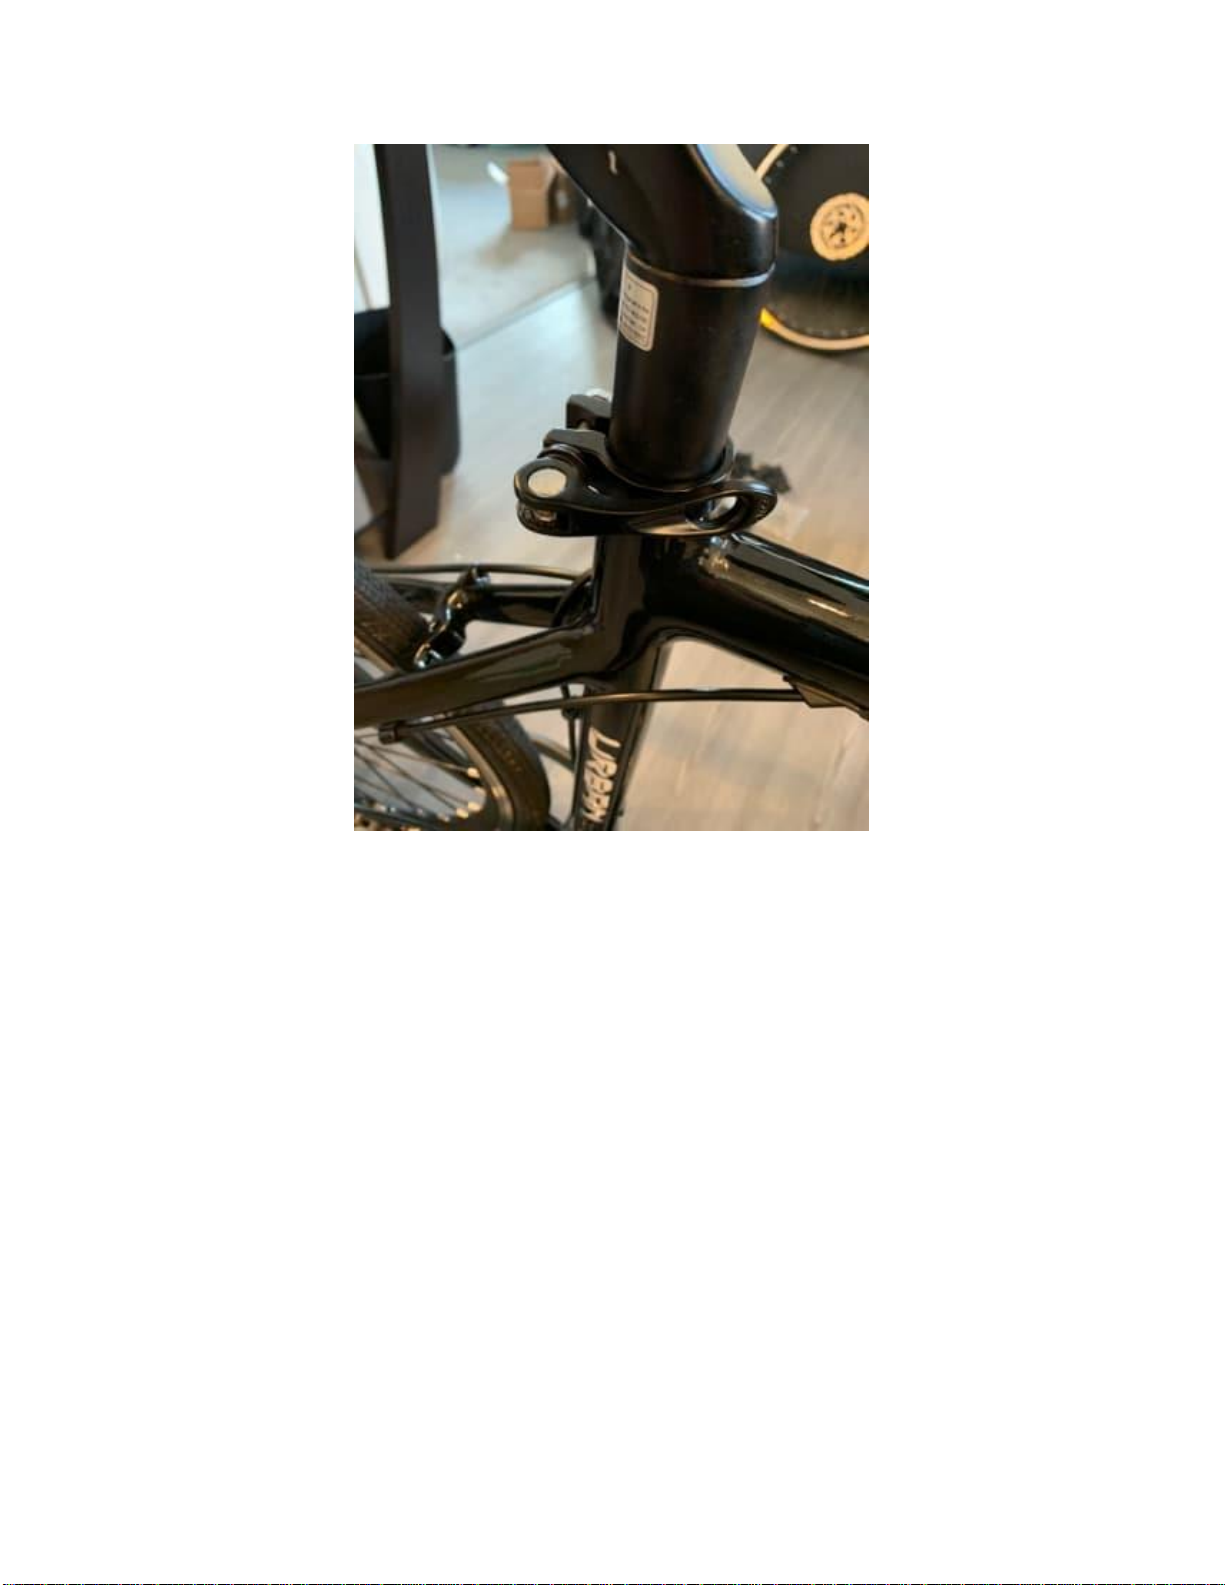
8a. Open the front wheel quick release lever. Remove locknut and spring. Slide
quick release through axle, replace spring and locknut on shaft. Turn locknut only
a few turns so it’s loose for easy wheel installation.
8b. Gently insert the front wheel into the fork. Carefully slide the disc brake rotor
into the disc brake pads. Make sure the wheel is on fork as far as it will go.
Tighten the locknut, until the quick release fully tightens the axle onto the fork.
You want the quick release to close snugly, but you don’t want to overtighten it.
You don’t want to have to “muscle” the quick release to close it, should close
firmly, but without excessive force.
Page 8
All Rights Reserved. Zeitgeist LLC
9. The pedals insert with opposite threading to safety. Install and tighten the left
pedal COUNTER CLOCKWISE. Install the right pedal, and tighten CLOCKWISE.
10. Pump the tires to 75 PSI.
Page 9
All Rights Reserved. Zeitgeist LLC
12. Plug the charger into the charging port located on the down tube and then
into the wall outlet. The charger indicator light will turn green when fully charged.
The charge time is around 4 hours.
Congratulations! You’re almost all done. Please read the following operation and
safety instructions and ride away!
Page 10
All Rights Reserved. Zeitgeist LLC
O P E R A T I O N A N D S A F E T Y I N S T R U C T I O N S
Charging: The battery takes around 4 hours to fully charge. The indicator light on the charger
will turn green when fully charged.
Turning on the bike:
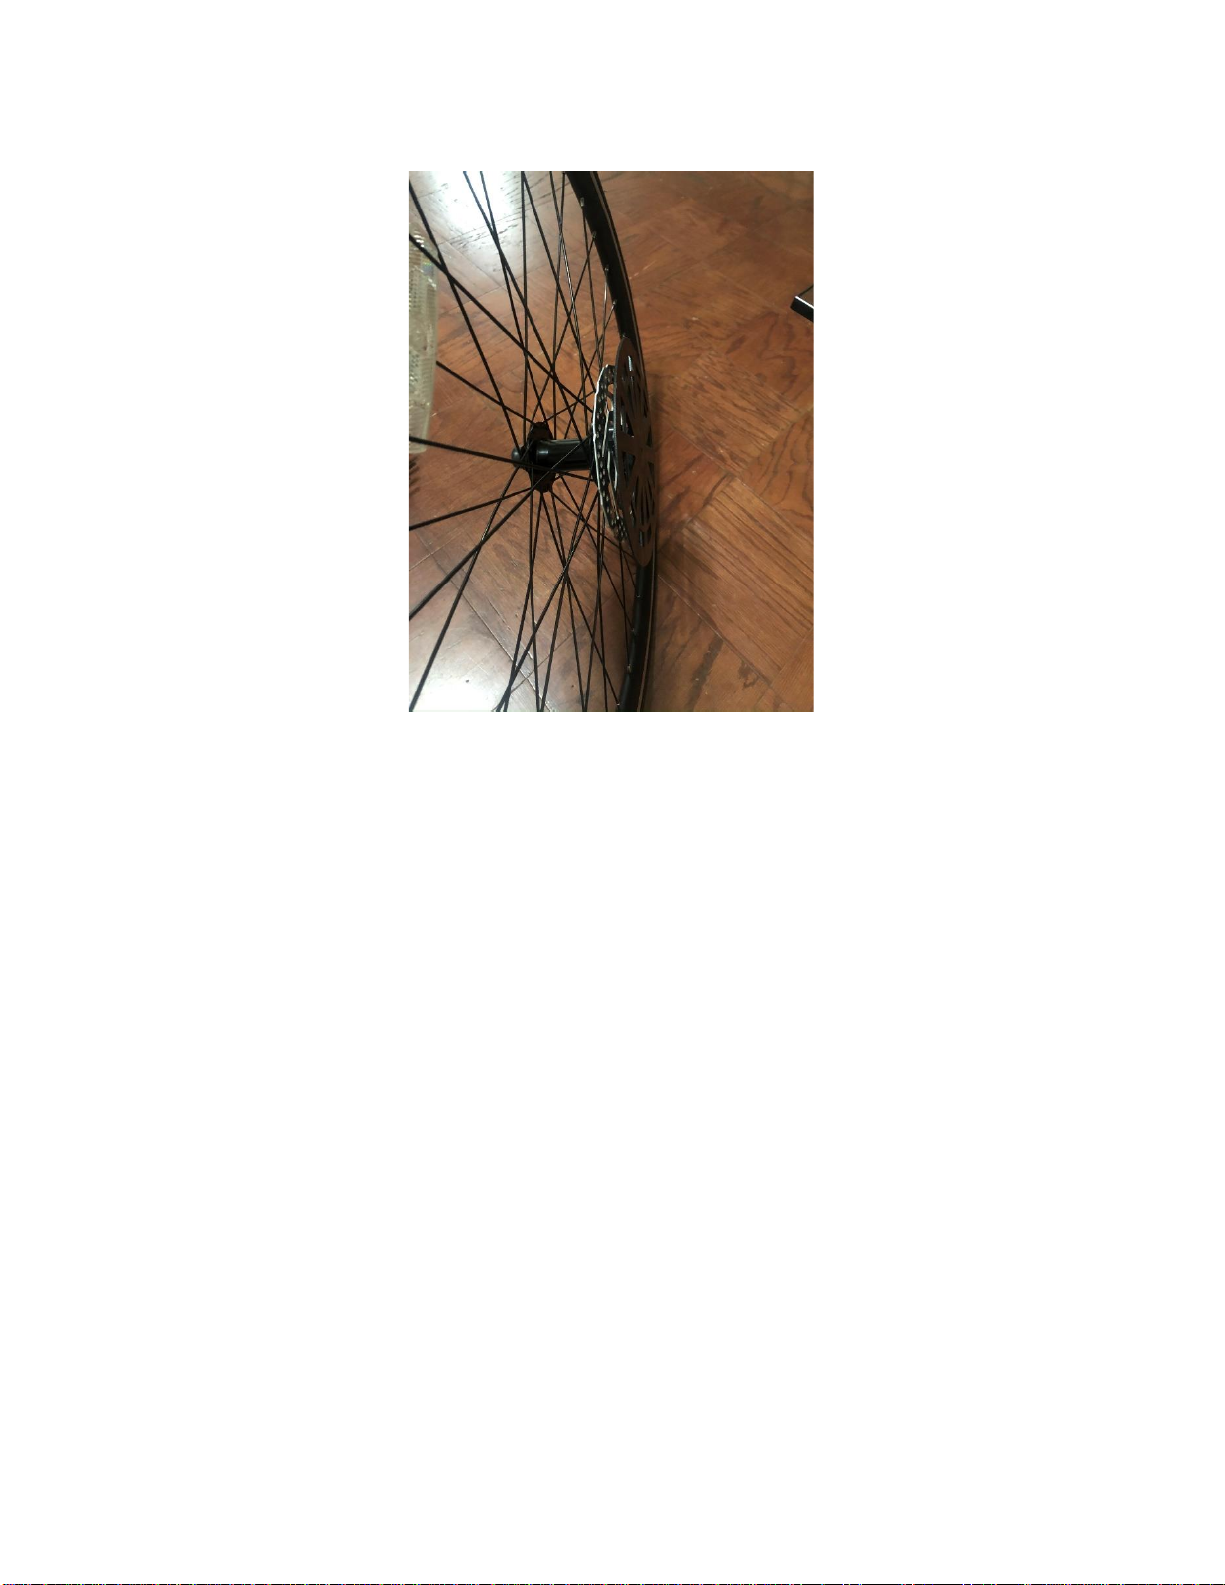
Step 1: Press the push button switch on the down tube which is on the opposite side of the
charging port.
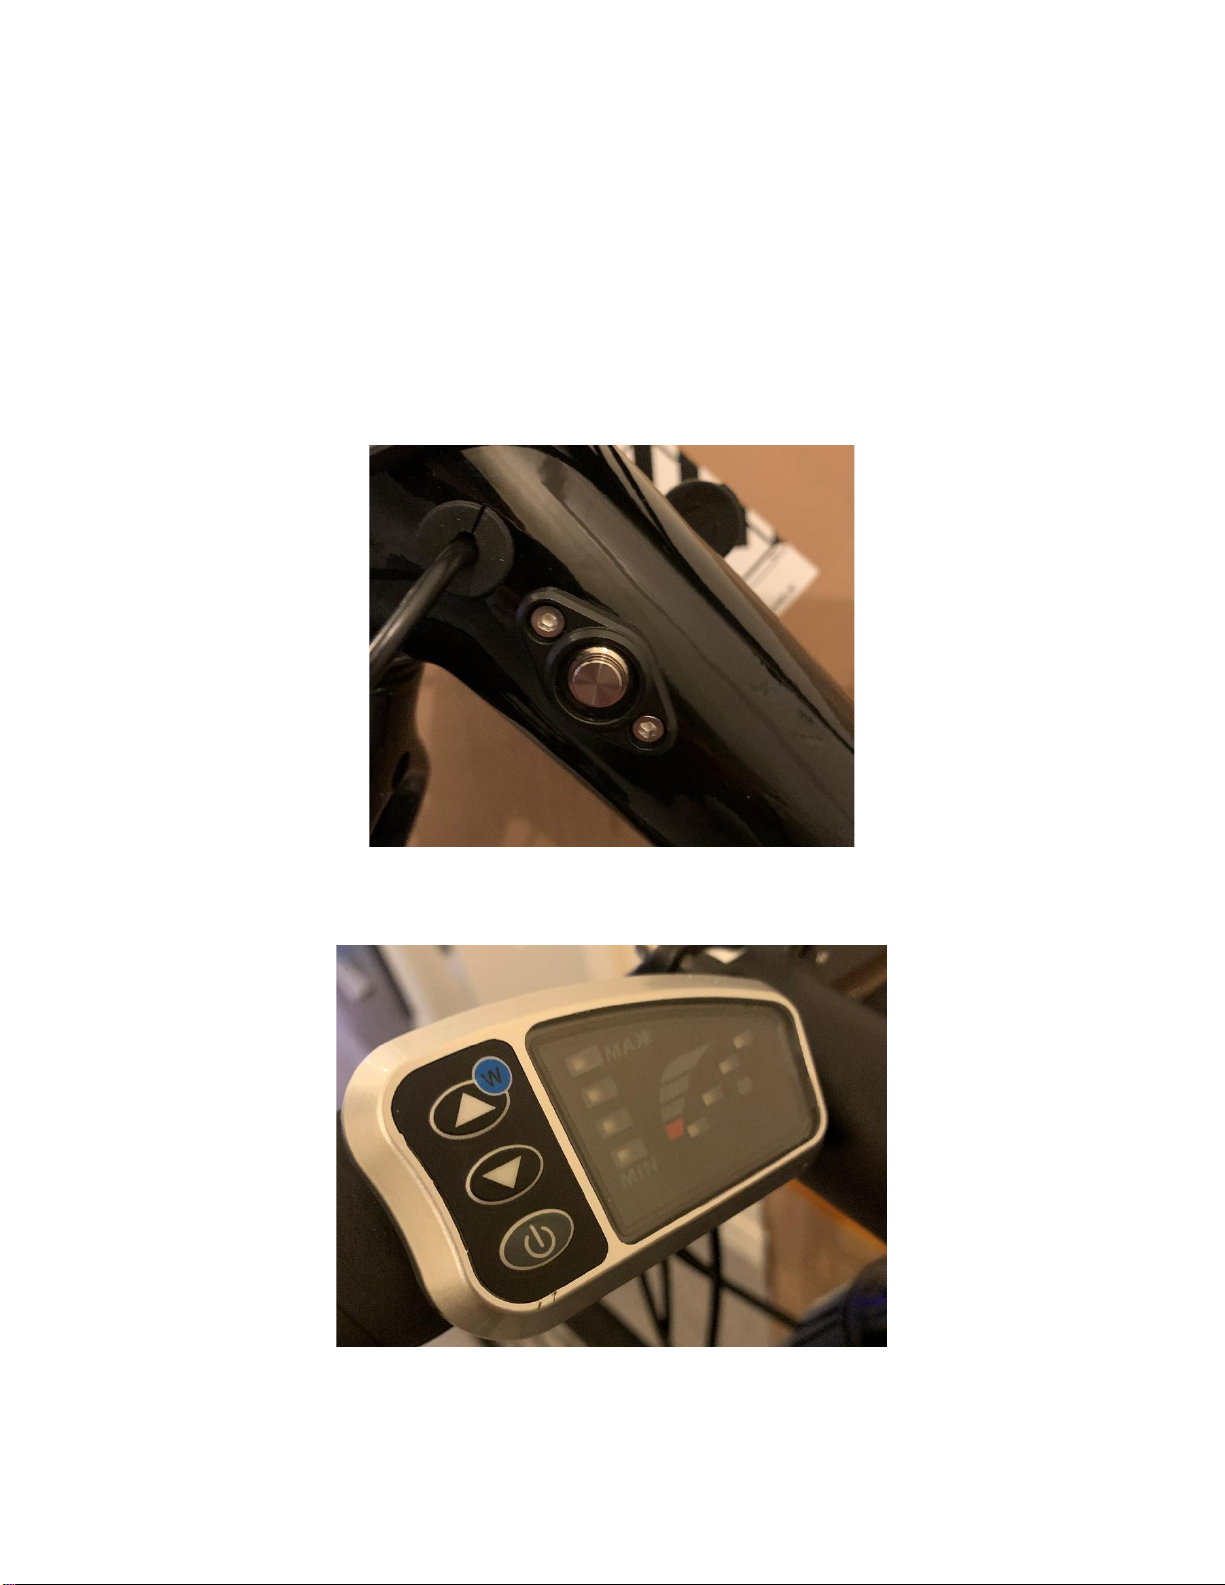
Step 2: Press the power button on the bottom left hand corner of the handlebar display show
below.
Page 11
All Rights Reserved. Zeitgeist LLC
Controlling the pedal assist strength: Use the up and down arrows in the display shown above
to increase or decrease the pedal assist. To ride without assist simply press the display power
button. The assist will turn of above 28MPH as this is the maximum legal limit.
Battery Care Practices: For maximum battery longevity let the battery drain most of the way
before recharging; however, this is an optional practice. Only store this product at
temperatures between -10°C and 60°C
S A F E T Y
Always wear a helmet while riding. Riding a bicycle is an inherently dangerous activity, and it is
your responsibility to ride safely and within your abilities. Be aware that other road users do
not expect that an electric bike can ride faster than a normal bike. Riding faster also increases
the risk of accidents. Do not ride abusively.
The Zeigeist AIR is intended for use by adult riders only. Many state laws require electric bicycle
riders to be a minimum age of 16 with some states having minimum ages set as low as 10 years
old and other states up to 18 years old.
As a parent you are responsible for the activities and safety of your minor child including the
following of your state and local laws in regards to the riding of an electric bicycle by a minor
(under the age of 18). That includes, if your state allows a minor to ride, making sure that your
minor child can safely ride and control all of the operations of the bicycle, and fully understands
all risks.
Be sure that you and your child have learned and understand the safe operation of the bicycle;
and that you and your child have learned, understand and obey not only the applicable local
motor vehicle, bicycle and traffic laws, but also the common sense rules of safe and responsible
bicycling.
Like any sport, bicycling involves the risk of injury and damage. By choosing to ride a bicycle,
you assume the responsibility for that risk, so you need to know —and to practice —the rules
of safe and responsible riding and of proper use and maintenance. Proper use and maintenance
of your bicycle reduces risk of injury.
Pick a controlled environment, away from cars, other cyclists, obstacles or other hazards for
your first ride. Because it is impossible to anticipate every situation or condition that can occur
while riding, this manual makes no representation about the safe use of the bicycle under all
conditions. There are risks associated with the use of any bicycle which cannot be predicted or
avoided, and which are the sole responsibility of the rider.
Please ride safely and responsibly.

Popular Bicycle manuals by other brands

Mobella AFARI product manual

Mobella

Mobella AFARI product manual

Quickie Attitude owner's manual

Quickie

Quickie Attitude owner's manual

DEMA ERGO Operation and maintenance manual

DEMA

DEMA ERGO Operation and maintenance manual

OZ Racing E-LEGGERA manual

OZ Racing

OZ Racing E-LEGGERA manual

Burley MYKICK Owner's instruction manual

Burley

Burley MYKICK Owner's instruction manual

Mycle The Classic user manual

Mycle

Mycle The Classic user manual

Trek DOMANE DISC owner's manual

Trek

Trek DOMANE DISC owner's manual

Worksman INB Owner's manual and parts list

Worksman

Worksman INB Owner's manual and parts list

AmTryke 50-FC-1416 Assembly instruction

AmTryke

AmTryke 50-FC-1416 Assembly instruction

Puky ceety user manual

Puky

Puky ceety user manual

Cube SUPER HPC Additional operating instructions

Cube

Cube SUPER HPC Additional operating instructions

Prophete REX BIKE operating instructions

Prophete

Prophete REX BIKE operating instructions

PARLEE ALTUM DISC Cabling guide

PARLEE

PARLEE ALTUM DISC Cabling guide

SmarTrike 650 manual

SmarTrike

SmarTrike 650 manual

Beleduc TopTrike QUADDY TT quick start guide

Beleduc

Beleduc TopTrike QUADDY TT quick start guide

Woom 1 Instructions for use

Woom

Woom 1 Instructions for use

MoMi ULTI manual

MoMi

MoMi ULTI manual

Scott BIG JON user manual

Scott

Scott BIG JON user manual

manuals.online logo
manuals.online logoBrands
  • About & Mission
  • Contact us
  • Privacy Policy
  • Terms and Conditions

Copyright 2025 Manuals.Online. All Rights Reserved.