Zenoah BCZ260L User manual

BCZ260L, EXZ260L, BCZ300L, BCZ400L
EN Operator's manual 2-27
DE Bedienungsanweisung 28-55
FR Manuel d'utilisation 56-83
IT Manuale dell'operatore 84-111
ES Manual de usuario 112-139
PT Manual do utilizador 140-167
EL Οδηγίες χρήσης 168-197

Contents
Introduction..................................................................... 2
Safety..............................................................................5
Assembly...................................................................... 11
Operation...................................................................... 14
Maintenance................................................................. 19
Troubleshooting............................................................ 22
Transportation, storage and disposal........................... 23
Technical data.............................................................. 23
Accessories.................................................................. 26
EC Declaration of Conformity....................................... 27
Introduction
Intended use
The product can be used with a grass blade or a trimmer
head to cut different types of vegetation. Do not use the
product for other tasks than grass trimming and grass
clearing. Use a grass blade or trimmer head to cut
grass.
Note: National or local regulations may regulate the use.
Comply to given regulations.
Product overview (BCZ260L, BCZ300L)
BCZ300L (Engine)
17
25
4
4
2
3
1
19 23
29
11
10 14
12
16
9
8
628
15
21
22
20
26
5
10
11
14
16
1215
13
27
30
18
24
713
31
1. Trimmer head
2. Grease filler cap for bevel gear
3. Bevel gear
4. Cutting attachment guard
5. Shaft
6. Loop handle
7. Throttle trigger
8. Stop switch
9. Throttle trigger lockout
10. Spark plug cap and spark plug
2353 - 003 - 06.01.2018

11. Cylinder cover
12. Starter handle
13. Fuel tank
14. Air filter cover
15. Primer bulb
16. Choke control
17. Locking nut
18. Support flange
19. Drive disc
20. Combination spanner
21. Allen key
22. Locking pin
23. Operator's Manual
24. Support cup
25. Blade
26. J-handle
27. Handle adjustment
28. Suspension ring
29. Harness
30. Transport guard
31. Tank guard
Product overview (EXZ260L)
4
2
3
1
11
10
9
7
8
6
19
17 20
4
18
16 12
14
5
21
22
23 13
15
1. Trimmer head
2. Grease filler cap for bevel gear
3. Bevel gear
4. Cutting attachment guard
5. Shaft
6. Loop handle
7. Throttle trigger
8. Stop switch
9. Throttle trigger lockout
10. Spark plug cap and spark plug
11. Cylinder cover
12. Starter handle
13. Fuel tank
14. Air filter cover
15. Primer bulb
16. Choke control
17. Drive disc
18. Combination spanner
19. Locking pin
20. Operator's Manual
21. Shaft coupling
22. Handle adjustment
23. Tank guard
353 - 003 - 06.01.2018 3

Product overview (BCZ400L)
12
31
4
30
21
22
26
20
18
24
14
16
13
15
32
10
17
425
19
11
6
3
2
1
27
29
9
8
5
28
23
7
1. Trimmer head
2. Grease filler cap for bevel gear
3. Bevel gear
4. Cutting attachment guard
5. Shaft
6. Loop handle
7. Throttle trigger
8. Stop switch
9. Throttle trigger lockout
10. Spark plug cap and spark plug
11. Cylinder cover
12. Starter handle
13. Fuel tank
14. Air filter cover
15. Primer bulb
16. Choke control
17. Locking nut
18. Support flange
19. Drive disc
20. Combination spanner
21. Allen key
22. Locking pin
23. Operator's Manual
24. Support cup
25. Blade
26. J-handle
27. Handle adjustment
28. Suspension ring
29. Harness
30. Transport guard
31. Screwdriver
32. Tank guard
Symbols on the product
WARNING! A clearing saw, brushcutter or
trimmer can be dangerous if used incorrectly
or carelessly, and can cause serious or fatal
injury to the operator or others. It is
extremely important that you read and
understand the contents of this operator’s
manual.
Please read the operator’s manual carefully
and make sure you understand the
instructions before using the product.
Use a protective helmet where there is a risk
of falling objects. Use approved hearing
protection. Use approved eye protection.
Use approved protective gloves.
4353 - 003 - 06.01.2018

Use heavy-duty slip-resistant boots.
Watch out for thrown objects and ricochets.
Maximum speed of the output shaft.
50FT
15 m
50FT
15 m
The operator of the product must ensure,
while working, that no persons or animals
come closer than 15 meters.
Risk of blade thrust if the cutting equipment
touches an object that it does not
immediately cut. The product can cut off
body parts. Keep a minimum of 15 m
distance to persons and animals during
operation of the product.
Choke: Set the choke control in the choke
position.
Primer bulb.
Noise emission to the environment
according to the European Community’s
Directive. The product’s emission is
specified in the Technical data chapter and
on the label.
Refueling.
This product is in accordance with
applicable EC directives.
The rating plate shows the
serial number. yyyy is the
production year, ww is the
production week and xxxx
is the sequential number.
yyyywwxxxx
Note: Other symbols/decals on the product refer to
special certification requirements for certain markets.
Safety
General safety instructions
WARNING: Read the warning instructions
that follow before you use the product.
• A clearing saw, brushcutter or trimmer can be
dangerous if used carelessly or incorrectly and can
cause serious injury or death to the operator or
others. It is extremely important that you read and
understand the contents of this operator’s manual.
• Under no circumstances may the design of the
product be modified without the permission of the
manufacturer. Never use a product that has been
modified in any way from its original specification
and always use original accessories. Non-authorized
modifications and/or accessories can result in
serious personal injury or the death of the operator
or others.
• The inside of the muffler contain chemicals that may
be carcinogenic. Avoid contact with these elements
in the event of a damaged muffler.
• This product produces an electromagnetic field
during operation. This field may under some
circumstances interfere with active or passive
medical implants. To reduce the risk of serious or
fatal injury, we recommend persons with medical
implants to consult their physician and the medical
implant manufacturer before operating this product.
Safety instructions for operation
WARNING: Read the warning instructions
that follow before you use the product.
• You must understand the difference between grass
clearing and grass trimming before use.
• If you encounter a situation where you are uncertain
how to proceed you should ask an expert. Contact
your dealer or your service workshop. Avoid all
usage which you consider to be beyond your
capability.
• Never use a product that is faulty. Carry out the
safety checks, maintenance and service instructions
described in this manual. Some maintenance and
service measures must be carried out by trained and
qualified specialists. See instructions under
Maintenance on page 19
• All covers, guards and handles must be fitted before
you start the product. Ensure that the spark plug cap
and ignition lead are undamaged to avoid the risk of
electric shock.
• Never use the product if you are fatigued, while
under the influence of alcohol or drugs, medication
353 - 003 - 06.01.2018 5

or anything that could affect your vision, alertness,
coordination or judgement.
• Do not use the product in bad weather such as
dense fog, heavy rain, strong wind, intense cold,
etcetera. Working in bad weather is tiring and often
brings added risks, such as icy ground,
unpredictable felling direction, etcetera.
• The only accessories you can operate with this
engine unit are the cutting attachments that we
recommend in the chapter
#
.
• Never allow children to use or be in the vicinity of the
product. As the product is equipped with a spring-
loaded start/stop switch and can be started by low
speed and force on the starter handle, even small
children under some circumstances can produce the
force necessary to start the product. This can mean
a risk of serious personal injury. Therefore remove
the spark plug cap when the product is not under
close supervision.
• Running an engine in a confined or badly ventilated
area can result in death due to asphyxiation or
carbon monoxide poisoning.
• The complete clutch cover and shaft must be fitted
before the product is started, otherwise the clutch
can come loose and cause personal injury.
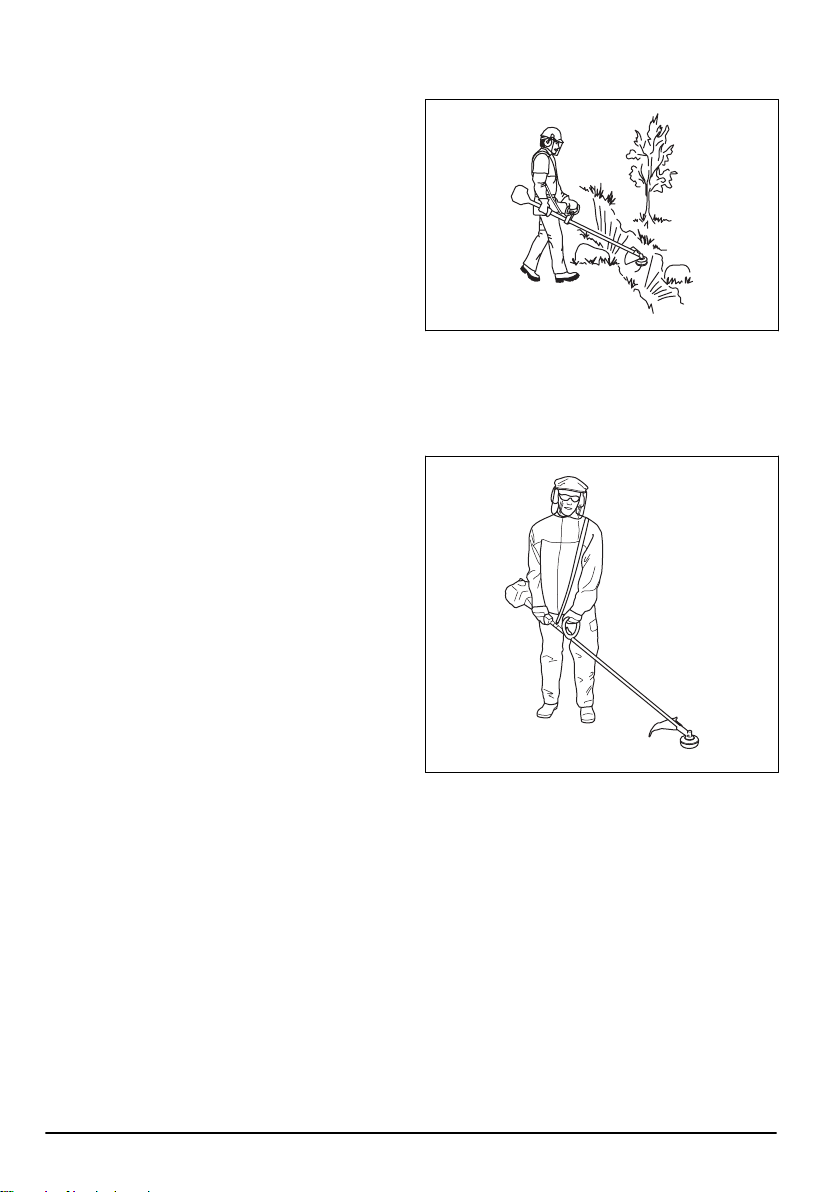
• Ensure that no people or animals come closer than
15 metres while you work. When several operators
are working in the same area the safety distance
should be at least 15 metres. Otherwise there is a
risk of serious personal injury. Stop the product
immediately if anyone approaches. Never swing the
product around without first checking behind you to
make sure that noone is within the safety zone.
• Ensure that people, animals or other things can not
affect your control of the product or that they do not
come in contact with the cutting attachment or loose
objects that are thrown out by the cutting
attachment. However, do not the product unless you
are able to call for help in the event of an accident.
• Always inspect the working area. Remove all loose
objects such as stones, broken glass, nails, steel
wire, string, etcetera, that could be thrown out or
become wrapped around the cutting attachment.
• Make sure that you can move and stand safely.
Check the area around you for possible obstacles
(roots, rocks, branches, ditches, etcetera) in case
you have to move suddenly. Take great care when
you work on sloping ground.
• Keep a good balance and a firm foothold at all times.
Do not overreach.
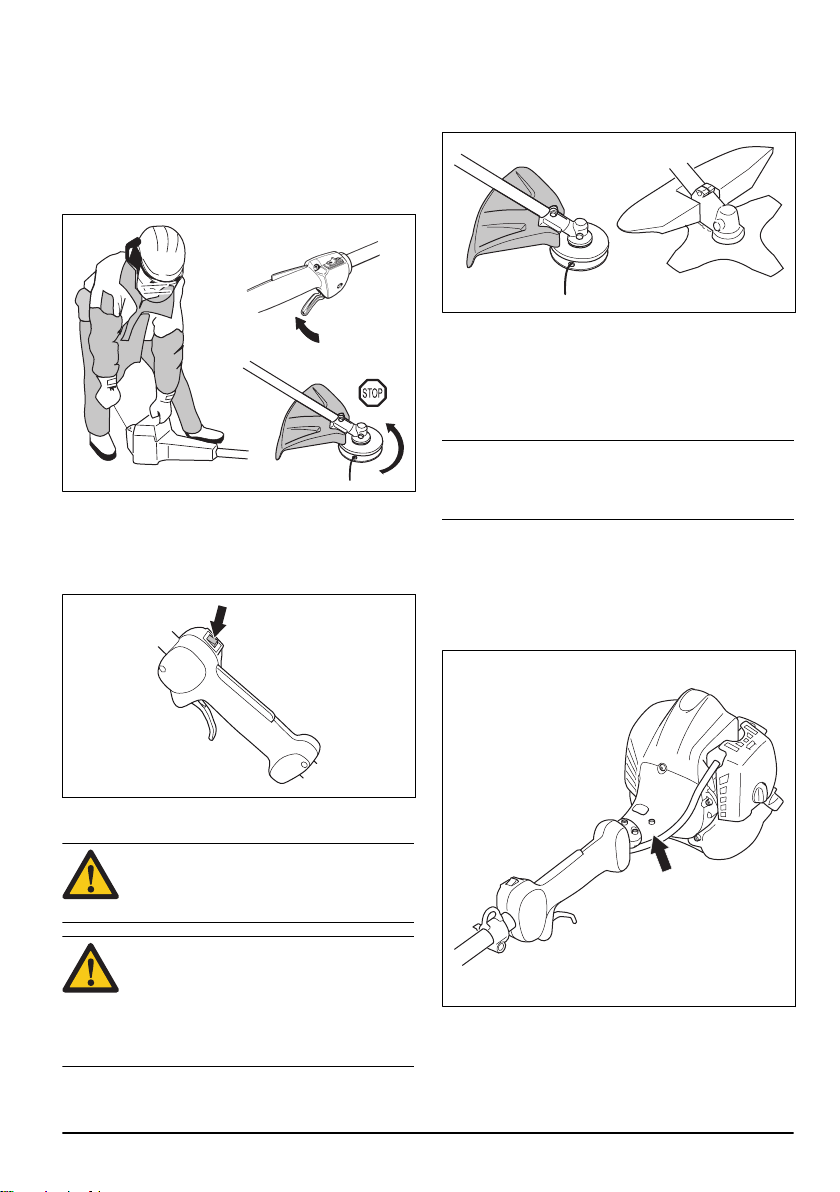
• Always hold the product with both hands. Hold the
product on the right side of your body.
• Make sure that you attach the harness to the
suspension ring.
• Keep the cutting attachment below waist level.
• Switch off the engine before you move to another
area. Fit the transportation guard before you carry or
transport the equipment any distance.
• Never put the product down with the engine running
unless you have it in clear sight.
• Stop the engine and cutting equipment before you
remove material that has wound around the blade
shaft. Neither the operator of the product nor anyone
else may attempt to remove the cut material while
the engine is running or the cutting equipment is
rotating, as this can result in serious injury. The
bevel gear can get hot during use and may remain
so for a while afterwards. You could get burnt if you
touch it.
• Watch out for thrown objects. Always wear approved
eye protection. Never lean over the cutting
attachment guard. Stones, rubbish, etcetera, can be
6353 - 003 - 06.01.2018

thrown up into the eyes which can cause blindness
or serious injury.
• Sometimes branches or grass get caught between
the guard and cutting attachment. Always stop the
engine before you clean the product.
• Products that are fitted with saw blades or grass
blades can be thrown violently to the side when the
blade comes into contact with a fired object. This is
called blade thrust. A blade thrust can be violent
enough to cause the product and/or operator to be
propelled in any direction, and possibly lose control
of the product. Blade thrust can occur without
warning if the product snags, stalls or binds. Blade
thrust is more likely to occur in areas where it is
difficult to see the material being cut.
• Avoid to cut with the area of the blade between the
12 o'clock and 3 o'clock positions. Because of the
speed of rotation of the blade, blade thrust can occur
if you attempt to cut thick stems with this area of the
blade.
• Always slow the engine to idle speed after each
working operation. Long periods at full throttle
without any load on the engine can lead to serious
engine damage.
• Listen out for warning signals or shouts when you
wear hearing protection. Always remove your
hearing protection as soon as the engine stops.
• Overexposure to vibration can lead to circulatory
damage or nerve damage in people who have
impaired circulation. Contact your doctor if you
experience symptoms of overexposure to vibration.
These symptoms include numbness, loss of feeling,
tingling, pricking, pain, loss of strength, changes in
skin colour or condition. These symptoms normally
appear in the fingers, hands or wrists.
• Do not use a product with a damaged spark plug
cap.
• Do not use a product with a defective muffler.
• Keep all parts of your body away from the rotating
cutting attachment and hot surfaces.
• Always wear gloves when you handle the grass
blade.
Personal protective equipment
WARNING: Read the warning instructions
that follow before you use the product.
• Always use approved personal protective equipment
when you use the product. Personal protective
equipment cannot fully prevent injury but it
decreases the degree of injury if an accident does
occur. Let your dealer help you select the right
equipment.
• Use a protective helmet where there is a risk of
falling objects.
• Use approved hearing protection that provides
adequate noise reduction. Long-term exposure to
noise can result in permanent hearing impairment.
• Use approved eye protection. If you use a visor, you
must also use approved protective goggles.
Approved protective goggles must comply with the
ANSI Z87.1 standard in the USAs or EN 166 in EU
countries.
• Use gloves when necessary, for example when you
attach, examine or clean the cutting equipment.
• Use protective boots with steel toes and non-slip
soles.
• Use clothing made of a strong fabric. Always use
heavy, long pants and long sleeves. Do not use
loose clothing that can catch on twigs and branches.
Do not wear jewelry, short pants, sandals or go with
353 - 003 - 06.01.2018 7

bare feet. Put your hair up safely above shoulder
level.
• Keep first aid equipment close at hand.
Safety devices on the product
WARNING: Read the warning instructions
that follow before you use the product.
In this section the product’s safety features, its purpose
and how checks and maintenance should be carried out
to ensure that it operates correctly. See instructions
under the heading
Product overview (BCZ260L,
BCZ300L) on page 2
to find where these parts are
located on your product.
The life span of the product can be reduced and the risk
of accidents can increase if product maintenance is not
carried out correctly and if service and/or repairs are not
carried out professionally. If you need further information
please contact your nearest servicing dealer.
WARNING: Never use a product with
defective safety components. The product's
safety equipment must be inspected and
maintained as described in this section. If
your product fails any of these checks,
contact your service agent to get it repaired.
CAUTION: All servicing and repair work on
the machine requires special training. This is
especially true of the machine′s safety
equipment. If your machine fails any of the
checks described below you must contact
your service agent. When you buy any of
our products we guarantee the availability of
professional repairs and service. If the
retailer who sells your machine is not a
servicing dealer, ask him for the address of
your nearest service agent.
To do a check of the throttle trigger lockout
The throttle lockout is designed to prevent accidental
operation of the throttle control.
1. Press the throttle trigger lockout (A) and make sure
that the throttle control is released (B).
A
B
Note: When you release the handle the throttle
control and the throttle trigger lockout both move
back to their initial positions. This movement is
controlled by two independent return springs. This
arrangement means that the throttle control is
automatically locked at the idle setting.
2. Make sure that the throttle control is locked at the
idle setting when the throttle trigger lockout is
released.
3. Press the throttle trigger lockout and make sure that
it returns to its intial position when you release it.
4. Do a check of the throttle control and throttle trigger
lockout move freely and that the return springs work
properly.
8353 - 003 - 06.01.2018

5. Start the product (see instructions under
To prepare
the product for start (BCZ260L, EXZ260L, BCZ300L)
on page 16
) and apply full throttle.
6. Release the throttle and make sure that the cutting
attachment stops and remains at a standstill. If the
cutting attachment rotates with the throttle in the idle
position the carburettor idle setting must be checked.
See instructions under the chapter
Maintenance on
page 19
.
To do a check of the stop switch
1. Start the engine.
2. Move the stop switch to the stop position and make
sure that the engine stops.
To do a check of the cutting attachment guard
WARNING: Do not use a cutting attachment
without an approved and correctly attached
cutting attachment guard. See
Accessories
on page 26
.
WARNING: Always use the recommended
cutting attachment guard for the cutting
attachment that you use. If an incorrect or
faulty cutting attachment guard is fitted this
can cause serious personal injury. See
intructions under heading
Technical data on
page 23
.
The cutting attachment guard prevents injuries from
objects that eject in the direction of the operator. It also
prevents injuries that occur if you touch the cutting
attachment.
1. Make sure that the cutting attachment guard is not
damaged or cracked.
2. Replace the guard if it has been exposed to impact
or is cracked.
To do a check of the vibration damping system
Note: Use of incorrectly wound cord or an incorrect
cutting attachment increases the level of vibration. See
instructions under
Assembly of blades and trimmer
heads on page 12
.
The vibration damping system decreases vibration in the
handles to a minimum which makes the operation
easier. The vibration damping system of the product
reduces the transfer of vibration between the engine unit
and the shaft unit of the product.
(BCZ260L, EXZ260L, BCZ300L)
353 - 003 - 06.01.2018 9

(BCZ400L)
1. Do a visual check for deformation and damage such
as cracks.
2. Make sure that the elements of the vibration
damping system are undamaged and correctly
attached.
To do a check of the muffler
WARNING: Never use a product with a
faulty muffler.
WARNING: Bear in mind that the exhaust
fumes from the engine are hot and may
contain sparks which can start a fire. Never
start the product indoors or near
combustible material!
The muffler keeps noise levels to a minimum and sends
exhaust fumes away from the operator. For mufflers it is
very important that you follow the instructions on how to
check, maintain and service your product.
Regularly check that the muffler is securely attached to
the product.
To attach and remove the locknut
WARNING: Stop the engine, use protective
gloves and be careful around the sharp
edges of the cutting attachment.
A locknut is used to attach some types of cutting
attachments. The locknut has a left thread.
10 353 - 003 - 06.01.2018

• To attach, tighten the lock nut in the opposite
direction to the direction of rotation of the cutting
attachment.
• To remove the locking nut, undo the lock nut in the
same direction as the cutting attachment rotates.
• To loose and tighten the locknut, use a socket
spanner with a long shaft. The arrow in the picture
shows the area where you should operate the socket
spanner.
WARNING: When you loose and tighten
the locknut there is a risk of injury from
the teeth of the saw blade. You should
therefore always ensure that your hand
is shielded by the blade guard when you
do this.
Note: Make sure that you can not turn the locknut by
hand. Replace the nut if the nylon lining does not have a
resistance of a minimum of 1.5 Nm. The nut should be
replaced after it has been put on approximately 10
times.
Fuel Safety
WARNING: Read the warning instructions
that follow before you use the product.
• Never start the product if you spill fuel on it. Wipe the
spillage of and allow remaining fuel to evaporate.
• Never start the product if you spill fuel on yourself or
your clothes. Change your clothes and wash any
part of your body that has come in contact with fuel.
Use soap and water.
• Never start the product if the product is leaking fuel.
Check regularly for leaks from the fuel cap and fuel
lines.
• Always put the product on a flat surface and make
sure the cutting attachment cannot come in contact
with any object while you add fuel.
• Take care when handling fuel. Bear in mind the risk
off fire, explosion and inhaling fumes.
• Observe caution when handling fuel and make sure
there is adequate ventilation. Fuel and fuel fumes
are highly inflammable and can cause serious injury
when inhaled or allowed to come in contact with the
skin.
• Mix and pour fuel outdoors, where there are no
sparks or flames.
• Do not smoke or place hot objects near fuel.
• Always stop the engine and let it cool off for a few
minutes before you refuel.
• Open the fuel cap slowly so that any excess
pressure is released gently when you refuel.
• Tighten the fuel cap carefully after you refueled.
• Clean the area around the fuel cap. Contamination in
the tank can cause operating problems.
• Always move the product 3m (10ft) or further from
the refuelling area and source before starting.
Assembly
Introduction
WARNING: Before you assemble the
product, you must read and understand the
safety chapter.
WARNING: Remove the spark plug cable
from the spark plug before you assemble the
product.
353 - 003 - 06.01.2018 11

To assemble the loop handle
1. Attach the loop handle onto the shaft between the
arrows.
2. Move the spacer into the slot of the loop handle.
3. Attach the nut, the knob and the screw, do not make
it to tight.
4. Adjust the product to a comfortable position.
5. Tighten the bolt.
To assemble the J-handle (BCZ260L,
BCZ300L, BCZ400L)
WARNING: Only grass blades/grass cutters
or trimmer heads/plastic blades may be
used when the J-handle is attached. Do not
use saw blades or clearing blades with the
J-handle.
1. Attach the J-handle to the loop handle with 3 screws.
2. Adjust the product to a comfortable position.
3. Tighten the screws.
To install the suspension ring
(BCZ260L, BCZ300L, BCZ400L)
1. Install the suspension ring between the rear handle
and the loop handle.
2. Adjust the ring to make the product balanced, and
easy to use.
3. Use the harness and attach it to the suspension ring
when you use grass blades.
Assembly of blades and trimmer heads
WARNING: When you install the cutting
attachment it is very important that the
raised section on the drive disc/support
flange engages correctly in the centre hole
of the cutting attachment. If the cutting
attachment is install incorrectly it can result
in serious and/or fatal personal injury.
12 353 - 003 - 06.01.2018

WARNING: Never use a cutting attachment
without an approved guard. See the chapter
on Technical data. If an incorrect or faulty
guard is fitted this can cause serious
personal injury.
To assemble and disassemble the cutting
attachment guard and trimmer head
1. Attach the correct cutting attachment guard (A) for
the trimmer head (See,
Accessories on page 26
).
2. Put the cutting attachment guard onto the fitting on
the shaft.
3. Secure with the bolt(L).
a) (BCZ260L, EXZ260L, BCZ300L)
A
A
B
C
H
L
b) (BCZ400L)
A
B
H
A
C
L
CAUTION: Make sure that the guard
extension is attached when you
assemble the BCZ400L.
4. Install the drive disc (B) on the output shaft.
5. Turn the output shaft until one of the holes in the
drive disc aligns with the related hole in the gear
housing.
6. Put the locking pin (C) in the hole to lock the shaft.
7. Turn the trimmer head /plastic blades (H) in the
opposite direction from which the trimmer head/
plastic blades rotate.
H
H
8. To disassemble, follow the instructions in the
opposite sequence.
To assemble the blade guard and grass blade
(BCZ260L, BCZ300L, BCZ400L)
CAUTION: Use the recomended blade
guard. See the Technical data section.
AB
C
D
E
F
G
E
F
BCZ260L, BCZ300L BC400L
1. Attach the correct blade guard (A) (See,
Accessories
on page 26
).
2. Put the blade guard onto the fitting on the shaft.
3. Secure the blade guard with the bolt.
4. Attach the drive disc (B) on the output shaft.
5. Insert the locking pin (C) in the hole to lock the shaft.
6. Place the grass blade (D), support cup (E) and
support flange (F), on the output shaft.
7. Get the socket wrench in the tool kit.
353 - 003 - 06.01.2018 13

8. Fit the nut (G).
9. Hold the shaft of the spanner as close to the blade
guard as possible.
10. Turn the spanner in the opposite direcection from
which the grass blade rotates to a tourque of 35-50
Nm (3.5-5kpm).
Note: (Left-hand thread).
WARNING: When you use grass blades,
Use the harness and attach it to the
suspension ring.
To assemble the two-piece shaft
(EXZ260L)
1. Turn the knob to loosen the coupling.
2. Align the tab of the attachment (A) with the arrow of
the coupling (B).
A
B
3. Push the attachment into the coupling until it snaps
into place.
4. Tighten the knob fully.
To disassemble the two-piece shaft
(EXZ260L)
1. Turn the knob 3 turns or more to loosen the
coupling.
2. Push and hold the button (C).
3. Hold the engine end tight.
4. Pull the attachment straight out of the coupling.
C
Operation
Fuel
CAUTION: This product have a two-stroke
engine and must always run on a mixture of
gasoline and two-stroke oil.
Gasoline
CAUTION: Always use a quality gasoline/oil
mixture of at least 90 octane (RON). There
is a risk that use of lower octane grade
causes knocking. This gives rise to high
14 353 - 003 - 06.01.2018

engine temperature, which can result in
serious engine damage.
CAUTION: If your product is equipped with a
catalytic converter use a good quality
unleaded gasoline/oil mixture. Leaded
gasoline will destroy the catalytic converter.
• Use low-emission gasoline, also know as alkylate
gasoline, if it is available.
• Ethanol blended fuel, E10 may be used (max 10%
ethanol blend). Using ethanol blends higher than
E10 will cause lean running condition which can
damage the engine.
• We recommend a higher octane rating when you do
work at continuous high speed.
Two-stroke oil
• For best results and performance use Zenoah two-
stroke oil, which is specially formulated for our two-
stroke engines.
• If Zenoah two-stroke oil is not available, you may
use another two-stroke oil of good quality that is
intended for air cooled engines.Contact your dealer
when you select an oil.
• Do not use two-stroke oil intended for water-cooled
outboard engines, also referred to as outboard oil.
• Do not use oil intended for four-stroke engines.
Gasoline, litre Two-stroke oil, litre
2% (1:50)
5 0,10
10 0,20
15 0,30
20 0,40
To make the fuel mixture
Note: Always use a clean fuel container when you do
the fuel/oil mixture. Do not make more than a month
quantity of fuel mixture. Empty and clean the fuel tank
before long storage.
1. Add half of the gasoline quantity. Add the full
quantity of oil.
2. Shake the fuel mixture.
3. Add the remaining gasoline quantity.
4. Shake the fuel mixture.
5. Fill the tank.
To fill the fuel tank
1. Clean the area around the fuel tank cap.
2. Shake the container and make sure that the fuel is
fully mixed. Use a fuel container with an anti-spill
valve.
3. Fill the fuel tank.
4. Tighten the fuel tank cap carefully.
5. Move the product 3 m (10 ft) or more away from the
refueling area and source before starting.
CAUTION: Contamination in the tanks
causes malfunction. Clean the fuel tank and
chain oil tank regularly and replace the fuel
filter one time a year or more.
Before you operate the product
• Examine the work area to make sure that you know
the type of terrain. Examine the slope of the ground
and if there are obstacles such as stones, branches
and ditches.
• Do an overhaul inspection of the product.
• Do the safety inspections, maintenance and
servicing that are given in this manual.
• Make sure that all covers, guards, handles and the
cutting equipment are correctly attached and not
damaged before you start the product.
• Make sure that there are no cracks at the bottom,
teeth or the center hole of the blade. Cracks most
usually occurs because sharp corners are shaped at
the bottom of the teeth while you sharpen the
353 - 003 - 06.01.2018 15

blades. Cracks can also occur if you use the blade
with blunt teeth. Replace the blade if it is damaged.
• Examine the support flange for cracks. Replace the
support flange if it is damaged.
• Make sure that the locking force on the locknut is not
decreased. The nut lock must have a locking force at
a minimum of 1.5 Nm. The tightening torque of the
locknut must be between 35-50 Nm.
• Examine the blade guard for damages or cracks.
Replace the blade guard if it has been hit or if it has
cracks.
• Examine the trimmer head and cutting attachment
guard for damages or cracks. Replace the trimmer
head and cutting attachment guard if they have been
hit or if they have cracks.
To prepare the product for start (BCZ260L,
EXZ260L, BCZ300L)
1. Press the primer bulb repeatedly until the fuel begins
to fill the bulb.
Note: The bulb does not need to be filled completely.
16 353 - 003 - 06.01.2018

2. Move the choke control up into choke position.
To prepare the product for start (BCZ400L)
1. Press the primer bulb repeatedly until the fuel begins
to fill the bulb.
Note: The bulb does not need to be filled completely.
2. Move the choke control clockwise to choke position.
To start the product
WARNING: Read the warning instructions in
the safety chapter before you start th
product (see
Safety on page 5
).
WARNING: When the engine is started with
the choke in either the choke or start throttle
position the cutting attachment will start to
rotate immediately.
1. Use protective gloves.
2. Hold the body of the product on the ground with your
left hand.
CAUTION: Do not use your feet!
3. Grip the starter handle.
4. Slowly pull out the cord with your right hand until you
feel some resistance (the starter pawl grip).
WARNING: Do not twist the starter cord
around your hand.
5. Pull the cord quick and with power.
CAUTION: Do not pull the starter cord all
the way out and do not let go off the
starter handle when the cord is fully
extended. This can damage the product.
6. Reset the choke when the engine fires.
7. Repeat to pull the cord until the engine starts.
8. Operate the throttle gradually when the engine
starts.
9. Make sure the engine runs smoothly.
WARNING: Do not put any part of your body
in the grey marked area. Contact can result
in burns to the skin, or electrical shock if the
spark plug cap has been damaged.
353 - 003 - 06.01.2018 17

To stop the product
1. Turn off the ignition to stop the engine.
CAUTION: The stop switch automatically
returns to the start position. In order to
prevent unintentional starting, the spark
plug cap must be removed from the
spark plug when assembling, checking
and/or performing maintenance.
Grass clearing with a grass blade
WARNING: Do not use grass blades and
grass knifes on woody steams.
The grass blade is used for all types of coarse grass.
You can decrease the risk of material wrapping around
the blade by:
• Always work with full throttle.
• Avoid previously cut material during the return
stroke.
To clear grass with a grass blade
1. Stand firmly with your feet apart.
2. Let the support cup rest lightly against the ground.
Do this to protect the blade from hitting the ground.
3. Use a sideway swing movement from right to left to
use the clear stroke and let the left side of the blade
(between 8 and 12 o'clock) do the cutting.
4. Angle the the blade to the left when you clear grass.
Note: The grass will collect in a line, which makes it
easier to collect.
5. Use a sideway swing movement from left to right for
the return stroke.
6. Do the work rhythmically.
7. Move forward and stand firmly again.
8. Stop the engine.
9. Remove the product from the clip on the harness.
10. Put the product on the ground.
11. Collect the cut material.
Grass trimming with a trimmer head
To use the grass trimming technique
• Keep the trimmer head near the ground at an angle.
The grass is cut by the end of the trimmer line.
• Move the trimmer line slowly into the area to be cut,
do not force it.
• Use this procedure to cut grass against for example
walls, fences and trees.
CAUTION: The trimmer line can do
damage to sensitive trees, bushes and
fences. To prevent this, decrease the
length of the trimmer line to 10–12 cm
and decrease the engine speed.
To use the grass clearing technique
• Use this procedure to fully remove the grass.
• Keep the trimmer head near the ground at an angle.
Let the trimmer line hit the ground around the object
where you remove the grass.
CAUTION: This procedure increases the
wear on the trimmer line. It is necessary
to increase the length of the trimmer line
more frequently when you clear grass
against stones, concrete and metal
fences than against trees and fences
made of wood.
• Decrease the engine speed to decrease the wear on
the trimmer line and the trimmer head.
18 353 - 003 - 06.01.2018

To use the cutting technique
• Use this procedure to cut grass where you cannot
use a lawn mower.
• Keep the trimmer head parallel to the ground.
CAUTION: Do not press the trimmer
head against the ground and do not let it
touch the ground frequently. This can do
damage to the lawn and the trimmer
head.
To use the sweeping technique
• The airflow from the rotating trimmer line can be
used to remove cut grass from an area.
• For best results, apply full throttle.
• Keep the trimmer line parallel to and above the
ground, and move the trimmer head from side to
side.
• Clean the trimmer head cover every time you refill
the cord to avoid unbalance and vibrations in the
handles. Also do a check of the other parts of the
trimmer head and clean it if necessary.
Maintenance
Carburettor
This Zenoah product is designed to reduce harmful
exhaust fumes. The engine will be run-in after you have
used 10 tanks of fuel. Contact your dealer/service agent
to adjust the carburettor to ensure that the engine run at
peak performance and produces as little harmful
exhaust fumes as possible after the running-in period.
Basic setting
the factory adjusts the basic settings for the carburettor
during tests. The basic setting is richer than the optimal
setting and must be maintaned for the first hours you
use the product. The carburettor must then be finely
adjusted by a skilled technician.
To adjust the idle speed
WARNING: Read the warning instructions in
the safety chapter before you start the
product (,see
Safety on page 5
).
WARNING: If the cutting attachment rotates
when the engine is at idle speed the idle
adjustment screw T must be turned
counterclockwise until the cutting
attachment stops.
1. Make sure that the air filter is clean.
2. Make sure that the air filter cover is in position.
3. Get the idle adjustment screw T.
4. Turn the idle adjustment screw T clockwise until the
cutting attachment starts to rotate.
a) (BCZ260L, EXZ260L, BCZ300L)
T
b) (BCZ400L)
T
5. Turn the screw counterclockwise until the cutting
attachment stops.
WARNING: Make sure the idle speed is
well below the speed which the cutting
attachment starts to rotate.
353 - 003 - 06.01.2018 19

6. Make sure the engine run smoothly in all position.
To clean/do maintenance on the
cooling system
This product has a cooling system. A dirty or blocked
cooling system can make the product to too hot which
will do damage to the piston and cylinder. Check and
clean the cooling system with a brush one time each
week or more frequently in demanding conditions. The
cooling system consists of air openings.
12
Spark plug
CAUTION: Always use the recommended
spark plug type! Use of the wrong spark plug
can damage the piston/cylinder. Check that
the spark plug is fitted with a suppressor.
The condition of the spark plug is influensed by
• Incorrect carburettor adjustment.
• An incorrect fuel mixture (To much or incorrect type
of oil).
• A dirty air filter.
These factors cause deposits on the spark plug
electrodes which may result in operating problems and
starting difficulties.
Always check the spark plug first If the product is low on
power, difficult to start or runs poorly at idle speed. If the
spark plug is dirty, clean it and check the electrode gap.
Replace the spark plug after a month of operation or
erlier if it is necesarry.
(BCZ260L, EXZ260L) electrode gap, see
Technical data
on page 23
.
( BCZ300L, BCZ400L) electrode gap, see
Technical
data on page 24
.
Two piece-shaft (EXZ260L)
Lubricate the drive shaft end in the lower shaft with
greace at an interval of 30 hours. There is a risk that the
drive shaft ends (splined coupling) on models with two-
piece shafts will seize if they are not lubricated regularly.
Bevel gear
The bevel gear is filled with the right quantity of grease
at the factory. But, before you use the product, make
sure that the bevel gear is 3/4 full with grease. Use
Zenoah special grease.
The grease in the bevel gear does not need to be
changed unless repairs are carried out.
Fuel filter
When the engine runs short of fuel supply, make sure
that the fuel tank cap and the fuel filter is not blocked.
1
20 353 - 003 - 06.01.2018
This manual suits for next models
3
Table of contents
Languages:
Other Zenoah Lawn And Garden Equipment manuals
Popular Lawn And Garden Equipment manuals by other brands

EINHELL
EINHELL 34.310.51 Original operating instructions

Rutland County
Rutland County Premium Pergola Assembly instructions

Black & Decker
Black & Decker 8288 owner's manual

DIY
DIY VERTICAL HERB GARDEN quick start guide

Royal Well
Royal Well Plant Station Assembly instructions

Gronomics
Gronomics ECOGW 34-48 EXT Assembly instruction

Poulan Pro
Poulan Pro Poulan PRO PB30 Operator's manual

VOUNOT
VOUNOT MJHG017 Original manual translation

SNOWJOE
SNOWJOE AQUAJOE AJFJH25-PRO manual

Solarlux
Solarlux Glass Room System 1 manual

Stinger
Stinger BK100 Series owner's manual

New England Arbors
New England Arbors The Windsor Long Planter Box Assembly instructions