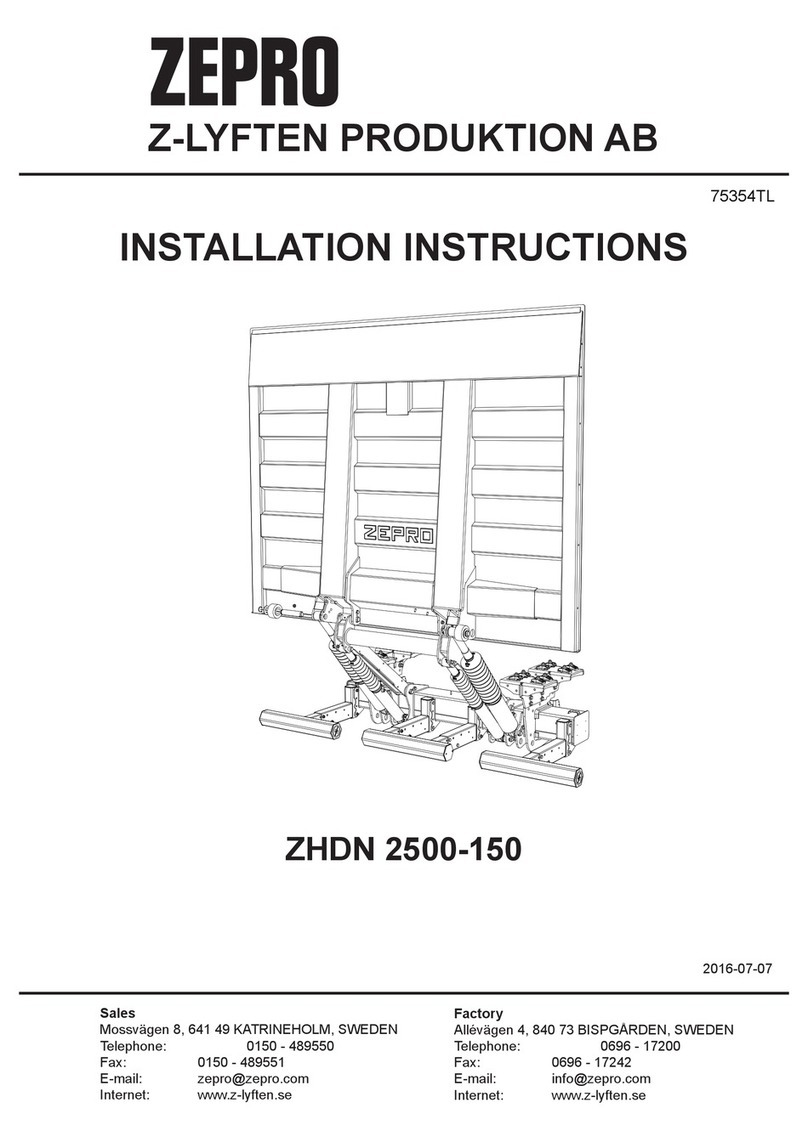
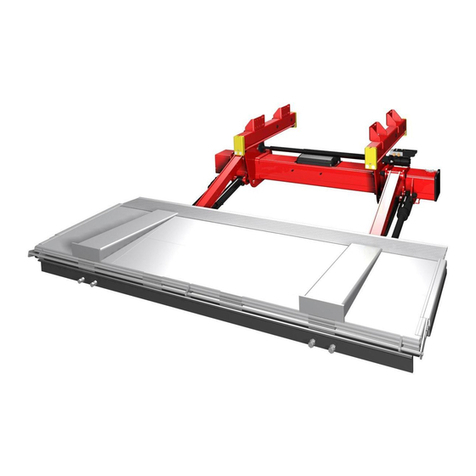
Zepro ZHD 1500-135 User manual

ZHD 1500/2000-135/155/175
ZHDL 1500/2000-135/155/175
Sales
Mossvägen 8, 641 49 KATRINEHOLM, SWEDEN
Telephone: +46 (0)150-489550
Fax: +46 (0)150-489551
E-mail: [email protected]
Internet: www.zepro.com
Factory
Allévägen 4, 844 41 BISPGÅRDEN, SWEDEN
Telephone: +46 (0)696-17200
Fax: +46 (0)696-17242
E-mail: [email protected]
Internet: www.zepro.com
01/05/2019
59581TL
INSTALLATION INSTRUCTIONS
Z-LYFTEN PRODUKTION AB


ZHD 1500/2000-135/155/175Contents
3www.zepro.com
Contents
1 Introduction ..................................................................................................... 5
1.1 Important ................................................................................................ 5
1.2 CE marking............................................................................................. 6
1.3 Hydraulicuid ......................................................................................... 6
1.4 Identication ........................................................................................... 7
2 Safety rules ....................................................................................................... 8
2.1 Repainting .............................................................................................. 8
2.2 Transport plug......................................................................................... 9
2.3 Moving parts - free movement................................................................ 9
2.4 Third-party equipment must not be attached........................................ 10
2.5 Installation ............................................................................................ 10
3 Installation workflow...................................................................................... 11
3.1 Installing the support frame .................................................................. 11
3.2 Electrical connections........................................................................... 11
3.3 Installing the platform ........................................................................... 11
3.4 Installing cylinders ................................................................................ 11
3.5 Attaching decals ................................................................................... 11
4 Calculating the installed dimensions ........................................................... 12
4.1 C dimension ......................................................................................... 12
4.2 D dimension ......................................................................................... 12
4.3 A dimension.......................................................................................... 12
4.4 H dimension.......................................................................................... 12
5 Rear member cut-outs ................................................................................... 15
6 Installation ..................................................................................................... 16
6.1 Support frame....................................................................................... 16
6.2 Control devices..................................................................................... 19
6.3 Control power cable.............................................................................. 19
6.4 M
ain power cable.................................................................................. 20
6.5 Underrun protection.............................................................................. 22
6.6 Armstops .............................................................................................. 24
6.7 Angle sensor for autotilt........................................................................ 24
6.8 Sealing strip (horizontal)....................................................................... 24
6.9 Sealing strip (vertical)........................................................................... 24
6.10 Platform ................................................................................................ 25
6.11 Purging the cylinders............................................................................ 30
6.12 Transport lock....................................................................................... 30
7 Temporary operation of lift............................................................................ 31
7.1 Connection ........................................................................................... 31
7.2 Operation.............................................................................................. 31
7.3 Disconnection....................................................................................... 31
8 Hydraulic unit and control card .................................................................... 32

ZHD 1500/2000-135/155/175
4
Contents
www.zepro.com
9 Electrical
and
hydraulic drawings................................................................. 33
9.1 ZHD 1500/2000 NN.............................................................................. 33
9.2 ZHD 1500/2000 CE .............................................................................. 34
9.3 ZHD 1500/2000 DVx4 NN .................................................................... 35
9.4 ZHD 1500/2000 DVx4 CE .................................................................... 36
9.5 ZHD 1500/2000 Hydraulic autotilt NN .................................................. 37
9.6 ZHD 1500/2000 Hydraulic autotilt CE................................................... 38
9.7 Connecting cabin switch and open platform alarm............................... 39
9.8 Alarm for open platform (trailer)............................................................ 39
9.9 Connecting control devices .................................................................. 40
10 Functional schematic drawings.................................................................... 41
10.1 ZHD1500-2000(Cong1)MA............................................................. 41
10.2 ZHD1500-2000(Cong3)DA
........................................................................................................... 43
11 Connection unit .............................................................................................. 45
11.1 Power save mode................................................................................. 45
11.2 Operating information........................................................................... 45
12 Marking and decals ........................................................................................ 51
12.1 Summary .............................................................................................. 51
12.2 Load diagram........................................................................................ 52
12.3 Identicationplate................................................................................ 52
12.4 Work area ............................................................................................ 52
12.5 Driver’s instructions .............................................................................. 53
12.6 Danger area ......................................................................................... 53
12.7 Warning tape ....................................................................................... 53
12.8 Warningags....................................................................................... 54
12.9 CE marking........................................................................................... 54
13 Lubrication and fluid level check.................................................................. 55
13.1 Lubrication............................................................................................ 55
13.2 Oil level check ...................................................................................... 55
14 Testing and verification ................................................................................. 56
14.1 Static load test...................................................................................... 56
14.2 Dynamic load test................................................................................. 57
14.3 Test of safety functions......................................................................... 57
15 Dismantling..................................................................................................... 58
16 Specifications ................................................................................................ 59
16.1 Weights ................................................................................................ 59
16.2 Maximum power consumption - Minimum recommended conductor cross sectional
area.................................................................................................... 60
16.3 Battery maintenance............................................................................. 60
16.4 Loading diagram................................................................................... 61
16.5 Tightening torque.................................................................................. 62

ZHD 1500/2000-135/155/175Introduction
5www.zepro.com
1 Introduction
1.1 Important
The following “warning markings” appear in the installation instructions and are intended to draw
your attention to circumstances that can potentially cause problems, near misses, personal injury
and/or damage to the product, etc.
Take care.
Risk of damage to the product.
NOTE.
Take extra care. Risk of personal injury or damage to the product and the surroundings.
mWARNING!

ZHD 1500/2000-135/155/175
6
Introduction
www.zepro.com
1.2 CE marking
Zepro’s tail lifts on sale on the European market have been CE marked (Conformité Européenne) since
1/1/1995. The manufacturer guarantees that the product complies with the EU Machinery Directive.
The aim of the Machinery Directive is to increase the safety of products throughout Europe.
There are some basic general rules that must be followed during installation. Follow the instal-
lation instructions. If it is not possible to follow the installation instructions or if changes must be
made, the changes must be approved by the manufacturer. This is a consequence of CE marking
rules. The manufacturer is unable to certify compliance with the Machinery Directive if the product
is subsequently changed without its knowledge or approval. To retain a valid CE marking for the
product, it is essential to contact Zepro.
Welding is not necessary except where expressly requested by the manufacturer.
To improve safety, we supply decals for the lift that are easy to understand regardless of the lan-
guage. Make sure these decals are attached so that the information they contain can be seen by
the lift operator.
Position control devices so that the operator is in the safest possible location and has a clear view
of the load, the tail lift and the surrounding area. Follow the driver’s instruction manual when using
the control device and its functions.
1.3 Hydraulic uid
Our tail lift must work just as well in tropical heat as in the Arctic cold. The heat is no problem for
theuid.Cold,ontheotherhand,isabigchallengeforhydraulicuid.ThatiswhyZeprohas
chosenhydraulicuidsthatcancopewithalltheseconditions.
1.3.1 Highly rened mineral oil (part no. 21963, 1 litre)
Contains zinc-free anti-wear additives and provides excellent wear protection.
Thespecialtemperaturepropertiesofthehydraulicuidandthehighviscosityindexmeanthat
thehydraulicsystemcanbestartedincoldweatherandrunsreliablyinuctuatingoperating
temperatures. Also gives optimum corrosion protection for the hydraulic system.
1.3.2 Biodegradable hydraulic uid (part no. 22235, 1 litre)
Weofferabiodegradablehydraulicuid(environmentaluid)asanoptionmadeofasynthetic
baseoilcalledpolyalphaolen,whichisbiodegradable.Thisbaseoilhasoutstandingproper-
tiesatlowandhightemperatures.Theuidstaysliquiddowntotemperaturesaslowas-50°C.
Oxidation stability is very good, resulting in a long service life with longer replacement intervals.
Theuidiseasytopumpthankstogoodlteringandairseparationpropertiesandlowdensity.
This minimises the risk of cavitation and foaming. Contact us for more information.
So-calledATFuidorHFuidmaynotbeused.Theseuidsaffecttherubberinthegaskets
and seals and shorten service life.
NOTE.

ZHD 1500/2000-135/155/175Introduction
7www.zepro.com
1.4 Identication
E.g. ZHD 1500 - 135 MA
_ _ _ _ _ _ - _ _ _ _ _
Identication list
ZHD = Standard model
ZHDL = Wide frame, wide lift arm
Max. lifting capacity x 1 (kg)
Max. lifting height -135 = 1340 mm
-155 = 1530 mm
-175 = 1710 mm
Cylinder model, MA = Double acting Adjustable Tilt
Single acting lift
DA = Double acting Adjustable Tilt
Double acting lift

ZHD 1500/2000-135/155/175
8
Safety rules
www.zepro.com
2 Safety rules
2.1 Repainting
Piston rods and cylinder covers must
not be painted. Painting could dam-
age the cylinder gaskets.
Boots,
hydraulic hoses and cables
must not be painted/coated as the
solvent in the paint could damage
thehoses/cablesandsignicantly
impair durability.
NOTE.
Fig. 1. Piston rods, cylinder covers and
boots must not be painted/coated
Fig. 2. Hydraulic hoses must not be painted/coated
Fig. 3. Cables must not be painted/coated

ZHD 1500/2000-135/155/175Safety rules
9www.zepro.com
2.2 Transport plug
When the lift is installed, the trans-
port plug in the hydraulic unit must
be removed and replaced with the
normal tank cap supplied with the
hydraulic unit.
NOTE.
54
8
5
3
2.3 Moving parts - free movement
Whenthenalinspection*takesplace,
the space occupied by the moving
cylinders must be cleared and made
safe. There is a risk of collision be-
tween the cylinder and the following
items: subframe, truck chassis, mem-
ber for rear lights (number plate) and
the lift’s chassis bracket (with a short
overhang).
*Thenalinspectionmustbecarried
outwiththeplatformatthevehicleoor
and tilted down 10°. The clearance
from the closest part of the cylinder
must be at least 40 mm.
mWARNING!
The platform must not be tilted down
morethanmax.10°fromhorizontal
when people are on the platform.
mWARNING!
min. 40 mm.
10°
10°
Fig. 4. Replace the transport plug with
the normal tank cap
Fig. 5. Clearance to the closest
part of the cylinder must be at least 40 mm
Fig. 6. The platform must not be tilted down
more than 10° from the horizontal

ZHD 1500/2000-135/155/175
10
Safety rules
www.zepro.com
2.4 Third-party equipment must not be attached
You must not attach third-party equipment (electric or hydraulic) to Zepro tail lifts. Attaching
third-party equipment may interfere with the lift system and the safety functions. Risk of injury
and damage. If it is necessary to install other equipment, check the vehicle manufacturer’s
body instructions and use the attachment features on the vehicle.
mWARNING!
2.5 Installation
The platform must not be installed so it cannot reach ground level.
mWARNING!
Zepro tail lifts are only approved for installation with Zepro installation kits.
mWARNING!

ZHD 1500/2000-135/155/175Installationworkow
11www.zepro.com
3 Installation workow
3.1 Installing the support frame
• Calculating the installed dimensions
• Attaching the mounting jig to the rear beam
• Aligning the support frame
• Mounting chassis brackets
• Detaching the mounting jig
3.2 Electrical connections
• Installing the control devices
• Installing the control device cables
• Installing the main power cable
3.3 Installing the platform
• Installing the platform
• Installing seals and end stops
• Installing the armstops
3.4 Installing cylinders
• Adjusting tilt cylinder
• Test running
3.5 Attaching decals

ZHD 1500/2000-135/155/175
12
Calculating the installed dimensions
www.zepro.com
4 Calculating the installed dimensions
For easier installation, it is useful to calculate and specify the necessary dimensions in advance.
DeterminetheCdimensionrst,thenobtaintheotherdimensionsfromtherelevanttable.You
shouldtrytoplacetheliftashighaspossiblewithinthespeciedCdimensioninthetable.
4.1 C dimension
TheCdimensionisthedistancebetweenthetopofthesupportframeandthevehicleoorlevel.
This dimension governs how far the lift needs to be installed under the vehicle body (D dimension)
andthespacetherewillbebetweentheliftarmsintheupperpositionandthevehicleoorlevel
(A dimension).
4.2 D dimension
The D dimension is the space the lift needs, measured from the rear edge of the body to the front
edge of the support frame (in the direction of the vehicle). Once the C dimension is determined,
the D dimension can be obtained from the table.
4.3 A dimension
The A dimension is the space provided for the rear member, i.e. the space there will be between
theliftarmandthevehicleoorwiththeliftintheraisedposition.TheAdimensiondependson
the C dimension.
4.4 H dimension
TheHdimensionistheheightfromtheground(unloaded)tothevehicleoorlevel.TheHdimen-
sion must not be greater that the maximum lifting height of the lift. The platform must always be
able to reach ground level.

ZHD 1500/2000-135/155/175Calculating the installed dimensions
13www.zepro.com
Fig. 7. ZHD/ZHDL 1500/2000-135
Fig. 8. ZHD/ZHDL 1500/2000-155
Fig. 9. ZHD/ZHDL 1500/2000-175
730
D
40
A
C
210
180
max. 1340
220
max.
min.
C D A
610 620 197
570 669 182
520 721 163
470 764 144
420 800 126
360 835 104
815
D
40
A
C
210
180
max. 1530
220
max.
min.
C D A
715 680 229
680 725 212
630 781 194
580 828 179
530 869 164
480 904 145
430 934 129
910
D
40
A
C
210
180
max. 1710
220
max.
min.
C D A
800 767 228
765 811 213
715 866 197
665 913 184
615 955 167
565 991 149
515 1023 134
465 1051 120

ZHD 1500/2000-135/155/175
14
Calculating the installed dimensions
www.zepro.com
Fig. 10. ZHD 1500/2000
Fig. 11. ZHDL 1500/2000
Fig. 12. ZHD/ZHDL 1500/2000
1014
min. 750 - max. 930
1435
2424
1515
1870
1246
min. 982 - max. 1162
1669
2481
1749
2102
D28
336
35
62
305
133-301
617-817

ZHD 1500/2000-135/155/175Rear member cut-outs
15www.zepro.com
5 Rear member cut-outs
It is often necessary to create cut-outs in the rear member to provide space for the platform
arms when the platform is in the upper position. The size of the cut-outs depends on the calcu-
lated installed dimension “A”, see illustration below.
1. Measure and mark the location and depth of the cut-outs on the rear member. The two cut-
outs must be centred on the rear member, i.e. both cut-outs must be an equal distance from
the mid-point of the member.
2. Cut along the markings.
3. Grind away any burrs or sharp edges.
Fig. 13. ZHD 1500/2000
Fig. 14. ZHDL 1500/2000
994
245 245
Amax.
1226
245 245
Amax.

ZHD 1500/2000-135/155/175
16
Installation
www.zepro.com
6 Installation
Also consult the vehicle manufac-
turer’s body instructions and Zepro’s
instruction booklet before installation.
NOTE.
Zepro tail lifts are only approved for
installation with Zepro installation kits.
mWARNING!
6.1 Support frame
1. Measure and mark the midpoint of
the rear member of the vehicle. See
Fig. 15.
2. Bolt or spot-weld the mounting jig
to
the rear member, so that both
mid-
points are aligned. See Fig. 16.
Art.
no. 51724 for ZHD 1500/2000
Art. no. 52312 for ZHDL 1500/2000.
3. Position the support frame under the ve-
hicle chassis.
4. Temporarily connect the control card to
enable the lift functions, see section "7
Temporary operation of lift" on page 31.
5. Raise the lift arms to their highest
position.
6. Attach the lift arms to the eye of the jig.
Use the steel platform’s normal bolts.
7. The support frame should be posi-
tioned as high as possible within the
specified C dimension. Adjust the
frame to the ideal height under the
chassis. A workshop jack is useful. The
frame must be positioned parallel with
theoorofthevehiclebodyandmust
not be in contact with the vehicle chas-
sis; there must be a few millimetres of
play. If necessary, adjust the angle of
the arms by carefully operating the lift.
8. Install the brackets on the support
frame so that its opening is facing
towards the front of the vehicle, and
adjust the position of the frame so they
are in contact with the vehicle chassis.
9. Install the U-prole with associated
washers and nuts, but do not tighten
these. Screw on the nuts alternately
untiltheU-proleisalignedincontact
with the frame, see Fig. 18.
Fig. 15. Measure and mark the midpoint of
the rear member of the vehicle.
Fig. 16. Bolt or spot-weld the
mounting jig to the rear member
Art. no. 51724 for ZHD 1500/2000
Art. no. 52312 for ZHDL 1500/2000.
Fig. 17. Mounting jig,
Fig. 18. Install the U-profile with as-
sociated washers and nuts

ZHD 1500/2000-135/155/175Installation
17www.zepro.com
10. When installing on a frame without pre-
drilled holes
,installrstwithascrewin
the brackets’ slot-shaped holes. On the
vehicle chassis, mark
the middle of the
brackets’ slot-shaped holes and then drill
Ø14 mm
holes in the frame, see Fig. 20.
11. Bolt the brackets securely on the outside
of the vehicle chassis. Use M14x45 bolts
and install the associated washer and
nut on the inside of the vehicle chassis.
Install the bolts but do not tighten.
12. Check and perform fine adjustment
regarding the position of the lift. Then
tighten the bolts with a torque wrench.
Tightening torque: 120 Nm.
13. Using a torque wrench, tighten the
boltsholdingtheU-proles.Tightening
torque: 280 Nm.
14. Drill holes in the vehicle chassis for
mounting bolts, Ø14 mm. Drill in the outer
holes of each bracket. Use M14x45 bolts
and install the associated washer and
nut on the inside of the vehicle chassis.
Installation must be performed with at least
6 bolts in the outer holes. The bolt that
was installed initially in the slot-shaped
hole may not be included in this gure. If
necessary, this bolt can now be moved
to one of the outer holes, see illustration.
Then tighten the bolts with a torque wrench.
Tightening torque: 120 Nm.
Welding is not permitted on the
chassis brackets.
Do not move the lift all the way to
the armstops or with the platform
tted before all the bolts are fully
tightened against the chassis.
Do not place the lift under load until:
· the correct number of bolts
have been installed and torque-
tightened.
· the vehicle body is installed to
reinforce the truck chassis.
NOTE.
15. Remove the mounting jig.
Min. 260
Min. 20
Min. 180
Min. 20
Min. D
D
Min. 6 pcs.
M14x45 10.9
120 Nm
New hole
Fig. 19. The chassis bracket requires
at least 35 mm clearance between ve-
hicle chassis and support frame
Fig. 20. Install the chassis bracket with
at least six M14x45 10.9 bolts
When installing on chassis with pre-
drilled holes, go directly to point 16.
35 mm

ZHD 1500/2000-135/155/175
18
Installation
www.zepro.com
16. Bolt the brackets securely on the
outside of the vehicle chassis. Install
in the slot-shaped holes with at least 6
screws. Use suitable bolts (durability
equivalent to M14 10.9 or higher) and
install the associated washer and nut
on the inside of the vehicle chassis.
Install the bolts but do not tighten.
See Fig. 21.
17. Check and perform ne adjustment
regarding the position of the lift.
Then
tighten the bolts with a torque wrench.
Tightening torque: Standard for
selected screw.
18. Using a torque wrench, tighten
theboltsholdingtheU-proles.
Tightening torque: 280 Nm.
19. D
rill holes in the vehicle chassis for
mounting bolts in each bracket’s two
upper round holes. Use suitable bolts
(durability equivalent to M14 10.9 or
higher) and install the associated
washer and nut on the inside of the
vehicle chassis. See Fig. 21. Tighten
the bolts with a torque wrench.
Tightening torque: Standard for
selected screw.
Welding is not permitted on the
chassis brackets.
Do not move the lift all the way to
the armstops or with the platform
ttedbeforealltheboltsarefully
tightened against the chassis.
Do not place the lift under load
until:
· the correct number of bolts
have been installed and
torque-tightened.
· the vehicle body is installed
to reinforce the truck chassis.
NOTE.
20. Remove the mounting jig.
When installing on chassis with
pre-drilled holes
Fig. 21. Installing the chassis bracket on ve-
hicle chassis with pre-drilled holes

ZHD 1500/2000-135/155/175Installation
19www.zepro.com
Fig. 22. When installing two control devices for
two-handed grip, there must be a space of at
least 260 mm between the control devices.
6.2 Control devices
1. Fit the control devices in the desired
locations. They must be positioned
so that the operator is in the safest
possible location and has a clear
view of the load, the tail lift and the
surrounding area.
All cable inlets must be pointing
downwards. Do not bend the ca-
ble to too small a radius as this
can cause damage to the cable.
NOTE.
2. The control device’s cable is routed
through the cable lead-through and
connected to the control card.
Min. 260 mm.
6.3 Control power cable
See also the trailer manufacturer’s
electrical instructions.
NOTE.
1. Route the control power cable from
the driver’s cab to the lift.
The cable must be protected with
rubber grommets when it passes
through members or walls. If
there are quick connectors, make
sure they are effectively pro-
tected from moisture and dirt. Do
not bend the cable to too small a
radius as this can cause damage
to the cable.
NOTE.
2. Connect the control power cable to
the cabin switch (CS) on the vehicle
instrument panel. Connect to the
on-board electrical system via a 10 A
(24 V), 15 A (12 V) fuse according the
customer’s wishes. See the connec-
tion diagram "9.6 Connecting cabin
switch and open platform alarm" on
page 39.

ZHD 1500/2000-135/155/175
20
Installation
www.zepro.com
Fig. 23. The fuse box must be installed in a well
protected position as close to the battery as possible
6.4 M
ain power cable
1. Route the main power cable from
the lift to the battery. Pull the cable
through the plastic casing.
The cable must not be tied to
brake lines or the normal on-
board electrical system.
The cable must be protected with
rubber grommets when it passes
through beams or walls.
The cable must be installed suf-
cientlyfar
from or be protected
against sharp edges so that it
cannot chafe or otherwise sustain
damage that can lead to short
circuitandcableres.
Do not bend the cable to too small
a radius as this can cause dam-
age to the cable.
In general, care must be taken
when laying all the cables in order
to obtain a longer cable service
life and to reduce the risk of un-
necessary stoppages.
The cable must be protected with
rubber grommets when it passes
through members or walls. If
there are quick connectors, make
sure they are effectively protected
from moisture and dirt.
NOTE.
2. Fit a 160 A (24 V) or 250 A (12 V)
fuse to the main power cable from
the battery to protect the electrical
systemfromshortcircuitandrerisk.
The fuse box must be installed in
a well protected position as close
to the battery as possible.
NOTE.
3. Check that the hydraulic unit is ef-
fectively earthed. Certain commercial
vehicle manufacturers provide spe-
cial earth connection points.
4. Test all functions from all control
devices. Fig. 24. Quick connectors must be well protected
This manual suits for next models
11
Table of contents
Other Zepro Automobile Accessories manuals
Popular Automobile Accessories manuals by other brands

POOL-LINE
POOL-LINE 110085 Assembly instructions

VBG
VBG Onspot Mounting instruction/Spare Parts List

Malone
Malone SaddleUp PRO Series Installation & Loading Instructions

Tyger
Tyger TG-BP6J85368 installation instructions

Lippert
Lippert Curt 16613 instruction manual

Atera
Atera STRADA SPORT M quick start guide