Tyger TG-BP6J85368 User manual

1/6
Customer Support: www.TygerAuto.com/Contact
Parts List
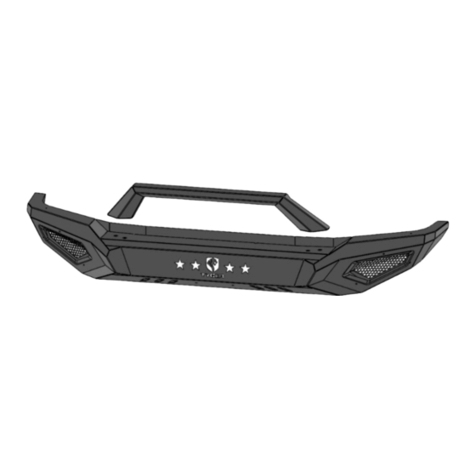
TYGER Front Bumper w-cable guide
2-Hole Support Plate
Slotted Spacers
Driver/left Light Bracket
Passenger/right Light Bracket
License Plate Bracket
Plastic Plugs for License Plate
1/2’’ x1.25”-13 Hex Bolts
1/2” Flat Washers
1/2” Lock Washers
8-1.25mm x 25mm Button Head Bolts
8mm x 24mm x 2mm Flat Washers
8mm Lock Washers
6-1.0mm x 20mm Button Head Bolts
6mm x 18mm x 1.6mm Flat Washers
6mm Nylon Lock Nuts
S=5mm Wrench (for 8mm Button Head Bolts)
S=4mm Wrench (for 6mm Button Head Bolts)
x1
x2
x2
x1
x2
x1
x1
x6
x6
x6
x2
x2
x2
x1
x1
x4
x2
x2
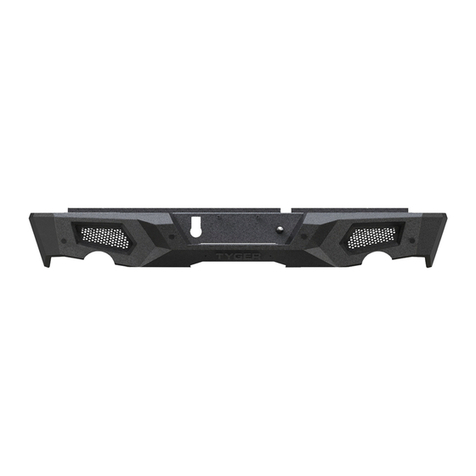
FRONT BUMPER TG-BP6J85368
(2) Slotted Spacers (YJ only)
License Plate Bracket
(2) Plastic Plugs
(2) 2-hole Support Plates (YJ only)
Fastener Size Class 8.8 Torque (ft-lbs) Class 10.9 Torque (ft-lbs)
14mm
87-88
125-126
Driver/left
Light Bracket
78-79
44-45
22-23
6-7
54-55
31-32
15-16
6-7
12mm
10mm
8mm
6mm
TORQUE VALUES
ONTACTCWWW.TYGERAUTO.COM/
VISIT:PLAESE
CLAIM,
URO
YFILE
O
T
SE.O
RP
U
P
PICTURE FOR THE CLAIM
ANY CLAIM. IF MISSING PARTS OR ANY DAMAGE FOUND, PLEASE TAKE A
IDENTIFY DAMAGE BEFORE INSTALLATION COULD LEAD TO A REJECTION OF
FAILURE TOCONTENTS FROM BOX AND VERIFY ALL PARTS ARE PRESENT.
READ INSTRUCTIONS CAREFULLY BEFORE STARTING INSTALLATION. REMOVE
BEFORE INSTALLATION
Fastener Size Class 8.8 Torque (ft-lbs) Class 10.9 Torque (ft-lbs)
Passenger/right
Light Bracket

lower splash guard or skid plate, (Fig 1).
STEP 2
Move to the top of the bumper. With assistance, remove the (4) bolts
s
s
s
s
s
s
s
s
s
s
attaching the bumper to the top of the frame, (Figure 2).
NOTE: Bolts may also be used to attach tow hooks to the top of the
bumper, remove bolts and tow hooks if equipped. On 1996-06 TJ
and LJ models, remove the plastic cover over the sway bar, (Figure
2).
PROCEDURE:
REMOVE CONTENTS FROM BOX. VERIFY ALL PARTS
ARE PRESENT. READ INSTRUCTIONS CAREFULLY BEFORE STARTING
INSTALLATION. ASSISTANCE IS RECOMMENDED. CUTTING MAY BE
REQUIRED.
STEP 1
Start under the front bumper of the vehicle and remove the (2)
button head T-55 torx bolts attaching the bumper to the bottom
of the frame, (Figure 1).
IMPORTANT: Factory bolts may be very tight or rusted in place.
Use of penetrating lubricant is highly recommended before
attempting to remove hardware.
Front
(Fig 1) Use T-55 torx tool (not included) to
remove bumper bolts from bottom of
bumper (arrow). TJ model pictured from below
Front
STEP 3
Determine correct procedure for your model.
1986-1995 YJ models.
a. With assistance, slide bumper over end of frame, (Figure 3).
b. Line up the top-forward mounting hole on back of bumper
with mounting hole closest to end of the passenger/right side
of the frame.
(Fig
2)
Remove
bumper
bolts
from
top
of bumper
(arrow).
On
TJ-LJ
models,
also
remove
plastic
sway
bar
cover
from
frame
Place (1) Slotted Spacer over
inner mounting hole in frame
Front
(Fig 3) Passenger/right side of YJ model
frame with bumper removed
Customer Support: www.TygerAuto.com/Contact
2/6

3/6
Customer Support: www.TygerAuto.com/Contact
(2) 1/2”Hex Bolts
(2) 1/2”Lock Washers
(2) 1/2”Flat Washers
c.Place the small Slotted Spacer over top inner mounting hole,
(Figures 3 &4).
d.Place the long 2-hole Support Plate over the forward hole in the
bumper, the slotted Spacer and (2) threaded holes in the frame,
(Figure 4).
e.Insert (2) 1/2” Hex Bolts, (2) 1/2” Lock Washers and (2) 1/2” Flat
Washers down through the 2-hole Support Plate, the Spacer, the
Bumper and into the frame, (Figures 4 &5). Leave loose.
f.Insert (1) 1/2” Hex Bolt, (1) 1/2” Lock Washer and (1) 1/2” Flat
Washer up through the bottom mounting hole in the Bumper and into
the frame, (Figures 4, 5 &8). Leave loose.
g.Repeat the previous steps to attach the driver/left side of the
Bumper to the frame.
Washer up through the bottom mounting hole in the bumper and into
the frame, (Figures 7 &9). Leave loose.
e.Repeat the previous steps to attach the driver/left side of the
bumper to the frame.
f.With bumper in place, check the fit of the plastic sway bar cover
and cut if necessary, to clear bumper.
frame, (Figures 4, 5
STEP 6
&8). Leave loose.
Front
1996-2006 TJ and LJ models
Retainers. Insert the Bolt Plates behind the mounting plate on the
back of the Bumper, (Fig 5). Thread the Plastic Retainers tight
Plastic Retainers installed
lation, (Fig 6). Repeat Step for the other side of the Bumper.
(Fig 5) On YJ models only, slide Bumper over
end of frame. Place (1) Slotted Spacer over
inner mounting hole on frame (see Fig. 3).
Place 2-hole Support Plate over mounting tab
on Bumper, Spacer and frame
2-hole Support Plate
Slotted Spacer
1/2”Hex Bolt
1/2”Lock Washer
1/2”Flat Washer
Front
(Fig 4) On YJ models only, slide Bumper over
end of frame. Place (1) Slotted Spacer over
inner mounting hole on frame (see Fig. 3).
Place 2-hole Support Plate over mounting tab
on Bumper, Spacer and frame. pictured)
Front
(2) 1/2”Hex Bolts
(2) 1/2”Lock Washers
(2) 1/2”Flat Washers
Slotted Spacer
1/2”Hex Bolt
1/2”Lock Washer
1/2”Flat Washer
2-hole Support Plate
(Fig 6) TJ-LJ model with bumper and sway
bar cover removed
1996-2006 TJ and LJ models
a.With assistance, slide bumper over the end of frame, (Figure 6).
b.Line up the (2) top mounting holes in the Bumper with the
threaded mounting holes in the end of the passenger/right side of
the frame.
Front
4/6
Customer Support: www.TygerAuto.com/Contact
c.Attach the top mounting plate on the bumper to the frame with
the included (2) 1/2” Hex Bolts, (2) 1/2” Lock Washers and (2) 1/2”
Flat Washers, (Figures 7 &8). Leave loose at this time.
d.Insert (1) 1/2” Hex Bolt, (1) 1/2” Lock Washer and (1) 1/2” Flat
Washer up through the bottom mounting hole in the bumper and
into the frame, (Figures 7 &9). Leave loose.
e.Repeat the previous steps to attach the driver/left side of the
bumper to the frame.
f.With bumper in place, check the fit of the plastic sway bar cover
and cut if necessary, to clear bumper.
Front
(Fig 7) TJ-LJ models, attach Bumper directly
to top and bottom mounting holes in frame.
No Spacers or Support Plates required
(Fig 8) TJ-LJ model with Bumper installed
(3) 1/2”Hex Bolts
(3) 1/2”Lock Washers
(3) 1/2”Flat Washers
Front
(Fig 9) Passenger/right side TJ-LJ model
pictured from below
Front

5/6
Customer Support: www.TygerAuto.com/Contact
STEP 4
Light brack
et installation, (LED light not included).
a. Select the left and right Light Brackets. Attach the Brackets to
the slots in the back of the hoop on the Bumper with the included
(2)
8mm x 25mm Button Head Bolts, (2) 8mm Lock Washers and
(2) 8mm Flat Washers, (Figure 10). Leave hardware loose. NOTE:
“L” Brackets are designed for 8mm light mounting hardware
only. Modify “L” Brackets if necessary, to install hardware larger
than 8mm.
b. Next, attach lights or light bar, (not included), to the Brackets.
c. Slide Brackets along slots as required to line up light with
Bumper and tighten hardware.
STEP 5
Winch Installation, (winch not included):
a. Attach the winch to the top of the mounting plate behind the
Bumper.
b. Follow the manufacturer’s instructions to properly attach the
winch to the top of the bumper and to connect the winch to the
electrical system. NOTE: As per winch instructions, never wind rope
over top of the winch drum.
.
As per winch instructions, never wind rope over top of the winch drum.
Front
(2) 8mm x 25mm Button Head Bolts
(2) 8mm Lock Washers
(2) 8mm Flat Washers
(Fig 10) Attach Light Brackets to inside of
hoop on Bumper
Front
(Fig 11) Remove screens for additional clearance
around outer lights (not included)
STEP 6
LED light installation at ends of bumper, (LED lights not included).
a. Remove the screen from the back of the driver/left opening,
(Figure 11).
b. Attach light to mounting tab at top of opening. Check for clearance
around light.
c. Repeat the above Steps for passenger/right side light installation.
d. Follow light manufacturer’s instructions to adjust and properly wire
the light to the vehicle electrical system.

Front
(Fig 12) License Plate Bracket attached to the bottom
of the Bumper
6/6
Customer Support: www.TygerAuto.com/Contact
STEP 7
Select the License Plate Bracket. Attach the Bracket to the bottom
of the bumper using (2) 6mm Button Head Bolts, (4) 6mm Flat
Washers and (2) 6mm Nylon Lock Nuts, (Figure 12).
Use the provided (2) Plastic Plugs to attach the License Plate to the
front of the Bracket.
(2) 6mm Button Bolts
(4) 6mm Flat Washers
(2) 6mm Nylon Lock Nuts
Complete installation
STEP 8
Stand back from the vehicle and check to see that the Bumper is
centered and level on the vehicle and adjust as required. Once
properly aligned, fully tighten all hardware.
STEP 9
Do periodic inspections of the installation to make sure that all
hardware is secure and tight.
Table of contents
Other Tyger Automobile Accessories manuals

Tyger
Tyger Armor TG-AM2T20208 User manual

Tyger
Tyger STAR ARMOR TG-AM2C20108 User manual

Tyger
Tyger TG-BP9D80398 User manual

Tyger
Tyger Guard TG-GD6C60047 User manual

Tyger
Tyger TG-RK1B204B User manual

Tyger
Tyger TG-BP9F80298 User manual

Tyger
Tyger TG-GD6D60078 User manual

Tyger
Tyger T1 User manual

Tyger
Tyger STAR ARMOR TG-AM2C20218 User manual

Tyger
Tyger TG-SB7J88678 User manual