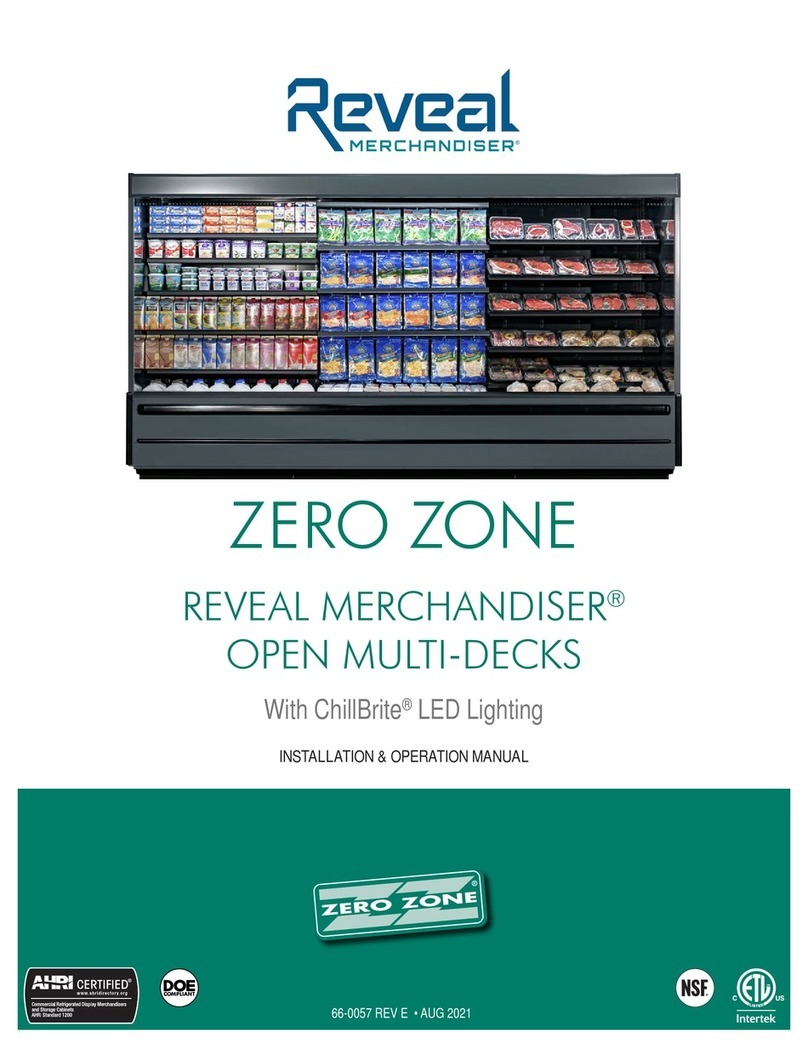
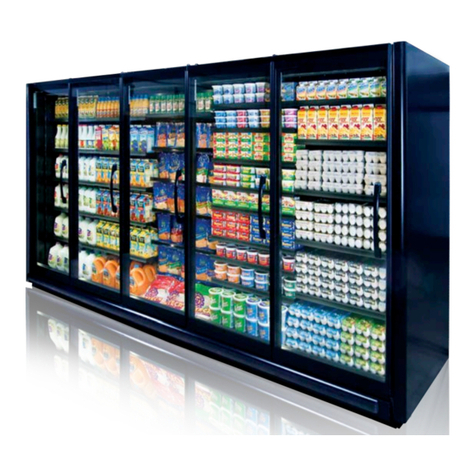
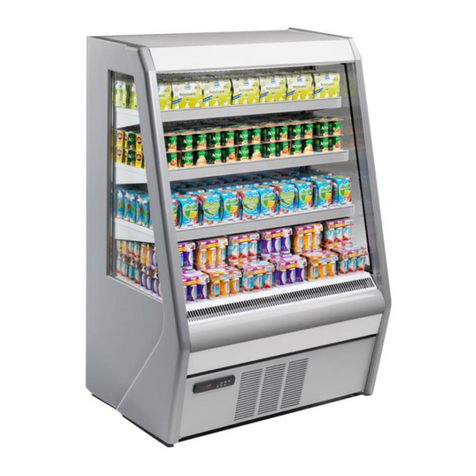
Zero Zone Reveal Merchandiser ORMC83D User manual

ZERO ZONE
REVEAL MERCHANDISER®
MULTI-DECKS WITH DOORS
With CoolView®Ultra™Doors & ChillBrite®LED Lighting
INSTALLATION & OPERATION MANUAL
COMPLIANT
66-0109 REV C • MAY 2021

II
Table Of Contents
ZERO ZONE WARRANTY......................................................................................1
INTRODUCTION.....................................................................................................2
INSTALLATION & OPERATION.............................................................................4
Delivery Inspection............................................................................................4
Packaging.........................................................................................................4
Location............................................................................................................4
Moving Cases...................................................................................................5
Optional Bases...........................................................................................5
Leveling.............................................................................................................6
LineupAssembly ..............................................................................................8
Door Leveling (Door Sag/Sawtooth)...............................................................10
Bottom Mounting Plate.............................................................................10
Top Mounting Plate...................................................................................10
Drain...............................................................................................................10
Kickplates........................................................................................................11
Bumper...........................................................................................................11
Top Trim Splice ...............................................................................................11
CoolView® Doors............................................................................................11
CoolArc™Door Handles ........................................................................... 11
Door Closer /Adjusting Door Tension ......................................................11
Hold-Open Bracket...................................................................................12
Door Gasket.............................................................................................12
Removing a Door.....................................................................................12
Shelves & Stocking Product............................................................................12
REFRIGERATION.................................................................................................14
Mechanical Components................................................................................14
Refrigerant Piping...........................................................................................14
Operation Set Points.......................................................................................14
Off-Cycle Defrost............................................................................................16
Case Thermometer.........................................................................................16
ELECTRICAL........................................................................................................17
General...........................................................................................................17
MAINTENANCE....................................................................................................18
Cleaning..........................................................................................................18
Under Case Floor Cleaning (NSF)...........................................................18

Zero Zone Warranty • 1
ZERO ZONE WARRANTY
Limited Warranty
Zero Zone, Inc. (Seller) hereby warrants that any products manufactured by it and sold are warranted to be free from defects in material and
workmanship, under normal use and service for its intended purpose, for a period of one (1) year from the date of original installation (not to
exceed 15 months from the date of factory shipment). Zero Zone ChillBrite®LED Lighting carries a 5-year parts warranty. Zero Zone CoolView®
Doors carry a 10-year glass pack parts warranty. The obligation under this warranty shall be limited to repairing or exchanging any part, or parts,
FOB Factory, which is proven to the satisfaction of the Zero Zone Service Department to be defective. Zero Zone reserves the right to inspect
the job site, installation, and reason for failure. This limited warranty does not cover labor, freight, or loss of food or product, including refrigerant
loss. This warranty does not apply to motors, switches, controls, lamps, driers, fuses, or other parts manufactured by others and purchased by
the Seller unless the manufacturer of these items warrants the same to the Seller, and then only to the extent of those manufacturer’s warranty
to the Seller.Any products sold on an “AS IS” basis shall not be covered by this warranty.
Extended Warranties
In addition to the standard limited warranty, for further consideration, the Seller will extend to the original purchaser prior to shipment, a limited
extended warranty on the compressor only, following expiration of the standard warranty.The Seller agrees to repair or exchange, at its option,
or provide reimbursement for such exchange as directed, less any credit allowed for return of the original compressor, of a compressor of
like or similar design and capacity, if it is shown to the satisfaction of Zero Zone that the compressor is inoperative due to defects in factory
workmanship or material under normal use and services as outlined by Zero Zone in its Installation & Operation Manuals and other instructions.
Length of Extended Warranty
Any compressor warranty may be extended for an additional four (4) years, but such extension must be purchased prior to shipment to be
effective.This warranty is only for the compressor and not for any other associated parts of the refrigeration system.
Product Not Manufactured by the Seller
The written warranty, if any, provided by the manufacturer of any part of the refrigeration unit sold by Seller to Buyer, but not manufactured by
Seller, is hereby assigned to the Buyer. However, Seller makes no representation or warranty regarding the existence, validity, or enforceability
of any such written warranty.
Limitation and Exclusion of Warranties
THE WARRANTIES SET FORTH HEREINARE EXCLUSIVEAND IN LIEU OFALL OTHER WARRANTIESAND REMEDIES WHATSOEVER,
INCLUDING, BUT NOTLIMITED TO, IMPLIED WARRANTIES OF MERCHANTABILITYAND/OR FITNESS FORA PARTICULAR PURPOSE.
2 • Introduction
Important User Information
Copyright © 2021 Zero Zone, Inc.
All rights reserved. No part of the contents of this manual may be reproduced, copied, or transmitted in any form or by any means including
graphic, electronic, or mechanical methods or photocopying, recording, or information storage and retrieval systems without the written
permission of the publisher, Zero Zone, unless it is for the purchaser’s personal use.
The information in this manual is subject to change without notice and does not represent a commitment on the part of Zero Zone. Zero Zone
does not assume any responsibility for any errors that may appear in this manual. In no event will Zero Zone be liable for technical or editorial
omissions made herein, nor for direct, indirect, special, incidental, or consequential damages resulting from the use or defect of this manual.
The information in this document is not intended to cover all possible conditions and situations that might occur. The end user must exercise
caution and common sense when installing, using, or maintaining Zero Zone products. Zero Zone products should only be installed by qualied,
professional refrigeration technicians. If any questions or problems arise, call Zero Zone at 800-247-4496.
Any change to a Zero Zone product made during the installation, start-up, or at any other time must be submitted in writing to Zero Zone for
approval and be approved by Zero Zone in writing prior to commission. The product warranty is voided when any unapproved change is made
to a Zero Zone product.
Manufacturer
Zero Zone, Inc.
Display Case Division
110 N Oakridge Dr • North Prairie, WI 53153 • 800-247-4496 • www.zero-zone.com
Intended Use
Zero Zone products are intended to be installed and used as described in this manual and other related Zero Zone literature, specications,
drawings, and data.All Zero Zone products must be leveled after being installed.
Display Case Models
The information contained in this manual pertains to the following Zero Zone display cases:
CASE MODEL DESCRIPTION DOOR SIZE & TYPE
ORMC83D 83" Standard Multi-Deck with Doors 24" x 69" CoolView®Ultra™French Doors
ORMC88D 88" Tall Multi-Deck with Doors 24" x 74" CoolView®Ultra™French Doors
Nomenclature
INTRODUCTION
Sill Height/Special: D=Doors
Case Height: 83", 88"
Case Shelving: C= Cantilever
Case Length: 4', 6', 8', 12', etc.
Type of Case: O= Open Multi-Deck
Style of Case: R= Reveal™
Operating Temp: M= Medium Temp
8 O R M C 83 D
Reveal Merchandiser®is a registered trademark of Zero Zone, Inc. in the United States.

Introduction • 3
INTRODUCTION
Case Features
Zero Zone produces high quality refrigerated display cases using state-of-the-art components, including a high efciency evaporator coil. Case
features may include:
Electronic fan motors
Zero Zone ChillBrite®LED Lighting
Zero Zone CoolView®Ultra
™Doors
Testing Standards
These display cases were designed and tested using the following industry standards:
NSF 7 – Commercial Refrigerators and Freezers (ANSI Approved) (equipment certied by NSF)
NSF 51 – Food Equipment Materials (ANSI Approved) (equipment certied by NSF)
UL 471 – Commercial Refrigerators and Freezers (ANSI Approved) (equipment certied by ETL)
ASHRAE Standard 72 – Method of Testing Commercial Refrigerators and Freezers (ANSIApproved)
AHRI 1200 – Performance Rating of Commercial Refrigerated Display Merchandisers and Storage Cabinets (ANSIApproved)
DOE Compliant (All U.S. Sales and U.S. Territories)
ASHRAE Standard 72 species the test conditions for the equipment. It includes the ambient conditions of 75°F dry bulb and 55% RH. It also
species the door opening requirements for the performance test. Doors are opened six times in one hour for six seconds. The door opening
test period is for eight hours during one 24-hour performance test.As an example, a 5-door case will have 240 door openings during one 24-
hour test. Consult the factory if your store exceeds these test conditions.

4 • Installation & Operation
INSTALLATION & OpERATIONINSTALLATION & OpERATION
Delivery Inspection
Zero Zone display cases are carefully factory-tested, inspected, and properly packed to ensure delivery in the best possible condition. The
equipment should be unwrapped and checked for damage immediately upon delivery. DAMAGE MUST BE NOTEDAT TIME OF DELIVERY,
ANDALL CLAIMS FOR DAMAGES MUST BE FILED WITH THE TRANSPORTATION COMPANY, NOT WITH ZERO ZONE. The carrier will
supply necessary report and claim forms.
Do not leave, store, or hold case outdoors in direct sunlight or high ambient temperature. With the end panels on, the case is airtight;
the inside temperature of the case will increase, and the heat will be unable to escape. This could potentially cause any plastic inside
the case to deform or warp.
Packaging
Each case in a lineup is labeled to identify the lineup and joint. The label uses a two digit number designation, separated by a decimal. The
rst number indicates the case lineup. The second number indicates the case joint. Case joints begin with the number “1” at the left most joint in
the lineup when looking at the front of the lineup. The rst case in the lineup will be labeled on the right end and the second case in the lineup
will be labeled on the left end. The numbers on each end to be joined will match (See Figure 1).
The rst case in a lineup (with the right side labeled “x.1”) has a packet attached to the shelving that contains touch-up paint. Every case in
a lineup has a packet attached to the shelving that contains important information about the case and/or lineup and, if applicable, special
instructions for installing ordered options.
Bumpers and kickplates are shipped on top of the case. Shelves for the case are tie-wrapped and blocked into the individual cases. Other
accessories like drain traps, drain pans, and condensate evaporation pans are shipped in the cases that require the parts.
Materials for joining cases—including caulk, joining bolts, splices, and end ller posts—are shipped in each case to be joined.
The doors are prevented from opening during shipment with the use of door-holding shipping brackets. The brackets are screwed to the top of
the case at each door and should be removed when the case is unpacked.
Location
Zero Zone cases must not be installed in the direct rays of the sun or near a source of radiant heat. Be certain that the oor under the
installation is of sufcient strength to prevent sagging. Uneven surfaces will result in reduced performance.
Cases should be set to allow a minimum 3" of space behind the back of the units. This will allow necessary air to circulate behind the
display cases and prevent condensation. Higher humidity stores with minimal air circulation require at least a 4" gap.Aminimum 2" gap is
recommended between cases on end-to-end installations.All minimum spacing requirements may increase if seismic restraints are used.
Building softs must be set back at least 6" from the front of the case to allow access to electrical wiring on the top of the case.
Front of Back-to-Back Lineup
1.1B 1.1B 1.2B 1.2B
1.1a 1.1a 1.2a 1.2a
Front of Lineup
1.1 1.1 1.2 1.2
FIGURE 1: Case Label Information
Front of Lineup

Installation & Operation • 5
INSTALLATION & OpERATION
Moving Cases
Various tools and equipment may be used to move cases including, but not limited to, a forklift, a Johnson bar, a pallet jack, furniture rollers,
casters, or a Rol-A-Lift. Be careful to avoid damaging the store ooring. Only certied forklift drivers should use forklifts to move the cases. The
case should only be lifted off the oor as high as necessary for transport. The forklift should be driven slowly; avoid abrupt motions or bumps.
1. Use the end frame to push/pull the case. For best results, push/pull lower on the end frame. Do not push/pull on the mullions as this
can cause the mullions to bend.
When using a Johnson bar, only contact the sheet metal of the bottom foamed panel. Do not contact the bumper support. Be careful
not to pierce the sheet metal with the corner of the Johnson bar.
When using a pallet jack or furniture rollers, only place them under the oor panels. Do not place them under the bumper support or
drain pipe as that will crush the components.
Cases have steel protective support plates under the end panels (not under insulated dividers) to protect them from Johnson bar damage.
Make sure that a forklift with the proper fork dimensions is available. Forks must be 48" long, 1 1/2" to 1 3/4" thick, and no more than 4"
wide to t the bases. Refer to the table below for instructions.
CASE MODEL INSTRUCTIONS
4ORMC (2-Door) Forks must extend 20" to 24" under the case from either end
6ORMC (3-Door) Forks must extend 26" to 30" under the case from either end
8ORMC (4-Door) Forks must extend 39" to 43" under the case from either end
12ORMC (6-Door) Forks must extend 44" to 47" under the case from either end
OPTIONAL BASES
Spacer blocks (also called ller blocks) are included in the end bases of 4 and 6-door cases that use bases taller than 4 1/2". These blocks limit
the case's forward tilt while it is being lifted by a forklift. The forks should be inserted above the spacer blocks (See Figure 2).
FIGURE 2: Spacer Block
4 3/8" max. opening for
4' & 6' cases.
3 3/8" max. opening for
8' & 12' cases.
Spacer Block(s)

6 • Installation & Operation
INSTALLATION & OpERATION
Leveling
Cases should be set level right to left to allow complete drainage of defrost and condensate water. Since a level oor area is seldom available,
the following steps are recommended to ensure a level installation. If your case uses seismic restraints, specic instructions for attaching
seismic restraints are included in your document package. Read and understand these instructions before assembling the lineup.
1. Measure off and mark on the oor the exact dimensions of the case lineup (See Figure 3). Refer to the xture plan or oor plan.
2. Snap a chalk line at the locations for the front and back positions of the bases.
3. Mark locations of all joints, both front and back.
4. Using a laser level or transit, nd the highest point along both base position lines. Using the high point as a reference, mark the difference
directly on the oor to each base, both front and back (See Figure 4).
5. Place enough shims under each base to equal the highest point. Shims should not extend beyond the front case bases or they will interfere
with installing trim. The shims should be oriented to sit under the front and rear bends of each base. Tape all shims in place (See Figure 5).
After the case is set, additional shims may need to be added at specic base locations (See Figure 6 on page 7).
6. The case must be leveled front-to-back and side-to-side. Ensure that the case is set square to within 1/8". Measure squareness from top
right corner to the bottom left corner, and then again from the top left corner to the bottom right corner. Measurements should be equal
(See Figure 7 on page 8).
7. Cases should be set with a slight backward tilt to offset the forward lean of a fully loaded case. We recommend an additional 3/8" of shims
be installed under the front bases after the case is leveled.
8. Place additional support shims under any bases with gaps taller than one shim. Note: Total height of shims should be less than 3/4".
FIGURE 3: Measure and Mark Exact Case Outline FIGURE 4: Mark Floor Level Difference
FIGURE 5: Tape Shims on the Floor Under Each Base
C
a
s
e
F
ro
nt
Case Fro
nt
Placement
Under Bases
Case Front

Installation & Operation • 7
INSTALLATION & OpERATION
FIGURE 6: Reveal Merchandiser®Base Locations
4ORMC 6ORMC
8ORMC
12ORMC
Drawings are top views with bases shown under the case.
Case length does not include end panels (1 1/2" wide each).

8 • Installation & Operation
INSTALLATION & OpERATION
LineupAssembly
Zero Zone display cases have been designed for continuous display so that multiple cases may be joined together to create a lineup of any
desired length. The lineup will be ready for assembly after removing the packaging material.
Acase lineup must be properly aligned, which starts with properly leveling the case (See "Leveling" on page 6). It is crucial to use a laser
level to measure the high points in the oor and properly shim each base location.
The bottom of the end panels are protected by steel support plates, which must be unbolted and removed before the lineup is set. There are
bolts that go up through the support plates into the underside of the foamed oor.
Acase must be prepared with Butyl caulk before setting the next case in the lineup. Case caulking instructions and caulk are shipped with every
case (See Figure 8 on page 9).
Move the next case into position and bolt it to the rst case using the joining bolts that are provided. Begin tightening the bolts at the top rear,
working down the back of the case and up the front, making sure that the seams are ush. Do not pull cases together using joining bolts.
For NSF case installation compliance, the interior case seams must be sealed using NSF-approved sealant (See Figure 9 on page 9). Do
not allow Butyl caulk and NSF-approved sealant to contact one another as this may affect adhesion or color of each.
FIGURE 7: Case Squareness
1. Measure squareness from top right corner of the case to the bottom left
corner of the case.
2. Measure again from the top left corner of the case to the bottom right
corner of the case.
3. Measurements should be equal. Difference should be no more than 1/8".

Installation & Operation • 9
INSTALLATION & OpERATION
FIGURE 8: Case Joint Caulking Instructions
IT IS CRITICAL TO FOLLOW THIS PROCEDURE TO
ENSURE CASESARE PROPERLY SEALED.
Note:Apply sealant to only one case—not both cases—as
excessive amounts of sealant may squeeze out of the case
joint. The sealant will spread out when the cases are joined.
1. Apply 1/4" to 3/8" wide beads of Butyl caulk along the ceiling,
rear wall, and base of the case where indicated by the dashed
lines in the drawing. Always apply 2 beads where specied.
2. After cases are joined and tightened, caulk the top and back
exterior seams, if possible, to ensure a tight seal.
3. Repeat this process between each case in the lineup.
SURFACES TO BE CAULKED MUST BE CLEAN,
DRY,AND FREE OF FROST (ABOVE 40ºF).
Note: NSF sealant must be applied with no gaps to seal the
case interior properly.
1. Cases must be properly caulked and joined before NSF
caulking.Avoid using excessive Butyl caulk to prevent it from
coming out of the joints because Butyl and silicone sealants
will not mix. That will affect adhesion.
2. Apply NSF-approved sealant (silicone-based) in small,
smooth beads where indicated by the dotted lines in the
drawing. Sealant must be added between cases at case
joints, between a case and an end panel, and between all
access holes and cut-outs in the case end frame. Do not thin
or feather excessively, as that may affect adhesion.
FIGURE 9: NSF Compliance Sealing

10 • Installation & Operation
INSTALLATION & OpERATION
Door Leveling (Door Sag/Sawtooth)
Doors must be leveled before the bumper and kickplate are installed (See
Figure 10).
For French-swing doors, there should be a 7/16" gap between doors at the
handle side and a 3/8" at the hinge side. To set the proper gaps, loosen the
screws holding the top or bottom door mounting plates, then shift the door.
BOTTOM MOUNTING PLATE
To move the bottom mounting plate, the center locking screw (located behind
the bumper) must be loosened.
1. To remove the bumper, use a athead screwdriver to pry it up from the
bottom. Lift the edge, and then slide the screwdriver down the entire
length of the bumper to loosen it. Once the bottom edge is disconnected,
use a hammer to tap the screwdriver upwards and disengage the bumper
from the upper track. Remove the bumper.
2. Loosen the center locking screw by 2 turns, accessed through the hole
in the bumper support plate (See Figure 11). This will allow the bottom
mounting plate to shift. Do not remove the center locking screw.
3. Tap the door’s aluminum extrusion with a rubber mallet to shift the door.
Once the door is in position, retighten the center locking screw.
TOP MOUNTING PLATE
1. To access the top mounting plate, remove the top trim piece. This will
require a Phillips bit and a 1/4" hex screw bit.
2. Loosen all 3 screws that secure the slotted plate by 2 turns (See Figure
12). Do not remove the screws.
3. Tap the door's aluminum extrusion with a rubber mallet to shift the door.
Once the door is in position, retighten all screws.
Drain
The 1.5" PVC drain line exits from the bottom center of the case. The lateral
runs of drain pipe should be installed through the bases, as needed (See
Figure 13). There is no room in front of the base for the drain pipe because the
kickplate installs directly to the front of the bases.
Install the drain tee to the outlet pipe and a drain trap to the tee. Plug the open
end of the tee using the clean-out plug supplied with the drain trap kit. The
drain line must be pitched away from the case. The tee, drain trap, and plug
are supplied with the case. The drain trap must be level.The drain trap should
be primed with water after installation. The drain line must be pitched away
from the case enough to ensure proper drainage, typically at least 1/4" per foot.
Consult your local codes for minimum requirements.
The forward drain section, tee, and “R” trap are shipped loose for eld
installation.
FIGURE 10: Properly Leveled Doors
7/16" Gap on
Handle Side 3/8" Gap on
Hinge Side
FIGURE 11: Center Locking Screw
FIGURE 12: Top Mounting Plate
FIGURE 13: Drain Installation

Installation & Operation • 11
INSTALLATION & OpERATION
Kickplates
Each case is shipped with a front kickplate. Cases with end panels are shipped with 1 side kickplate per end panel. Cases that join together are
shipped with a kickplate splice.
Front and side kickplates are attached to the case bases using Tinnerman
clips. Position the front kickplate so the ange is on top and facing outward.
The screw (supplied) goes through the kickplate and into the Tinnerman clip
(See Figure 14).
1. Install Tinnerman clips at each base.
2. Install side kickplate.
3. Install front kickplate.
4. Insert fasteners to secure kickplates.
There is a natural gap between the top of the kickplate and the underside of
the Reveal Merchandiser® that allows airow of 20 CFM/foot. If more airow is
required, contact the factory to order optional louvered kickplates (provides 60
CFM/foot).
Bumper
Cases are supplied with a protective bumper shipped loose on top of each case. The steel bumper support and snap track are factory-installed
on the front of the case. The bumper may need trimming before snapping it onto the snap track. Door leveling must be completed before
attaching the bumper (See "Door Leveling (Door Sag/Sawtooth)" on page 10).
Top Trim Splice
Top trim is factory installed, and it hides the door hardware located on the top
exterior of the case. Joint splices are shipped loose and must be eld-installed at
the upper case joints (See Figure 15). Screw the top trim joint splice to the top trim.
CoolView®Doors
Door leveling must be completed before attaching the bumper (See "Door Leveling
(Door Sag/Sawtooth)" on page 10).
COOLARC™DOOR HANDLES
The CoolArc™door handle is attached to the glass surface of the door by an industrial-grade adhesive.
DOOR CLOSER /ADJUSTING DOOR TENSION
The door closer is a spring cartridge that automatically closes the door. It is located on the bottom of the hinge-side of the door. Asquare pin
inside the door closer ts into a square opening on the door, transferring the spring tension to the door. This means that the square pin must be
aligned with the square opening when installing a door.An adjustment screw on the front can be used to increase or decrease tension.
1. Open the door to observe current door tension.Aproperly tensioned door will close itself gently and not swing open.
2. Use a athead screwdriver to turn the door tension screw (See Figure 16 on page 12). Do not use power tools; a screwdriver allows
for more control.
FIGURE 14: Kickplate Installation
DETAIL A (ASSEMBLED)
4. INSERT FASTENERS TO SECURE KICKPLATES
3. INSTALL KICKPLATE FRONT
1. INSTALL TINNERMAN NUTS AT EACH BASE
2. INSTALL KICKPLATE END
DETAIL A (EXPLODED)
BASE
TINNERMAN NUT
KICKPLATE END
KICKPLATE INSTALLATION
KICKPLATE FRONT
REV.SP-6108 B
SPECIFIED, ALL DIMENSIONS
(PER SP-0457) REVEAL
TOLERANCES:
RELEASED
PART WEIGHT:
(IN LBS)
REVISION INFORMATION
BREMOVE EXTRA KICKPLATE COMPONENT FROM DETAIL A. 978
NO MANUAL REVISIONS
CONSENT OF ZERO ZONE, INC. IS STRICTLY PROHIBITED.
CAD DRAWING
REPRODUCTION OR OTHER MEANS, WITHOUT THE WRITTEN
FINISH:
(PER SP-0404)
(UNLESS OTHERWISE SPECIFIED)
(PER SP-0154)
MATERIAL:
SIZE
NOT TO SCALE
Ron Oman
SCALE:
MODELED BY:
A
ZERO ZONE, INC.
DOCUMENT OR DISCLOSURE OF ITS CONTENTS; BY
ARE IN DECIMAL INCH
7/27/2016
B
1 OF 1
SP-6108
KICKPLATE ASSEMBLE FIELD
SHEET:DATE:
REVISION
SHEET
DRAWN BY:
UNLESS OTHERWISE
USA 53153
DRAWING No:
DESCRIPTION:
BY
DATE
ECN No.
REVISION DESCRIPTIONNo.
BF6/9/2020
COPYRIGHT INFORMATION
THIS DRAWING AND THE INFORMATION CONTAINED WITHIN, IS
THE SOLE PROPERTY OF ZERO ZONE, INC. ANY USE OF THIS
110 NORTH OAKRIDGE DRIVE
NORTH PRAIRIE, WISCONSIN
David Giese
A
Base
Front
Kickplate
Side Kickplate
Tinnerman Clip
Fastener
F
5.75
GRAIN DIRECTION
IF STAINLESS STEEL
.88
.88
FINISH SIDE REF
NOTE 1
.41
.63
4.50±.03
.188±.010
NOTES:
1. NOTED FACE AND ALL ADJACENT EDGES ARE TO BE FINISHED
PART INFORMATION
PART NUMBER
BASE METAL
FINISH
37-0437-P1
.032 ALUMINUM
BLACK
37-0437-P2
.032 ALUMINUM
WHITE COIL COAT
37-0437-P3
.032 ALUMINUM
PEARL COIL COAT
37-0437-P4
.032 ALUMINUM
SAVANNAH YELLOW COIL COAT
37-0437-P5
24 GA GALV
CHEM TREAT DRY
37-0437-P7
20 GA 204 STAINLESS STEEL
#4 BRUSHED
37-0437-P11
24 GA GALV
ANTIQUE COPPER TIGER DRYLAC
49/90620
37-0437-P16
24 GA GALV
TEXTURED WHITE
37-0437-P18
24 GA GALV
SILVER METALLIC
37-0437-P19
24 GA G60 GALV SEVILLE EMBOSSED
EMBOSSED WHITE
37-0437-P20
24 GA GALV
MATTE BLACK TIGER DRYLAC
009/80450
37-0437-P21
24 GA GALV
MEDIUM GRAY, TIGER DRY LAC
049/70785 IRON GLIMMER EFFECT
POWDER COATED
37-0437-P23
24 GA GALV
GOLDEN BROWN
37-0437-P24
24 GA GALV
SPANGLED SILVER, POWDER-COAT
37-0437-P32
24 GA GALV
TYGER DRYLAC 049/707/89 db FINE
TEXTURE GLIMMER
37-0437-P33
24 GA GALV
TYGER DRYLAC 09/60610 BEIGE
FULL HT GEN 2
ZERO ZONE WORKMANSHIP STANDARDS SHALL APPLY PER
ES-08-1007
ASME Y14.41-2012 & ASME Y14.5-2009 SHALL APPLY AS REQUIRED
ALL DIMENSIONS IN INCH UNLESS OTHERWISE SPECIFIED
RELEASED
SIGNIFICANT DIMENSIONS DENOTED BY
X.XX
OR
X.XXX
AND MUST MEET Cpk ≥ 1.33.
CRITICAL DIMENSIONS DENOTED BY
X.XX
OR
X.XXX
AND MUST MEET Cpk ≥ 1.66.
CAD DRAWING
NO MANUAL REVISIONS
COPYRIGHT INFORMATION
THIS DRAWING AND THE INFORMATION CONTAINED WITHIN,
IS THE SOLE PROPERTY OF ZERO ZONE, INC. ANY USE OF
THIS DOCUMENT OR DISCLOSURE OF ITS CONTENTS; BY
REPRODUCTION OR OTHER MEANS, WITHOUT THE WRITTEN
CONSENT OF ZERO ZONE, INC. IS STRICTLY PROHIBITED.
SEE CHART
SEE CHART
FINISH:
(PER SP-0154)
MATERIAL:
(PER SP-0404)
NOT TO SCALE
SCALE:
MODELED BY:
DRAWN BY:
9/1/2015
F
1 OF 1
37-0437
SPLICE TOP TRIM CRSTL/CRSTL
SHEET:
DATE:
REVISION
ZERO ZONE, INC.
110 NORTH OAKRIDGE DRIVE
NORTH PRAIRIE, WISCONSIN
USA 53153
DRAWING No:
DESCRIPTION:
REVISION INFORMATION
F
ADDED P32 AND P33
12552
12/29/2017
DB
No.
REVISION DESCRIPTION
ECN No.
DATE
BY
UPDATED DIMENSIONS WITH NEW TITLE BLOCK
Kurt Albrecht
SHEET SIZE
A
TOLERANCES SHALL APPLY
UNLESS OTHERWISE SPECIFIED
.X = ± .1 .XX = ± .02
.XXX = ± .005 ANGLES, ± 1º
FIGURE 15: Top Trim Splice

12 • Installation & Operation
INSTALLATION & OpERATION
3. To increase tension, hold the door open 2" and turn the screw counter-clockwise
until the door begins to close. Once it closes, increase tension by 2 more turns.
4. To decrease tension, turn the screw clockwise.
The screws holding the door closer are secured with removable threadlocker gel; extra
force will be necessary to remove them.
HOLD-OPEN BRACKET
CoolView®doors are self-closing, and closing tension increases as the door opens wider.
The hold-open bracket keeps the door open when engaged, which is useful for stocking
shelves or case maintenance. To engage the hold-open bracket, open the door to 90°
until it clicks. Closing the door to about 80° will release tension on the door, and it will self
close again.
DOOR GASKET
Upper and lower horizontal magnetized gaskets run the length of each case. The gaskets mate up to steel plates installed at the top and bottom
of each door.Asweeper gasket runs along the handle-side of each door.Aspecialized bulb gasket runs along the hinge-side of most doors,
except where two hinges meet, then only the left door has the gasket.
REMOVINGA DOOR
Note: The top trim piece must be removed to access the door shoulder bolt. This
will require a Phillips bit and a 1/4" hex screw bit.
1. Remove hold-open bracket, located on the bottom of Reveal™with doors.
2. Turn door tension screw clockwise until door does not close on its own. This
removes tension between the door and torque adjuster.
3. Remove shoulder bolt and bushing on the top of the hinge-side of the door (See
Figure 17). Only remove the bolt holding the door; do not remove the bolts attached
to the case.
4. Pull the top corner of the door away from the case. Note: The door is heavy. Be
prepared to hold the weight of the door.
5. Lift the door up and clear of the torque adjuster and set down carefully. Note: For
safety, do not lift the door by the handle.
Shelves & Stocking Product
Shelf location may be adjusted in 1" vertical increments in any position for best display advantage. Make sure the shelf brackets are securely
seated before placing any product on the shelf. The standard shelves may be tilted down at a 10° angle. Optional shelf assemblies are available
that may be tilted at 5°, 10°, or 15° angle.
The case may be stocked with product after it has operated at least 24 hours with correct case temperature and proper control operation. When
stocking the shelves, leave at least a 1" gap between the product and the shelf above, which allows air to circulate over and around the product.
Product should not extend beyond the front of the shelves or bottom wire rack. Note: Do not place product on the return air grille. Do not
exceed shelf load capacity (See Figure 18 on page 13). Do not stand on the case when stocking or adjusting shelves.
To unassemble a shelf, insert a putty knife between the side of the shelf and the shelf bracket. Pry the pieces apart to disengage the bracket.
FIGURE 17: Door Shoulder Bolt
FIGURE 16: Door Tension Screw

Installation & Operation • 13
INSTALLATION & OpERATION
SHELF TYPE DEPTH BRACKET TYPE LOAD CAPACITY (LBS.)
Solid Shelf,
Standard Duty
22" 2-Position (0°/10°) 250/150
4-Position (0°/5°/10°/15°) 250/250/150/100
24" 2-Position (0°/10°) 250/150
4-Position (0°/5°/10°/15°) 250/250/150/100
Solid Shelf,
Heavy Duty
22" 2-Position (0°/10°) 350/275
4-Position (0°/5°/10°/15°) 350/300/275/250
24" 2-Position (0°/10°) 350/275
4-Position (0°/5°/10°/15°) 350/300/275/250
FIGURE 18: Shelf Load Capacities

14 • Refrigeration
REfRIgERATIONREfRIgERATION
Mechanical Components
Air is circulated through the display case by evaporator fans, which are located below the deck pans in the bottom of the case (See Figure 19).
Air is drawn through the front return air grill and discharged out of the honeycomb at the top.
The evaporator coil, located at the rear bottom of the case, can be inspected by removing the deck pans. Unless otherwise specied, the
thermostatic expansion valve (TXV) is mounted to the evaporator coil (See Figure 20). Superheat should be adjusted to 6-10°F. Contact Zero
Zone for high-glide refrigerants.
Glycol cases typically have a balance valve located in the outlet line inside of the case. If a stop solenoid is provided, it will also be located in
the outlet line. Schrader valves are provided inside the case on the right-hand side of the coil for venting and draining the system.
Refrigerant Piping
Correct refrigeration line sizing and industry standard installation practices are essential for proper system operation (See Figure 21 on page
15).After connections have been made, the refrigeration access hole in the case must be sealed completely with an aerosol-dispensed
urethane insulation or equivalent (example: Great Stuff). Penetrations made in sheet metal bafes should also be sealed.
Operation Set Points
Refer to the case spec sheet for Btu/h requirements and electrical requirements. Operate the case at the proper settings to maintain correct
product temperature, per food safety regulations (See Figure 22 on page 16). Note: Set points are based on at shelves. Alternate
shelving—such as angled or tiered shelving, peg hooks, or produce inserts—may require lower operating temperatures.
FIGURE 19: Fans and
Case-to-Case Piping FIGURE 20: Expansion Valve Next to Evaporator Coil

Refrigeration • 15
REfRIgERATION
FIGURE 21: R-404ALine Sizing Tables for Zero Zone Cooler (28°F Evaporator Temperature)

16 • Refrigeration
REfRIgERATION
Off-Cycle Defrost
Periodic defrosting is necessary to keep the evaporator coil free of frost. See Figure 23 for defrost settings.
During off-cycle defrost, refrigerant is stopped either by stopping the compressor or by closing the liquid line solenoid valve and allowing the
compressor to pump down. The fans and lights remain on during off-cycle defrost.
If temperature termination is selected, set the termination temperature for 45°F for discharge air and coil temperature. Note: Opening the
doors, stocking product, or shopping during off-cycle defrost may cause premature defrost termination.
Case Thermometer
An NSF thermometer is shipped loose and should be installed in the warmest product location as required by NSF. Specic eld installation
instructions are packaged with the NSF thermometer.
SETTING ORMC83D ORMC88D
Evap Temp 28°F 28°F
Condensing Unit Cut-In 74 psig 74 psig
Condensing Unit Cut-Out 62 psig 62 psig
ReturnAir Temperature Cut-In 37°F 37°F
ReturnAir Temperature Cut-Out 33°F 33°F
DischargeAir Temperature Cut-In 34°F 34°F
DischargeAir Temperature Cut-Out 30°F 30°F
Superheat Setting * 8°F 8°F
Note: For high-glide refrigerants, use dew point for unit sizing.Adjust evaporator
pressure as needed to maintain discharge air temperatures. To receive the full
benet of high-glide refrigerant properties, the superheat may need to be lowered
to 4-6°F. Contact Zero Zone with questions.
FIGURE 22: Case Temperature Internal Control Options (R-404A)
SETTING ORMC83D ORMC88D
Defrost Type Off-Cycle Off-Cycle
Frequency 2 Per Day 2 Per Day
Duration 30 Minutes 30 Minutes
FIGURE 23: Defrost Settings

Electrical • 17
ELECTRICALELECTRICAL
General
! CAUTION! DISCONNECT POWERTOTHE CASE BEFORE SERVICING ELECTRICALCOMPONENTSTOAVOID PERSONAL
INJURYAND DAMAGE TO THE UNIT.
Cases will have 2 electrical circuits for the fan circuit and the lighting circuit.
The electrical enclosure is located behind the lower trim on the right side of
the case. The enclosure includes the power connection and power supplies
for the LED light sticks. The light switch is located on the front right side of the
false ceiling (See Figure 24). When supplying electrical power to the case,
connect to the supplied black and white wires and wire nuts inside the electrical
enclosure.Aground connection should also be connected inside the electrical
enclosure. See Figure 25 for typical wiring diagram with off-cycle defrost.
Note:Always refer to the wiring diagram shipped with the case.
Optional top electrical will be located in a junction box on top of the case.
External wiring should be sized according to the amperage rating stamped on
the serial tag, which is located on the ceiling inside the left-hand door. Typical
electrical values are shown on specication sheets that are available online. All
internal wiring has been completed at the factory.
All wiring must comply with the National Electrical Code (NEC) and all local codes.After installing the equipment, correct operation of the
electrical circuits, controls, and defrost controls should be veried. All operating voltages and amperages should be measured and recorded.
In coolers, 1 sensor bulb is factory installed. Temperature probe wires are white (common) and green (supply). The temperature probe
(discharge air) is located in the false ceiling.
FIGURE 25: Sample Wiring Diagram
FIGURE 24: Light Switch

18 • Maintenance
MAINTENANCEMAINTENANCE
Cleaning
Although each Zero Zone display case is thoroughly cleaned before shipping, the cases should be thoroughly cleaned again before start-up and
routinely thereafter to maintain a clean appearance. With just a few minutes of cleaning each week, the case will remain in top condition.
1. Do not use high-pressure water or steam to clean the interior or any components.
2. Do not wash fan motors.Adamp cloth can be used to wipe the fan motors. Cover the fan motors with a plastic bag when washing the case.
3. Wipe out the case interior using mild detergent and warm water (never an abrasive cleaner).
4. Clean all glass doors, windowed ends, and mirrors using glass cleaner. Cleaning interior glass reduces fogging and increases visibility.
If your doors have an anti-fog coating, do not use any cleaning products containing silicone.
5. Internal components can be cleaned after removing coil covers, access panels, and sheet metal components. Use a mild detergent and
warm water or a mild sanitizer.
6. If the case is equipped with a condensate pan and pump, the drain should be blocked before washing coils. Water can be removed with a
shop vacuum.
7. Coils may be cleaned with a garden hose or pails of water. If the case is equipped with a condensate pan and pump, cases should be
cleaned with a minimal amount of water so the evaporator, pump, and drain pans do not get overlled.
8. The case drain should frequently be cleaned of debris to prevent clogging. If water is not draining, check to see if the drain is clogged.A
clean-out tee can be accessed from the front of the case behind the kickplate.
UNDER CASE FLOOR CLEANING (NSF)
The oor under your Zero Zone display case can be cleaned by following these steps:
1. Remove the fasteners attaching the kickplate to the case. The fasteners are accessed from the front of the unit.
2. With the kickplates removed, vacuum under the case to remove any dirt, debris, and dust build-up.
3. Mop under the unit using non-abrasive oor cleaner and warm water.
4. When nished mopping, squeegee any remaining water under the unit to the oor drains to speed up the drying process. Replace the
kickplates when the oor has dried.
This manual suits for next models
1
Table of contents
Other Zero Zone Display Case manuals
Popular Display Case manuals by other brands

Kysor/Warren
Kysor/Warren DX6LN-MCU Installation and operation manual

Casselin
Casselin CVG413 manual

Costan
Costan AERIA Series User instructions

Turboair
Turboair CRT-77-1R Installation and operation manual

Hillphoenix
Hillphoenix ORIGIN2 ONIZ Installation & operation handbook

Delfield
Delfield F5MR48N Specifications

Royal Catering
Royal Catering RCKV-AMS user manual

Delfield
Delfield Dual View 536-SR68 Service, installation and care manual

Tecnodom
Tecnodom Salina Installation and operation guide

Vibocold
Vibocold OSC OSLO SELF SERVE user manual

Federal
Federal SN48 Installation & operation instructions

Maxima
Maxima SC 58L user manual