manuals.online logo
Brands
  1. Home
  2. •
  3. Brands
  4. •
  5. Zodiac Pool Systems
  6. •
  7. Swimming Pool Filter
  8. •
  9. Zodiac Pool Systems Jandy JS100-SM Manual

Zodiac Pool Systems Jandy JS100-SM Manual

This document gives instructions for replacing all
of the o-rings, seals and screws in all Jandy JS100-SM
Model Side Mount Sand Filters. Replacement of all of
the o-rings and seals requires the complete disassem-
bly and reassembly of the lter components and piping
subassemblies.
The instructions were written with safety as the
priority and must be followed exactly. Not following the
written procedure or taking shortcuts may increase the
risk of personal injury. Read through the instructions
completely before starting the procedure.
Before starting the procedure, use the parts list at
the back of these instructions to identify the parts that
are in your kit. In addition to the parts supplied in this
kit, a small amount of silicone sealant is required. If
any parts are missing from the kit please call your local
Jandy distributor for assistance. For technical assistance,
please contact the Zodiac Pool Systems, Inc. Technical
Support Department at 1.800.822.7933.
A. Remove the Lid
WARNING
SHOCK HAZARD!
Turn off all switches and the main breaker in the
pool/spa heater electrical circuit before starting the
replacement procedure. Failure to comply may cause
a shock hazard resulting in severe personal injury or
death.
Replacement Kit Instructions
Jandy® JS Sand Filter O-Rings, Seals and
Hardware Replacement Kit
WARNING
FOR YOUR SAFETY: This product must be installed and serviced by a professional service techni-
cian, qualied in pool/spa pump and lter installation and maintenance. Improper installation and/
or operation can create dangerous high pressure which can cause product failure or also cause
the filter lid to be blown off, possibly causing death, serious injury or property damage. Improper
installation and/or operation will void the warranty.
These instructions are to be used with the following Jandy Replacement Kit:
R0488500 -- JS100-SM O-Ring and Hardware Replacement Kit
WARNING
Before installing this product, read and follow all warning notices and instructions that
accompany this lter replacement kit. Failure to follow warning notices and instructions may
result in property damage, personal injury, or loss of life.
H0332400-
WARNING
Never attempt to adjust or remove the
lid when the pump is running or there is
pressure in the system. This can cause
product failure or also cause the filter lid
to be blown off which can result in
death, serious personal injury, or
property damage.
1. Before attempting to loosen or remove the lid, turn
OFF the pump and OPEN the air release valve on
top of the lter. DO NOT attempt to loosen or
remove the lid while the pump is running or if the
lter pressure gauge indicates there is pressure in
the lter.
2. First, try to remove the lid by hand using the
handles.
3. If removal by hand is not successful, use a mallet
or soft-faced hammer to alternately strike the
handles to loosen the lid.
B. Drain Water From The Filter
1. Remove the water drain cap and drain the water
from the lter. See Figure 1.
C. Remove the Sand From the Filter
1. The sand may be removed by scooping it out
through the lter lid opening, vacuuming it out
with a suitable wet/dry shop vacuum supplied by
a GFCI protected circuit, or may be ushed out of
the lter through the large tting at the drain. See
Figure 2.
2. If desired, a universal tailpiece connection, part
number R0449000 (not included in kit), can be
Page 2
used with a short piping section to direct the
ushed sand away from the base of the lter. See
Figure 3.
3. Rinse the internal piping to remove the sand.
D. Remove the Internal Piping Assemblies
From the Filter
1. Slide the vent screen and grommet from the end of
the tubing extending above the diffuser. See
Figure 4.
2. Pull the tubing out of the bottom of the diffuser.
3. Unscrew the diffusers from the inlet piping
assembly.
4. Cut the cable tie that secures the piping.
5. Remove the hex head screws that connects the hub
pipe subassembly to the outlet pipe subassembly.
Disconnect the hub pipe subassembly from the
outlet pipe subassembly.
Flush Out Sand
Through Large Fitting
Unscrew
Universal
Coupling Nut
Drain Screen
O-Ring
Large Fitting
For Sand Flushing
O-Ring
Univeral Tailpiece (Not Included)
Universal
Coupling Nut
Short Piping to Direct
Flushed Sand Away
From Filter Base
Figure 2. Sand Flushing Fitting
Figure 3. Universal Tailpiece Connections
Hub Pipe
Subassembly
Vent Screen with
Rubber Grommet
and Tubing
Diffuser
Hex Head
Screws
Outlet Pipe
Subassembly
Wye
Subassembly
Inlet Pipe
Subassembly
Hub and
Laterals
Diffuser Pupe
Subassembly (2)
Diffuser
Cable Tie
Compression
Fitting
Figure 4. Piping Components
Hold fitting when
removing or
installing drain cap
1 1/2” NPT Water
Drain Cap
Figure 1. Water Drain Cap
6. Unscrew the outlet pipe subassembly from the tank
outlet tting.
7. Remove the hex head screw that connects the
wye subassembly to the inlet pipe subassembly.
Disconnect the wye subassembly. The complete
wye assembly with the two (2) diffuser pipe
subassemblies may now be removed through the lid
opening at the top of the lter.
8. Lift the hub pipe subassembly through the lid
opening at the top of the lter and unscrew seven
(7) of the eight (8) laterals from the hub. Remove
the pipe assembly, hub and laterals for the lter.
9. Unscrew the inlet pipe subassembly from the tank
inlet tting.
Page 3
E. Removal and Replacement of the Inlet
and Outlet Bulkhead Fittings
CAUTION
This procedure must be followed exactly. Failure to
follow the procedure exactly can result in system
leaks or property damage.
1. Use a brush to clear all sand from the exposed
tting threads and rinse with water. Removal of the
nuts will be difcult if there is sand in the tting
threads.
Note: Make sure that the exposed threads are free of
sand before continuing with the next step.
2. Remove the nuts from the bulkhead ttings.
Note: Donotrotatethebulkheadttings.Usetheats
onthebulkheadttingtoholditfromrotating
while the nut on the inside of the tank is re-
moved.
3. Thoroughly clean any parts that will be reused.
4. Reassemble ttings taking care that the curved
surfaces of the spacers are towards the tank. Ensure
that the wide spacer on the outside of the tank is
on the top (outlet) port, and the narrow spacer is
placed on the bottom (inlet) port. See Figure 5.
5. When tightening the nuts on the bulkhead tting
assemblies, DO NOT rotate the bulkhead ttings.
Orient the bulkhead ttings such that the wrench
at with the part number on it faces up. This will
put the keyway in the bulkhead tting at the top
and will keep the curvature of the tank. Use the
wrench ats on the bulkhead tting to hold it in this
position and do not rotate the bulkhead tting while
the nuts are being tightened inside the tank.
F. Remove and Replace the Drain Fitting
1. Remove the drain tting nut and o-ring from the
outside of the tank.
2. Thoroughly rinse and wipe clean the inside and
outside surfaces of the tank around the drain tting
hole.
3. Reassemble the drain tting as shown in Figure 6.
Before installing the o-ring at the drain tting nut,
brush soapy water (mild detergent or bar soap and
water) onto the o-ring. Tighten the drain tting
nut.
4. Clean and reinstall the drain screen assembly and
drain cap.
G. Reassemble the Internal Piping
Assemblies Inside the Filter
Note: Allpartsmustberinsedandushedcleanof
sand before assembly, inside and out. If old
lateralsarebeingreused,brushanyltermedia
from the slots.
1. Make sure the keyways in the inlet and outlet
ttings are dry. Place a dab of silicone sealant
(about ¼ inch diameter) in each of the keyways
against the nut of both the inlet tting and outlet
tting (silicone sealant is not provided in the kit).
2. Thread the inlet pipe assembly (this is the assembly
with the shorter piece of pipe with four (4) holes
drilled and a female adapter on the opposite end)
onto the inlet bulkhead tting hand tight only.
Adjust the pipe so a screw hole is facing up. Refer
to Figure 4.
3. While holding the pipe of the hub sub assembly,
place the hub inside the top of the tank and
thread the laterals into the hub. Ensure laterals
are threaded fully into the hub and are hand tight.
Drain Inner Seal
Drain Fitting
Tank
Base
O-Ring
Drain Nut Fitting
Figure 6. Drain Fitting
Inner Spacer
(Curved Side
Towards the Tank)
Nut
Slip Ring
Bulkhead
Fitting
Narrow Spacer
on Inlet Fitting
(Curved Side
Towards Tank)
Wide Spacer on
Outlet Fitting
(Curved Side
Towards Tank)
Flat
Gasket
O-Ring
Figure 5. Inlet and Outlet Fitting Parts
Page 4
Table 1. Required Sand Level
Model Freeboard
"F" inches
(cm)
Sand Only
lbs (kg)
Layered Media
Pea
Gravel
lbs (kg)
Sand lbs
(kg)
JS100-SM 11 1/4" (31) 600 (273) 175 (80) 425 (193)
Notes: All media to be marked as meeting NSF®requirements for
Sand Filters.
Sand is to be #20 Silica Sand (.016"-.021").
Pea Gravel, if used, is to be 1/8" to 1/4" diameter range.
2. Before adding any filter media, ensure the laterals
(spokes) are screwed firmly into the hub and that
the hub is centered in the tank with the laterals
(spokes) horizontal.
CAUTION
To avoid damaging the laterals (spokes), slowly add
theltermediauntilthelateralsarefullycovered.
Cracked or broken laterals (spokes) will cause sand
to be discharged to the pool.
3. Add water to approximately 4 inches above the
level of the laterals.
4. Place a plastic bag over each of the diffusers
to completely cover all of the holes. Keep the
diffusers covered until the addition of the filter
media is completed.
5. If used, pour pea gravel SLOWLY into the filter
first. Level the surface of the gravel, and then
pour in the appropriate amount of sand to the level
indicated in Table 1. If using sand only, pour it into
the filter SLOWLY to the level indicated in Table
1. Be careful not to dislodge the vent tubing from
its fitting in the piping while adding filter media.
Refer to Figure 8.
6. Remove the plastic bags from the diffusers. Wash
away any sand or dirt particles in the threads in the
top of the tank.
7. Ensure diffuser(s) are upright and centered
properly.
Lid/Top of Filter
Vent Screen
in Close Proximity
to Filter Lid
Diffuser
Venting Tubing
to Fitting in Piping
Figure 7. Automatic Vent Positioning
Lower the hub and laterals assembly to rest on the
tank bottom, and turn the elbow away from the
bulkhead ttings to provide working room for the
next steps.
4. Thread the outlet pipe assembly (this is the
assembly with the longer piece of pipe with four
(4) holes drilled and a female adapter on the
opposite end) onto the inlet bulkhead tting hand
tight only. Adjust the pipe so a screw hole is facing
up.
5. Prepare the wye subassembly. The diffuser pipe
subassemblies may be connected to the wye
subassembly before it is placed into the lter, or
afterwards. Use a hex head screw to attach the
diffuser pipe subassemblies to the wye. Insert the
assembly into the lter. Connect the wye to the
inlet pipe assembly, align the screw holes and
fasten in place using a hex head screw.
6. Connect the elbow of the hub pipe assembly to
the outlet pipe assembly, align the screw holes and
fasten in place using a hex head screw.
7. Thread the cable tie through the hole in the wye
plate, wrap it around the hub pipe and fasten it tight
around the pipe.
8. Install the air relief tubing and vent screen as
follows:
a. The body of the compression tting connector
should be fastened rmly into the threaded hole
in the outlet pipe assembly. Loosen the threaded
cap on the connector about one (1) turn from the
tight position, but do not remove this cap from the
tting.
b. Slide the tubing into the end of the cap until it
bottoms out. Tighten the end cap and check the
tubing. It should not pull out.
9. Screw the diffusers hand-tight onto the diffuser
pipes.
10. Complete the assembly of the air relief. Thread
the free end of the air relief tubing through the
diffuser (see Figure 7). Slide the vent screen with
its grommet onto the end of the tubing so that the
tubing is approximately 3/4 the distance into the
screen.
H. Relling the Filter with Sand
Jandy high rate sand lters most commonly use
sand as a lter medium, or sand over a shallow layer of
pea gravel. If pea gravel is used, it will cover the laterals
to approximately 1" above the laterals. The use of lter
media other than sand is also described in Section I.
1. Sand density can vary depending on the sand and
how much moisture it is carrying. For this reason,
consider the sand weights given as approximation
only. Determine the actual amount of sand to add
based on freeboard dimension shown in Table 1.
Page 5
Air Release Valve Vent Hole
Lid Flange Fully
Seated Against Tank
Air Vent
Screen
Figure 9. Filter Lid Installation
WARNING
The automatic vent screen and tubing
must be positioned properly to avoid
trapping air inside the filter. Trapped air
can cause product failure or also cause
the filter lid to be blown off, which can
result in death, serious personal injury,
or property damage.
8. Make sure that the automatic vent tubing is in
place (threaded through the diffuser) and the vent
screen is installed at the top of the vent tubing. See
Figure 7.
I. Use of Zeobrite®as an Alternative to
Sand
As an alternative lter media for use instead of
sand, Zeobrite has been qualied for use in Jandy JS
series lters.
1. For filter sizes of 30 inches in diameter and
greater, it is recommended that a pea gravel bed
be used before adding the filter media. See Table
2 for the type and amount of pea gravel to use.
Ensure the top surface of the pea gravel is flat
before adding filter media.
Using the correct pea gravel will ensure that the
filter media is evenly lifted during backwashing
cycles and settles evenly after backwashing to
optimize filter performance. The pea gravel will
cover the laterals to approximately 1" above the
laterals.
2. Fill the filter with Zeobrite to the level shown
in Table 2. The weight of the material shown is
approximate. See Figure 8 for the illustration of
"Freeboard".
Table 2. Required Zeobrite Level
Model Freeboard
"F" inches
(cm)
Layered Media
Pea Gravel*
lbs (kg)
Zeobrite lbs
(kg)
JS100-SM 11 1/4" (31) 175 (80) 270 (122)
* Pea Gravel is to be 1/8" to 1/4" in diameter.
J. Lid Installation
WARNING
Follow these instructions carefully.
Improper lid installation can cause
product failure or also cause the filter lid
to be blown off, which can result in death,
serious injury, or property damage.
WARNING
Never attempt to adjust or remove the
lid when the pump is running or there is
pressure in the system. This can cause
product failure or also cause the filter
lid to be blown off which can result in
death, serious personal injury, or property
damage.
1. Ensure that the lid seal is fully seated within the
groove in the flange of the lid.
2. Before installing the lid, ensure that the air vent
screen at the top of the air vent tubing is properly
located above the diffuser such that it will be close
to the underside of the lid when the lid is installed.
See Figure 9.
WARNING
Inspect the lid and tank for any damage before in-
stalling the lid. A damaged lid or tank could cause the
lid to be blown off which can result in death, serious
personal injury, or property damage.
3. Inspect the threads to make certain that they are
free of sand particles and wipe the threads on the
tank and lid clean of any sand or debris. Apply a
light coating of liquid dish washing detergent or
Freeboard "F"
Sand or
Sand and Gravel
Figure 8. Sand Level
Page 6
bar hand soap with some water to the lid sealing
surface on the top of the tank before installing the
lid. Do not use any type of oil or grease that can
cause sand to get caught in the threads. Thread the
lid into the tank, making certain that the lid threads
in smoothly. If resistance is felt while turning,
remove the lid and ensure that it is not being cross-
threaded into the tank and the threads are free
of sand. Use the handles to tighten the lid hand-
tight only. Do not use impact or hammers when
installing the lid.
WARNING
Fiberglass and threads have sharp edges. To avoid
cuts, use a brush to clean threads free of sand or dirt.
4. When the lid is fully installed, the seal flange must
contact the surface of the tank.
5. If not already in place, the filter gauge/air relief
valve assembly should be installed.
H. Start-Up and Operation
WARNING
NEVER start pump while standing
within 5 feet of the filter. Starting the
pump while there is pressurized air in
the system can cause product failure
or also cause the filter lid to be blown
off, which can cause death, serious
personal injury or property damage.
WARNING
NEVER operate the filter system at
more than 50 psi of pressure. Operating
filter system in excess of 50 psi can
cause product failure or also cause
the filter lid to be blown off, which can
cause death, serious personal injury or
property damage.
CAUTION
DONOToperatelteratwatertemperaturesabove
104° F (40° C). Water temperatures above the manu-
facturer's recommendations will shorten the life span
ofthelterandvoidthewarranty.
Once service on the circulating system is completed,
the system must be properly vented of all air. Do the
following steps:
1. Turn off the pump. Switch off the circuit breaker
to the pump motor.
2. Check that the drain plug is in place and tight.
3. Check that the tank lid is correctly seated and
tight, see Figure 9, and ensure the pressure gauge/
relief valve assembly is fully installed in the lid.
4. Ensure the backwash piping is open.
5. Open the pump hair/lint pot lid and fill the pump
basket with water to prime the system. Replace the
lid. (You may have to do this several times on new
and seasonal start-ups.)
6. Completely open the air release valve on the
gauge/air release assembly by turning the knob on
the back of the assembly fully counterclockwise
(do not remove the knob).
7. Be sure to open any filter isolation valves that
were installed in the system.
8. Ensure the backwash piping is open. Set the
backwash valve handle to the “Backwash”
position, if a multiport backwash valve is installed,
and if a slide valve is used, turn the handle to
unlock and pull fully upwards to the backwash
position.
9. Stand clear of the lter and start the pump. When
a steady stream of water starts to come out of
the air release valve, close the valve. There will
be a steady stream of water flowing out of the
backwash valve piping. Continue to backwash
until the backwash water is clear (3 to 5 minutes).
10. Turn the pump off.
11. If the multiport backwash valve has a "Rinse"
position do the following:
a. Set the selector handle in "Rinse" position.
b. Start the pump and run for 30 to 40 seconds.
This helps settle the sand bed and removes
fine particles in the bottom of the sand bed.
c. Stop the pump.
12. Set the backwash valve handle to normal operation
position, or to “Filter” position if a multiport
backwash valve is installed. If using a slide valve,
push the handle down to the normal filter position
and turn the handle to lock in place.
13. Make certain all inlet and return lines to the pool
are open to allow free movement of water from the
pool and returning to the pool.
14. Completely open the air release valve on the
gauge/air release assembly by turning the knob on
the back of the assembly fully counterclockwise.
Do not remove the knob.
15. Stand clear of the filter and start the pump. When
a steady stream of water starts to come out of the
air release valve, close the valve.
16. Ensure that the water is returning to the pool. The
system is now in normal filtration mode.
17. After the pressure gauge has stabilized, turn the
bezel ring so that the arrow next to the word
"CLEAN" aligns with the needle of the gauge. As
Page 7
Parts List for Replacement Kit
Description R0488500
O-Ring, Blue, -231 1
O-Ring, #340 1
Inner Drain Seal 1
Gasket, 3.25" x .06 2
O-Ring, Blue, -335 2
Seal, Sand Filter Lid 1
Screw, #10 x 3/4", Hex, Gimlet 6
Seal, Drain Cap 1
Instructions 1
the filter cleans the water and the sand begins to
clog, the pressure will increase. When the needle
of the pressure gauge aligns with the arrow next
to the word "DIRTY" on the bezel, it is time to
clean the filter (see Cleaning Instructions). This
indicates an increased pressure of between 10 and
12 psi above original starting pressure.
K. Replacement Kit Lists
1. The table below is for your reference. To order
additional parts, please contact your local Jandy
distributor.
All trademarks used herein are the property of their respective owners.
Page 8
H0332400-
Zodiac Pool Systems, Inc.
6000CondorDrive,Moorpark,CA,USA93021 • 800.822.7933 FAX877.327.1403
     LithoinU.S.A.©ZodiacPoolSystems,Inc.0908

This manual suits for next models

1

Other Zodiac Pool Systems Swimming Pool Filter manuals

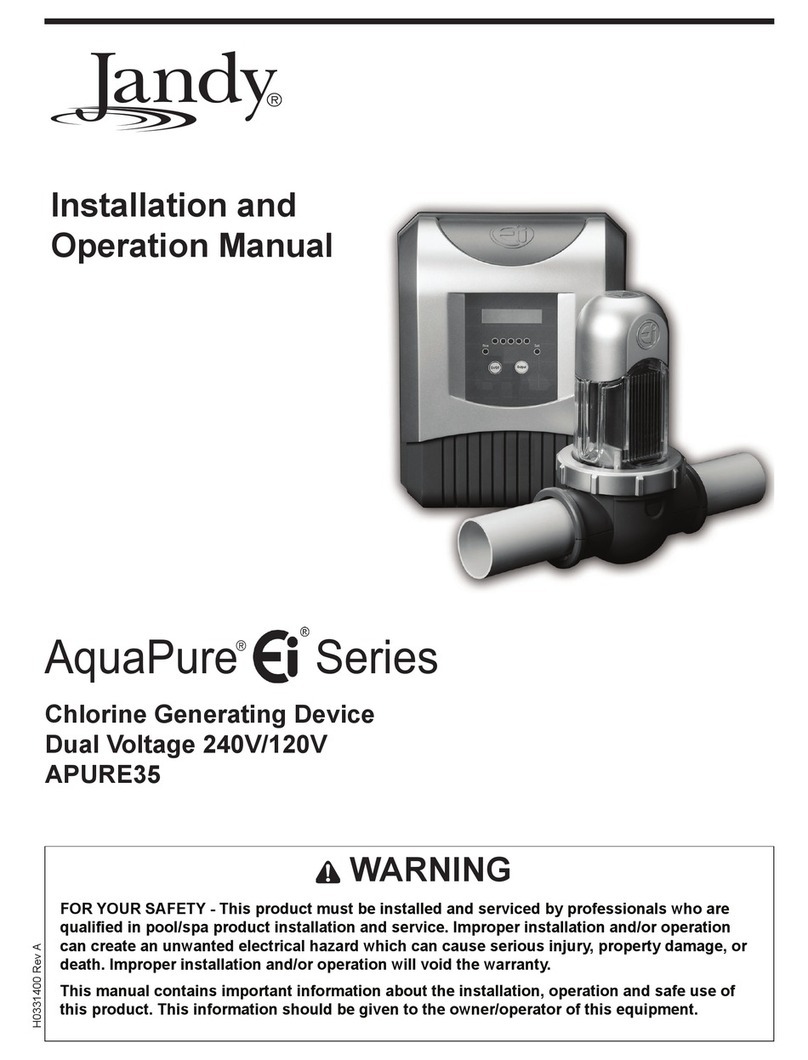
Zodiac Pool Systems andy AquaPure EI Series User manual

Zodiac Pool Systems

Zodiac Pool Systems andy AquaPure EI Series User manual

Zodiac Pool Systems Nature2 Fusion soft User manual

Zodiac Pool Systems

Zodiac Pool Systems Nature2 Fusion soft User manual

Zodiac Pool Systems Aquapure Ei APURE35PLGC User manual

Zodiac Pool Systems

Zodiac Pool Systems Aquapure Ei APURE35PLGC User manual

Zodiac Pool Systems PG User manual

Zodiac Pool Systems

Zodiac Pool Systems PG User manual

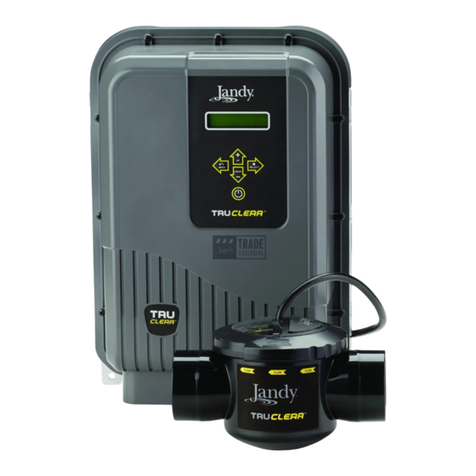
Zodiac Pool Systems TruClear Jandy Pro Series User manual

Zodiac Pool Systems

Zodiac Pool Systems TruClear Jandy Pro Series User manual

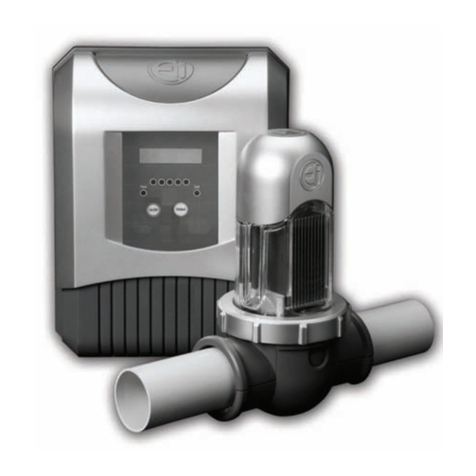
Zodiac Pool Systems Ei Series User manual

Zodiac Pool Systems

Zodiac Pool Systems Ei Series User manual

Zodiac Pool Systems JANDY TRUCLEAR XL User manual

Zodiac Pool Systems

Zodiac Pool Systems JANDY TRUCLEAR XL User manual

Popular Swimming Pool Filter manuals by other brands

GRE AR7051 Installation and maintenance manual

GRE

GRE AR7051 Installation and maintenance manual

Hayward Perflex owner's manual

Hayward

Hayward Perflex owner's manual

ECO-MATIC ESC 48 operating instructions

ECO-MATIC

ECO-MATIC ESC 48 operating instructions

Klever Kleena Sprinta owner's manual

Klever Kleena

Klever Kleena Sprinta owner's manual

Pentair QUAD D.E. Series Installation and user guide

Pentair

Pentair QUAD D.E. Series Installation and user guide

Splash 91001 owner's manual

Splash

Splash 91001 owner's manual

Oase Skimmer 250 operating instructions

Oase

Oase Skimmer 250 operating instructions

Reltech EVOCHLOR EV15 Installation and operation manual

Reltech

Reltech EVOCHLOR EV15 Installation and operation manual

Hayward S310T owner's guide

Hayward

Hayward S310T owner's guide

Innovative Water Care Pulsar Precision 30 System Operation and installation manual

Innovative Water Care

Innovative Water Care Pulsar Precision 30 System Operation and installation manual

Davey Monarch EcoSalt BMSC Series Installation & operating instructions

Davey

Davey Monarch EcoSalt BMSC Series Installation & operating instructions

JNS Aquaria VS-2 installation guide

JNS Aquaria

JNS Aquaria VS-2 installation guide

HEISSNER F540-00 Instructions for use

HEISSNER

HEISSNER F540-00 Instructions for use

Procopi REGUL SYSTEM Instructions for installation and use

Procopi

Procopi REGUL SYSTEM Instructions for installation and use

Zodiac eXO Manual addendum

Zodiac

Zodiac eXO Manual addendum

Autopilot ChlorSync troubleshooting guide

Autopilot

Autopilot ChlorSync troubleshooting guide

Oase SwimSkim 50 operating instructions

Oase

Oase SwimSkim 50 operating instructions

Fox GALAXY Digital 60 Installation and operation manual

Fox

Fox GALAXY Digital 60 Installation and operation manual

manuals.online logo
manuals.online logoBrands
  • About & Mission
  • Contact us
  • Privacy Policy
  • Terms and Conditions

Copyright 2025 Manuals.Online. All Rights Reserved.