Zoetis AlphaTrack3 User manual

1 2
User Guide
3
For In Vitro Diagnostic Use In Animals

Table of Contents Table of Contents (continued)
1.0 How It Works ............................................................................................................................................................................................................ 3
2.0 Components.............................................................................................................................................................................................................. 4
Starter Kit............................................................................................................................................................................................................................................ 4
3.0 Important Information.......................................................................................................................................................................................... 5
4.0 AlphaTrak3 Meter Usage...................................................................................................................................................................................... 6
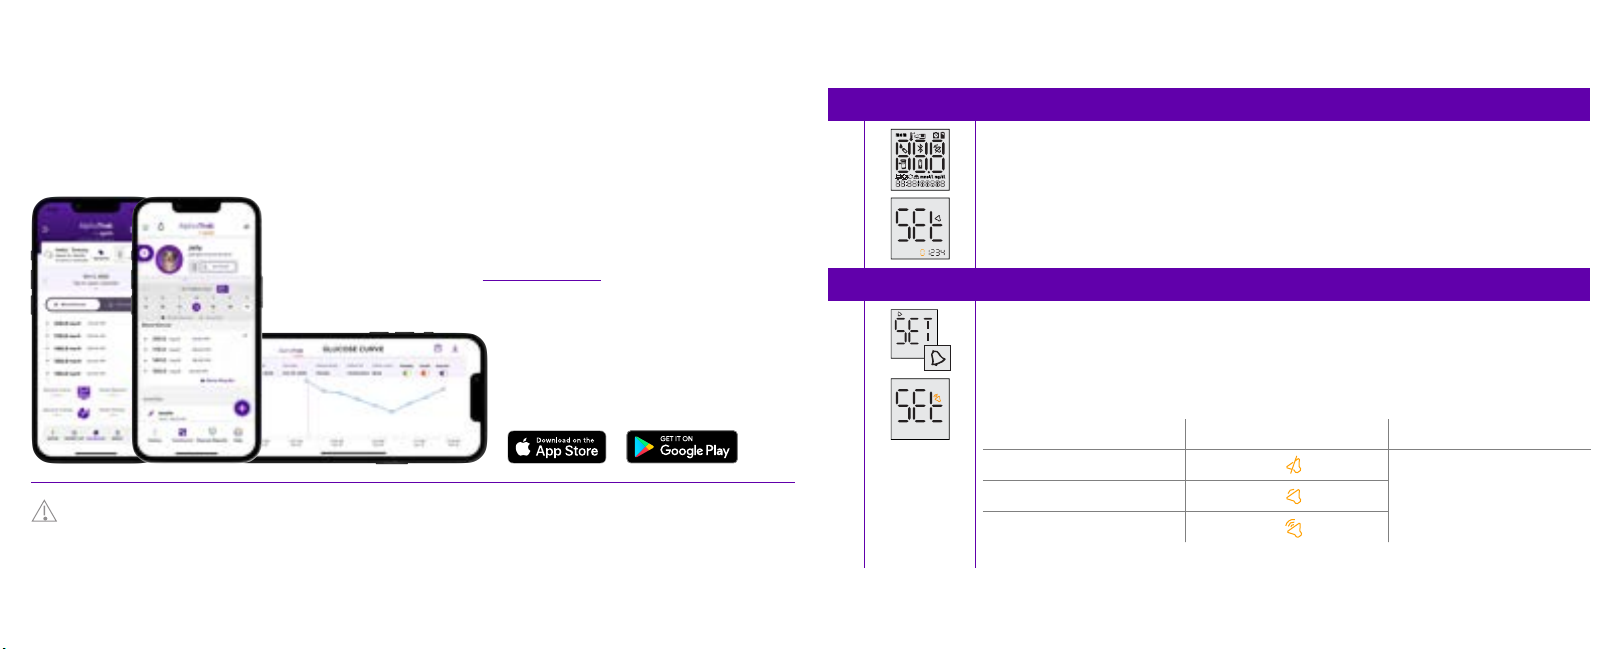
5.0 Bluetooth® Wireless Technology ...................................................................................................................................................................... 7
6.0 Meter Set Up ............................................................................................................................................................................................................. 8
Setting the Meter Sound.............................................................................................................................................................................................................8
Sound Volume.................................................................................................................................................................................................................................. 8
Blood Glucose Unit........................................................................................................................................................................................................................ 9
Date Format.......................................................................................................................................................................................................................................9
Time Format ......................................................................................................................................................................................................................................10
Bluetooth® Connection................................................................................................................................................................................................................ 10
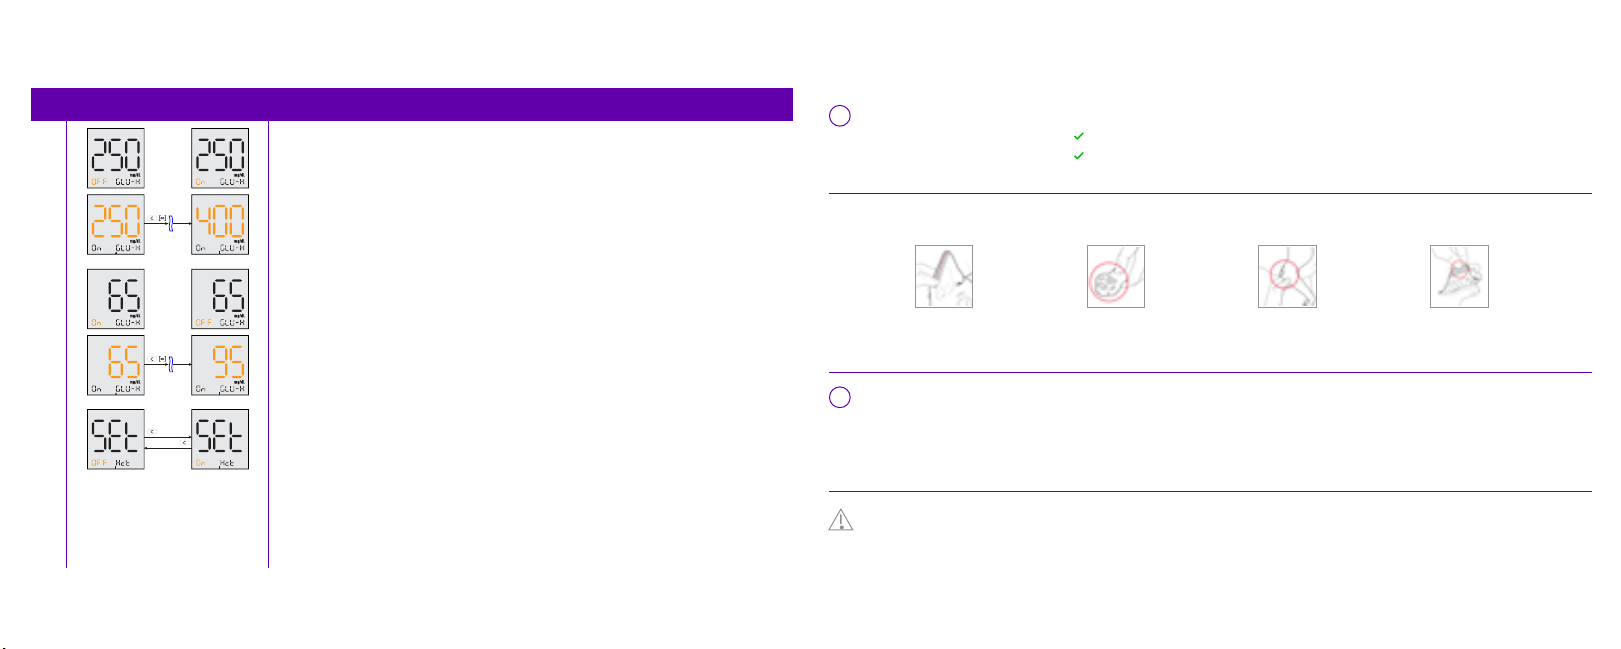
Glucose Warnings ..........................................................................................................................................................................................................................11
7.0 Obtaining Blood Samples ................................................................................................................................................................................... 12
How to Lance ....................................................................................................................................................................................................................................12
8.0 Blood Glucose Testing.......................................................................................................................................................................................... 14
9.0 Understanding Blood Glucose Results .......................................................................................................................................................... 18
Low and High Blood Glucose Results ................................................................................................................................................................................. 18
10.0 Control Solution ...................................................................................................................................................................................................... 20
Control Solution Information................................................................................................................................................................................................... 20
Out of Range Control Solution Results .............................................................................................................................................................................. 20
How to Perform an AlphaTrak 3 Control Solution Test............................................................................................................................................. 21
11.0 Using Meter Memory.............................................................................................................................................................................................. 23
12.0 Reminder Alarms..................................................................................................................................................................................................... 24
13.0 Maintenance & Care ............................................................................................................................................................................................... 25
Replacing the Batteries...............................................................................................................................................................................................................26
Cleaning & Care ............................................................................................................................................................................................................................... 26
14.0 Error Codes................................................................................................................................................................................................................ 27
15.0 Troubleshooting ...................................................................................................................................................................................................... 31
16.0 Specifications......................................................................................................................................................................................... 32
Meter......................................................................................................................................................................................................................................................32
Test Strips............................................................................................................................................................................................................................................33
Control Solution...............................................................................................................................................................................................................................33
17.0 Regulatory............................................................................................................................................................................................... 34
USA......................................................................................................................................................................................................................................................... 34
Canada.................................................................................................................................................................................................................................................. 35
European Union............................................................................................................................................................................................................................... 36
18.0 Definition of Symbols........................................................................................................................................................................... 37
19.0 References............................................................................................................................................................................................... 39

3 4
How It Works
AlphaTrak 3 is an easy-to-use veterinary canine and feline blood glucose monitoring system.
Sample Area
Sample area is the dark-colored rectangle on
the test strip
Apply blood or control solution to the
front edge of the sample area only
(not on top of it)
m (Mode) Button
• Turns meter on/o
• Access primary settings
• Access record log
• Scroll backwards
• Silences alarm
c (Configure) Button
• Scrolls forward
• Silences alarm
• Access secondary settings
• Marks a control solution test
Press m and c at the same time after glucose
test or when viewing record log to turn on
Bluetooth
Hold c and press m to change species
code after inserting the test strip and
waiting on sample
System Check Screen
This display always appears when the
meter is turned on. You should check that
the meter matches the example exactly
every time the meter turns on. Do not use
the meter if the display check screen does
not exactly match the example. If the screen
does not match, the meter may show an
incorrect result. Please contact
Customer Care
Display Screen
Displays test results and other
important information
Test Strip Port
Insert the top end of a new AlphaTrak 3 strip
here. The meter powers on when you insert
the test strip
AlphaTrak 3 Test Strip
Insert strip into the meter printed side up
and following the purple arrow
1
1
2
6 7
3
6
7
2
3
4
5
For more information
www.alphatrak.com
4
5
Components
Starter Kit
AlphaTrak 3 Meter
50 AlphaTrak 3 Test Strips
Lancing Device and 30 Lancets
AlphaTrak 3 Control Solution (4 mL)
Carrying Case
Code Strip
Diabetes Diary
Quick User’s Guide
Two Batteries (3V, CR2032)
For more information
www.alphatrak.com
1
6
7
8
9
2
3
4
5
1
2
4
5
3
6
7
8
9

5 6
Important Information
Important health-related information
AlphaTrak 3 meter usage
Testing blood glucose in dogs and cats
Testing fresh whole blood samples
Testing fresh whole capillary samples
Testing fresh whole venous samples
Testing whole blood collected in a syringe or tube with EDTA or heparin
anticoagulant if testing is carried out within 10 minutes of sample collection
Testing whole blood collected in a syringe or tube without anticoagulant, if testing is
performed immediately after sample collection
DO NOT
use the AlphaTrak 3
meter for:
IMPORTANT
Use only AlphaTrak 3 test strips and AlphaTrak 3 control solution with this meter. Using older version AlphaTrak
test strips or o-brand test strips and control solution can yield inaccurate results.
CAUTION
Read all instructions before and practice the testing procedure before using the AlphaTrak 3 meter.
Blood glucose monitoring should be done with the guidance of a veterinarian/veterinary surgeon.
DO
use the AlphaTrak 3
meter for:
Testing arterial blood
Testing serum
CAUTION
The AlphaTrak 3 test strips are not intended for human blood glucose testing.
If the AlphaTrak 3 meter is used in any way other than described in this manual, the meter may not operate as intended,
may produce inaccurate or no results, and may pose a safety hazard.
WARNING
This system contains small parts that may be dangerous if swallowed.
Testing plasma
Diagnosis of diabetes
U.S. CUSTOMER CARE 1-888-963-8471
The AlphaTrak 3 meter is intended for testing outside the body only (in vitro
diagnostic use). The AlphaTrak 3 Blood Glucose Monitoring System is intended to be
used for the quantitative measurement of glucose (sugar) in whole blood samples
drawn from cats and dogs.
Glucose values are aected by stress, meals, exercise, health, and medication use.
Severe dehydration and excessive water loss may cause false low results.

7 8
Sound Volume
2
Note: With the sound volume on, the meter will beep when:
The test strip is full of blood
The test result appears on the display
An error occurs
You may also choose to silence the meter.
Bluetooth® Wireless Technology
The AlphaTrak 3 meter uses
Bluetooth® wireless technology to
pair and send glucose results to
compatible mobile devices.
Bluetooth® wireless technology is used by some smartphones and other devices.
The AlphaTrak 3 meter uses Bluetooth® wireless technology to pair and send
glucose results to compatible mobile devices. The meter is designed to work with
the AlphaTrak Mobile App available for pet owners and veterinary professionals.
By connecting the meter with the App, it allows to review and graph glucose
results, record pets’ daily activities such as water intake, feeding, exercise, set up
notifications and reminders. The Mobile App helps pet owners to connect with
their veterinarians to strengthen their relationship, share their pet’s glucose results
and send reports. It also allows veterinary professionals to easily keep track of
their patient’s diabetes management and create Blood Glucose Curves to better
understand their patients. Visit www.alphatrak.com for more information.
WARNING
In locations where cell phone use is not permitted, such as hospitals, some healthcare professional oces and
airplanes, the Bluetooth® feature should be turned o.
U.S. CUSTOMER CARE 1-888-963-8471
Meter Set Up
U.S. CUSTOMER CARE 1-888-963-8471
Setting the Meter Sound
1
With the meter o (no test strip inserted), press and hold “m” for 3 seconds
until SET appears on the screen.
Use “c” and “m” buttons to progress through the steps of the initial meter set up.
Press “m” to bypass the 4 optional reminder alarms setting. You may choose to
set these later (see ‘Reminder Alarms’ section).
If you prefer Press “c” until you see: Then
No sound
Press “m” to save
your preference
A low beep
A louder beep

910
Meter Set Up (continued)
U.S. CUSTOMER CARE 1-888-963-8471
Blood Glucose Unit
3
Note: Blood glucose results are generally reported in milligrams per deciliter (mg/dL) or millimoles
per liter (mmol/L). Please be aware of which unit your device is displaying as normal results can
appear abnormal, and vice versa if the results are ascribed to the wrong units. Please check with your
veterinarian regarding the preferred units. The glucose unit is preset to mg/dL.
Press “c” to change the unit to mmol/L then press “m” to save.
Date Format
4
Year
The year will blink first. Press “m” to accept the displayed year or press “c” to change.
Press “m” to save.
Date format
Note: The date format depends on the blood glucose unit you chose before.
Press “c” to change the format to day-month or month-day then press “m” to save.
Month
The month will blink first. Press “c” to set the correct month then press “m” to save.
Day
Press “c” to set the correct day then press “m” to save.
Time Format
5
Note: The meter can display time in 12-hour (e.g., 1:24P) and 24-hour (e.g., 13:24) time formats. “A” is
displayed for AM and “P” is for PM. It is set to 12-hour format by default.
Press “c” to change to 24-hour format then press “m” to save.
Hour
Press “c” to set the hour then press “m” to save.
Minutes
Press “c” to set the minutes then press “m” to save.
Press and hold “m” for 3 seconds until the meter turns o. Initial set up is now complete.
Bluetooth® Connection
6
Note: The Bluetooth® is “ON” by default, so the meter will automatically turn on the Bluetooth® when
the strip measurement is complete. This will enable automatic data transfer to the AlphaTrak App.
If you want to change the Bluetooth settings, press and hold “c” for more than 3 seconds to enter the
Bluetooth® and Glucose Warning setting mode.
Press “c” again to turn OFF the automatic Bluetooth® connection mode then press “m” to save your
preference.
Meter Set Up (continued)
U.S. CUSTOMER CARE 1-888-963-8471

11 12
Meter Set Up (continued)
U.S. CUSTOMER CARE 1-888-963-8471
Glucose Warnings
7
Note: Glucose warnings can help you easily evaluate a pet’s glucose readings,
whether they are too high or too low. Glucose warning setting will apply for all species.
Hematocrit warning is “OFF” by default.
High Glucose values can be set between 140 mg/dL (7.5 mmol/L) and 400 mg/dL
(22.5 mmol/L). You can change the value in steps of 10 mg/dL (0.5 mmol/L).
1. Press “c” to turn the High Glucose warning “ON” or “OFF” then press “m” to save.
2. Press “c” to set the High Glucose value, then press “m” to save.
Note: The Hyperglycemia (High Glucose) warning is “OFF” by default and preset to
250 mg/dL (14.0 mmol/L).
Low Glucose values can be set between 45 mg/dL (2.4 mmol/L) and 95 mg/dL
(5.4mmol/L). You can change the value in steps of 5 mg/dL (0.2 mmol/L).
1. Press “c” to turn the Low Glucose warning “ON” or “OFF” then press “m” to save.
2. Press “c” to set the Low Glucose value then press “m” to save.
Note: The Hypoglycemia (Low Glucose) warning is “ON” by default and preset to 65
mg/dL (3.6 mmol/L).
Note: Hematocrit (Hct) warning is “OFF” by default.
Press “c” to turn the Hct warning “ON” or “OFF” then press “m” to save.
Press and hold “m” for 3 seconds until the meter turns o.
Bluetooth® and Glucose Warning set up is now complete.
Obtaining Blood Samples
How to Lance
U.S. CUSTOMER CARE 1-888-963-8471
Use the AlphaTrak 3 lancet to obtain blood samples
Consult a veterinarian/veterinary surgeon for recommended
sampling methods and instructions
CAUTION
Animal blood is a potential source of zoonotic diseases. We recommend wearing personal protective equipment when handling
animal blood. Be sure to follow local occupational health and safety regulations.
Select a test site
There are many sites to obtain
capillary blood samples.
See illustrations below.
Wash your hands and the test site with soap and warm water to ensure accurate
results. Thoroughly dry your hands and the test site.
Warming the area will help increase blood flow. Gently rub or apply a warm (not hot) cloth to the test site.
If using a wet cloth, place the cloth inside a plastic bag to avoid diluting the blood sample.
Marginal ear vein
(cats and dogs)
Paw pad
(cats and dogs)
Leg callus
(usually dogs)
Inner lip
(dogs only)
1
2

13 14
Obtaining Blood Samples (continued)
U.S. CUSTOMER CARE 1-888-963-8471
CAUTION
If you accidentally stab or scratch yourself with the lancet, follow basic first aid procedures.
If bleeding persists, contact your local healthcare professional.
Prepare the lancing device and puncture the test site
Optional: a thin layer of petroleum jelly may be applied to the test site prior to lancing. This
can help the blood form a droplet without getting into the hair. The AlphaTrak 3 lancing
device may be used to help obtaining a blood sample. For more information on the lancing
device follow the instructions included in your AlphaTrak 3 Starter Kit (Quick Start Guide).
3
4
5
Blood Glucose Testing
Use the test strips within the meter’s operating temperature
range: 39 - 104 °F (4 - 40 °C)
Store test strips in a dry place between 36 - 90 °F (2 - 32 °C)
Store test strips away from direct sunlight and heat
Store test strips in their original vial only
Clean and dry your hands before removing a strip
from the vial
Close the vial cap tightly immediately after removing
a test strip
Use the test strips beyond the expiration date printed on
the side of the test strip vial since this may cause inaccurate
results (Test strips expire at 12 months after opening)
Transfer test strips to another container
Store test strips outside the vial
Bend, cut, or alter test strips
DO NOT:
DO:
Press the test strip against the test site
Scrape the blood onto the test strip
Apply blood to the flat side of the test strip
Apply blood to the test strip when the test strip is out
of the meter
Put blood or foreign objects into the meter
IMPORTANT
Use only AlphaTrak 3 test strips. Other test strips can give inaccurate results. The test strips are single use only.
WARNING
Drying agents in the test strip vial may be harmful if inhaled or swallowed and may irritate skin and eyes.
Read the AlphaTrak 3 test strip package insert for more information.
Perform a glucose test
See ‘Blood Glucose Testing’ section of this user guide.
Gently apply pressure to the test site
Use a sterile gauze or cotton pad to help stop the bleeding.

15 16
Testing
1
Check test strip expiration date (printed on the vial)
Do not use expired test strips or the results may be inaccurate.
2
Remove a test strip from the vial
3
Insert test strip into the meter to turn it on
Note: The meter turns o automatically after 2 minutes of inactivity. Remove and re-insert the unused
test strip to restart the meter. If the meter does not turn on, refer to ‘Troubleshooting’ section.
Note: If you are using the AlphaTrak 3 meter or a new strip vial for the first time,
it will ask to confirm the Lot Code (for dog or cat). To do so, insert the Code Strip
attached to the test strip vial.
Blood Glucose Testing (continued)
U.S. CUSTOMER CARE 1-888-963-8471
4
Set Lot Code (using the Code Strip)
• Insert Code Strip
• Press “c” to set the correct code (match the code on the strip vial)
• Press “m” to save
5
Set Species
• Change the species on the meter after inserting the test strip
• Press and hold “c” and at the same time press “m” to switch between the species
6
Obtain a Blood Sample
When the blood droplet and strip icons appear on the display,
use the lancing device to obtain a drop of blood.
See ‘Obtaining Blood Sample’ section of this user guide.
7
Apply and hold blood to the front edge of the sample area of the test strip (dark-colored rectangle on
the test strip) until you hear a beep, and a vertical line appears on the screen.
The meter will start to count down (3, 2, 1) which indicates the test strip has enough blood and the
meter is checking the glucose level.
If a vertical line does not appear after 5 seconds, the sample may be too small.
If the test does not start after applying the blood drop, go to ‘Troubleshooting’.
Blood Glucose Testing (continued)

17 18
Low and High Blood Glucose Results1,2,3
Result What It Means Clinical Signs1What To Do
Lower than 65 mg/dL (3.6
mmol/) for adult cats & dogs
Low blood glucose
(Hypoglycemia)
Dogs and Cats
• Lethargy or abnormal
drowsiness
• Weakness
• Disorientation
• Visual disturbances
• Incoordination
• Tremors/shaky movements
• Seizures
• Coma
• Repeat the test with a new test strip if the result
is not consistent with the clinical signs.
• If the blood glucose result is not consistent with
the clinical signs, perform a control solution test
with a new test strip.
• If the test results are within the range printed on
the test strip vial, retest using fresh blood and a
new test strip.
• If the blood glucose result is still not consistent
with the clinical signs, contact a veterinarian/
veterinary surgeon.
U.S. CUSTOMER CARE 1-888-963-8471
Blood Glucose Testing (continued)Blood Glucose Testing (continued)
IMPORTANT
Low or high blood glucose readings can indicate a potentially serious medical condition. Consult a veterinarian
regarding low and high blood glucose levels.
NOTE: Consult a veterinarian if your pet is displaying any abnormal signs or behavior, to know more about your pet’s normal
glucose ranges, or for assistance with any further questions you may have about your pet´s glucose results.
11 Remove test strip to turn meter o (meter turns o automatically after 1 minute)
Discard used lancet and test strip as directed below
Understanding Blood Glucose Results
8
View result
The result will appear on the display when the test is complete.
9
Add feeding information (optional)
If you like to add information about whether the glucose test has
been taken before or after feeding your pet, press “c” until the desired
setting appears (full, empty, or no food bowl).
The selected setting will automatically be captured after the meter turns o.
10
Turn on Bluetooth®
Note: If the Bluetooth® mode is set to turn on automatically, you will see the blinking Bluetooth® icon once the result is
ready. This indicates that Bluetooth® is on and ready to pair with the AlphaTrak App.
If it is not set to turn on automatically, but you would like to send the result to your AlphaTrak App, press and hold “m” and
then press “c” within 3 seconds to turn on Bluetooth®.
Note: If you are pairing an AlphaTrak 3 meter to the AlphaTrak App for the first time, press on “Device” on the left side
of the bottom menu in the App. Then click on “Add a Meter”. Select the meter you want to pair from the list and confirm.
Next, a 6-digit pairing key will be displayed on your AlphaTrak 3 meter. Please enter these 6 digits to your AlphaTrak App
on your phone (pop up window) and confirm. This will complete the pairing process. Next, click on “Get Results” on the
Dashboard screen to sync the meter results to the App.
Note: When the meter is connected to the AlphaTrak App, the Bluetooth® icon will stop blinking.
Note: 2 blinking arrows will indicate that the result is being transmitted.

19 20
Understanding Blood Glucose Results (continued) Control Solution
IMPORTANT
Control solution results should fall within the control solution range printed on the test strip vial.
Do not use this range when testing blood glucose.
CAUTION
Control solution range is not a range for animals’ blood glucose level.
AlphaTrak 3 control solution is a red liquid that contains a fixed amount of glucose.
The purpose of a control solution test is:
• To practice testing without using animal blood
• To confirm that the meter and test strips work together properly
• To use when you are unsure of the blood glucose test results
Control solution information
• Use only AlphaTrak 3 control solution with the AlphaTrak
3 meter
• Replace the bottle cap and tighten it securely immediately
after use
• Control solution results are only accurate between
39 – 104 °F (4 – 40 °C)
• Store control solution at a dry place between
39 - 86 °F (4 - 30 °C)
• Do not add water or other liquid to the control solution
Out of range control solution results
Possible causes:
• Expired or defective control solution
• Expired or defective test strip
• Testing error
• Watered-down control solution
• Meter malfunction
• Test strip deterioration
• Control solution test done outside of 39 – 104 °F (4 – 40 °C)
• Correct code is not set in the meter
What to do:
• Repeat the test if control solution results are out of range
(printed on the test strip vial)
• Stop using the meter if control solution results are
consistently out of range (printed on the test strip vial)
• Contact Zoetis Customer Care
For information on how to obtain control solution, contact Zoetis Customer Care.
IMPORTANT
Low or high blood glucose readings can indicate a potentially serious medical condition.
Consult a veterinarian regarding low and high blood glucose levels.
Lo Result Display (LOW)
Result What It Means What To Do
Lower than 20 mg/dL or
1.1 mmol/L (outside the
system range)
Severe low blood glucose
(Hypoglycemia)
• Follow a veterinarian/veterinary surgeon’s advice to treat low blood glucose
• If the blood glucose result does not match the clinical signs, perform a control
solution test to confirm that the meter and strips are working properly
HI Result Display (HIGH)
Result What It Means What To Do
Higher than 750 mg/dL or
41.6 mmol/L (outside the
system range)
Severe high blood glucose
(Hyperglycemia)
• Follow a veterinarian/veterinary surgeon’s treatment advice to treat high
blood glucose
• If the blood glucose result does not match the clinical signs, perform a control
solution test to confirm that the meter and strips are working properly
Higher than 250 mg/dL (13.9
mmol/L) for adult cats &
dogs2, 3
High blood glucose
(Hyperglycemia)
Dogs and Cats
• Excessive thirst
• Frequent urination
• Weight loss
• Excessive appetite
• With chronically elevated
levels can see vomiting,
dehydration, depression,
acetone (‘fruity’) breath,
coma
• Repeat the test with a new test strip if the result
is not consistent with the clinical signs.
• If the blood glucose result is not consistent with
the clinical signs, perform a control solution test
with a new test strip.
• If the test results are within the range printed on
the test strip vial, retest using fresh blood and a
new test strip.
• If the blood glucose result is still not consistent
with the clinical signs, contact a veterinarian/
veterinary surgeon.

21 22
Control Solution (continued)
IMPORTANT
Do not use expired control solution. Discard control solution 3 months after opening or on the day of expiration printed on the bottle,
whichever comes first. (Example: opened on April 15, discard on July 15; write the discard date on the side of the bottle.)
How to Perform an AlphaTrak 3 control solution test
1
Check the expiration date of the control solution (printed on the bottle)
2
Remove a test strip from vial
3
Insert test strip into the meter to turn it on
Note: The meter turns o automatically after 2 minutes of inactivity. Remove and re-insert the unused
test strip to restart the meter. If the meter does not turn on, refer to ‘Troubleshooting’ section.
4
Confirm system check screen
• This display appears when you turn on the meter. Do not use the meter if the display check screen
does not exactly match this example. Contact Zoetis Customer Care.
• See the ‘How it works’ section for more information
• If the system check screen does not appear, go to ‘Troubleshooting’
How to Perform an AlphaTrak 3 control solution test (continued)
5
Set the correct species code
See steps in ‘Blood Glucose Testing’ section
6
Start control solution testing
Press and hold “c” for 3 seconds until you see the control solution bottle icon on the display
7
Apply control solution to the sample area of the test strip until you hear a beep, and a vertical line
appears on the screen. The meter will start to count down (3, 2, 1) which indicates the test strip has
enough sample and the meter is running the control solution test. If a vertical line does not appear
after 5 seconds, the sample volume may be too small.
If the test does not start after applying the control solution, go to ‘Troubleshooting’.
8Review result
9
Compare the control solution result to the test range printed on the test strip vial. The result should
fall within this range.
Note: The control solution test results correlate with the species code. Choosing dierent species will
result in dierent readings.
10
Remove the test strip to turn o the meter (meter turns o automatically after 1 minute)
Control Solution (continued)

23 24
Using Meter Memory
1
Turn meter on
Press the “m” button for less than 3 seconds
2
View result history
Press “m” again for less than 3 seconds
3
Press “c” to scroll to the Control Solution test result
4Press “m” to scroll to the earliest test results
Note: The latest control reading is at the end of the list.
5
Transfer stored test results to the AlphaTrak App
Press and hold “m” then press “c” within 3 seconds to turn on Bluetooth®
Note: Two blinking arrows will indicate that results are being transmitted
Press and hold “m” to exit meter memory
Reminder Alarms
1
Press and hold “m” for more than 3 seconds to enter system settings
2
Press “c” to select which alarm you would like to set (1, 2, 3, or 4)
3Press “m” to save
4
Set hour
• Press “c” to select correct hour
• Press “m” to save
5
Set minute
• Press “c” to select correct minute
• Press “m” to save
6
Set sound
• Press “c” to select your preferred sound setting for this alarm (low beep, loud beep, no sound).
Note: If you select “no sound”, the reminder will be suspended.
• Press “m” to save
Press and hold “m” for 3 seconds to turn o the meter

25 26
Maintenance & Care Maintenance & Care (continued)
Cleaning & care
Handle the meter with care and avoid getting dirt, dust, blood, control solution or any
type of liquid on the meter test strip area and in data ports.
Clean the outside of the meter using a damp cloth and:
Replacing the batteries
The meter comes with two CR 2032 3 V lithium batteries already installed.
Pull the plastic tab up to release the batteries, if you are using the meter for the first time.
icon on the screen indicates low battery
• When the icon appears, the meter may fail to turn on
• When you are ready to install new batteries, remove the old batteries and install the new ones
one after the other to avoid losing your settings
• If time and date settings are lost, time and date will flash until reset
• Even if the time and date settings are lost, you may still perform accurate blood glucose test
• Memory log and certain previously stored user settings, such as date and time format,
are not aected by removing the batteries
Mild detergent/soap and water 70% isopropyl alcohol
(available in the USA)
or A mixture of 1 part household
bleach, 9 parts water
or
IMPORTANT
Do not immerse the meter in water or other liquids.
Note: The battery in this product should be removed and disposed in accordance with local regulations for separate
collection of electronic waste and spent batteries.
Open the battery door
1
Remove the old batteries
2
Insert 2 new batteries
(+) facing up
3
Slide the battery door in until
it snaps into place to close
4

27 28
Error Codes
Display message What it means What to do
• The sample volume is too small
• There may be a problem with the
test strip
• Meter error
• Use a new test strip and try again with proper amount of
sample
• Perform a control solution test using a new test strip. If the
test results are within the range printed on the test strip vial,
retest using a fresh blood sample and a new test strip
• If the control solution result is out of range or the error
reappears, contact Zoetis Customer Care
• Meter error
• Internal reference error
(data memory)
• Firmware checksum error
(program memory)
• Perform a control solution test using a new test strip. If the
test results are within the range printed on the test strip vial,
retest using blood and a new test strip
• If the control solution result is out of range or the error
reappears, contact Zoetis Customer Care
• Incorrect test procedure (e.g.,
applying blood on the test strip
before prompted by the meter)
• There may be a problem with the
test strip
• Meter error
• The test strip is aected by moisture
• Wait for the drop and strip icons to appear before applying
blood or control solution
• Perform a control solution test using a new test strip. If the
test results are within the range printed on the test strip vial,
retest using blood and a new test strip
• If the control solution result is out of range or the error
reappears, contact Zoetis Customer Care
• There may be a problem with the
test strip
• Meter error
• Strip Sensing path broken
• Strip Type (OEM) error
• Perform a control solution test using a new test strip. If the
test results are within the range printed on the test strip vial,
retest using blood and a new test strip
• If the control solution result is out of range or the error
reappears, contact Zoetis Customer Care
Display message What it means What to do
• There may be a problem with the test
strip connection with the meter
• Meter error
• Perform a control solution test using a new test strip. If the
test results are within the range printed on the test strip vial,
retest using a fresh blood sample and a new test strip
• If the control solution result is out of range or the error
reappears, contact Zoetis Customer Care
No calibration code Use the code strip attached to the test strip vial to set
the correct lot code.
Code Strip reading failed • Try to set the lot code again
• If the code strip is illegible or broken,
contact Zoetis Customer Care
Operating temperature too low Try again after warming up the device.
Error Codes (continued)

29 30
Display message What it means What to do
Operating temperature too high Try again after cooling down up the device.
The glucose test result is below the
lower limit (outside the system range)
Repeat the test. If the result is still too low, contact your
veterinarian for further help.
The glucose test result is higher than
the upper limit (outside the system
range)
Repeat the test. If the result is still too high, contact your
veterinarian for further help.
The hematocrit test result is too low Repeat the test. If the result is still too low, contact your
veterinarian for further help.
The hematocrit test result is too high Repeat the test. If the result is still too high, contact your
veterinarian for further help.
Error Codes (continued)
Display message What it means What to do
Dead/flat battery • Replace battery. Reset date and time, if necessary.
• If meter still does not enter test mode, contact Zoetis
Customer Care.
• Bluetooth®pairing failure
• Wrong pairing key entered
• Ensure Bluetooth®is turned on your mobile device and you
have started the AlphaTrak Application. Press “Get results”
on your mobile application to establish the connection.
• If you are pairing an AlphaTrak 3 meter to the AlphaTrak
mobile app for the first time, press on “Device” on the left
side of the bottom menu of the app. Then click on “Add a
Meter”. Select the meter you want to pair from the list and
confirm. Next, a 6-digit pairing key will be displayed on
your AlphaTrak 3 meter. Please enter these 6 digits to your
AlphaTrak app on your phone (pop-up window). This will
complete the pairing process.
• If the error still occurs, contact Zoetis Customer Care.
Error Codes (continued)

31 32
Troubleshooting
Meter
Assay method Electrochemistry
Calibration Plasma equivalent
Automatic shuto 2 minutes of inactivity
Hematocrit 15-65%
Measurement units mg/dL or mmol/L
Storage temperature – 4 to 140 °F (– 20 to 60 °C)
Relative humidity Operation: 5% to 90% (non-condensing)
Storage: 5% to 95% (non-condensing)
Operating temperature 39 to 104 °F (4 to 40 °C)
Altitude Operation: 71.7kPA (3048 m)
Storage: 54 kPA (5000 m)
Usage For indoor use
Power source Two CR 2032, 3V lithium battery, replaceable
Result range 20 mg/dL (1.1 mmol/L) - 750 mg/dL (41.67 mmol/L)
Sample whole blood, capillary, or venous
Sample Size 0.3 microliter (300 nanoliters)
Size 3.56˝x 2.19˝x 0.65˝
Weight 50 g (w/o battery)
Specifications
Problem Possible cause Easy solution
The meter does not enter test
mode after inserting a test strip.
Test strip is inserted upside down, or
bottom end in, or not fully inserted
into the meter
Insert test strip print side up, top end in
No battery is installed
Battery is installed incorrectly
Install battery with (+) facing up
Flat battery • Replace battery. Reset date and time,
if necessary
• If meter still does not enter test mode,
contact Zoetis Customer Care
Defective test strip or meter
Blood or foreign objects inside the
test strip port
Contact Zoetis Customer Care
The test does not start after
applying the blood sample.
Blood sample is too small Repeat the test using a new test strip and
a larger blood sample
Defective test strip
Sample applied after meter turns o
• Repeat the test using a new test strip.
Wait for drop and strip icons to appear
before applying blood or control
solution
• If problem persists, contact Zoetis
Customer Care
Defective meter Contact Zoetis Customer Care

33 34
Meter (continued)
Safety EN 61010-1:2010; IEC 61010-1:2010/AMD1:2016 COR1:2019; IEC 61010-2-101:2018, EN 61010-
2-101:2017; EN ISO 15197:2015 (Clause 5.9 & 5.10) EMC/RF: EN 61326-1:2013; IEC 61326-
1:2020; EN 61326-1:2021; EN 61326-2-6:2013; IEC 61326-2-6:2020; EN 61326-2-6:2021; EN
60601-1-2:2015; FCC Part 15 B (Class B ANSI C63.4-2014); J55011 (H27):2015 EN 301 489-1
V2.2.3:2019-11; EN 301 489-17 V3.2.4:2020-09; EN 300 328 V2.2.2:2019-07; EN 62479:2010
EMC FCC Part 15 B, IEC 60601-1-2:2014, IEC 61326-1:2012,
IEC 61326-2:2012, J55011 (H27):2015
Pollution Degree 2
Communication method Bluetooth
Operating Frequency Range 2402.0 - 2480.0 MHz
Operating Output 0.000234 W
Test strips
Storage temperature 36 to 90 °F (2 to 32 °C)
Storage relative humidity 0% to 90% (non-condensing)
Altitude Storage: 54 kPA (5000 m)
Strip Open vial 12 months
Control solution
Storage temperature 39 to 86 °F (4 to 30 °C)
Storage relative humidity 0% to 90% (non-condensing)
Altitude Storage: 54 kPA (5000 m)
Specifications (continued) Regulatory
USA
FCC Class B
This equipment has been tested and found to comply with the limits for a Class B digital device, pursuant to Part 15 of the FCC
Rules. These limits are designed to provide reasonable protection against harmful interference in a residential installation.
This equipment generates, uses and can radiate radio frequency energy and, if not installed and used in accordance with the
instructions, may cause harmful interference to radio communications. However, there is no guarantee that interference will not
occur in a particular installation. If this equipment does cause harmful interference to radio or television reception, which can be
determined by turning the equipment o and on, the user is encouraged to try to correct the interference by one or more of the
following measures:
• Reorient or relocate the receiving antenna
• Increase the distance between the equipment and receiver
• Connect the equipment into an outlet on a circuit dierent from that to which the receiver is connected
• Consult the dealer or an experienced radio/TV technician for help
FCC Class C
This device complies with part 15 of the FCC Rules. Operation is subject to the following two conditions: (1) This device may not
cause harmful interference, and (2) this device must accept any interference received, including interference that may cause
undesired operation.
FCC ID: 2A3FBALPHATRAK3
To assure continued FCC compliance:
Any changes or modifications not expressly approved by the grantee of this device could void the user’s authority to operate the
equipment.
Exposure to Radio Frequency Radiation:
This equipment complies with FCC radiation exposure limits set forth for an uncontrolled environment.
This transmitter must not be co-located or operating in conjunction with any other antenna or transmitter.

35 36
Regulatory (continued)
Canada
IC warning:
This device complies with Industry Canada license-exempt RSS standard(s). Operation is subject to the following two conditions:
(1) this device may not cause interference, and (2) this device must accept any interference, including interference that may cause
undesired operation of the device.
Exposure to Radio Frequency Radiation:
This equipment complies with IC radiation exposure limits set forth for an uncontrolled environment. This transmitter must not be
co-located or operating in conjunction with any other antenna or transmitter.
IC ID: 27797-ALPHATRAK3
IC attention:
Cet appareil est conforme aux normes RSS exempts de licence d’Industrie Canada. Son fonctionnement est soumis aux deux con-
ditions suivantes: (1) cet appareil ne doit pas causer d’interférences et (2) cet appareil doit accepter toute interférence, y compris
les interférences pouvant provoquer un fonctionnement indésirable de l’appareil.
Exposure to Radio Frequency Radiation:
Cet équipement est conforme aux limites d’exposition aux rayonnements IC définies pour un environnement non contrôlé. Cet
émetteur ne doit pas être situé au même endroit ou fonctionner en conjonction avec une autre antenne ou un autre émetteur.
IC ID: 27797-ALPHATRAK3
Regulatory (continued)
European Union
Declaration of Conformity
Directives covered by this Declaration:
• EU RoHS2 Directive 2011/65/EU including amendments by Directives 2015/863/EU and 2017/2102/EU
• EU RED Directive 2014/53/EU
The manufacturer hereby declares under his sole responsibility that the AlphaTrak 3 glucose meter complies with the RoHS2
Directive 2011/65/EU including amendments by Directives 2015/863/EU and 2017/2102/EU, and essential requirements set out in
Article 3 of the Radio Equipment Directive 2014/53/EU.

37 38
Definition of Symbols
Symbol Name/description
Manufacturer of the device
Date of manufacturing in Taiwan
Model number
Serial number
Biological risks
Indicates that there are potential biological risks associated with the device
Indicates the need for the user to consult the instructions for use or the electronic instructions for use
Caution
Indicates that caution is necessary when operating the device in order to avoid undesirable consequences
Indicates important information about the use of the glucose meter
Do not discard in household waste. Needs to be sent to separate collection facilities for recovery and recycling.
DC current
Importer contact (EU)
Definition of Symbols (continued)
Symbol Name/description
Single use
Quantity
Temperature limit
Lot number
Expiry date
To be used within X month after opening
Sterilized using irradiation
Ocial distributor contact
Indicates that a device should not be used if the package has been damaged or opened and
that the user should consult the instructions for use for additional information
Keep away from sunlight
Keep dry
Table of contents
Other Zoetis Blood Glucose Meter manuals