Zonerich AB-58C User manual

ZonerichAB-58C
MaintenanceManual
ZonerichBusinessMachineCo.,Ltd
http://www.zonerich.com

Contents
Ⅰ.ProductAppearanceandConfiguration:...................................1
Ⅱ.CommonProblemsandTroubleshooting.......................................5
Ⅲ.DIPSwitchFunction.....................................................................7
Ⅳ.Replacemainboard.......................................................................9
Ⅴ.Replacetheprinthead.................................................................11
Ⅵ.Partofschematiccircuitdiagram..................................................13

1
Ⅰ.ProductAppearanceandConfiguration:
Productappearance
FrontBack
TopBottom
Printerpartsandconventionalfaultdiagnosis
1.PrintHead:Theprintheadisoneofthemostimportantpartsoftheprinter,
mainlyincludingthethermalelementandelectricmotor.Thethermalelement
printsoutthetextandgraphicsandthemotorisusedtomovethepaper.

2
Printheadhasacertainlifespan,whichisrelatedtotheworking
environmentandthequalityofpaper.Thebadenvironmentsuchasdusty
environmentandthepoorqualityofpaperwillreducetheservicelifeofthe
printhead.Afteraperiodoftimeofuse,theprintheadrequiresthecleaning
andmaintenance.
Afterthethermalprintheadisusedforsometime,thethermalelementwill
turndirty,whichwillcauseunclearprintingeffect.Justusethecottoncloth
dippedwithalcoholtocleanthethermalelement.
Theproblemthatthepapermovesproperlybuttheprinterdoesnotprint
completelyorpartiallymaybecausedbythepoorcontactbetweentheprint
headandthemainboard.Pullouttheconnectingcableandre-plugit,the
faultmaybesolved.
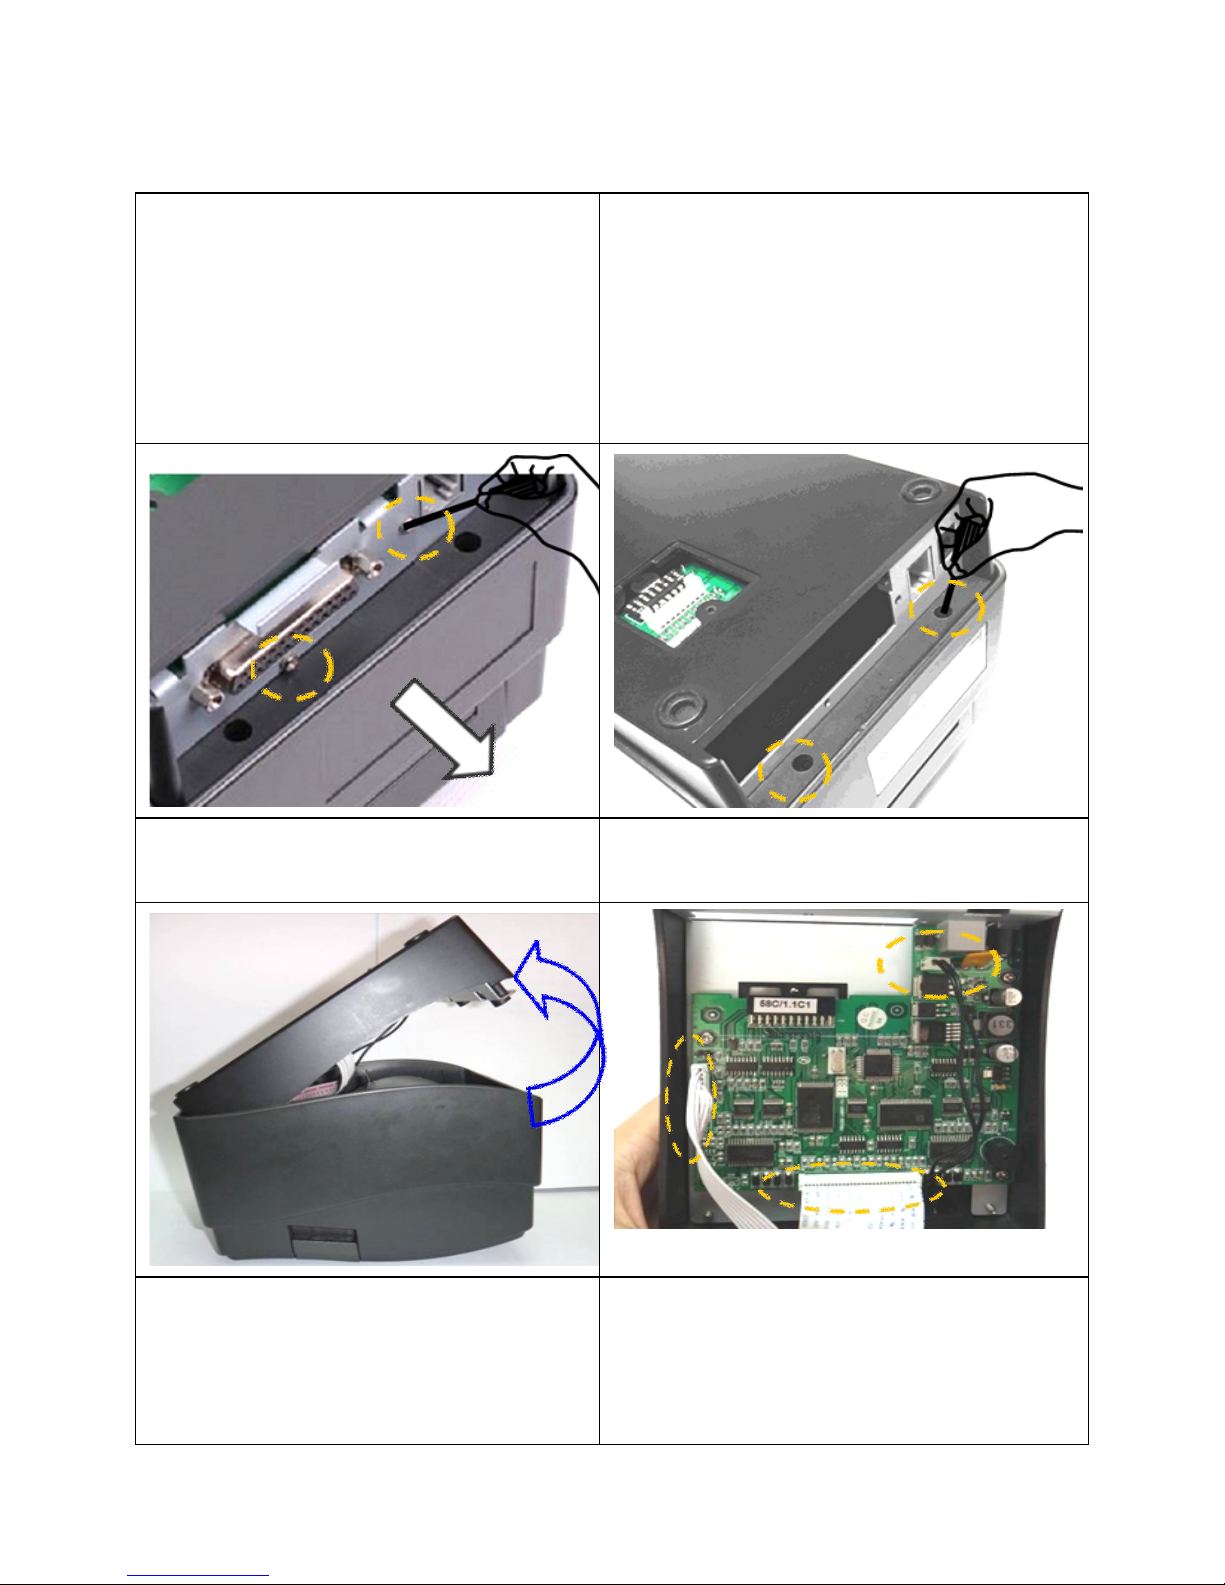
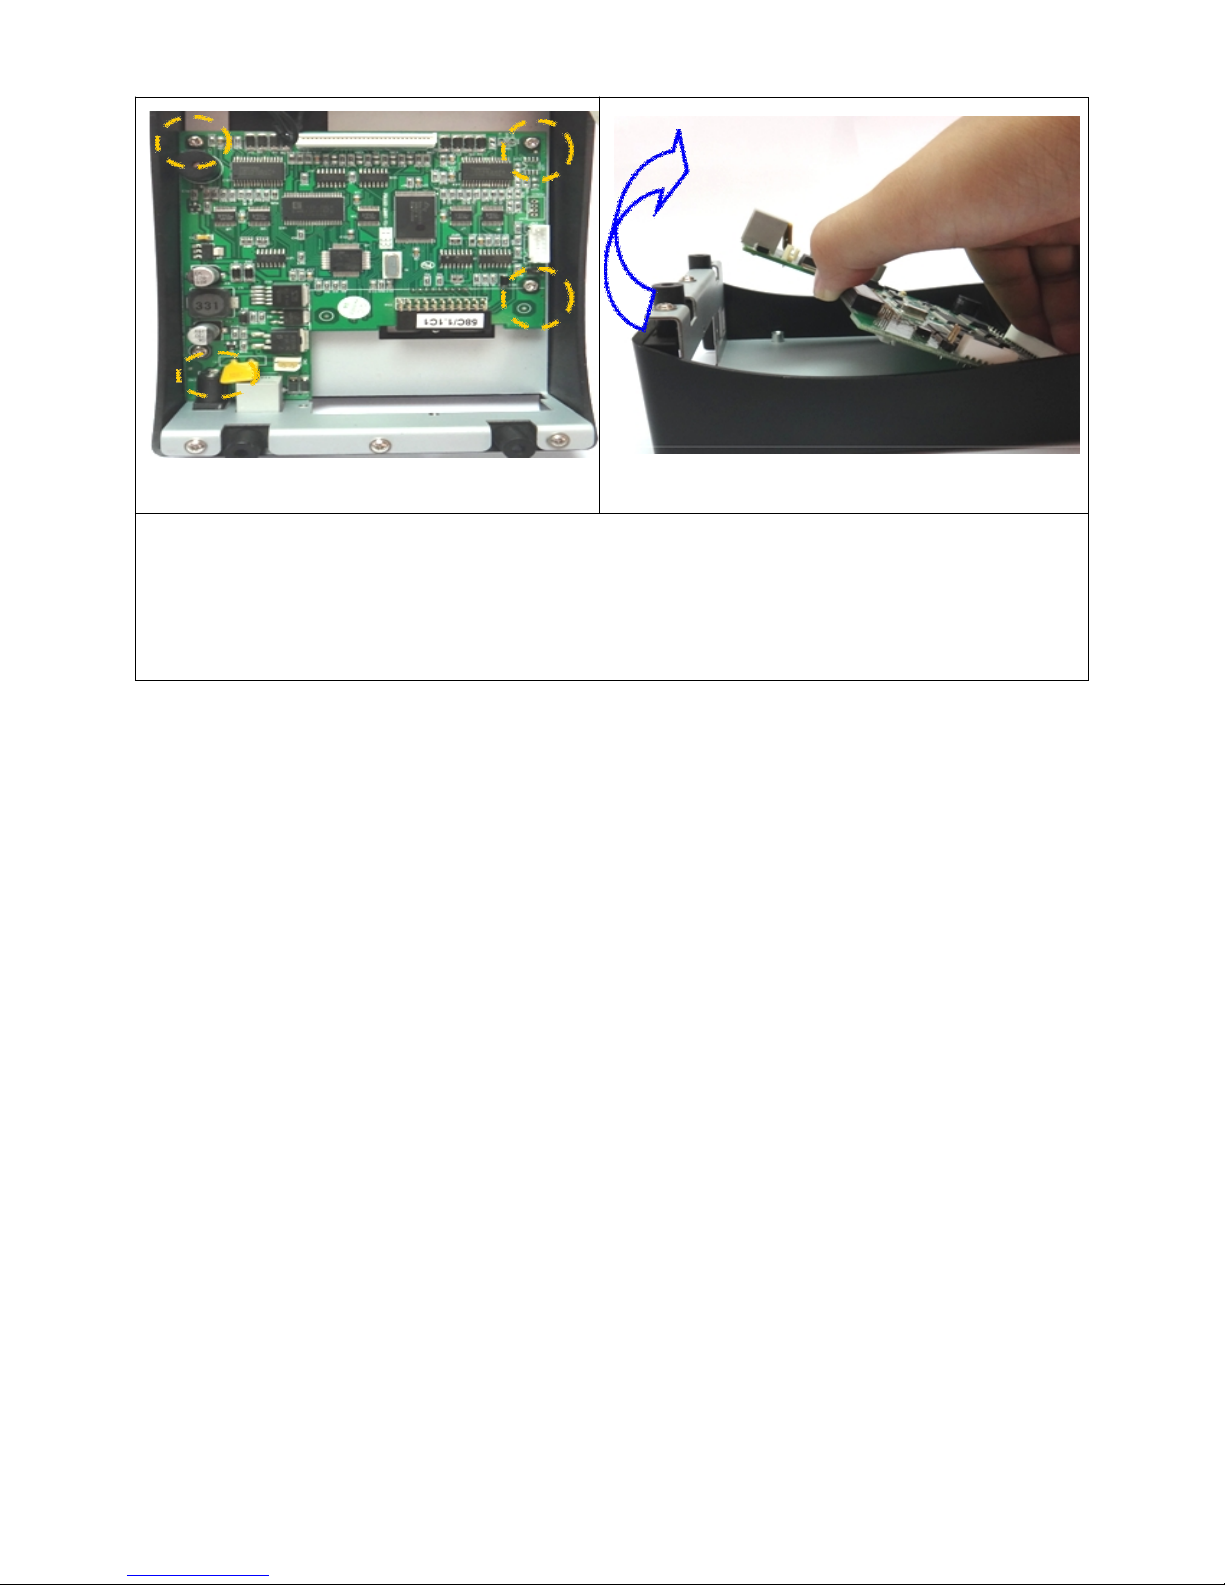
2.Mainboard:Themainboardisalsooneofthemostimportantpartsofthe
printeranditisusedtocontrolalltheactionsoftheprinter,mainlycomposed
oftheCPUcontrolcircuit,powercircuit,motorcontrolcircuit,boxcircuit
andinterfacecircuit.
Whentheprinterisnottyping,printingmessycodesorthepaper
abnormalitiesappear,itispossiblybecausethecomponentsonthe
mainboardarebroken.Youcanreplacethefailedmainboardwithagoodone
tojudgewhetheritistheproblemcausedbythemainboard.
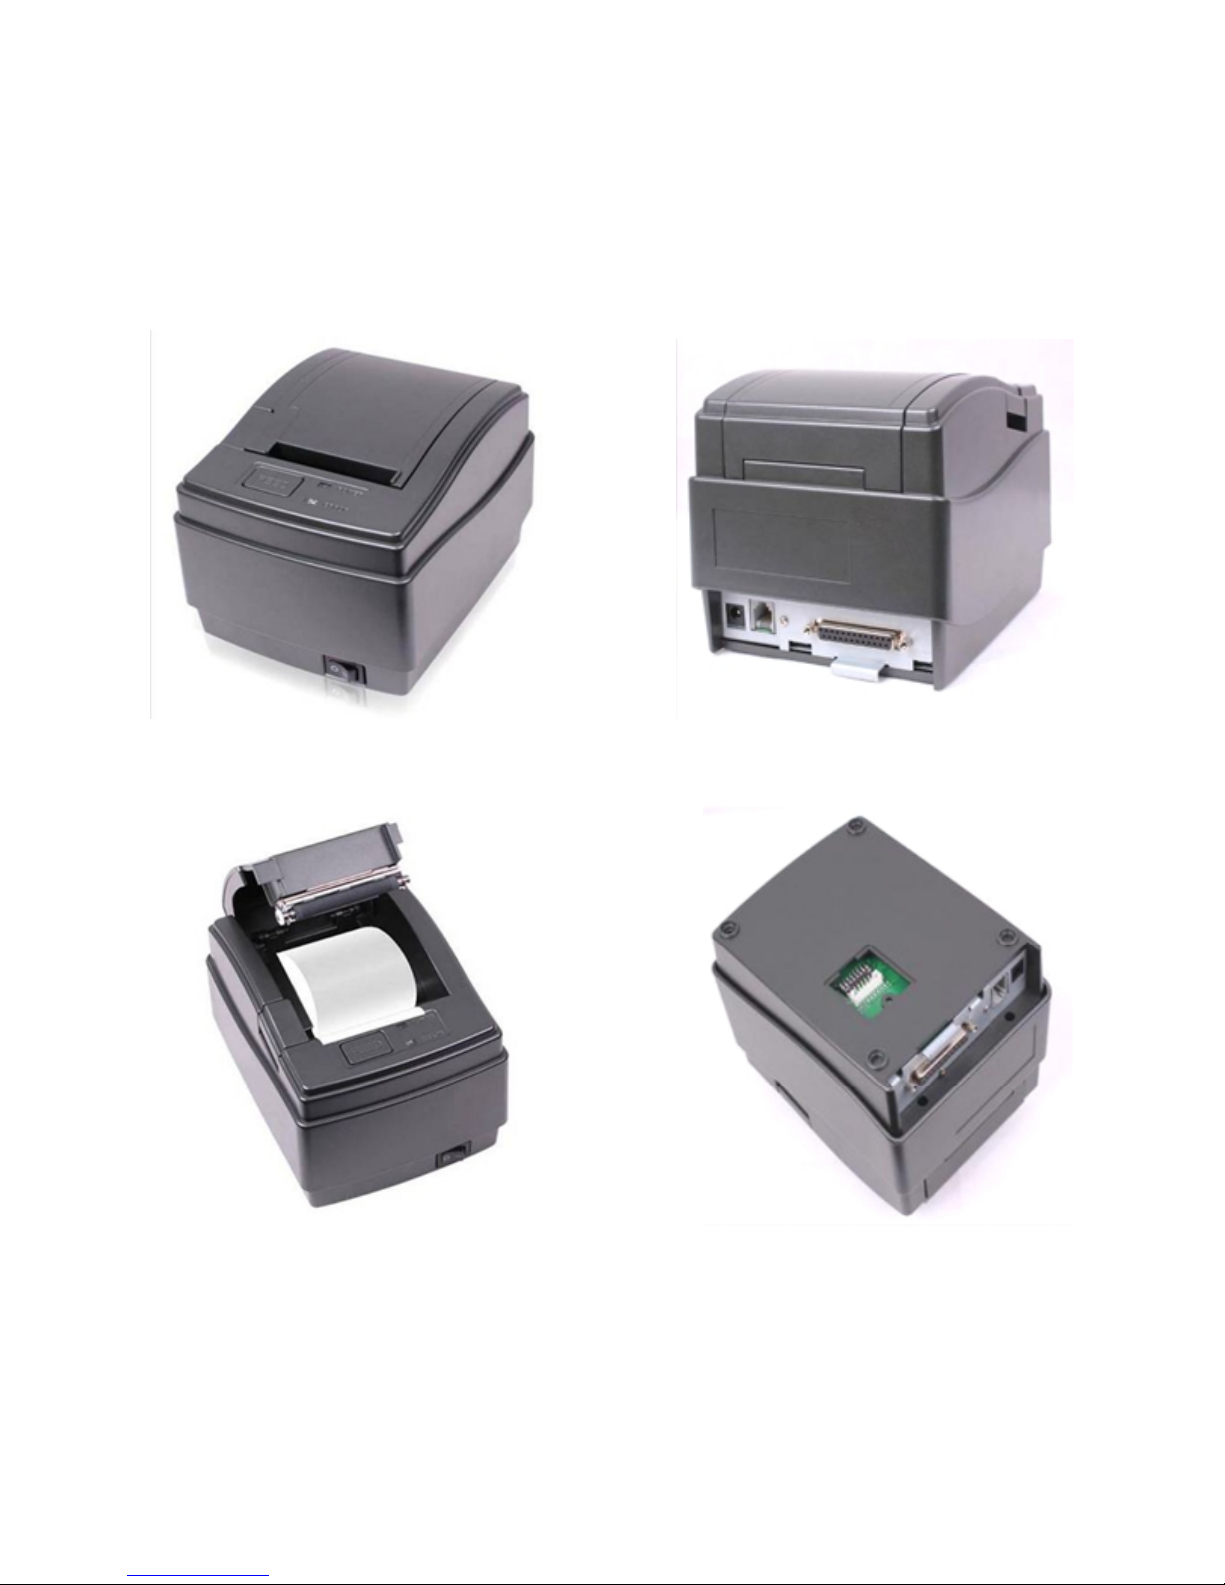
3.Caseholder:Theplasticpartsandhardwareusedtoinstallthemainboard
andprintheadsoastoassembleallcomponentsintoacompleteprinter.
TheCaseholderarenotpronetobedamaged,unlessbyviolenttransport,
falls,collisions.Oncedamaged,pleasereplacewithanewone.
4.Powersupply:ChangetheACintoDCsoastoprovideastableDCpower
supplyfortheprinter.
Pleasecheckwhetherthepowersupplymeetstherequirementsoftheprinter
beforegettingtheprinterpoweredonandtrytousetheoriginalpowersupply.
Ifthepoweradapter’slightisnotonafterthepowersupplyisprovided,it
meansthepowersupplyisdamagedandreplaceit.

3
5.Communicationinterface:Itisusedtoachievethedataexchangebetween
theprinterandthePC,thecommunicationinterfaceboardisremovableand
multipleinterfacessuchasserialinterface,parallelinterface,USBinterface
andEthernetinterfacecanallbesupported.
Whentheprinterdoesnotprintorprintoutmessycodes,youcanreplace
withabettercommunicationinterfaceboardtojudgewhetheritisthefailure
causedbythecommunicationinterfaceboard.
6.Keyboard:Therearekeys,powerindicatorlightandstatuslightonthekey
board.Anditisusedtopressthebuttontomovepaper,makeself-test,enter
DUMPmode(hexmode)andindicatevariouserrorconditions.
Whentheprintercanprintasnormal,butthepapermovingbuttondoesnot
workwell,itmeansthekeyboardgetswrong.Iftheprinterworkswell,the
powerlightonthekeyboardisoff,itmeansthekeyboardgetswrong.
Productparts

4
Ⅱ.CommonProblemsandTroubleshooting
CommonProblemsSolutions
1.Messycodeswith
serialinterface
CheckwhetherthehostPCandtheprinterhavethesame
baudrate
2.Unclearprinting
effect
Entirelyunclear:poorqualityofthermalpaper;changethe
printingdensityfromthethinmodetothetickmode.
Partlyunclear:theprintheadisdirty.Usethecottoncloth
dippedwithalcoholtocleanthethermalelement.
3.Thecashboxcan
notbeopened.
Checkwhetherthecashboxmeetswiththecashinterface
specifications.
4.ThePapercannot
bedetected.
Checkwhetherthetopcoveriswellplaced.Usethesoft
brushtocleanthepapersensor.
5.Thepaperdoesnot
move
Thepapermovingbuttonisbroken.Theprintheadisbroken.
Themainboardisbroken.Replacethebrokenpart.
6.Theindicatorlight
isnoton.
Checkwhethertheappropriatepowersupplyisconnected.
Checkwhetherthepowerswitchisturnedon.
7.Theredlight
flasheswhenthereis
paperprinting.
Thetemperatureoftheprintheadisoverhigh,anditisinthe
hightemperatureprotectionstatus.Afterawhile,itcanprint
asnormal.
8.Whethertheonline
printingissupported.Itissupported.
9.Howtosharethe
printer
EntertheNetworkNeighborhoodandfindtheprinteronthe
computersharingtheprinter.Double-clicktheprinterand
installthedrivertothelocalcomputer.
10.SkewprintingThepaperisplacedskew.Placethepaperintherightway
11.Slowprintingwith
serialinterface.
Thebaudrateoftheserialportissmall.Selectappropriate
biggerbaudrate.
12.Thewatergets
intotheprinter.
Turnthepoweroff.Useahairdryertodrythemainboard
andallthepartswiththetemperatureabout50℃

5
Ⅲ.DIPSwitchFunction
TheDIPlocatesatthebottomoftheprinter.OpentheDIPcoverandtheDIPis
shownasinthefigure.TheuserneedstoadjustDIPtoON/OFFaccordingtothe
actualneeds.
DIPswitchself-testpage’sDIPdefaultsetting
DIP1DIP2Baudrate
(bps)
DIP5DIP6
Verification
mode(Validin
serialstate)
Parallel
interfacemode
(Validin
parallelstate)
ONON9600
(Default)ONON--
ONOFF19200ONOFF--
OFFON38400OFFONOddParity
Check(Default)-
OFFOFF115200OFFOFFEvenparity
check
Printserver
mode

6
DIP3BuzzerDIP4
Printing
densityDIP7
Printing
modeDIP8Bytemode
ON
Turned
on
(defaul
t)
ON
Thin
(default)ON
36
charactersON
Doublebyte
(default)
OFF
Turned
offOFFThickOFF
Epson
mode
(default)
OFFSinglebyte

7
Ⅳ.Replacemainboard
Step1:Removethetwoscrewsforthe
communicationinterfaceandremove
thecommunicationinterfaceboard
accordingtothedirectionofthearrow
(serialinterface,parallelinterface
needtoberemoved)
Step2:Removethetwoscrewsatthe
base.
Step3:Removethebaseaccordingto
thedirectionofthearrow.
Step4:Removethethreeconnecting
linesonthemainboard.
Step5:Removethefourscrewsonthe
mainboard.
Step6:removethemainboardaccording
tothedirectionofthearrow.Ifitisnot
easytoremove,removethepower
switchfirst.

8
Step7:Installthenewmainboardinaccordancewithreverseorderoftheabove
sequence.Placethemainboard-tightenscrewsofthemainboard–plugthe
connectingcable–installthebase-tightenthetwoscrewsforthebase-Install
thecommunicationinterfaceboard-tightenthescrews

9
Ⅴ.Replacetheprinthead
Thestepsonetofivearethesamewiththestepstoreplacethemainboard.
Step5:Removethe5screwsforthe
printheadholder
Step6:pulloutthetwobucklesforflat
cable.Removetheprinthead’scable
accordingtothedirectionofthearrow.
Step7:Removethetwoscrewsforthe
printhead.
Step8:Separatetheprintheadandthe
bracket
Step9:Installthenewprintheadinaccordancewithreverseorderoftheabove
sequence.Assembletheprintheadandthebracket-tightenthescrews-insertthe
connectingcablebetweentheprintheadandkeyboard-Assembletheprinthead
andprintertopcover,tightenthescrews-plugthemainboard’sconnectingcable
–installthebase-Tightenthetwoscrewsforthebase–installthe
communicationinterfaceboard-tightenthescrews

10
Ⅵ.Partofschematiccircuitdiagram
6.1Partofcircuitdiagramforpowersupply
6.2Partofcircuitdiagramforcashbox
PrintercashboxinterfaceusesRJ116P4Csocketandtheinterfaceisdefinedas
follows:
PinNameofsignalDirection
1Signalground-
2--
3Cashboxopen/closeOutput
4+24V-
5--
6Signalground-

11
6.3PartofcircuitdiagramCircuitdiagram

12
6.4PartofcircuitdiagramSensors
6.5PartofcircuitdiagramInterfaces

13
6.6PartofcircuitdiagramFont
Table of contents
Other Zonerich Printer manuals
Popular Printer manuals by other brands

Epson
Epson B-510DN - Business Color Ink Jet Printer Brochure & specs

Xerox
Xerox DocuPrint 96 IPS Series System overview guide

Samsung
Samsung SCX 6555N - MultiXpress Mono Multifunction user guide

FLORA
FLORA LJ3208P user guide

Colorjet
Colorjet Vulcan user manual

TE Connectivity
TE Connectivity T3212 Instruction