4
2. Use the Input buttons to select an input source:
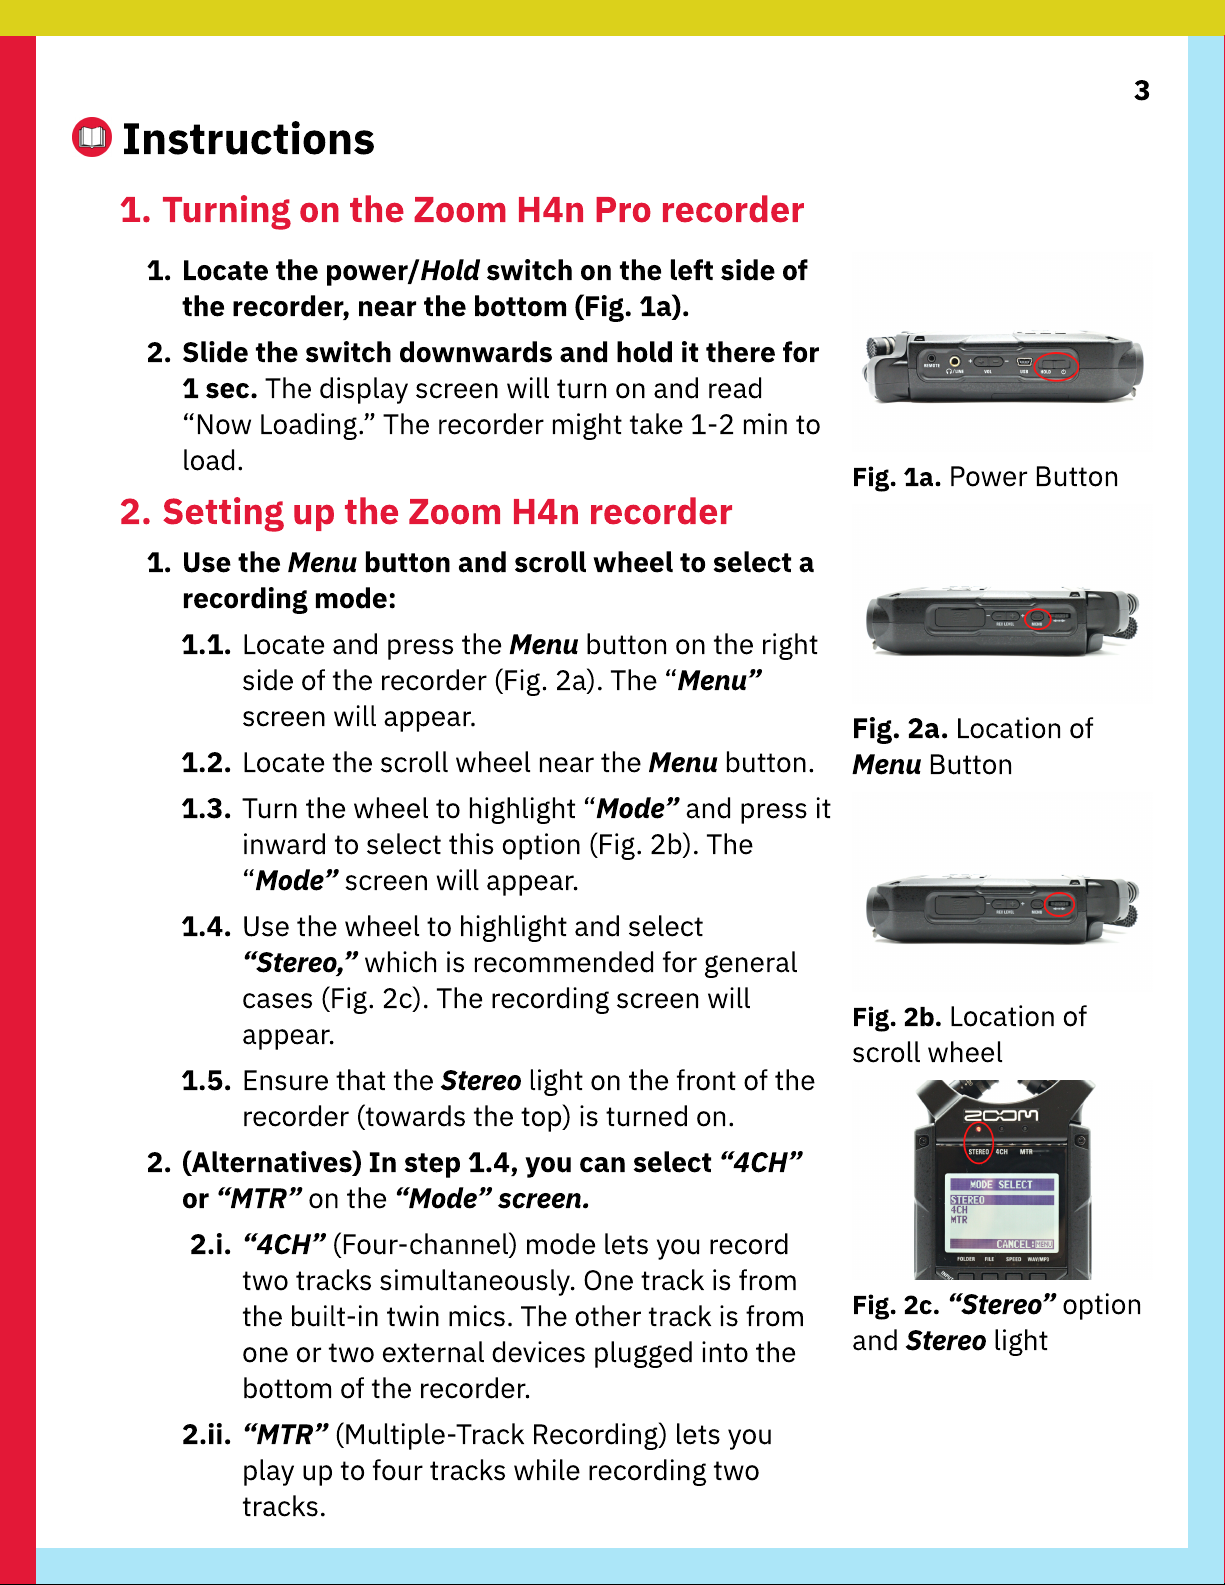
2.1 Locate the three Input buttons (Mic, 1, and 2)
on the front of the device (toward the eft side).
They form a vertica ine (Fig. 2d).
2.2a. Press the Mic (microphone) button to use the
bui t-in twin microphones (on top of recorder).
2.2b. (A ternative) Press 1 or 2 to use any externa
mic(s) p ugged into one of the recorder’s two
bottom ports.
3. Put the recorder in standby mode:
3.1. Locate the Rec (Record) button on the front of
the recorder (toward the right side, Fig. 2e).
3.2. Press the Rec button once to enter standby
mode. The button wi continuous y f ash. The
screen wi f ash a ‘paused’ icon (two vertica
bars) in the top- eft corner.
3.3. Ensure that the screen shows a generated
ename of the upcoming recording (Fig. 2f).
3. Adjusting the recording volume
1. Position the recorder as i
f
actually recording:
1.1.
S
pea
k
into the device. The screen wi show
moving
“
L”
and
“
R
”
bars to represent the
recording vo umes of the eft- and right-
channe s (Fig.
3
a).
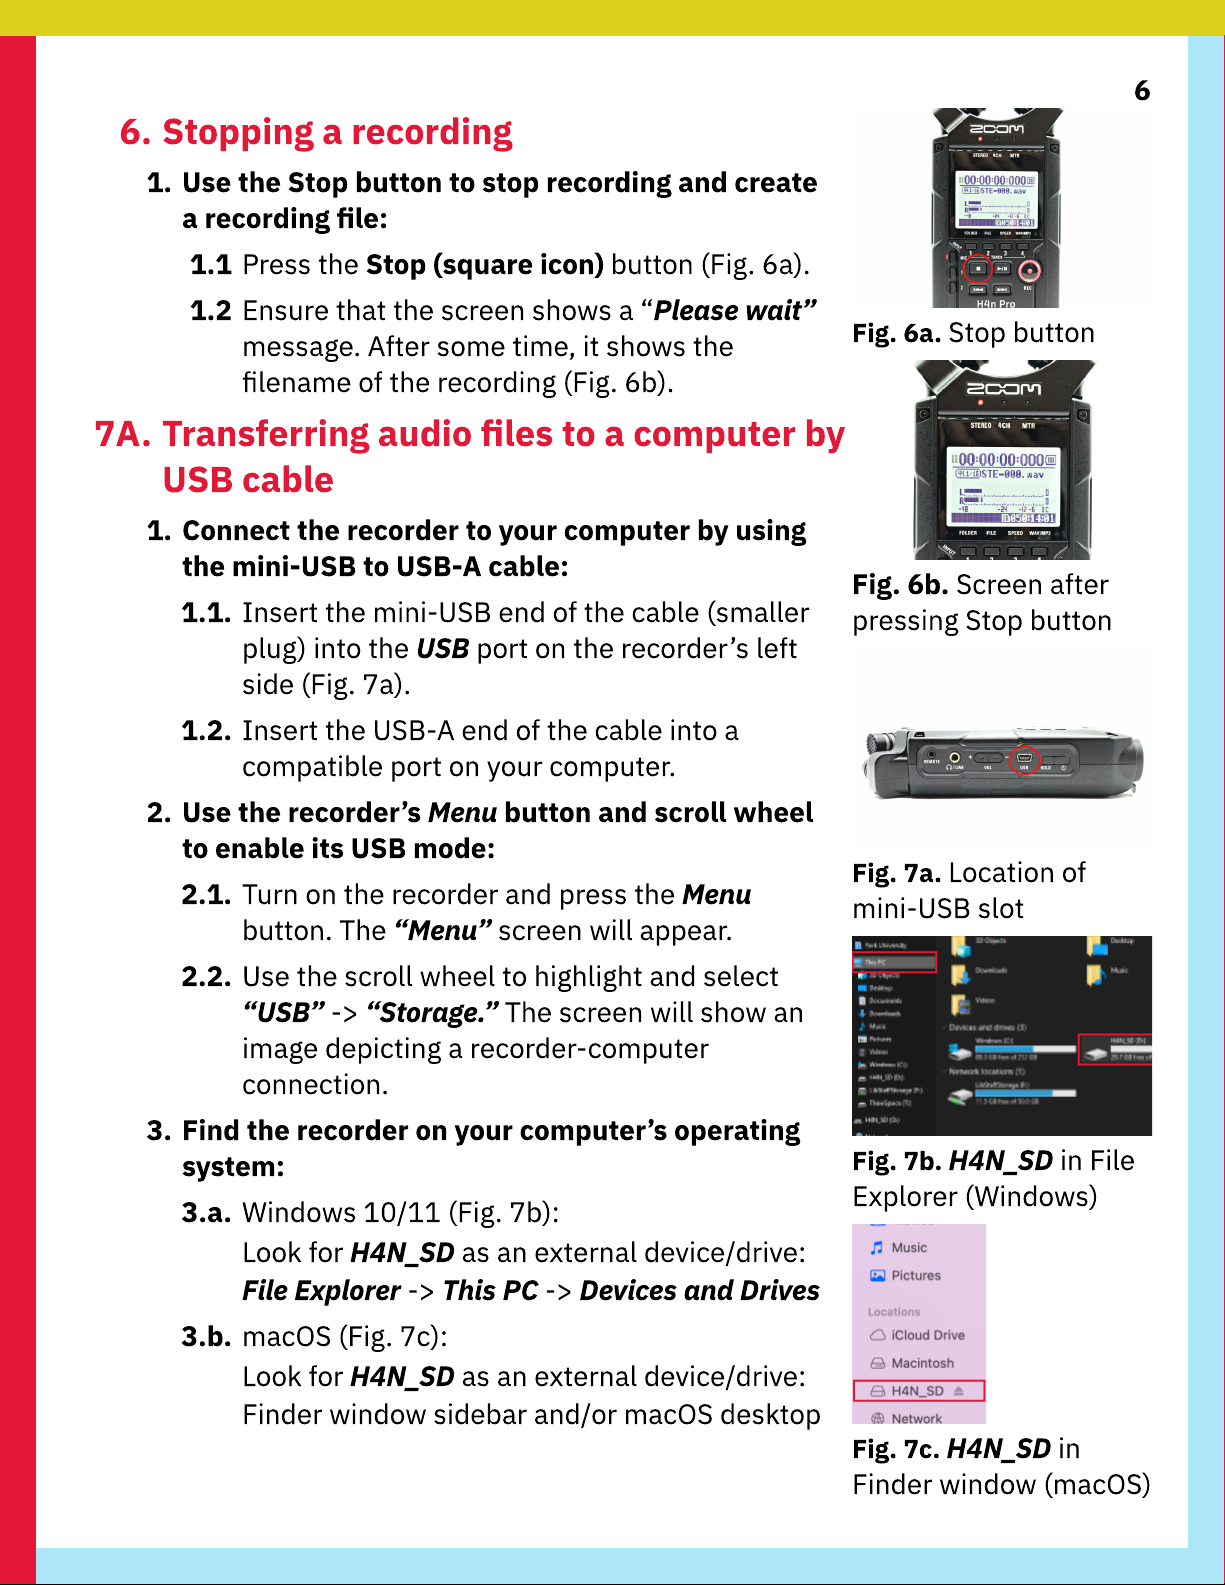
2. Use the Rec
L
evel buttons
(+
and
-)
to adjust
recording volume as needed:
2.1. Locate the Rec
L
e
v
e
l
(recording eve ) buttons
on the right side.
2.2. Press the
+
and
-
buttons to ad
j
ust the
recording vo ume. The screen wi show the
“
Mic
L
e
v
e
l”
va ue (Fig.
3
b). The max is 1
00
.
2.3. (Recommended) Ad
j
ust the
“
Mic
L
e
v
e
l”
so the
“L”
and
“
R
”
vo umes pea
k
between the
“-
12
”
and
“-6”
mar
k
ers on the recording screen.
F
ig. 2d. Mic 1 and Mic 2
F
ig. 2e. Record (Rec)
button
F
ig. 2
f
. Recording
screen
F
ig. 3a.
M
oving
“L”
and
“
R
”
bars
F
ig. 3b.
+
and
-
buttons
affect
“
Mic
L
e
v
e
l”
va ue