ZOSI Z18.5.T.1 User manual

Wireless indoor base station
system user manual
Base station system manual ---1
Manual de sistema de estación base --- 7
Anleitung für das Basisstation System---- 13
Manuel du centrale de système --- 19
Pуководствосистемыпобазовойстанции-----25
ベースステーションシステムマニュアル ----- 31
Z18.5.T.1

1
Plug and play,add device to APP by scanning QR code.
Before using the product,please read the quick guide carefully and keep the manual properly.

2
List of products ( please refer to the material item)
After undo the package, please check whether the camera is in good condition,
and confirm whether the accessories are complete according to the below pictures.
Power supply*3
IPC*2 NVR*1
Quick guide*1
Quick guide

3
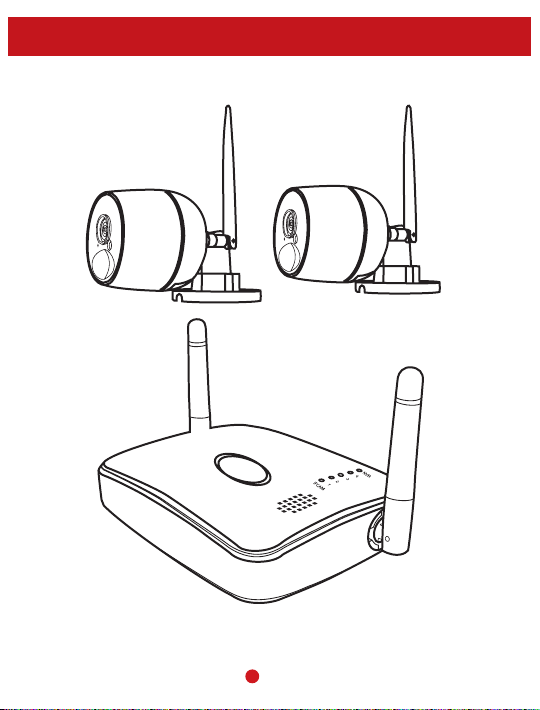
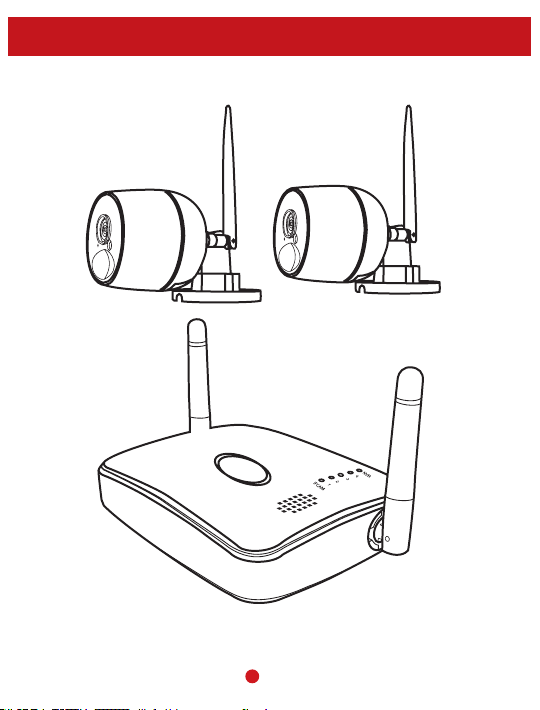
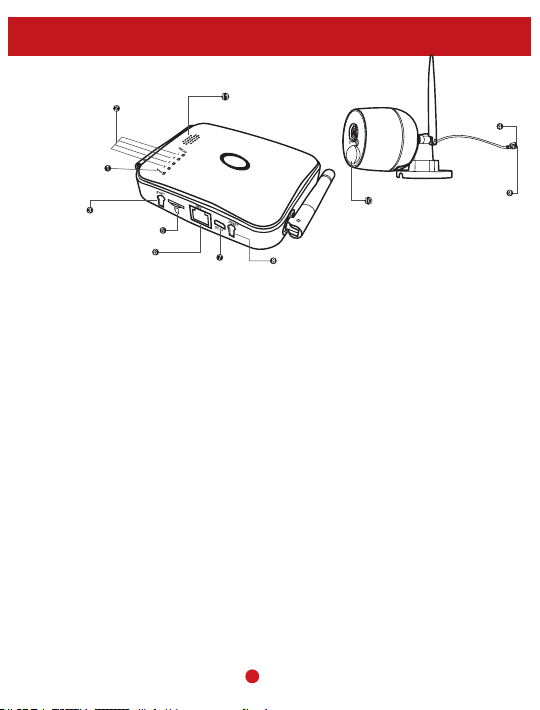
Product description (pictures are for reference only, please refer to the actual object)
IPC connection status
indicator light
WAN connection
status indicator light
SYNC(match code
button)
TF card slot
NET(Ethernet port)
Power port
loudspeaker
Reset button
Reset button
PIR body induction
DC 12V power supply
Description and explanation
1. WAN(Wide Area Network) connection status indicator light
When LAN is connected or the WAN is disconnected,the indicator light will flash slowly. When WAN is connected
successfully ,the indicator light keeps on.
2. IPC connection status indicator light
When the IPC is connected to MINI NVR,the light keeps on,and flash slowly when disconnected.
3. SYNC(match code button)
Long press the button for 4 seconds to enter the code state,you can hear the voice prompt “matching code
started,please wait for voice prompt to complete”,then you get the voice prompt of “matching code successfully’”or
“matching code failed”.
4. IPC(match code method)
Long press the reset key of the two IPC for 5 seconds,then the cameras will restore to the factory default
settings,the IPC tail light will flash.Then long press the MINI NVR match code key for 4 seconds,wait the voice
prompt of “matching code successfully”,and check if the MINI NVR indicator light and IPC tail light are keeping
on,if yes,it means the matching code successfully.(Please note,the IPC matching code was accomplished before
it leaves the factory,plug and play,you don’t need to match code at the first time.If you need to change or add
more IPC,please refers to the above instruction and add the new IPC by matching code. )
5.TF card slot
The system defaults to motion detection recording after inserting a TF card.
6. NET
Network cable interface router
7. DC 5V power port
8. RESET long press 10 seconds to reset
9. DC 12V power port
10. PIR body induction PIR body motion detection
11. Loudspeaker built-in speaker, audio broadcast

4
Operation tips
Scan the QR Code or search ZOSI Cloud (in App store or Google Play) to download the free APP�
install on smart phone
User registration
App store Google play

5
Add device
Step 1: Power on the IPC and MINI NVR,and connect the MINI NVR to the router by network cable.
Step 2: Connect your phone to the same WiFi of the router.
Step 3: Open zosicloud and login,then click “+” in the top right corner.

6
Step 4: Add the device by scanning the QR code on the MINI NVR manually,then submit it.
Step 5:Tap the channel number to connect the camera or “playback” to view the footage remotely.

7
Conectar y todo listo. Añadir el dispositivo escaneando el código QR
Por favor léalo bien el manual antes de usar el equipo.

8
Contenido del equipo ( por favor consultar la descripción).
Por favor examina si los productos están correctos antes de usarlos.
Examine si están todos los accesorios.
Alimentador*3
IP Cámara*2 NVR*1
Manual*1
Quick guide

9
Descripción de productos (Las fotos siguientes solo sirve como un ejemplo)
Luz de indicador de
estado de IPC
Luz de indicador de
estado de WAN
Botón de coincidir
(SYNC)
Puerto de tarjeta TF
Puerto de red
Puerto de potencia
Altavoz
Botón de resetear
Botón de resetear
Detector de PIR
Alimentador de DC 12V
Descripción de producto.
1.Luz de indicador de estado de WAN
La luz destellará cuando el LAN/WAN no está conectado. Cuando la red está bien conectada la luz mantendrá
encendida.
Luz de indicador del estado de IPC
Cuando la cámara está conectada al mini NVR, la luz mantiene encendida. Cuando no está conectada la luz
destellará.
2. SYNC(botón de coincidir)
Presionando el botón por 4 seconds escuchará la noticia en inglés “matching code started,please wait for voice
prompt to complete”, luego el Sistema le dirá si el código ha sido coincidido(“matching code successfully’”or
“matching code failed”.)
3. IP Cámara(Coincidir el código)
Presionando el botón por 5 seconds, luego la cámara se reiniciará, la luz de IPC destellará. Presionar el botón
de coincidir por 4 segundos hasta eschucar el mensaje “matching code successfully”, luego examiner si la luz de
indicador del mini NVR y la luz de IPC está encendida. (Todas las cámaras serán configuradas antes de salir de
fábrica, no hace falta configurarlo.Si necesita añadir de nuevo una cámara puede consultar el manual.)
4. Puerta de tarjeta TF
Después de insertar la tarjeta TF se activará automáticamente la función de detección de movimientos.
5. Red
Rúter con interfaz de cable de red.
6. Puerto de alimentación de DC 5V
7. Resetear Presionar 10 segundos para resetear.
8. Puerto de alimentación DC 12V
9. PIR inducción de cuerpo humano
Detección de movimientos PIR
10. Altavoz
altavoz y micrófono preinstalado.

10
Ojo
Escanee el código QR o busque ZOSI Cloud (en la tienda de aplicaciones o Google Play) para
descargar la aplicación gratuita, luego instálela en un teléfono inteligente.
Registrar tu cuenta
App store Google play

11
Añadir dispositivos
Paso 1: Enchufar la IP cámara y la base, luego conectar la base a un rúter.
Paso 2: Conectar tu móvil al mismo wifi del rúter.
Paso 3: Abrir zosicloud e ingresar, luego haga clic“+” en la esquina superior derecha.

12
Paso 4: Añadir el dispositivo escaneando el código QR code en la base o puede ponerlo
manualmente.
Paso 5:Tocar la cámara para ver las cámaras en tu móvil.

13
Plug and Play, schnelle Handyzugriff durch QR-Code-Scann
Lesen Sie diese Bedienungsanleitung sorgfältig vor der Verwendung und bewahren Sie es zum
späteren Nachschlagen auf.

14
Liste der Produkte (Bitte beziehen Sie sich auf den tatsächlichen Artikel)
Nach dem Auspacken überprüfen Sie bitte, ob die Kameras in gutem Zustand sind. Bestätigen Sie,
ob das Zubehör gemäß den folgenden Bildern vollständig ist.
Netzteil * 3
IPC*2 NVR*1
Anleitung * 1
Quick guide

15
Produktbeschreibung (Bitte beziehen Sie sich auf den tatsächlichen Artikel)
IPC-Verbindungsstatusanzeige
WAN-
Verbindungsstatusanzeige
SYNC(Match Code
Taste)
TF-Kartensteckplatz
NET (Ethernet-Anschluss)
Stromanschluss
Lautsprecher
Neustart Taste
Neustart Taste
PIR Körper Induktion
DC 12V Netzteil
Anweisungen:
1. WAN(Weitverkehrsnetz)-Verbindungsstatusanzeige
Wenn das LAN verbunden ist oder das WAN getrennt ist, blinkt die Anzeigeleuchte langsam.Wenn das WAN erfolgreich verbunden ist,
leuchtet die Anzeigelampe auf.
2 IPC-Verbindungsstatusanzeige
Wenn die IPC mit dem NVR verbunden ist, leuchtet die Anzeigelampe auf.Wenn die Verbindung getrennt wird, blinkt die Anzeigeleuchte
langsam.
3 SYNC(Match Code Taste)
Halten Sie die Taste für 4 Sekunden, um den Code Staus einzutreten. Sie werden die Sprachansage „Matching code started, please
wait for voice prompt to complete" hören. Dann hören Sie die Sprachansage „Matching code successfully" oder „Matching code failed".
4 IPC (Match Code Methode)
Drücken Sie die Neustart Taste der beiden IPC für 5 Sekunden. Wenn die Kameras auf der Werkseinstellungen wiederherstellen
werden, blinkt die Rücklicht der IPC schnell. Dann drücken Sie die NVR Match Code Taste für 4 Sekunden, warten Sie die
Sprachansage von „Matching code successfully”. Bitte prüfen Sie, ob die Anzeigelampe der NVR und das Rücklicht der IPC leuchten.
Wenn ja, bedeutet, dass Matching Code erfolgreich ist. (Bitte beachten Sie, dass die IPC ab Werk schon voreingestellt wurden. Sie
müssen keinen Matching-Code bei erster Verwendung machen.Wenn Sie später eine neue IPC hinzufügen möchten, bitte beziehen Sie
sich auf die obige Anleitung und fügen Sie die neue IPC durch Match Code hinzu.)
5 TF-Kartensteckplatz
Das System nimmt nach dem Einlegen einer IF-Karte standardmäßig eine Bewegungserkennung Aufzeichnung vor.
6. NET
Netzwerkkabel Schnittstelle zum Verbinden mit dem Router
7. DC 5V
Stromanschluss
8 Neustart
Drücken Sie 10 Sekunden zum Zurücksetzen
9 DC 12V
Stromanschluss
10 PIR Körper Induktion
PIR Körperbewegungserkennung
11 Lautsprecher
Eingebauter Lautsprecher, Audiosendung

16
Bedienungstipps:
Scannen Sie den QR-Code oder suchen Sie nach ZOSI Cloud (im App Store oder Google Play),
um die kostenlose APP herunterzuladen und auf dem Smartphone zu installieren.
Benutzer Registrieren:
App store Google play

17
Gerät hinzufügen:
Schritt 1: Schalten Sie die IPC und der NVR ein und verbinden Sie der NVR mit dem Router über
ein Netzwerkkabel.
Schritt 2: Verbinden Sie Ihr Handy mit demselben WLAN des Routers.
Schritt 3: Öffnen Sie die Zosi Cloud und loggen Sie sich ein. Klicken Sie dann auf „+“ in der
rechtens oben.

18
Schritt 4: Scannen Sie die QR-Code auf dem NVR, um das Gerät in die App hinzuzufügen.
Schritt 5: Klicken Sie auf dem Bildschirm, um die Aufnahme anzuschauen.

19
Подключи и играй, добавьте устройство в APP, сканируя QR-код.
Перед использованием продукта, пожалуйста прочитайте быстрое руководство
внимательно и сдержите руководство как следует.
Other manuals for Z18.5.T.1
2
Table of contents
Languages:
Other ZOSI Accessories manuals