Zubler 330 Series User manual

0
987
654
321
Made in Germany
series
EN07-2022EN07-2022

2

3
from page
0. Introduction 4
0.1 Declaration of conformity
0.2 General
0.3 Intended use
0.4 Safety instructions
1. Installation 6
1.1 Setting up the device
1.2 Initial installation
1.3 Display
1.4 Diagnostic program
2. Operation 8
2.1 Program selection
2.1.1 Preview
2.1.2 Start program
2.1.3 Change program during a program run
2.1.4 Program abort
2.1.5 Functional error during program execution
2.1.6 Program ended
2.1.7 Program overview and parameter assignment
2.1.8 Explanation of terms
2.2 Edit folder / programs
2.3 Warm up
2.4 Standby
2.5 Settings
2.5.1 Data transfer
2.5.2 Firmware update
2.5.3 Idle- / Standby temperature
2.5.4 Custom calibration
2.5.5 Last error message
2.5.6 Mufeoperatinghours
2.5.7 Start purge program
2.5.8 Chamotte drying program
2.5.9 Basic settings
2.5.10 Initial oven setup
2.5.11 Vacuum, pressure, lift
2.5.12 Service menu
2.5.13 Factory reset
2.5.14 Upgrade oven
3. Data 30
3.1 Technical data
3.2 Scope of delivery
3.3 Spare parts
4. Status messages 32
5. Warranty 33
5.1 Filter element for vacuum pump P3
5.2 Cleaning the heating chamber
6. Guarantee 34
7. Disposal instructions 34
CONTENTS
5.3 Checking the water separator
5.4 Filter element for compressed air supply

4
0
987
654
321
MadeinGermany
we are pleased that you have decided
in favor of a Zubler furnace VARIO 230
and wish you pleasant work with it. The
constant further development of our
technology is based on the cooperation
with experienced dental technicians. The
focus is on the goal of building furnaces
ofthehighestquality,exibilityandsus-
tainability. Performance and economy are
basic requirements. To ensure trouble-
free work, you must read the operating
instructions carefully.
0.1 Declaration of conformity
We, Zubler Gerätebau GmbH
Buchbrunnenweg 26
89081 Ulm-Jungingen
www.zubler.de
declare that the product "VARIO 230" complies with the provisions of the
following EC directives:
2006/42/EC Machinery Directive
2014/35/EU Low Voltage Directive
2014/30/EU EMC Directive
2011/65/EU RoHS.
Iftheproductismodiedwithoutouragreement,thisdeclarationloses
its validity.
The correct processing of modern cera-
mic materials places increasing demands
on dental technicians. We have taken
this into account and combined the latest
technology and future-oriented proces-
ses in the VARIO ovens. The software
installed in the VARIO series allows you
tocarryoutindividualpressingandring
for all dental ceramics available on the
market. The use of the highest quality
materials increases the service life of
the furnace and offers you reproducible
results at the highest level. It is now our
desire that you use the VARIO furnaces to
produce top-quality dental ceramics for
years to come. Therefore we will inform
you about changes to the software or
additions to the processing options. We
are sure that you will have much success
with the ceramic furnace and congratula-
te you on the choice you have made.
0. Introduction
0.2 General
QThe VARIO series ovens are used
exclusively for the firing and pressing
of dental ceramics and is only
intended for these applications.
QThe user is liable for damage
resulting from other use.
QWhen working frequently with
temperatures above 1075°C, the
service life of the heating chamber is
reduced.
QThe manufacturer's warranty
provisions apply.
QIntended use also includes observing
all the information in these operating
instructions.
QRepairs may only be carried out by
authorized service centers.
QDo not operate the control panel with
wet or damp fingers.
QPlease unpack the oven with care
and transport with two people.
Always lift by the base, never by the
oven cavity or lift table.
QDo not operate the control panel with
hard and/or pointed objects.
QNever operate the furnace without
the firing insulation base or press
insulation base.
QDo not put your hands between the
oven table and the oven chamber
during operation. There is a risk of
crushing and burns.
QNever place items or hands under the
lift table when in use. The oven table
must not be obstructed during the
opening process.
QThe cooling slots must not be
covered, otherwise air circulation
may not be optimal and the device
may overheat.
QNo liquids or objects may get into the
device or into the ventilation slots, as
this could cause a short circuit.
QThe oven table has an electric drive
and must be operated with the
opening and closing button. Do
not open or close the oven table by
hand.
0.3 Intended use
Dear Sir or Madam,
0.1 Declaration of conformity
We, Zubler Gerätebau GmbH
Buchbrunnenweg 26
89081 Ulm-Jungingen
www.zubler.de
declare that the product "VARIO PRESS 330" complies with the provi-
sions of the following EC directives:
2006/42/EC Machinery Directive
2014/35/EU Low Voltage Directive
2014/30/EU EMC Directive
2011/65/EU RoHS.
Iftheproductismodiedwithoutouragreement,thisdeclarationloses
its validity.
We are appreciative of your decision in
favor of the Vario Press 330 pressing fur-
nace. We hope you enjoy working with
it! Further technological development
has been achieved with the cooperation
of experienced dental technicians. Our
focus is to achieve the goal of building
furnaces of the highest quality and sustai-
nability. Perforamnce and economy are
basic requirements. To ensure success,
please read these operating instructions
carefully.

5
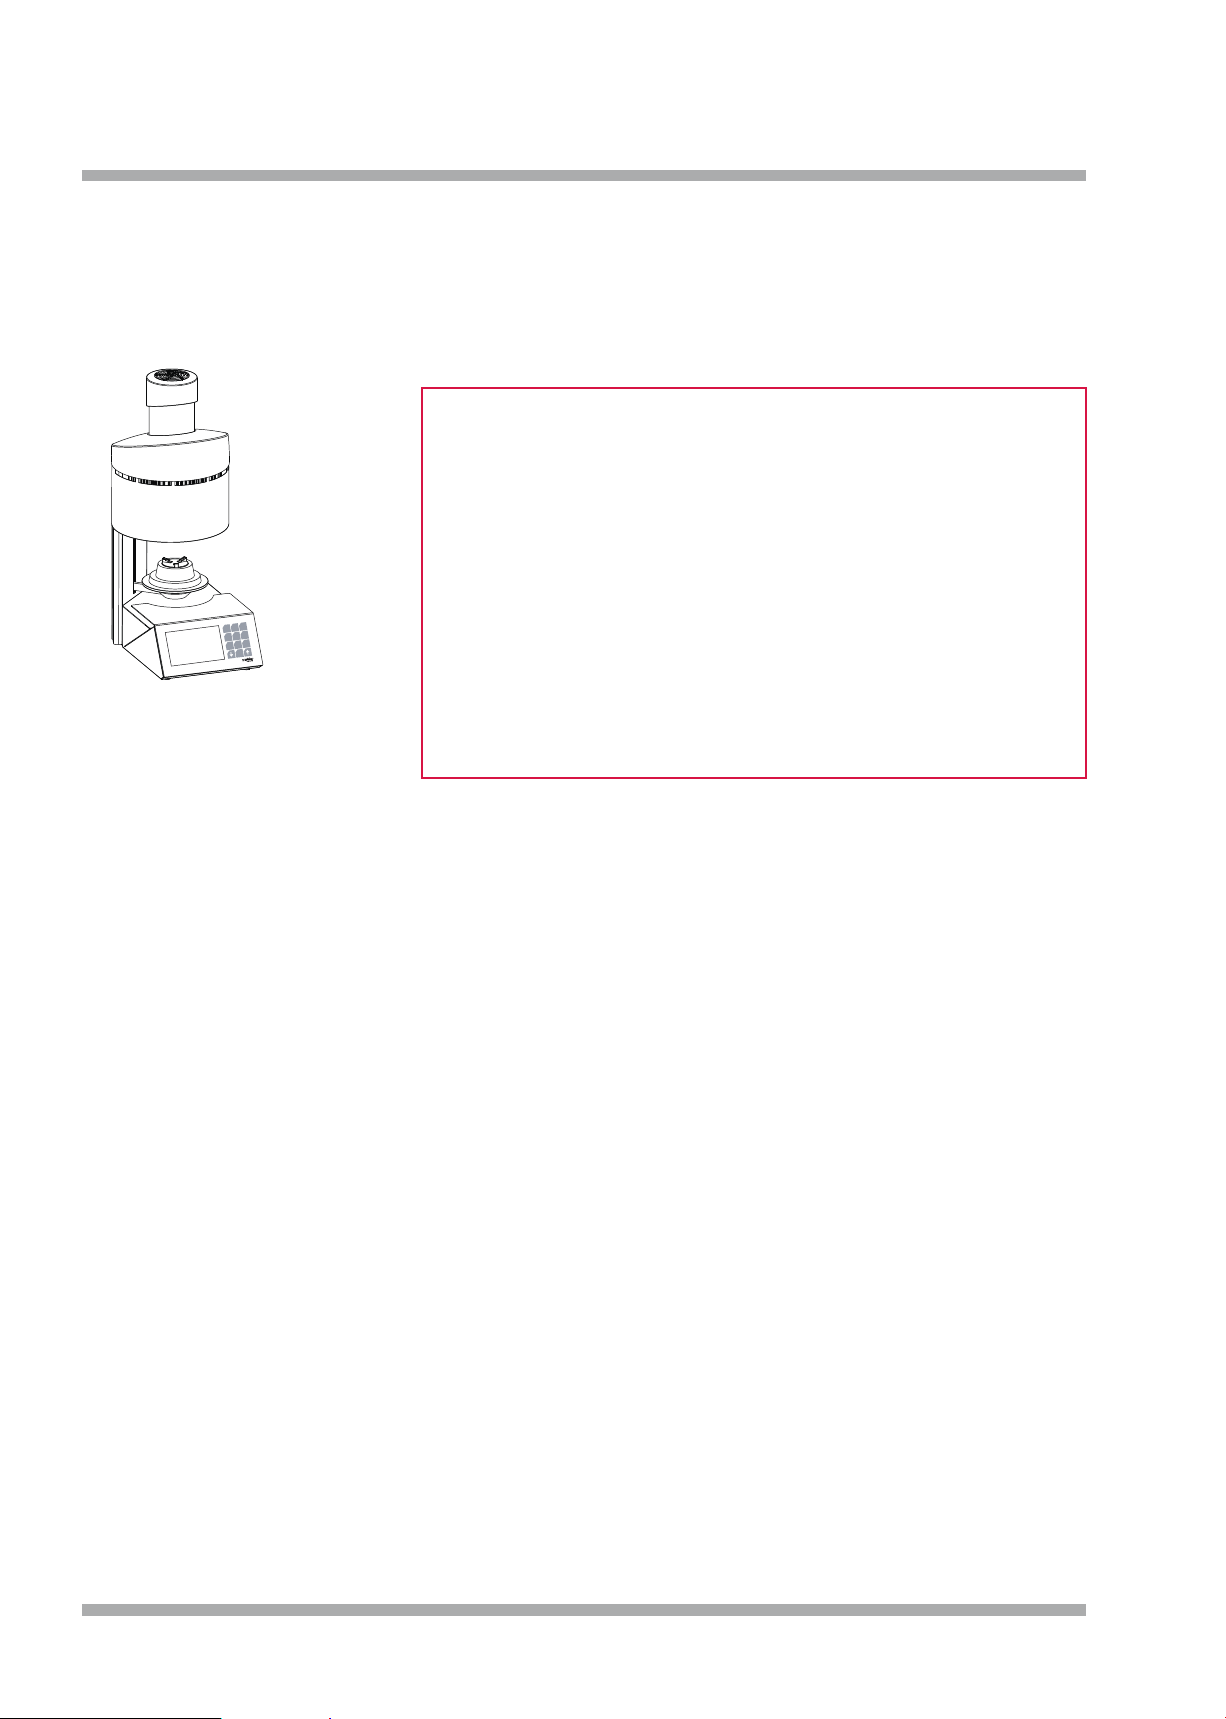
QPosition the oven in the up-right
position. A clearance of 200-300
mm must be maintained above and
on all sides of the oven. Immediately
adjoining walls surrounding the
device must be made of non-
flammable material. The area should
be well ventilated.
QIn accordance with fire codes, install
an appropriate, recommended, multi-
purpose, dry foam fire extinguisher
near the oven and ensure your
employees are trained in its proper
use.
QNever wear loose or loose fitting
clothing when operating the oven.
Be careful when reaching for objects
around the oven. Flammable material
can ignite if it comes into contact
with a hot surface of the device and
cause serious burns to the user.
QDo not set up the furnace and
vacuum pump in the immediate
vicinity of heat sources (e.g.
preheating furnaces, sintering
furnaces).
QFurnace soldering reduces the
service life of the thermocouple and
heating muffle.
QMake sure the oven is professionally
installed according to our instructions
and the chosen electrical connection
is properly grounded.
QFor 230/240 V, use the grounded
mains cable H05VV-F3G1.0 with
a non-heating device socket and
Schuko plug.
QFor 100/120V use the grounded
mains cable SJT3xAWG14 with a
non-heating device socket.
QThe electrical service must be carried
out carefully and ensure that the
oven is connected to the existing
mains with sufficient voltage. Consult
a qualified electrician to ensure the
power rating is adequate and will not
overload an existing circuit.
QDo not use an extension cord with
the oven. Ask your electricity supplier
about the electrical connection
values that apply to your local
network.
QIn the event of undervoltage, the
temperature rise may be slower.
QHoses and fittings should be
checked periodically for proper fit,
wear and damage and replaced or
re-tightened as necessary.
QAll cables and hoses should be
located away from walkways and
passageways.
QDuring use, such as when opening
the heating chamber, high
temperatures may radiate outside the
oven chamber.
QDo not touch the surface parts, the
heating elements or the inner surface
of the oven. The hot surfaces can
cause serious burns.
QImmediately after the firing process,
do not leave the firing chamber
unattended, close it as soon as
possible.
QIf the furnace is left under vacuum for
a long time when it is switched off,
the lift plate O-ring may stick easily.
QOnly clean the device with a dry
or slightly damp cloth. Do not use
solvents! Always disconnect the
power plug from the outlet before
doing this work.
QWhen the heating chamber heats up,
the heating coil may oscillate.
QIn the event of defects or damage
that no longer ensures safe
operation, the device must be
secured against unintentional use.
QBefore performing any recommended
and authorized routine maintenance
or service, turn the oven off and
disconnect the power plug from the
outlet, to avoid risk of electric shock,
injury or death. Allow the oven to cool
to room temperature.
QDo not attempt to open, repair,
or replace any part of your oven
until you have read the manual
and the repair or replacement is
specifically recommended therein.
Any unauthorized attempt to repair,
replace or open any part of your
oven could pose a safety hazard
and void your warranty. All service
work, whether during or outside the
warranty period, may only be carried
out by our customer service.
QIn the event of service, only original
spare parts are to be used.
QUnauthorized modifications to the
hardware or software can cause
serious safety damage as well as
void your right to warranty.
QNever leave children or visitors
unattended near an operating oven.
Children should never be allowed to
stand on or climb up on a surface on
which a oven is placed. Objects that
could be of interest to children should
never be placed near the oven. There
is a serious risk of injury.
QKeep the original packaging
materials for your VARIO oven and
vacuum pump. Only use the original
packaging to transport these parts.
Improper transport will void the
warranty.
0.4 Safety instructions

6
6
5
2
1
4
8
3
7
1. Installation
1main switch
2 USB port
3 power cord connection
4 main fuse automat
5
power cord connection vacuumpump
6connection for the vacuum hose
1.1 Setting up the device
QPlace the oven on a stable and level
work station
QSet up the vacuum pump near the
oven (remove the rubber cover from
the brass nozzle))
QKeep the original box and packaging
material for warranty claims and
service
QHave the firing or pressing insulation
base ready for the further procedure.
QPower connection:
QThe ceramic oven requires
230V/50Hz or 115V/60Hz.
QDo not use extension cords
QConnect oven to a dedicated
electrical outlet.
QThe main switch should be in the "0"
position.
QConnect the oven to the power
supply using the supplied power
cord.
Switch on the furnace at the main
switch.
1.2 Initial installation
QAfter switching on for the first time,
instructions for the first steps are
shown on the display. After that, the
initial installation cycle runs auto-
matically. The oven is only ready for
operation after a complete set-up
(2. 5.10, 2.5.11).
QRemove any remaining packaging
QInitial setup program
1 Setting the language
2 Put on the firing or press insulation
base
3 Brightness
4 Volume
5 Connection vacuum pump
6 Compressed air connection
7 Set date and time
8 Setting the unit (°C / °F)
9 Idle temperature
Standby temperature
10 Loading programs via USB
11 Vacuum test
12 Drying program,
(process time 20 min)
11 Press sensor test
12 Vacuum test
13 Drying program,
(process time 20 min)
1Main switch
2 USB port
3 Power cord connection
4 Main fuse automat
5
Power cord connection "vacuum pump"
6 Connection for the vacuum hose
7 Fuse automat "vacuum"
8Connection compressed air
supply 5 bar (0,5 MPa)

7
Made in Germany
Fenster Durchsicht Display
0
987
654
321
500°C
1.4 Diagnostic program
When you switch on the device, the oven
starts a diagnostic program to check the
function of various sensors. At the same
time,theringchamberisheatedto
operating temperature. If there is a fault/
defect in basic functions, the oven will
display a corresponding error message.
The total duration of this process is about
20 minutes, with the option of bypassing
this step using the red Abort function
eld.Thisgivesyoudirectaccesstothe
main menu.
Oven type / folder Main menu Furnace actual temperature Number pad
Select program
Edit program
Warm-up oven
Standby
Settings
Main menu
1.3 Display
The display of the VARIO furnaces is a
full-touch display including an additional
number block
The number block is only active when
numerical values can be entered.
The "UP" and "DOWN" arrows are active
when they can be used. In the top posi-
tion only the down arrow is active, in the
lower plate position only the up arrow is
active. In this way, the proper functioning
of the lift and the end positions can be
checked.
VP330eZR

8
500°C
500°C
500°C
><
VP330eZR
2. Operation
Folders Preview Start
Main menu
Main menu
Select folder
Display, Status: Main menu
Display, Status: Select program / select a folder / program overview
Display, Status: Select program / folder overview
Programmwahl
Programm bearbeiten
Ofen vorwärmen
Stand-by
Einstellungen
DC CONCEPT PRESS
Ceramay
DC 12.5
Hans
DC 12.5
Ceramay
DC 9.2
Sarah
DC 9.2
Ceramay
DC 9.2
Hans
DC CONCEPT ART
Ceramay
Oxidation
Diverse
ZIRKON
Monolitic
DC 12.5
Dr.Zahnstein
DC 12.5
Sarah
*
DC 9.2 Sarah *
DC 9.2
Wash
DC 9.2
Stain 3+
Full Zirkon
Stain
DC 9.2
Dentin 1
DC 9.2
Correction
Full Zirkon
Glaze
DC 9.2
Dentin 2
DC 9.2
Stain
DC 9.2
Glaze
Selection of the menu parameters
After the furnace is switched on, the main
menuwithveoptionsappearsonthe
display. Selecting an option takes you
directly to it.
2.1 Program Selection
QThe Folder Menu contains a list of
customizable Program Folder buttons.
This menu will be recognizable by the
prompt at the top of the page "Select
Folder". Each Program Folder button
contains the programs for the listed
specific porcelain, or process you
desire. Folder Buttons are dark grey,
while program buttons are light grey.
Example: All DC 9.2 Programs will
be in the DC 9.2 Folder. The red
Main menu button takes you back
to the main menu.
QOnce a folder has been opened, the
Program buttons in that folder are
displayed. This menu will be recogniz-
able by the prompt at the top of the
page in yellow "Select Program".
Press the desired program button.
The press the "Preview" button to
view/change parameters or press the
"Start" button to start the selected
program. The parameters can be
changed individually for this one
program sequence
(see also point 2.1.1).
Select Program
Edit program
Warm-up oven
Standby
Settings
Select program
Image 08.1
Image 08.3
Image 08.2
VP330eZR

9
500°C
DC 9.2
500°C
PreviewFolders Start
Start
Select program
Preview
Professional
Temper
Start temp.
450 °C
Heat rate
35 °C/min
Pre dry
Yes
Final temp.
Pre dry time
03:00 mm:ss
Hold time
01:00 mm:ss
Closing time
03:00 mm:ss
Soak temp.
450 °C
Temper temp.
690 °C
No
Opening temp.
720 °C
Opening time
02:00 mm:ss
Vacuum
Yes
Release vacuum
Heat up
Vacuum end
720 °C
Soak time
01:00 mm:ss
Temper time
02:00 mm:ss
500°C
DC 9.2
Correction
OK
zurück
Preview
Professional
Temper
Start temp.
450 °C
Heat rate
35 °C/min
Pre dry
Yes
Final temp.
820 °C
Pre dry time
03:00 mm:ss
Hold time
01:00 mm:ss
Closing time
03:00 mm:ss
Soak temp.
450 °C
Temper temp.
690 °C
No
700°C
Opening temp.
720 °C
Opening time
02:00 mm:ss
Vacuum
Yes
Release vacuum
Heat up
Vacuum end
720 °C
Soak time
01:00 mm:ss
Temper time
02:00 mm:ss
700°C
700°C
DC 9.2
Wash
DC 9.2
Stain 3+
Full Zirkon
Stain
DC 9.2
Dentin 1
DC 9.2
Correction
Full Zirkon
Glaze
DC 9.2
Dentin 2
DC 9.2
Stain
DC 9.2
Glaze
DC 9.2
Correction
*
Select program Start
Abort
Display, Status: Select program / select a folder / program selected
Display,Status:Selectprogram/selectafolder/selectaprogram/Preview/naltemp.selected
Display,Status:Selectprogram/selectafolder/selectaprogram/Preview/naltempchangedandconrmed
Image 09.1
Image 09.3
Image 09.2
Delete
2.1.1 Preview - change program
QWhen changing program parameters
in the "Preview" mode, changes
are temporarily saved for the
next program run and return to
the previous parameters upon
completion. This is not saved
permanently in the program.
Parameters can only be changed
and saved permanently via Edit
program in the main menu.
QSelect the desired parameter to
change and enter the values using
the number field that is now active.
QWhen changing parameters the
green "Start" button changes to
"OK". Please confirm your input
by activating this field. The original
parameter is restored by pressing the
Abort function field.
QIf a value is entered that follows
the correction of subsequent
parameters, these are high-lighted in
yellow (image 09.3).
*

10
450°C
DC 9.2
15:34 mm:ss
97 %
**
500°C
2.1.2 Start program
QAs soon as a program is started
using the green Start button, the
program sequence is displayed once
as a graph and as a list of
parameters. The currently active
parameter is highlighted in a darker
shade of grey in the program slider,
while parameters that have already
been processed recede into the
background (image 10.2). In the
graph, the active parameter is also
highlighted in a darker shade of grey.
In this way, the program status can
be seen at a glance, even from a
greater distance from the device.
The parameter slider provides more
detailed information. As already
described, the active parameter
is highlighted in a darker shade of
grey. If a subsequent parameter is
controlled, the parameter bar scrolls
accordingly. Subsequent parameters
can be checked by dragging the
process bar to the appropriate
positions with a "swiping motion".
QThe vacuum status is displayed in %.
Display,Status:Arunningringprogram
Abort Edit program
Soak temp.
450°C
Closing time
03:00mm:ss
Pre dry time
03:00mm:ss
Correction
DC 9.2
Correction
Start
Select program
Display, Status: Select program / select a folder / select a program / Preview
Professional
Temper
Start temp.
450 °C
Heat rate
35 °C/min
Pre dry
Yes
Final temp.
720 °C
Pre dry time
03:00 mm:ss
Hold time
01:00 mm:ss
Closing time
03:00 mm:ss
Soak temp.
450 °C
Temper temp.
690 °C
No
Opening temp.
720 °C
Opening time
02:00 mm:ss
Vacuum
Yes
Release vacuum
Heat up
Vacuum end
720 °C
Soak time
01:00 mm:ss
Temper time
02:00 mm:ss
Preview
Image 10.1
Image 10.2

11
500°C
DC 9.2
500°C
Dentin 1
2.1.4 Program abort
QIf you want to end a program
prematurely or cancel it, you can
do this by pressing the red Abort
function field. In this case, the
program abort must be confirmed
again by a security prompt (image
11.2).
OK
Abort
Display, Status: Select program / select a folder / select a program / Start / Edit program
Display,Status:Programabort,abortconrmation
YesNo
Temper
Start temp.
450 °C
Heat rate
35 °C/min
Pre dry
Yes
Final temp.
820 °C
Pre dry time
03:00 mm:ss
Hold time
01:00 mm:ss
Closing time
03:00 mm:ss
Soak temp..
450 °C
Temper temp.
690 °C
Professional
720°C
Opening temp.
720 °C
Opening time
02:00 mm:ss
Vacuum
Yes
Release vacuum
Heat up
Vacuum end
720 °C
Soak time
01:00 mm:ss
Temper time
02:00 mm:ss
DC 9.2
Correction
Should the program really
be aborted?
Abort
2.1.3 Change program during a
program run
QParameters can be changed during
a program run via the program
Edit program button.
As with the
program preview (image 10.2), these
changes only apply to the current
brand. After the end of the process,
the initial values are valid again.
QOnly values that the oven has not yet
started or completed can be changed.
Values that you can no longer change
are optically pushed back into the
back-ground. Press the green OK
function field to activate
changes and
Continue, you get back to the para-
meter slider and the graph.
QPress programs cannot be changed
while the program is running.
Edit program
No
Image 11.1
Image 11.2
Delete

12
500°C
DC 9.2
weiter
500°C
DC 9.2
Abbruch
Dentin 1
Wash
DC 9.2_Wash_2022-05-03_14-19
7
3000
01:00
Concept Press 500°C200g
Concept Pr._200_2022-05-03_14-19
2.1.5 Functional error during
program execution
QIn the event of a functional error, the
oven interrupts the work process and
displays a window with an error
message in plain text and an error
code.
QThis error message and the program
termination must be confirmed with
the green OK button.
QThe error message that was
displayed last can be called up
later under Settings, Last error
messages.
2.1.6 End program
QThe end of a program is indicated
by an acoustic signal and visually
by a text window. The name of the
completed program, the time and the
date at the end of the process are
given in the text window (image 12.2).
QIn the case of pressing programs,
the pressing time actually required,
the pressing pressure used and
the pressing path covered are also
specified.
QA code is generated (image 12.3) for
documentation or quality assurance.
This consists of the serial number
of the furnace, the date YYMMDD -
time (24-hour system). The complete
program data can be called up under
Settings - Data transfer - Export
protocol files (image 12.2). The last
50 program sequences are saved
here. Older program sequences are
overwritten. The log data should
therefore be backed up at regular
intervals.
Display, Status: Error message during a running program
Display,Status:Accomplishedringprogram
OK
OK
V-01
Abort: Vacuum error
Error
Program accomplished
Image 12.1
Image 12.3
Image 12.2
Display, Status: Accomplished pressing program
OK
Program accomplished
Press distance
Pressure
Press time
mm
mbar
mm:ss

13
Types of burning program
Parameter Professional Professional
TTC 2-Step 2-Step TTC
Start temperature l l l l
Pre dry l l l l
Pre dry time l l l l
Closing time l l l l
Soak temperature l l l l
Soak time l l l l
Heat rate l l - -
Final temperature l l - -
Hold time l l - -
Heat rate 1 and 2 - - l l
Final temperature 1 and 2 - - l l
Hold time 1 and 2 - - l l
Temper l- - -
Temper temperature l- - -
Temper time l- - -
TTC (Time Temperature Cooling) -l-l
TTC cool rate -l-l
Opening temperature l l l l
Opening time l l l -
Vacuum l l l l
Release vacuum / Heat up / Hold time / Cooling
l l l l
Vacuum end l l l l
2.1.7 Program overview and parameter assignment
Professional Ceramicringprogramtypewithoptionaltemperingfunction
Professional TTC Ceramicringprogramtypewithoptional,linear,coolingrates-controlledtemperaturefeedback
2-Step 2-phaseringprogram(twoheatingstagesincludingholdingtime)
2-Step TTC 2-phaseringprogramwithoptional,linear,coolingrates-controlledtemperaturefeedback
Types of press program
Parameter Press I-Press Advanced Press
Start temperature l l
Preset press program for
lithium disilicate press ceramic
(preinstalled, not
changeable)
Heat rate l l
Final temperature l l
Hold time l l
Press time - -
Max. press time -l
Pressure l l
Opening time l l

14
Starttemperature Thetemperatureintheringchamberatwhichtheprogrambegins.
Pre dry Selecting "YES" activates the pre-drying program.
Pre dry time Enter a time value. In this section, the lift looks for a predetermined position over the entire
period, depending on the radiated heat of the heating chamber, in which the object is thus
pre-dried at a constant temperature.
Closingtime Speciesthetimefromtheopentothefullyclosedlift
Soaktemperature Atthistemperature,theringobjectremainsintheclosedringchambertowarmituptothe
starting temperature. This serves to evenly "burn through" a ceramic work. Soak temperature
= Vacuum start.
Soak time Indicates the dwell time of the object in the heating chamber before the temperature rises
and before the vacuum pump is switched on.
Heatrate Respectivetemperatureincreasein°C°F/mintoreachthenaltemperature.
Heatrate1-2 Respectivetemperatureincreasein°C°F/mintoreachthenaltemperature.
Finaltemperature Thetemperatureatwhichtheceramicisred.
Finaltemperature1-2 Therespectivenaltemperatureatwhichtheceramicisred.
Holdtime Residencetimeoftheceramicatthenaltemperature.
Holdtime1-2 Dwelltimeoftheceramicatthenaltemperature.
Temper The tempering program is activated by selecting "Yes ".
Temper temperature The ceramic is tempered at this temperature, i.e. thermally treated with pinpoint accuracy at
a constant temperature.
Temper time Indicates the duration of the thermal treatment with the heating chamber closed.
TTC Activates linear cooling to the desired temperature using temperature gradients
TTC Cool rate Cooling in °C °F/min to reach the opening temperature. Recommendation: heating rate =
cooling rate
Opening temperature Indicates the temperature at which the oven opens. When using TTC, the opening
temperature must be below the end temperature. The linear cooling in TTC mode takes
place until this temperature is reached. Recommendation: opening temperature = starting
temperature or Tg of the ceramic used.
Opening time The time it takes for the lift to fully open.
Vacuum Activation or deactivation of the vacuum function (is a 2nd holding time at a lower
temperatureinrelationtothenaltemperature)itDeterminesthetimeatwhichthering
chamber is ventilated.
Release vacuum Limits the time to vent the heating chamber. You can choose from:
During the heat up phase: Release vacuum: Heat up
Duringtheholdtimeatnaltemperature; Releasevacuum:Holdtime
Duringthecooldownperiod; Releasevacuum:Cooling
Vacuumend Denesexactlywhentheheatingchamberisventilated.Atimeortemperaturevaluemustbe
entered here, depending on which phase vacuum was selected.
Save Save the program
2.1.8 Explanation of terms
Press time Determines the duration of the actual pressing process
Press pressure Determines the amount of press pressure used in mbar.
(VP300 low pressing pressure corresponds to 3000mbar with the VP330
VP300 high pressing pressure corresponds to 4500mbar with the VP330)
Maximum pressing time Limits the maximum pressing time before the pressing process is automatically stopped.
Save Save the program

15
500°C
DC 12.5
<<< >>>
Y
Z
QIn the Edit program area, folders
or programs can be created, edited,
copied or deleted. A basic distinction
is made between two "levels". The
"folder level" and the "program level".
For visual orientation, the "folder
level" is kept in a darker shade of
grey, the "program level" in a lighter
shade of grey. These structures can
be freely named by the customer. So
the folder structure e.g. material or
technician - are created related.
QIf a folder function field is selected in
Edit program mode, this is optically
highlighted. The corresponding
function fields are now active in the
lower area of the display (image 15.1).
If a free folder function field was
selected, this can now be named
using the New function field. If a
folder function field that has already
been described is selected, the
field and its content can be copied,
moved, edited or even deleted.
Corresponding function fields are
activated as soon as the function is
available.
QIf a described folder function field
was selected, a green Programs
and a red Main menu function field
become active, among other things.
By pressing the Programs field, you
get to the program level, by pressing
the Main menu field, you get back
to the main menu.
2.2 Edit folder/program
Display, Status: Edit program / folder selected / Edit or New
Display, Status: Edit program / existing folder selected
Edit folder
OKAbort
DC CONCEPT PRESS
Ceramay
DC 12.5
Hans
DC 12.5
Ceramay
DC 9.2
Sarah
DC 9.2
Ceramay
DC 9.2
Hans
DC CONCEPT ART
Ceramay
OXIDATION
Various
ZIRKON
Monolitic
DC 12.5
Dr.Zahnstein
DC 12.5
Sarah
500°C
>
<
Main menu
Edit Folder
Delete
Edit
PasteCopyCut
New Programs
Dr. Zahnstein
Image 15.1
Image 15.2
Ctrl

16
500°C
< >
1 New
The New function field is activated as
soon as an empty program or folder
function field has been selected. If
the New field is now pressed, the
oven opens two lines of text and
a keyboard field for entering the
desired name. Up to 12 characters
or letters can be used per line of text.
Letters can be represented in both
upper and lower case (image 16.1).
2 Cut
Using the cut function, you can
move individual programs or entire
folders, including their contents. To
do this, the desired program or folder
is selected first. This field (program
or folder function field) is now
highlighted for checking purposes.
Now the desired function field Cut
is selected. The oven now hides
all other function fields except for
Paste. The target storage location
must now be selected (in the case
of programs, this can also be in a
different folder). By clicking on the
Paste field, the program or the folder
and its contents are moved to the
desired position.
3 Copy
Here the folder/program is copied
to the clipboard. The folder remains
unchanged in the same position.
the procedure is the same as
described under point 2 "Cut".
4 Paste
The folder / program from the
clipboard is inserted at the activated
position. Only free program fields can
be activated.
Display, Status: Edit program / folder selected / Programs / existing program selected
Folders
Delete
Edit
PasteCopy
New
Cut
DC 9.2
WASH
DC 9.2
Stain 3+
Full Zirkon
Stain
DC 9.2
Dentin 1
DC 9.2
Correction
Full Zirkon
Glaze
DC 9.2
Dentin 2
DC 9.2
Dentin 1 6+
Full Zirkon
Stain 3+
DC 9.2
Stain
DC 9.2
Dentin 2 6+
Full Zirkon
Glaze 3+
DC 9.2
Glaze
DC 9.2
Stain 6+
Full Zirkon
Stain 6+
DC 9.2
Dentin 1 3+
DC 9.2
Glaze 6+
Full Zirkon
Glaze 6+
DC 9.2 Sarah Edit program
Image 16.1

17
500°C
500°C
DC 9.2
Display, Status: Edit program / folder selected / Programs / existing program selected / Delete
Delete
The program will be permanently deleted!
DC 9.2 Sarah Dentin 1
Delete
No Yes
Display, Status: Edit program / select a folder / Programs / existing program selected / Edit
Edit program
SaveAbort
Start temp.
450 °C
Heat rate
35°C/min
Pre dry
Yes
Final temp.
780°C
Pre dry time
03:00 mm:ss
Hold time
01:00 mm:ss
Closing time
03:00 mm:ss
TTC
Yes
Soak temp.
450°C
TTC cool rate
35°C/min
Professional TTC
Opening temp.
450 °C
Opening time
0:00 mm:ss
Vacuum
Yes
Release vacuum
Heat up
Vacuum end
780°C
Soak time
01:00 mm:ss
5 Delete
After pressing the Delete function
field, a security query appears, which
you must confirm with Yes or No.
6 Edit
The name can be changed for
existing programs or folders.
The number block is active. With
programs, additional parameters can
be changed and saved permanently.
If parameters are changed that
have a direct influence on the
following parameters (e.g. the
opening temperature when the
final temperature is lowered), these
parameters are adjusted accordingly
after the OK field has been clicked
and highlighted in yellow. These
values are accepted and saved with
Save, and the initial values are called
up again with Abort.
7 Next / Previous
With the forwards >and backwards
<keys you can switch to the
next page with further groups or
programs. The buttons are only
active if there is also another page.
DC 9.2
Dentin 1
Image 17.1
Image 17.2

18
DC 12.5
Dentin 1
500°C
DC 9.2
500°C
DC 9.2
Dentin 1
500°C
Dentin 1
Homogenisieren
ja/nein
Öffnungszeit
[min/s]
Anzahl der Rampen
1/2/3/4/5
Vakuum
ja/nein
Professional TTC
Professional
Professional TTC
2-Stepp
2-Stepp TTC
Y
Z
Display, Status: Edit program / select a folder / Programs / New (after the name is entered)
OKAbort
Create program
Start temp.
450 °C
Heat rate
55 °C/min
Pre dry
Yes
Final temp.
820 °C
Pre dry time
03:00 mm:ss
Hold time
01:00 mm:ss
Closing time
03:00 mm:ss
Temper
yes/no
Soak temp. .
450 °C
Temper temp.
690 °C
Opening temp.
820 °C
Opening time
00:00 mm:ss
Vacuum
Yes
Release vacuum
Heat up
Vacuum end
820 °C
Soak time
00:30 mm:ss
Temper time
02:00 mm:ss
No
Professional
Display,Status:Editprogram/selectafolder/Programs/selectafreeprogrameld/New
Display, Status: Edit program / select a folder / Programs / New (after the name is entered)
Abort
OKAbort
Edit program
Create program
Start temp.
450 °C
Heat rate
35°C/min
Pre dry
Yes
Final temp.
780°C
Pre dry time
03:00
Hold time
01:00 mm:ss
Closing time
03:00 mm:ss
TTC
Yes
Soak temp.
450°C
TTC cool rate
35°C/min
Soak time
01:00 mm:ss
Save
8 Name programs / folders
If a new program or a new folder is
to be created, a name must first be
entered.
Two lines of text, each with a maxi-
mum of 12 characters or letters, are
available for this purpose (image 18.1).
When programs are created, the
second step is to select the program
type. To do this, as shown in the
diagram on the right, activate the
arrow in the program type. A list with
all available program types opens.
After the desired program type has
been selected, the oven offers the
parameters required for this type.
These parameters can now be
programmed at will. To do this, select
the respective parameter and enter
the desired value using the number
field that is now active. A green OK
field is now activated with which this
value can be confirmed. The initial
value is called up again by pressing
the red Abort field. If all parameters
are named accordingly, they can
finally be saved with the green Save
field.
Image 18.1
Image 18.3
Image 18.2
Ctrl
Professional TTC
Professional
Professional TTC
2-Step
2-Step TTC
Press
I-Press
Advanced
Professional TTC
Professional
Professional TTC
2-Stepp
2-Stepp TTC
Press
I-Press
Advanced

19
500°C
V230ZR
2.3 Warm-up
QIf you select Warm-up, the device
starts a program to heat up to the
operating temperature.
The furnace is preheated to 900°C
and held for 10 minutes. The heating
chamber is then heated through
homogeneously. This guarantees
optimal firing or pressing results from
the first firing/first pressing.
This process can last up to 20
minutes.
2.4 Standby
QIf standby is selected, the furnace
opens the firing chamber or leaves
the chamber open and cools down
to the standby temperature selected
under Settings. The display is
largely switched off, only the text
"Standby" is shown. The Standby
temperature can be set up under
Settings between 20°C and 100°C.
Once this temperature has been
reached, the furnace closes the
heating chamber and remains there
until the display is touched.
QThe oven then opens the lift again
and heats up to the set Idle
temperature. When open, this is
limited to 400°C.
Select program
Edit program
Warm-up
Standby
Settings
Main menu
Display, Status: Main menu Image 19.1

20
500°C
500°C
500°C
2.5 Settings
Settings take you to the "Service level"
of the menu. Various basic settings can
be adjusted here, service programs can
be carried out and data can be transfer-
red (software, program and log data).
Pressing the red Main menueldtakes
you back to the Main Menu.
Main menu
Display, Status: Settings
Settings
Chamotte
Dry program
Basic settings
Initial oven setup
Vacuum, pressure, lift
Data transfer
Firmware update /
Firmware version
Idle- /
Standby temperature
Customize calibration
Last error message
Purge program
Mue hours
Service menu
Factory settings reset
Oven upgrade
1 Import all folders
QIf there is already a corresponding
folder on the USB stick, this will
be recognized by the oven and the
Import all folders function field will
be activated (dark grey background)
(image 20.2).
QIf this field is now activated, the
furnace opens a list with all the
corresponding data. Select the
desired data record, the green
Import function field is activated.
The required data record is loaded by
pressing this button (image 20.3).
2.5.1 Data transfer
Included with your Zubler ceramic
furnaceaUSBdatastick(ashdrive)is
enclosed.
With the help of this USB stick you can
transfer program datas (from the oven to
USB or from USB to oven) or log datas
for quality assurance to save. When the
oven detects the USB stick, all active
functioneldsarehighlighted(image20.2).
When using a third-party data medium,
problems may arise during data trans-
fer. If the USB stick is not recognized, all
functioneldsremaininactive.
Pressing the red Settings control panel
takes you back to the settings area.
All folders and programs on the
furnace will be overwritten!
Display, Status: Settings / Data transfer / Import all folders / one folder selected
Display, Status: Settings / Data transfer
Import all folders
ImportAbort
Settings
Import all folders
Export all folders
Import one folder
Export one folder
VP330.eZR_01-001001-22_2022-02-22_13-12
VP330.eZR_01-001001-22_2022-03-15_08-45
VP330.eZR_01-001001-22_2022-04-12_10-23
VP330.eZR_01-001001-22_2022-04-27_09-15
VP330.eZR_01-001001-22_2022-05-02_11-25
VP330.eZR_01-001001-22_2022-05-06_14-26
Protocol les
Alle Protokolle löschen
Data transfer
Image 20.1
Image 20.3
Image 20.2
Table of contents
Popular Power Tools manuals by other brands

MEKANIKA
MEKANIKA Pro Series user manual

Bosch
Bosch GST 18 V-LI S Original instructions

Powerfix Profi
Powerfix Profi Z16531 Operation and safety notes

Skil
Skil 2570 Original instructions

Desontter
Desontter EPBC8-1800-4Q Safety information

Harbor Freight Tools
Harbor Freight Tools 40939 Owner's manual & safety instructions