|2 & 2 1/2" Wood & Faux Wood & Angled Slat Blinds3
OUTSIDE MOUNT
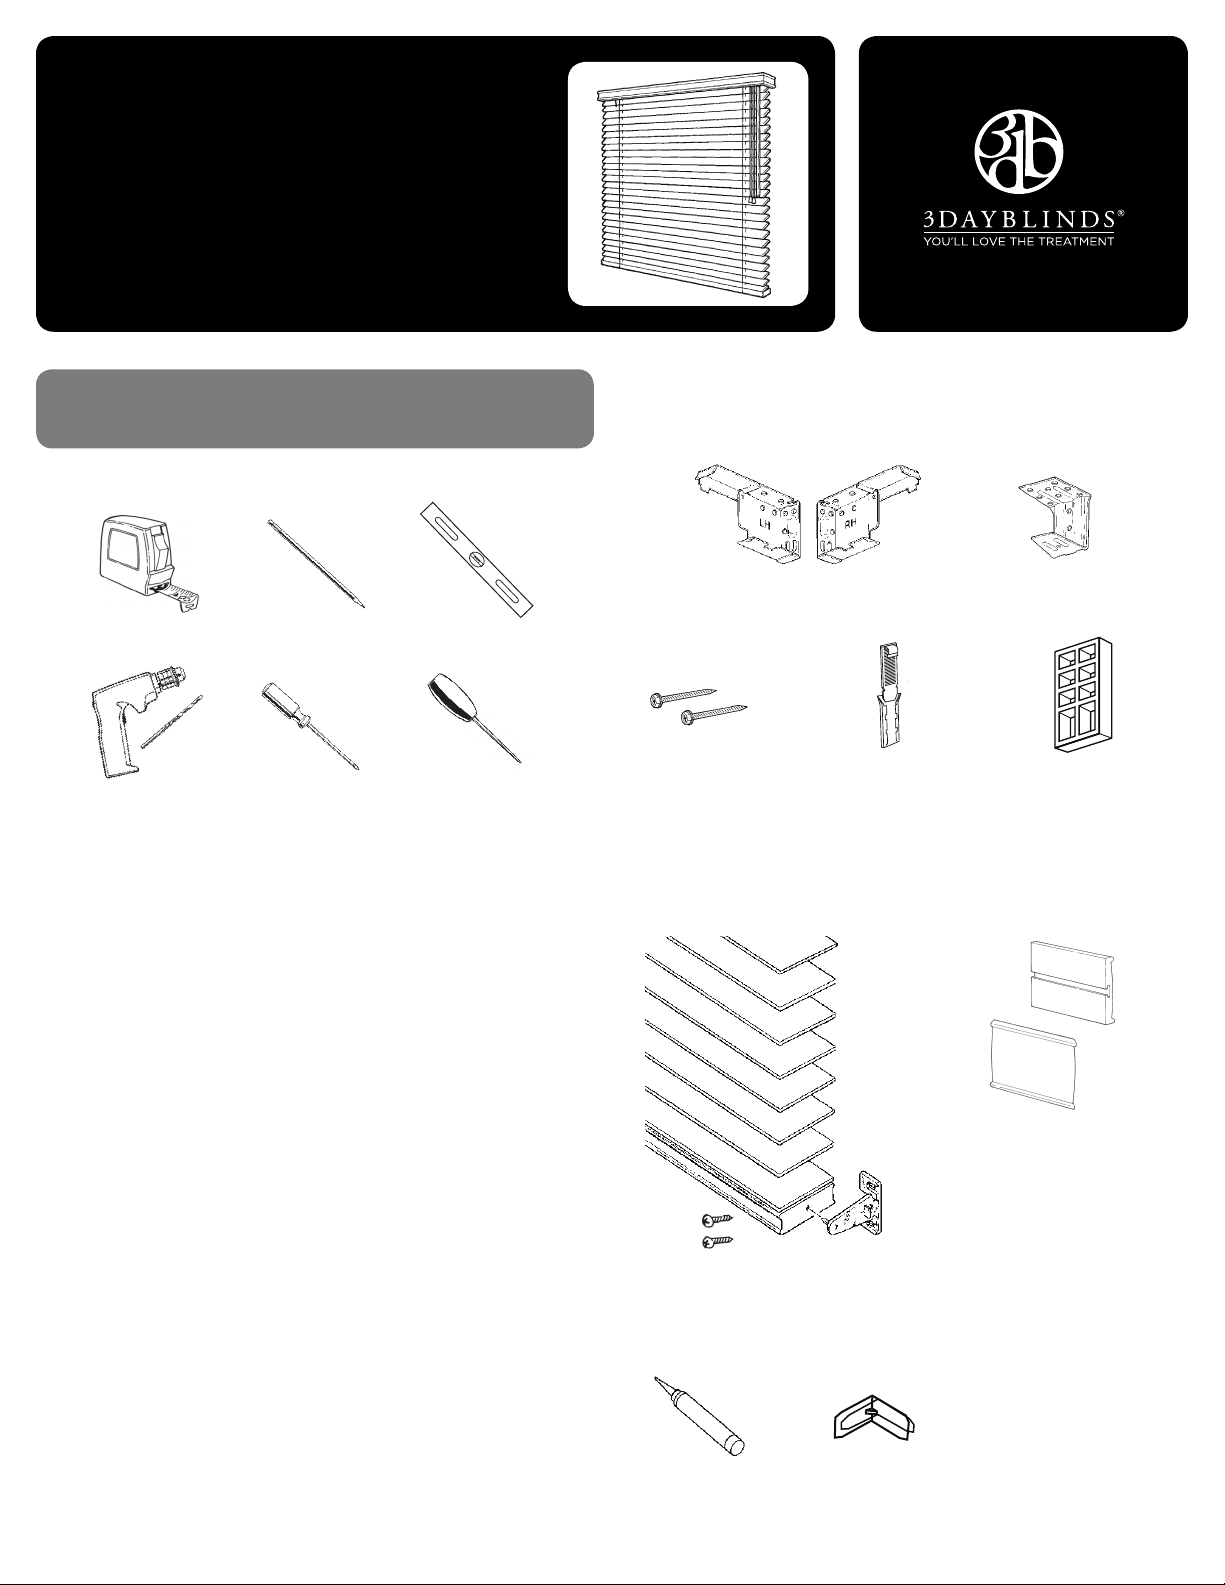
• Unwrap the cellophane from around the blind stack.
Caution: DO NOT cut the cellophane as the cords or ladders
supporting the blind may be inadvertently cut.
• Lower the blind to its full length. (See “Blind Operation”.)
1/8"
• Hold the blind up to the
desired mounting position.
• Once the blind is level,
mark the wall at the lower
corners of each end of the
headrail using a pencil.
• Draw the blind completely up and set it aside.
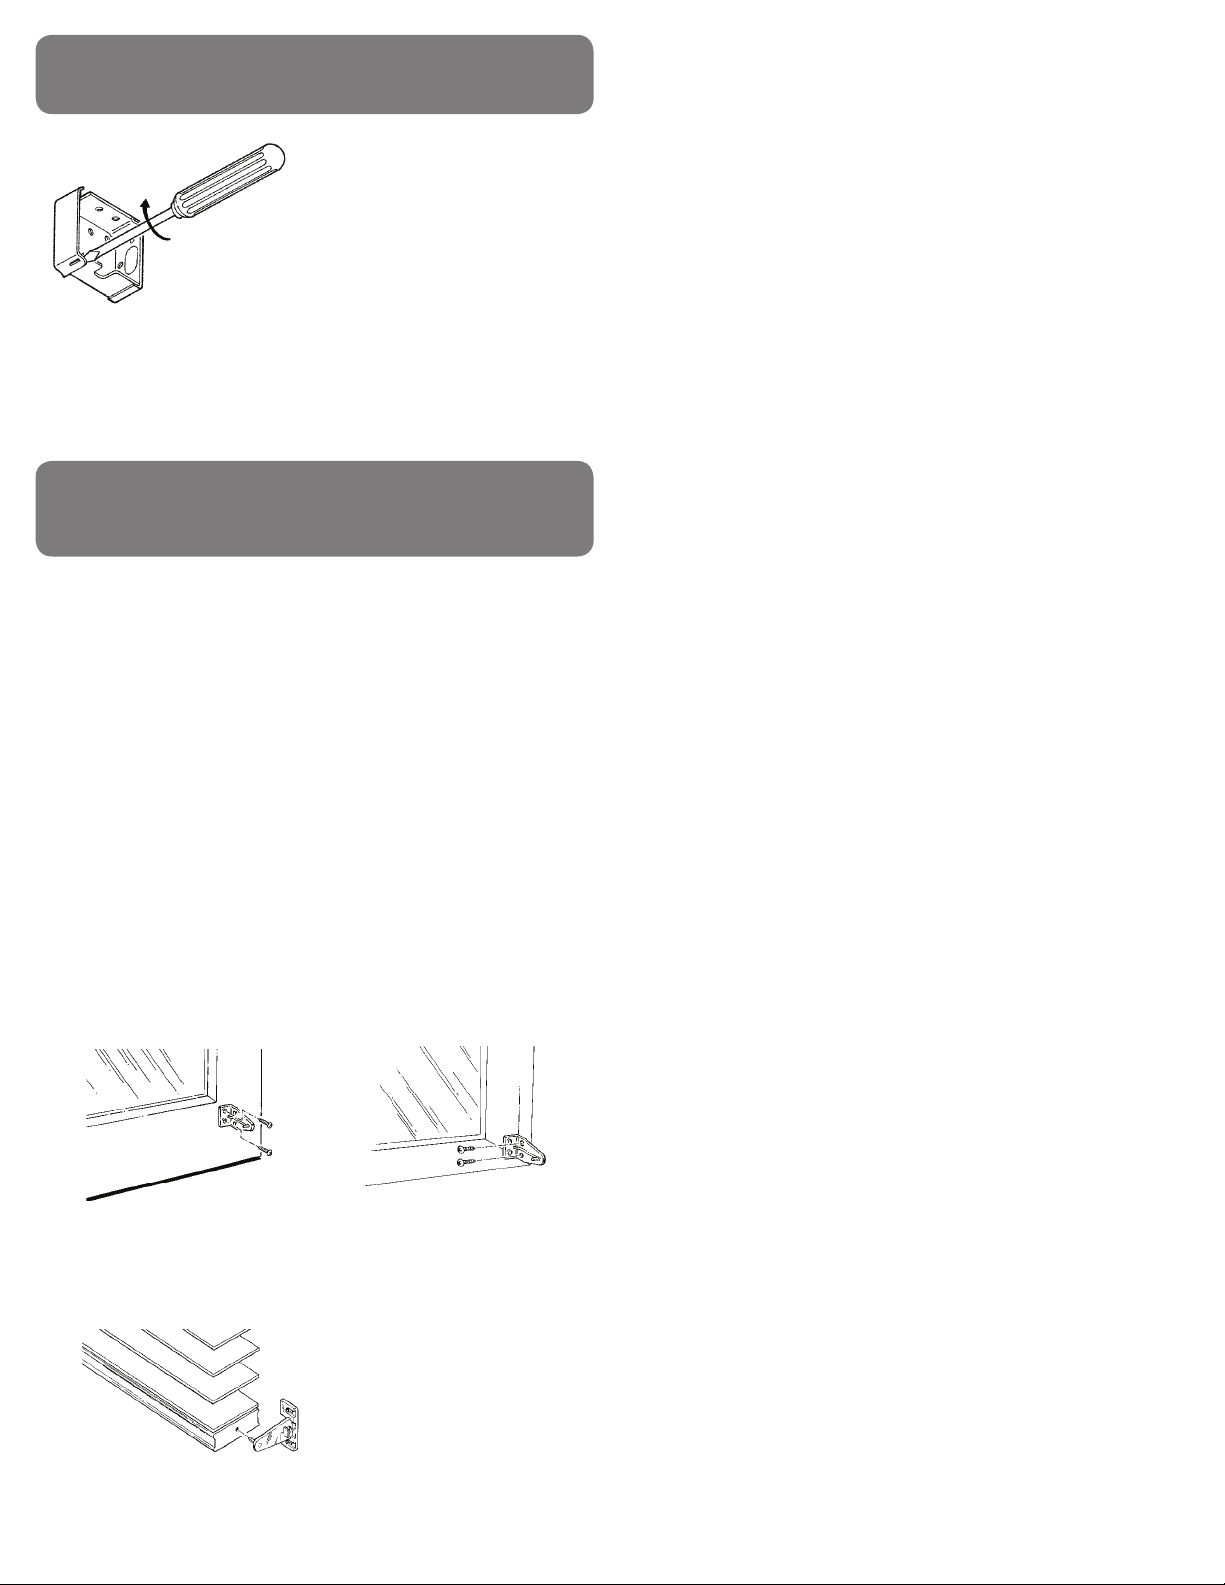
• Using a flathead
screwdriver, open the
latches of the end
brackets.
• Facing the window,
position the end bracket
marked “LH” above the
top left corner of the
window, 1/8" TO THE LEFT
of the pencil marks.
• Using a pencil, mark the
wall through the holes
in the back of the end
bracket. For maximum
stability, the pencil
marks should be made
diagonally.
• Using a drill with a 1/16" drill
bit or an awl, make a small
pilot hole at each pencil
mark.
• Mount the bracket using the 2 screws provided.
• Repeat this procedurre for the right end bracket.
• For 2” Wood & Faux Wood
& Angled Slat Blinds mount
the bracket using two of
the screws provided.
• For 2 1/2” Wood & Faux
Wood Blinds mount the
bracket using one spacer
block and two of the screws
provided.
TO INSTALL CENTER SUPPORT BRACKET(S):
If your hardware packet includes one center support
bracket, position it as close to the center of the mounting
surface as possible, making sure it will not interfere with
any moving parts. If more than one center support bracket
has been provided, position them equidistant from the end
brackets and each other, again avoiding all moving parts.
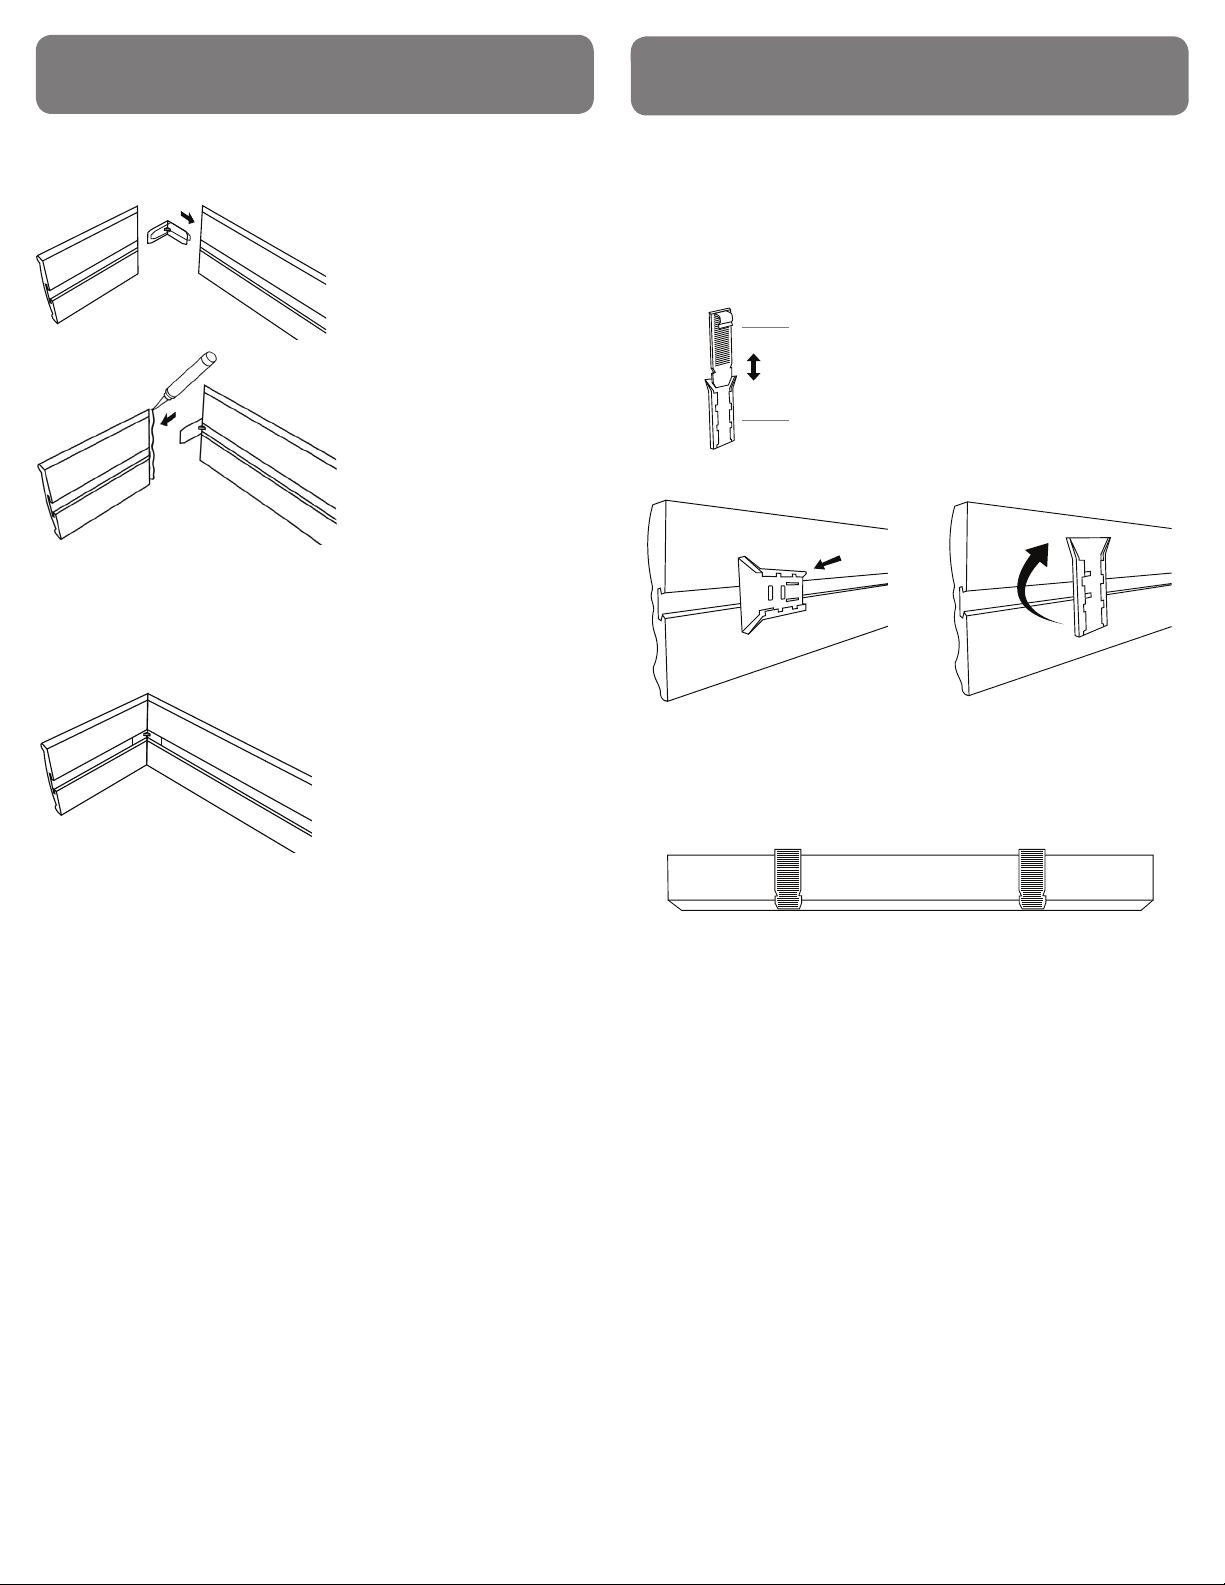
Proceed to “Valance Return Assembly”.
• Make sure all center
support brackets are
positioned at the same
height and are level with
the end brackets.
• Using a pencil, mark the
mounting surface through
the holes in the back
of the center support
bracket. For maximum
stability, the pencil marks
should be made in the top
two holes of the center
support bracket.
• Using a drill with a 1/16" drill
bit or an awl, make a small
pilot hole at each pencil
mark.
• Repeat this procedure for any remaining center support
bracket(s).
• For 2” Wood & Faux Wood
& Angled Slat Blinds, mount
the bracket using two of
the screws provided.
• For 2 1/2" Wood & Faux
Wood Blinds, mount the
bracket using one spacer
block and two of the
screws provided.