manuals.online logo
Brands
  1. Home
  2. •
  3. Brands
  4. •
  5. 3Com
  6. •
  7. Modem
  8. •
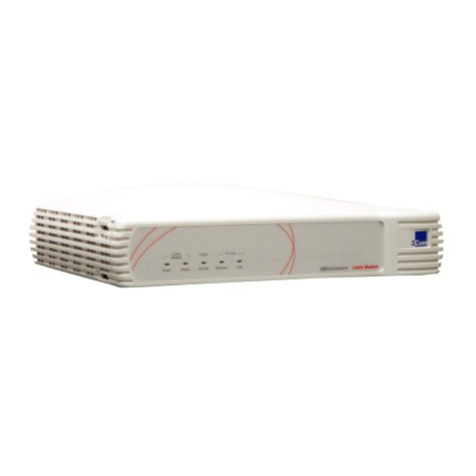
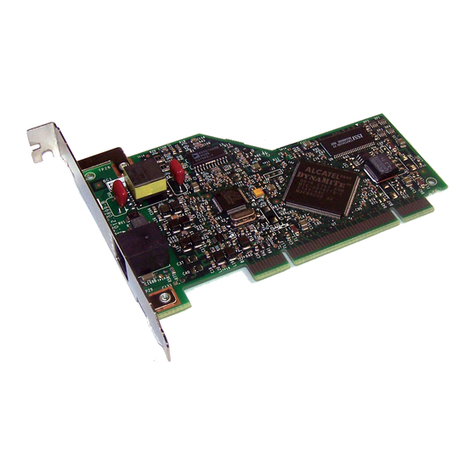
  9. 3Com 000698-13 - Dimensions

3Com 000698-13 - Dimensions

Published June 1998
I-MODEM INF README FILE
New Features The MDMUSRIM information file now allows the selection of the 230,400 bps DTE
speed from Windows if you have an external I-Modem and a serial card that
supports the 230,400 bps DTE rate. If you use the 230,400 bps speed selection
from Windows without meeting the previous two conditions, your modem will
not function.
Most PCs do not support the 230,400 bps DTE rate. Consult the documentation
that came with your PC or serial interface card to determine if the 230,400 bps
DTE rate is supported.
Profiles Windows 95/98 users now have the ability to install preset "Profiles” for the
I-Modem using the MDMUSRIM information file. Multiple profiles can be installed
on the same communications port which allows you to change the type of
connection you make with your I-Modem without modifying initialization strings.
For detailed information on installing profiles please see section Installing
Profiles under Windows 95.
Unimodem Driver The release of the I-Modem includes a new Unimodem driver for Windows 95 and
Windows N.T. 4.0. The Unimodem driver for the I-Modem and Total Control
products is MDMUSRIM.INF.
Follow these steps to determine what you will need to do next in order to upgrade
your modem information file to support V.90.
4I-MODEM INF README FILE
Go to Start--> Settings--> Control Panel
Double click Modems
If your modem is already listed in your Control panel, Modems list, you will need
to update your information file to support your V.90 modem. Skip to section
Updating your I-Modem information file to support V.90.
If your modem is not listed in Control Panel Modems, skip to section Installing
your I-Modem information file to support V.90.
Updating your I-Modem Information file to support V.90 5
Updating your
I-Modem Information
file to support V.90
If your modem is already listed in your Control Panel, Modems list.
For Windows 95 : First copy the MDMUSRIM.INF file to a disk. Next, follow the steps below.
1Go to Start--> Settings--> Control Panel
2Double click System.
3Select the Device Manager tab.
4Double click Modems.
6I-MODEM INF README FILE
5Select your Courier and choose Properties.
If there is a tab labeled Driver, select it.
If there is no driver present, skip to section Installing your Courier information
file to support V.90.
6Click the Update Driver button.
A prompt will appear to search for the driver. Insert the disk containing the
information files into your floppy drive.
7Select Yes and click next.
Windows will report that it found an updated driver and list Courier I-Modem
(V.90&x2).
8Click on finish. Your modem will now be listed in Control Panel Modems as a
Courier I-Modem (V.90&x2).
The process of updating your information file is complete.
Installing Your I-Modem Information File to Support V.90 7
Windows 98 First copy the MDMUSRIM.INF file to a floppy disk and follow the steps below.
1Go to Start -->Settings --> Control Panel
2Double click System.
3Select the Device Manager tab.
4Double click Modems.
5Select your Courier and choose Properties.
6Select the Driver tab.
7Click the Update button (This will start the Update Device Wizard).
8Click Next.
9Choose "Search for a better driver than the one your device is using right now"
and click Next.
10 Check the box for "floppy drive." Insert the disk containing the INF file into your
floppy drive and click Next.
Windows will report that it found an updated driver and list "Courier I-Modem
(V.90&X2)".
11 Click on finish. Your modem will now be listed in Control Panel Modems as a
"Courier I-Modem (V.90&x2)".
The process of updating your information file is complete.
For Windows NT Skip to Installing your information file to support V.90.
Installing Your
I-Modem Information
File to Support V.90
First copy the MDMUSRIM.INF file to a floppy disk. Next, follow the steps below.
Windows 95 or
Windows 98
1On your Desktop, double-click My Computer.
2Double-click the disk drive where you have installed Windows (usually C:)
3Double-click the Windows folder (or the folder where you have installed
Windows).
4Go to the View menu and select options. Choose the view tab and select “show
all files”. Click OK.
5Double-click the INF folder.
6Insert the disk containing the INF files into your floppy drive.
7Double-click My Computer. Double-click the floppy drive (usually A:).
8I-MODEM INF README FILE
8From the floppy drive, select MDMUSRIM.INF and drag it into the folder. If you are
prompted with a “Confirm File Replace” dialog box, choose Yes.
9Search in the INF folder for these files: DRVDATA.BIN and DRVIDX.BIN
Select both files by holding the <Ctrl> key and left clicking on each file.
Go to the File menu-->Delete
10 In the INF folder, look for a file named CR230K.INF. If the file is not present
proceed to the next step. If the file exists, select it, go to File menu--> Delete.
11 Close all open windows.
12 Go to Start--> Settings--> Control Panel.
13 Double-click Modems.
14 Highlight any Courier modems you have listed in that screen and choose Remove.
15 Reboot your computer.
16 Windows should find new hardware and install your Courier as a Courier I-Modem
(V.90&x2).
The process of updating your information file is complete.
Installing Your I-Modem Information File to Support V.90 9
For Windows NT Copy the MDMUSRIM.INF file to a floppy disk and follow the steps below.
1Go to Start--> Settings--> Control Panel
2Double-click Modems.
3Select any Courier modems that are installed and click Remove.
4Click Add. The Install New Modem window will appear.
5Check the box that says, “Don’t detect my modem; I will select it from a list” and
click Next.
10 I-MODEM INF README FILE
6Insert the disk containing the INF files into your floppy drive and choose “Have
disk.” You will be prompted for the letter of your floppy drive (usually A:). Click
OK.
7If you have an external Courier select “Courier I-Modem EXT (V.90&x2)”.
If you have an internal Courier select “Courier I-Modem INT (V.90&x2)”.
Click Next.
8Select the COM port your modem is installed on and click Next.
9Click OK to close Control Panel Modems.
Installing Profiles Under Windows 95/98 11
10 Windows may inform you that the list of installed modems has changed and that
Dial-up Networking needs to be reconfigured. You can reconfigure Dial-up
Networking now.
11 Reboot your computer.
The process of updating your information file is complete.
Installing Profiles
Under Windows 95/98 The profile feature of the MDMUSRIM information file allows you to install
multiple instances of your Courier I-Modem on the same communications port.
This will allow you to change the type of connection you make with your I-Modem
without modifying initialization strings.
You can choose the connection you would like to make by choosing a different
modem profile in the "connect using" dialog box of Windows 95/98 Dial-Up
Networking.
In addition to the standard I-Modem driver the MDMUSRIM information file allows
Windows 95 users to install the following modem profiles.
■I-Modem EXT (V.120 Profile)
■I-Modem EXT (TurboPPP 128K Profile)
■I-Modem EXT (TurboPPP DBA Profile)
■I-Modem EXT (Forced Analog Profile)
■I-Modem INT (V.120 Profile)
■I-Modem INT (TurboPPP 128K Profile)
■I-Modem INT (TurboPPP DBA Profile)
■I-Modem INT (Forced Analog Profile)
For your modem to Use this Profile These I-Modems
Autodetect 56/64K, V.120, or Analog
type connections (Initializes modem
with *V2=0)
V.120 Profile Internal (INT)
and
External (EXT)
Use MultilinkPPP connectionswhen you
want Both B channels to always be
connected (Initializes modem with
*v2=5*D0=1)
TurboPPP 128K
Profile Internal (INT)
and
External (EXT)
Use MultilinkPPP connectionswhen you
want only the second B channel active
when it is needed (Initializes modem
with *V2=5*D0=0)
TurboPPP DBA Profile Internal (INT)
and
External (EXT)
Force an analog type connection.
(Initializes modem with *V2=3) Forced Analog Profile Internal (INT)
and
External (EXT)
12 I-MODEM INF README FILE
To install a profile under
Windows 95/98
1Go to Start--> Control Panel
2Double-click Modems.
3Click Add.
4Check the box that says “Don’t detect my modem; I will select from a list” and
click Next.
5Select U.S. Robotics Access Corp from the manufacturers list.
6From the Models list, choose the profile you want to install.
If you have an internal I-Modem use the “I-Modem INT” profiles.
If you have an external I-Modem, use the “I-modem EXT” profiles.
Click Next.
Installing Profiles Under Windows 95/98 13
7Choose the communications port where your I-Modem is installed and click Next.
Windows will install your profile.
8Click Finish.
9Repeat the procedure for each profile you want to install.
Using your profiles
1Double click My Computer.
2Double click the Dial Up Networking folder.
3Right click one of your connectiods and choose properties.
If you do not have connections refer to the I-Modem Getting Started Guide and
the Command Reference, found on the CD-ROM, for help on setting up
connections.
14 I-MODEM INF README FILE
4Under the General Tab you will see a box to select the modem you want to use for
your connection.
Click the drop down box and select one of your I-Modem profiles.
5Click OK.
When you double click this connection the modem will be initialized according to
the profile you selected.
When you have completed your connection click the Disconnect button. Your
I-Modem will return to it's factory default settings of the Hardware Flow Control
template and Multilink PPP with Dynamic Bandwidth Allocation.
The initialization string that is used to restore your modem to these settings is
AT&F1*V2=5*D0=0.
Windows views each of these profiles as independent devices. You cannot use two
profiles with two different programs simultaneously.
For example, if you use a fax application in auto answer mode with forced analog
profile, you will not be able to dial out with Dial-Up Networking using the V.120
profile because the fax application already has control of the communications
port.
Copyright © 1997, 3Com Corporation. All rights reserved.
Unless otherwise indicated, 3Com registered trademarks are registered in the United States and may or may not be registered in other countries.
3Com, Boundary Routing, LANplex, LinkBuilder, NETBuilder, NETBuilder II, Parallel Tasking, EtherLink, SmartAgent, SuperStack, TokenLink,
TokenDisk, Transcend, and ViewBuilder are registered trademarks of 3Com Corporation. EtherDisk, EtherLink II, FDDILink, FMS, and NetProbe are
trademarks of 3Com Corporation. 3ComFacts is a service mark of 3Com.
Other brand and product names may be registered trademarks or trademarks of their respective holders.

This manual suits for next models

1

Other 3Com Modem manuals

3Com ISDN Modem User manual

3Com

3Com ISDN Modem User manual

3Com OfficeConnect 3C891A Instruction Manual

3Com

3Com OfficeConnect 3C891A Instruction Manual

3Com U.S. Robotics 56K Voice Installation manual

3Com

3Com U.S. Robotics 56K Voice Installation manual

3Com U.S. Robotics 56K Voice User manual

3Com

3Com U.S. Robotics 56K Voice User manual

3Com OfficeConnect 3C886A Instruction Manual

3Com

3Com OfficeConnect 3C886A Instruction Manual

3Com 3C888 - OfficeConnect Dual 56K LAN Modem... User manual

3Com

3Com 3C888 - OfficeConnect Dual 56K LAN Modem... User manual

3Com OfficeConnect 3C886A User manual

3Com

3Com OfficeConnect 3C886A User manual

3Com Impact IQ 3C882 User manual

3Com

3Com Impact IQ 3C882 User manual

3Com 005699-00 - User manual

3Com

3Com 005699-00 - User manual

3Com 005605-00 User manual

3Com

3Com 005605-00 User manual

3Com DIGITAL MODEM User manual

3Com

3Com DIGITAL MODEM User manual

3Com HomeConnect 3CP4130 User manual

3Com

3Com HomeConnect 3CP4130 User manual

3Com ADSL Modem Ethernet User manual

3Com

3Com ADSL Modem Ethernet User manual

3Com HomeConnect User manual

3Com

3Com HomeConnect User manual

3Com HomeConnect 3CP3617B User manual

3Com

3Com HomeConnect 3CP3617B User manual

3Com HomeConnect 3CP3617B Instruction Manual

3Com

3Com HomeConnect 3CP3617B Instruction Manual

3Com OfficeConnect 3CR29210 User manual

3Com

3Com OfficeConnect 3CR29210 User manual

3Com U.S. Robotics 56K Voice User manual

3Com

3Com U.S. Robotics 56K Voice User manual

3Com U.S. Robotics 56K Voice User manual

3Com

3Com U.S. Robotics 56K Voice User manual

3Com HomeConnect 3CP4130 User manual

3Com

3Com HomeConnect 3CP4130 User manual

3Com TMX 10031161 User manual

3Com

3Com TMX 10031161 User manual
3Com OfficeConnect 3CR29210 User manual

3Com

3Com OfficeConnect 3CR29210 User manual

3Com 2940, 2941 User manual

3Com

3Com 2940, 2941 User manual

3Com 005683-00 - User manual

3Com

3Com 005683-00 - User manual

Popular Modem manuals by other brands

Enfora GSM1208PB001MAN user manual

Enfora

Enfora GSM1208PB001MAN user manual

Belkin F5D5630au4 user manual

Belkin

Belkin F5D5630au4 user manual

Sierra Wireless V4221-AA - Raven X EV-DO Revision A user guide

Sierra Wireless

Sierra Wireless V4221-AA - Raven X EV-DO Revision A user guide

Boca HOME OFFICE user guide

Boca

Boca HOME OFFICE user guide

US Robotics SureConnect 9000 Quick installation guide

US Robotics

US Robotics SureConnect 9000 Quick installation guide

Zoom V.34 Plus quick start

Zoom

Zoom V.34 Plus quick start

Maestro 100 3G Quick start guide & user manual

Maestro

Maestro 100 3G Quick start guide & user manual

ADTRAN Total Access 1240 Installation and maintenance practice

ADTRAN

ADTRAN Total Access 1240 Installation and maintenance practice

Paradyne Hotwire 7975 user guide

Paradyne

Paradyne Hotwire 7975 user guide

Westermo ODW-600 Series user guide

Westermo

Westermo ODW-600 Series user guide

Silex technology SX-10WAG user manual

Silex technology

Silex technology SX-10WAG user manual

Billion BiPAC 7100SV Specifications

Billion

Billion BiPAC 7100SV Specifications

P1 W1MAX DX-230 Quick setup guide

P1

P1 W1MAX DX-230 Quick setup guide

Huawei HiLink E3131 manual

Huawei

Huawei HiLink E3131 manual

NAL RESEARCH CORPORATION A3LA-RG General description

NAL RESEARCH CORPORATION

NAL RESEARCH CORPORATION A3LA-RG General description

AUTOTERM Qstart Connection and set up manual

AUTOTERM

AUTOTERM Qstart Connection and set up manual

Raveon RV-M7 Technical manual

Raveon

Raveon RV-M7 Technical manual

H3 System H3G-850 instruction manual

H3 System

H3 System H3G-850 instruction manual

manuals.online logo
manuals.online logoBrands
  • About & Mission
  • Contact us
  • Privacy Policy
  • Terms and Conditions

Copyright 2025 Manuals.Online. All Rights Reserved.