Page 10 Page 11
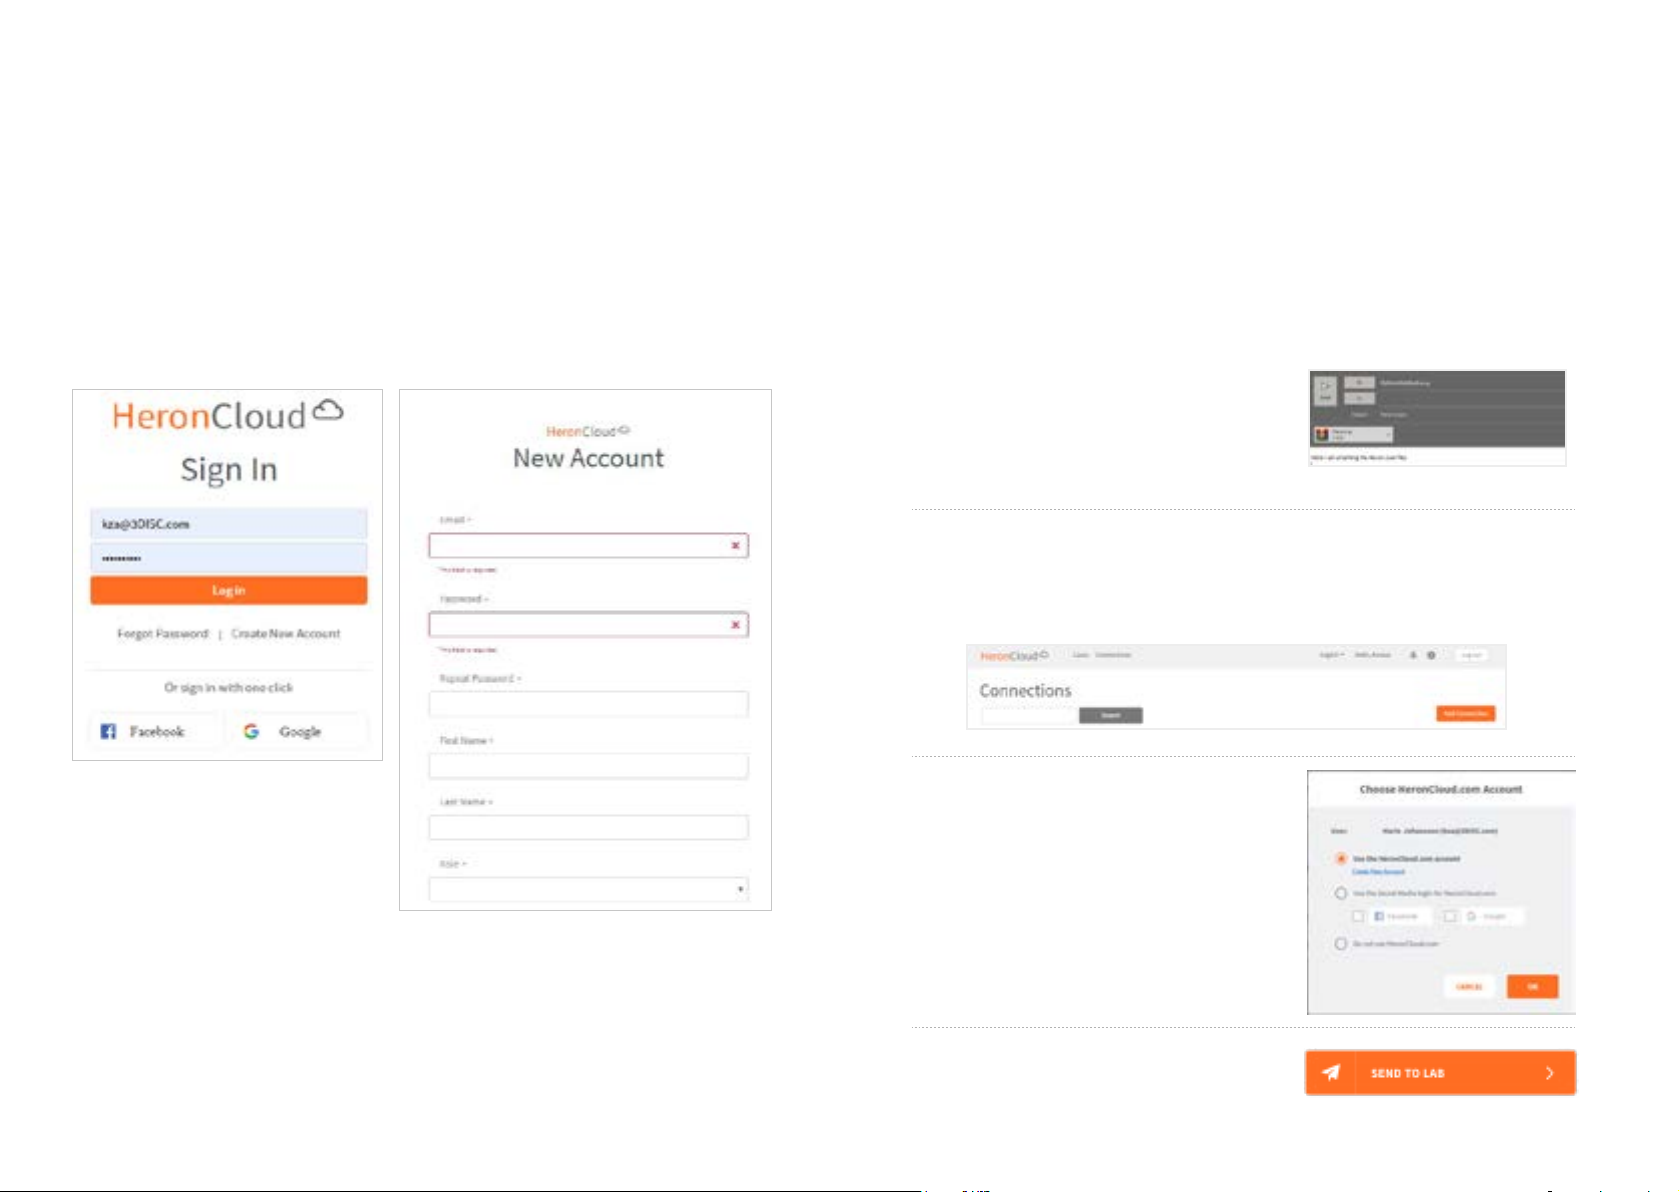
3.1.3Soware&LabIntegration
OutputFileFormat STL,PLY,OBJ
CompatibilitywithCAD/CAMSystems OpenArchitectureOutputformatSTL,
PLY,OBJCompatiblewithmostDental
CADsystems
CaseManagementapplicationInterface Touchscreensupport
3.2ComputerRequirements
3.2.1RequiredSowareandMisc.
OperatingSystem Windows10(ExcludingWindows10
S,nowdefunct)Administrativerights
required
DiskSpace 100GBoffreediskspaceorgreater
Ports 1xUSB3.0port(SuperSpeed)2xUSB
port
3.2.2RequiredHardware
CPUType Inteli7-4Coresorgreater(e.g.i78700)
CPUClock 2.8GHzclockorgreater
Memory 16GBofRAMorgreater(DDR4orbetter)
GPU NVIDIAGeForceGraphicsProcessor000
Series(GTX):1070orGreater1000Series
(GTX):1070orgreater-Atleast6GB
videomemory
2000Series(RTX):2060orgreater-At
least6GBvideomemory
NOTE:AMDGPU’sareNOTcompatiblewiththeHeron™IOS.Not
meetingminimumhardwarerequirementswillaectthe
performanceofthescanner.
3.3EnvironmentConditions
OperatingTemperature 10°C ~ 40°C
OperatingRelativeHumidity 10%~80%(non-condensing)
StorageTemperature -20°C~60°C
StorageRelativeHumidity 10%~80%(non-condensing)Indooruse
only
Installation Category 1
Pollution Degree 2
IngressofLiquids IPXO
Protective Class ClassIIIb
Overvoltage category I(SuppliedfromoutputDCsource,max.
5V.dc,600mA)ofnotebookornon-me-
dicalgradePCcertiedbyIEC60950-1
Max.workingcondition Continuouscycleswithimagecapture
andtransmissionfrom/toNotebookor
non-medicalgradePC.
Otherpossibleaccessories(IEC60601-1
3rd,Cl.16)
NotebookwithAC/DCAdapter.
EquipmentMaintenance Nousermaintenanceisrequired,andno
userserviceisallowed.Pleasecontact
technicalsupportifthereisaproblem.
Cleaning Donottrytocleantheinsideofthede-
vice.RefertoChapter6forcleaningand
sterilization.
3.4PowerInput
Thepoweradapterinputis5VDC,100-240VAC,50-60Hz.
3.5ReusableTips
Scannertipisautoclavableupto50timesinasteamautoclave.Seechapter6.
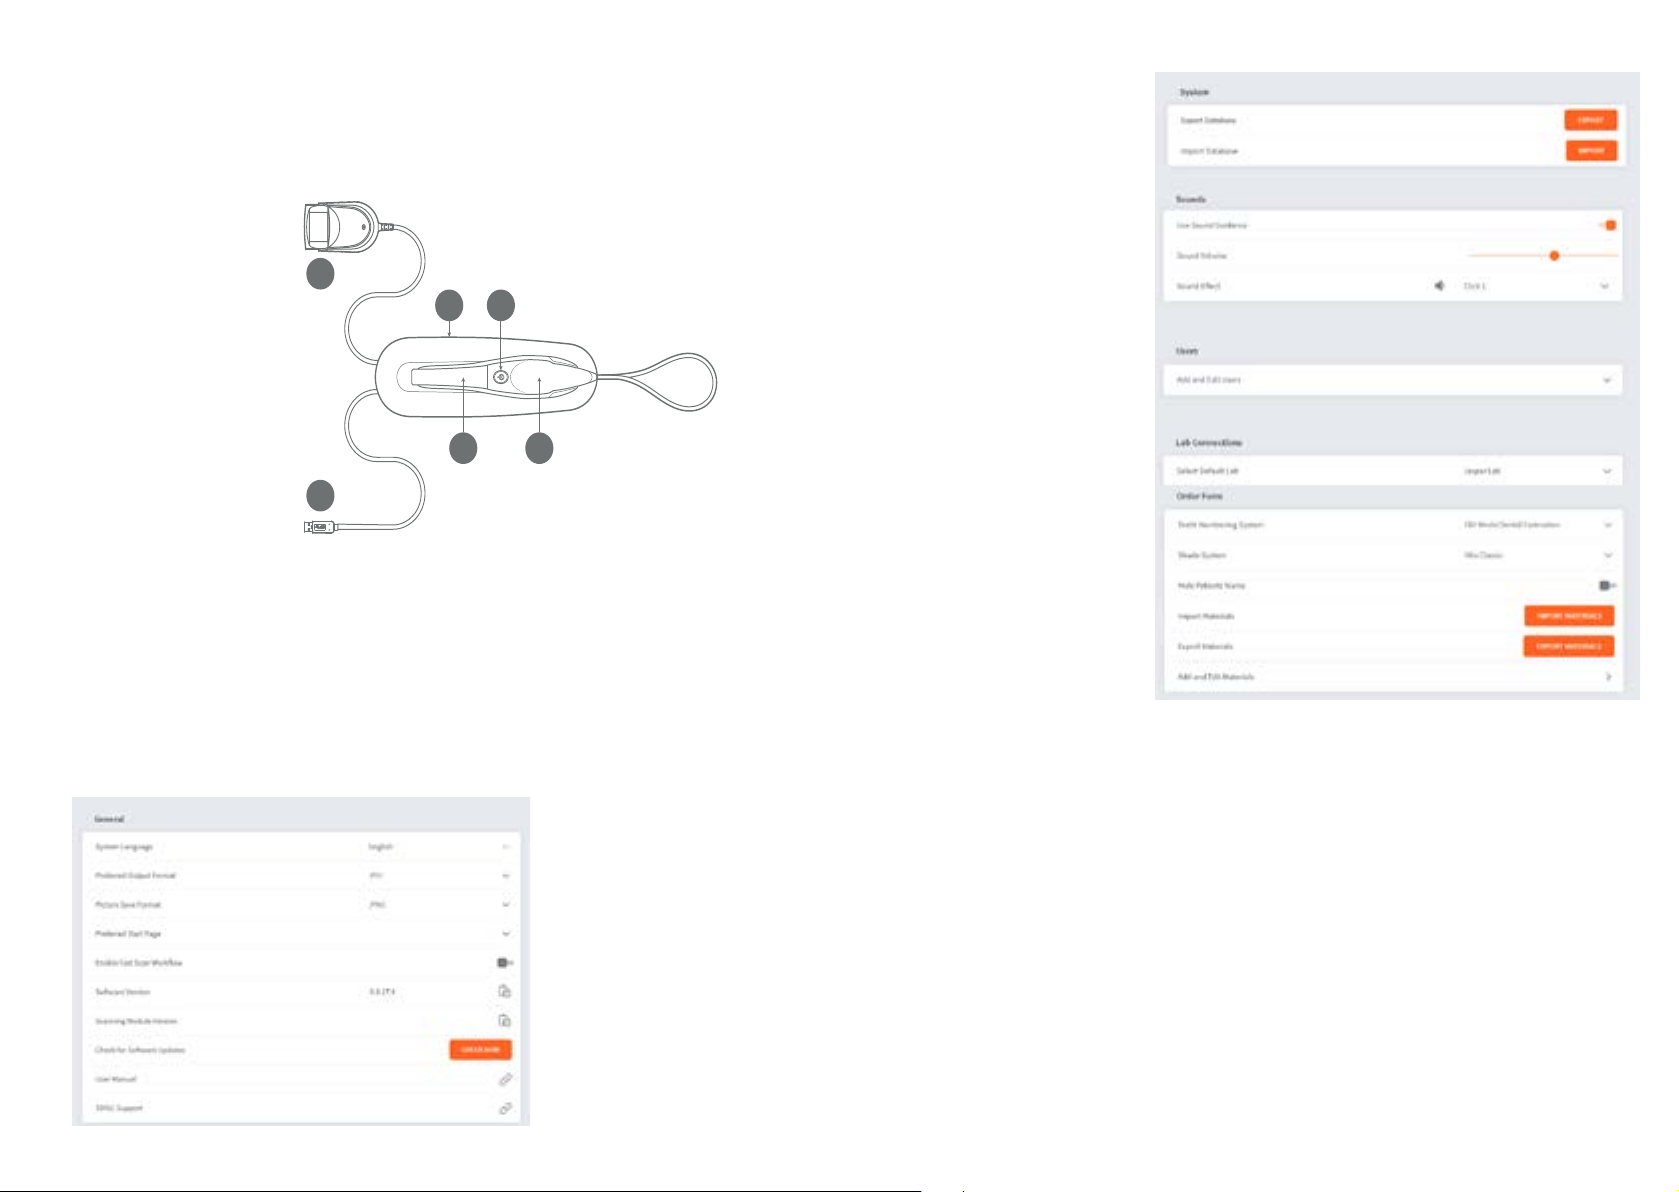
3.6 Scanner – Base and Handpiece
ThescannerbodyconsistsoftheBaseandHandpiece,whichareconnectedbya
exible,non-detachablecable.