7
7. The scan is saved automatically at each step in the workow.
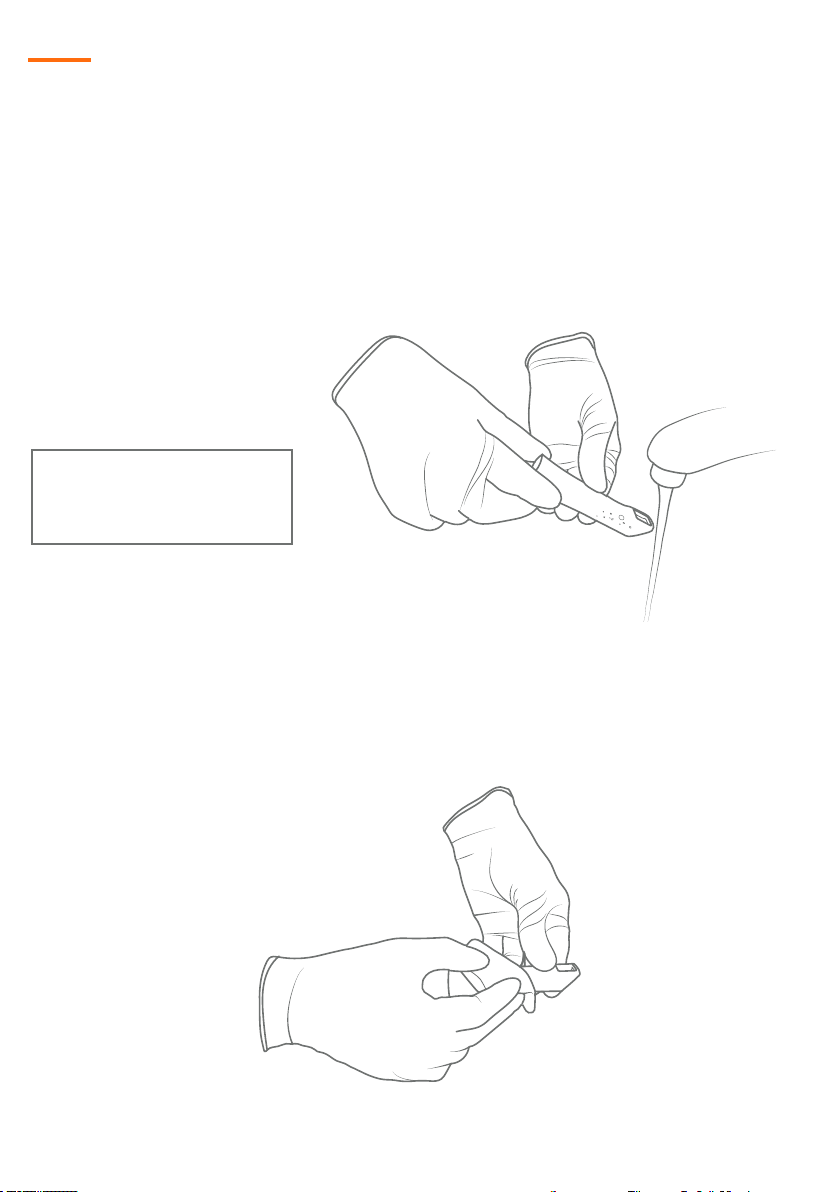
8. To restart the scan, press the reset button. This will delete the current scan and
allow one to start a new scan.
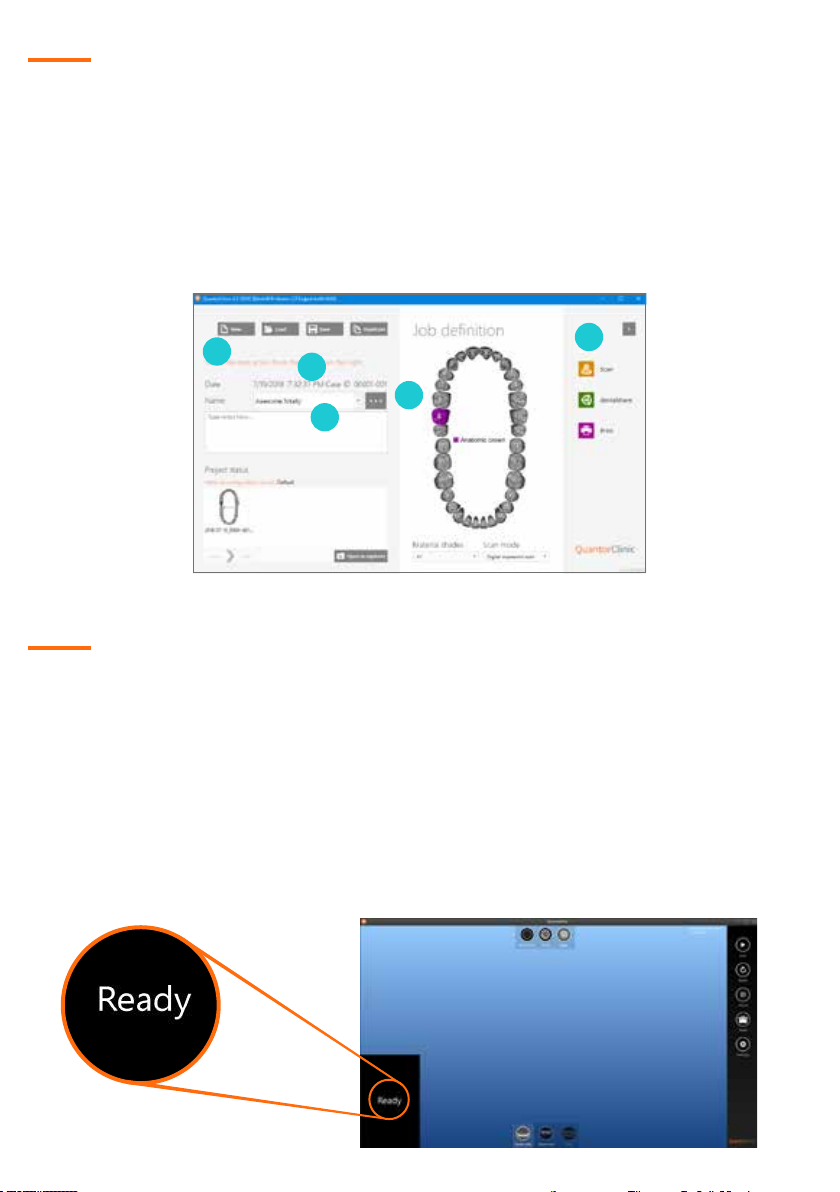
9. Aer a scan step is complete you will see a green check mark in the workow at
the bottom of the screen beneath the appropriate icon.
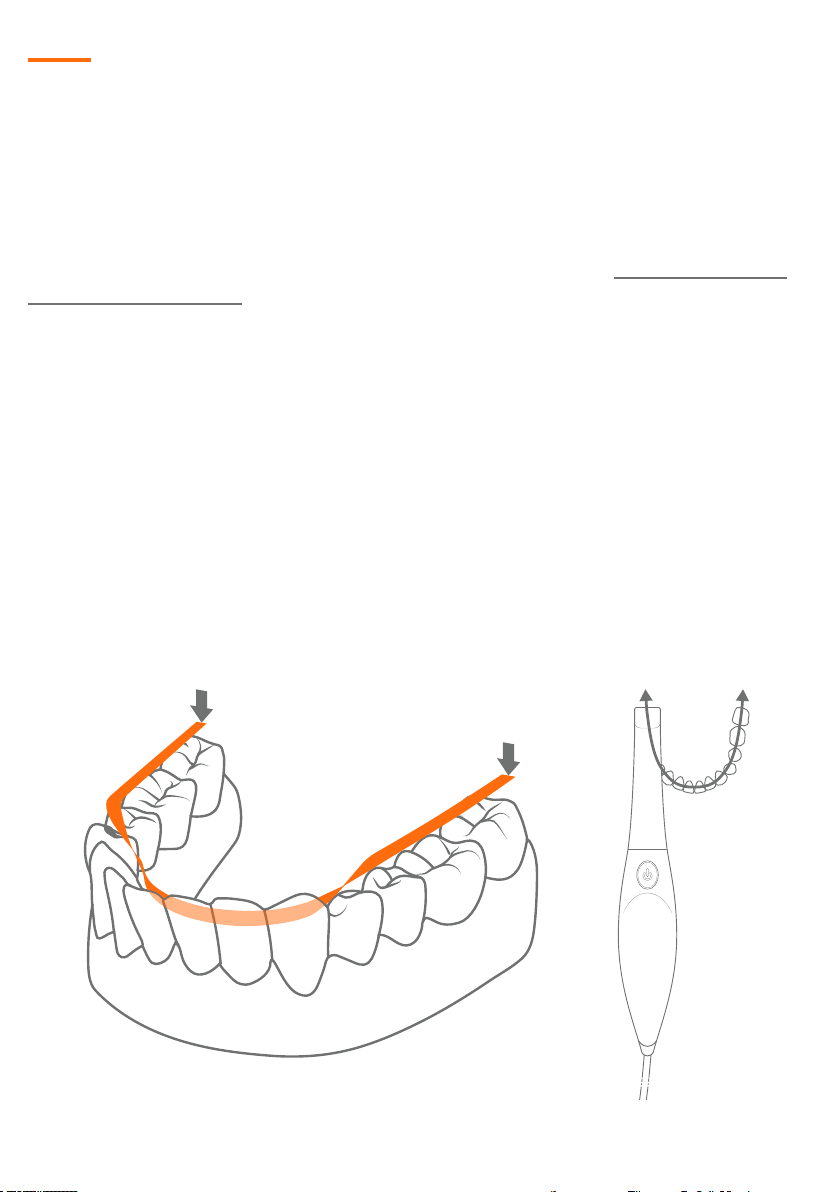
Scanning Step 4: Finalization (A.T.R.S)
Aer the basic scan has been conducted, below are some tips that should be followed
to nalize the scan.
☑Analyze the scan for completeness and accuracy, make sure to rotate the scan
image on the main view screen in order to obtain a complete view of the scan
data
☑Trim away excess information (tongue, cheek, vestibule, tissue, ngers, etc.)
that may interfere with a successful bite alignment. (The Trim options are on
the right side work-ow in the “TOOLS” icon)
☑Rescan any area that is missing critical data for the success of the nal
restoration
☑Save and proceed to the next step in the scan strategy
Scanning Step 5: Exporting Files with Dentalshare & STL
• Aer you have successfully scanned the upper and lower jaws and aligned the
bite it is time to export the scan les to the dental laboratory for fabrication of
the restoration
• Dentalshare is a built-in le sharing system, your dental laboratory needs to
sign up for a dentalshare account in order to use the dentalshare network
• STL exporting (outside of dentalshare)
Keyboard Shortcuts
Use these keys anytime:
• {R} – reset entire scan
• {X} – re-center scan
• {Space} – start & stop scanning
• {Enter} – same as clicking OK
• {Escape} – same as clicking CANCEL
To use while navigating:
• {Ctrl + Z} – undo last step
• {Ctrl + Y} – redo last undo
• {+/=} – increase size of tool
• {-/_} – decrease size of tool
• {C/Insert} – Crop to current
selection
• {D/Delete} – Delete selection
• Hold Ctrl while clicking a tooth to
copy last selection
• Hold Shi to apply last setting to
multiple teeth